
The world of cell phones is a constantly evolving landscape, with new models and features being released on a regular basis. Whether you’re a tech enthusiast or simply in need of a new device, knowing how to open a cell phone can be a valuable skill. Whether you want to replace a faulty component, upgrade the memory, or simply explore the inner workings of your phone, opening it up can provide a deeper understanding of its functionality.
In this article, we will guide you through the process of opening a cell phone step by step. We will discuss the tools you need, the precautions you should take, and provide a general overview of the process. By the end, you’ll have the knowledge and confidence to open a cell phone and delve into its inner workings. Whether you’re a DIY enthusiast or simply curious about what goes on inside your device, let’s explore the world of cell phone opening!
Inside This Article
- Step 1: Gather Necessary Tools
- Step 2: Power Off the Cell Phone
- Step 3: Locate the Phone’s SIM Card Slot
- Step 4: Use a SIM Card Ejector Tool or Paperclip
- Step 5: Insert the Tool into the SIM Card Slot
- Step 6: Apply Gentle Pressure to Eject the SIM Card Tray
- Step 7: Remove the SIM Card from the Tray
- Step 8: Insert a New SIM Card (Optional)
- Step 9: Replace the SIM Card Tray into the Phone
- Step 10: Power On the Cell Phone
- Step 11: Test the Functionality of the Phone
- Conclusion
- FAQs
Step 1: Gather Necessary Tools
Before you can open a cell phone, you will need to gather a few essential tools. Having the right tools on hand will make the process easier and help prevent any damage to your device. Here’s what you’ll need:
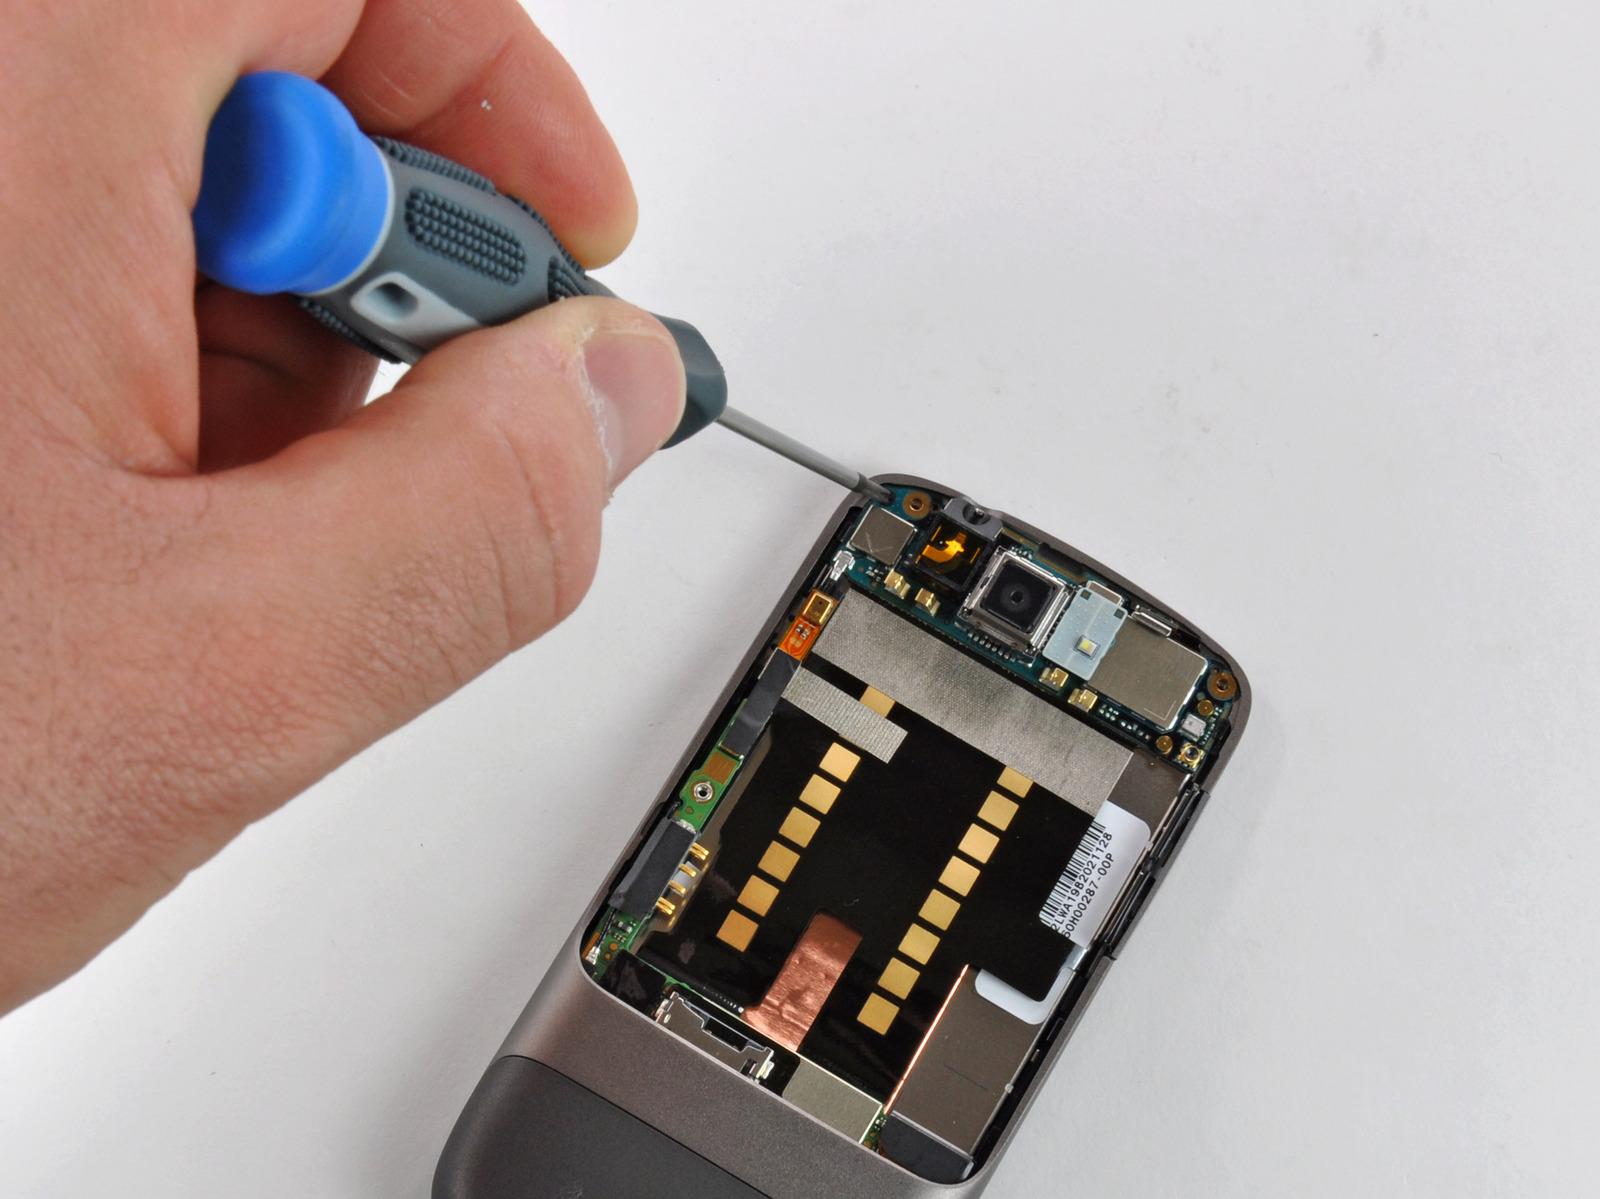
- Small Phillips screwdriver: This will be necessary if your phone has screws that need to be removed in order to access the internals. Make sure you have a size that matches the screws on your specific phone model.
- SIM card ejector tool or a paperclip: Many cell phones have a SIM card slot that can be accessed by ejecting a small tray. To do this, you’ll need either a SIM card ejector tool that often comes with the phone or a bent paperclip that can fit into the ejector hole.
- Tweezers: Tweezers can be handy for delicately removing or handling small components inside the phone.
- Plastic pry tool or a guitar pick: These tools can help you gently pry open the phone’s casing without scratching or damaging it.
- Anti-static wrist strap (optional): This tool is not essential, but it can be helpful in preventing electrostatic discharge that could potentially damage the internal components of the phone.
By having these tools ready, you’ll be well-prepared to open your cell phone and perform any necessary repairs or modifications. Remember to always handle your device with care, following proper safety precautions, and consult professional guidance if you are unsure of any steps.
Step 2: Power Off the Cell Phone
Before attempting to open a cell phone, it is crucial to power it off to ensure your safety and prevent potential damage to the device. The process of powering off a cell phone may vary slightly depending on the make and model, but the basic steps remain consistent.
First, locate the power button on your cell phone. It is usually located on the side, top, or front of the device. Look for a button with a distinct power symbol, such as a circle with a line through it, or the word “power” written on it.
Once you have located the power button, press and hold it for a few seconds until a menu or prompt appears on the screen. This menu typically provides options such as power off, restart, or airplane mode.
Select the “power off” option from the menu by tapping on it or using the volume buttons to navigate and the power button to confirm. The screen should then display a message indicating that the device is shutting down or powering off.
After you have initiated the power off sequence, wait for a few moments until the device completely turns off. You may see a blank screen, a logo disappearing, or a message indicating that the phone is powering down.
It is crucial to ensure that the cell phone is completely powered off before proceeding with any further steps. This will minimize the risk of accidental damage to the internal components and make it safer to handle the device during the opening process.
Remember to exercise caution while handling your cell phone, as it is a delicate piece of technology. Avoid applying excessive force or pressure, as this may cause harm to the internal circuitry or the screen.
Now that your cell phone is powered off, you are ready to move on to the next step of the process, which is locating the SIM card slot.
Step 3: Locate the Phone’s SIM Card Slot
When opening a cell phone, one crucial step is to locate the SIM card slot. The SIM card slot is where the subscriber identity module (SIM) card is inserted to enable cellular communication. While the placement of the slot can vary depending on the make and model of the phone, it is typically found on the side or the back of the device.
Manufacturers often label the SIM card slot with symbols or illustrations to help users locate it easily. Look for a small drawer-like compartment with a tiny hole or a removable panel. These indicators commonly point to the location of the SIM card slot.
If you’re unsure about where to find the SIM card slot, refer to the user manual or the manufacturer’s website for specific instructions. These resources can provide you with detailed diagrams or descriptions to guide you to the correct location.
It’s important to note that not all cell phones have a removable SIM card. Some devices, such as iPhones, use embedded or eSIM technology, which doesn’t require a physical SIM card. In such cases, you won’t need to locate a removable slot.
Once you’ve successfully located the SIM card slot, you’re ready to move on to the next step of the cell phone opening process.
Step 4: Use a SIM Card Ejector Tool or Paperclip
When it comes to opening a cell phone to access the SIM card slot, you’ll need a SIM card ejector tool or a simple paperclip. Don’t worry if you don’t have a SIM card ejector tool, as a paperclip works just as well. The purpose of these tools is to safely and easily eject the SIM card tray from the phone.
To begin, locate the SIM card slot on your phone. This slot is usually located on the side of the phone or sometimes on the top. It is a small, rectangular slot that holds the SIM card tray. Once you’ve found it, take your SIM card ejector tool or straightened paperclip and get ready to work your magic.
Insert the SIM card ejector tool or paperclip into the small hole adjacent to the SIM card slot. Apply a gentle amount of pressure and push the tool or clip into the hole until you feel a slight resistance. This is a sign that you’ve engaged the mechanism responsible for ejecting the SIM card tray.
As you continue to push, the SIM card tray should start to loosen. Once it does, simply pull out the SIM card tray from the phone using the tool or clip. If you’re using a paperclip, be sure to create a hook-like shape at the end to ensure a better grip on the tray.
With the SIM card tray in your hands, you can easily remove the SIM card from the tray. Gently push the SIM card out of its holder and set it aside. Be cautious not to touch the metallic contacts on the SIM card, as any dirt or oil can interfere with the phone’s functioning.
It’s worth noting that some newer phone models may have a different mechanism for ejecting the SIM card tray, such as a push-to-eject or a pull-out tray. In such cases, consult the phone’s user manual for specific instructions on how to access the SIM card slot.
Now that you’ve successfully removed the SIM card from the tray, you can either insert a new SIM card or re-insert the same one. Carefully align the SIM card with the slot in the tray and gently push it into place. Ensure that the orientation of the SIM card matches the markings on the tray to avoid any potential damage.
Once the SIM card is securely in place, it’s time to re-insert the SIM card tray back into the phone. Slide the tray back into the slot until it clicks or locks into place. Double-check to make sure the tray is flush with the phone’s body, without any protrusions.
Finally, power on your cell phone. If everything was done correctly, your phone should recognize the SIM card and display your network provider’s information. Test the functionality of the phone, such as making calls, sending messages, and connecting to the internet, to ensure that the SIM card was inserted properly.
Remember, using a SIM card ejector tool or a paperclip can make the process of opening your cell phone a breeze. Just be sure to handle the SIM card and the phone with care to avoid any accidental damage. Now, let’s proceed to the next step to check if your cell phone has a locked SIM card slot or not.
Step 5: Insert the Tool into the SIM Card Slot
Once you have located the SIM card slot on your cell phone, it’s time to insert the tool into the slot. This step is crucial for safely removing the SIM card tray from the phone. The tool you need to use can vary depending on the phone model, but in most cases, a SIM card ejector tool or a bent paperclip will do the trick.
Start by holding the tool in your hand with the pointed end facing downwards. Align the tool with the small hole beside the SIM card slot. Gently insert the tool into the hole until you feel a slight resistance.
It’s important to note that you should not apply excessive force when inserting the tool. If you encounter any resistance, remove the tool and reposition it before trying again. Pushing too hard or using too much force can damage the internal components of your phone.
As you insert the tool, you may feel a click or a slight popping sensation. This indicates that the tool has engaged with the internal mechanism of the SIM card tray. At this point, the SIM card tray should start to slide out of the phone.
Carefully slide the SIM card tray out of the phone using the tool. Ensure that you are holding the tray securely and applying even pressure to ensure a smooth and controlled removal. Be mindful not to drop the SIM card or misplace it during this process.
Once the SIM card tray is fully extended, remove the tool from the slot and set it aside. You are now ready to continue with the next steps of the process, such as removing or replacing the SIM card if desired.
Remember to handle the tool and the SIM card tray with care throughout this process to avoid any unnecessary damage. Take your time, ensure a steady hand, and follow these steps diligently to successfully insert the tool into the SIM card slot.
Step 6: Apply Gentle Pressure to Eject the SIM Card Tray
Now that you have located the SIM card slot and inserted the tool, it’s time to eject the SIM card tray. Applying gentle pressure is crucial in order to avoid damaging the phone or the SIM card tray itself. Here’s how you can do it:
1. Hold the phone securely in one hand, ensuring that your fingers are not pressing against the SIM card tray or obstructing its movement.
2. With your other hand, use your thumb or index finger to apply careful and even pressure to the SIM card tray. Remember, the goal is to eject the tray smoothly and without force.
3. Push the tray gently in the direction indicated on the phone, usually towards the outside edge of the device.
4. As you apply pressure to the tray in the correct direction, you should feel a slight click or resistance. This is an indication that the tray is being released from its position.
5. Continue to apply gentle pressure until the SIM card tray slides out partially, exposing the SIM card slot.
6. Once the tray is partially ejected, you can carefully remove it from the phone entirely, using your fingers or the SIM card ejector tool.
7. Take a moment to examine the tray and ensure that it is intact and undamaged. If you notice any abnormalities or defects, it may be necessary to consult a professional or seek a replacement tray.
By following these steps and applying gentle pressure, you can safely eject the SIM card tray from your cell phone. Remember to handle the tray and SIM card with care to prevent any accidental damage.
Step 7: Remove the SIM Card from the Tray
After successfully ejecting the SIM card tray, it’s time to remove the SIM card from the tray itself. It’s crucial to handle the SIM card with care as it contains important data and is quite delicate. Follow these simple steps to safely remove the SIM card from the tray:
1. Take a close look at the SIM card tray and locate the SIM card. It is a small rectangular card made of plastic or metal.
2. Gently place your fingers on either side of the SIM card and lift it out of the tray. If the SIM card is bent or damaged, do not attempt to insert it into another device, as it may cause further damage.
3. Inspect the SIM card for dust or debris. If you notice any, use a microfiber cloth or a soft, lint-free cloth to wipe it gently. Avoid using any liquids or abrasive materials that could potentially damage the card.
4. Once you have removed the SIM card and cleaned it (if necessary), place it in a safe and secure location. If you are replacing the SIM card with a new one, make sure to keep the old one as a backup in case you need to switch back in the future.
5. Take a moment to double-check that both the SIM card tray and the phone’s slot are clean and free from any debris. This will help prevent any connectivity issues when reinserting the tray.
Removing a SIM card may seem like a simple task, but it’s important to handle it with care and attention. Remember to be gentle when removing the SIM card from the tray, and avoid touching the metal contacts on the card to prevent any damage.
Once you have safely removed the SIM card, you can proceed to the next step of inserting a new SIM card or reinserting the tray into the phone, depending on your needs.
Step 8: Insert a New SIM Card (Optional)
Inserting a new SIM card into your cell phone can provide several benefits, including access to a new phone number or switching to a different mobile carrier. If you’ve obtained a new SIM card and want to use it with your cell phone, follow these steps:
1. Power off the cell phone: Before inserting a new SIM card, ensure that your cell phone is powered off. This will prevent any potential damage to the device or the SIM card.
2. Locate the SIM card slot: Next, locate the SIM card slot on your cell phone. The exact location and type of slot may vary depending on the make and model of your device. Typically, it can be found either on the side of the phone or beneath the battery compartment.
3. Use a SIM card ejector tool or paperclip: Most smartphones come with a SIM card ejector tool. If you don’t have one, you can use a small paperclip as an alternative. Gently unfold the paperclip or insert the ejector tool into the small hole near the SIM card slot.
4. Insert the tool into the SIM card slot: Insert the tool or unfolded paperclip into the small hole until you feel a slight resistance.
5. Apply gentle pressure to eject the SIM card tray: Apply gentle and even pressure to the tool or paperclip, pushing it inwards. This will cause the SIM card tray to partially eject from the slot.
6. Remove the existing SIM card: Carefully remove the existing SIM card from the tray by pulling it out. Be sure to handle the card with care, as damage to the card or its connectors can result in connectivity issues.
7. Insert the new SIM card: Take the new SIM card and align it with the shape of the SIM card slot. Gently push the card into the slot until it fits securely.
8. Replace the SIM card tray into the phone: Once the new SIM card is inserted, carefully place the SIM card tray back into the phone. Make sure it is inserted properly and sits flush with the device.
9. Power on the cell phone: Power on your cell phone and wait for it to fully boot up. The phone will recognize the new SIM card and establish a connection with your mobile network.
10. Test the functionality of the phone: After the phone has powered on, make a test call or send a text message to ensure that the new SIM card is working properly. If you encounter any issues, double-check the SIM card installation and contact your mobile carrier for assistance.
By following these steps, you can successfully insert a new SIM card into your cell phone and enjoy the benefits of a new phone number or a different mobile carrier. Remember to always handle the SIM card with care to avoid any potential damage.
Step 9: Replace the SIM Card Tray into the Phone
Now that you’ve successfully removed the old SIM card, it’s time to replace the SIM card tray back into your cell phone. Follow these simple steps to ensure a smooth reinstallation:
- Inspect the tray: Before reinserting the tray, take a moment to examine it for any signs of damage or debris. Clean the tray if necessary to prevent any interference with the new SIM card.
- Align the tray: Carefully align the SIM card tray with the corresponding slot on your phone. Make sure that the tray is facing the correct way to avoid forcing it in the wrong direction.
- Insert the tray: Gently slide the SIM card tray back into the phone, ensuring that it fits securely and smoothly into place. Apply gentle pressure until you feel a slight click, indicating that the tray is properly seated.
- Double-check: Take a moment to double-check that the tray is fully inserted and flush with the phone’s exterior. This will prevent any connectivity issues and ensure that the SIM card is properly recognized.
Once you have successfully replaced the SIM card tray, you are now one step closer to having your cell phone fully operational again. The SIM card tray acts as a protective housing for the SIM card and ensures that it stays securely in place.
If you plan to insert a new SIM card, remember to follow the appropriate steps to activate it with your service provider. This may involve contacting customer support or visiting their website to complete the activation process.
Now that you’ve completed Step 9, you’re almost done! Just one more step to go before powering up your cell phone.
Step 10: Power On the Cell Phone
After successfully inserting the SIM card into the cell phone, it’s now time to power on the device. Turning on your cell phone is a simple process, and it can be done with just a few taps of the buttons.
To power on your cell phone, locate the power button. The location of the power button may vary depending on the make and model of your phone. It’s typically situated on the side or top of the device. Once you’ve located the power button, press and hold it for a few seconds.
Keep holding the power button until you see the manufacturer’s logo or the initial boot screen appear on your cell phone’s display. This indicates that the device is turning on and going through its startup process.
Once your cell phone has fully booted up, you will be greeted with the lock screen or home screen, depending on your phone’s settings. If you have set up a passcode or pattern lock, you will need to enter it to unlock the device and gain access to the home screen.
On the home screen, you can start exploring the features and settings of your cell phone. Take a moment to familiarize yourself with the layout and navigation options. You can swipe left or right to access different screens, tap on icons to open apps, and use the navigation buttons at the bottom of the screen to navigate through menus.
If you inserted a new SIM card, the cell phone may prompt you to set up the SIM card or enter any necessary information, such as your PIN code or network settings. Follow the on-screen instructions to complete the setup process and ensure that your phone can connect to the cellular network.
Once you have powered on your cell phone and completed any necessary setup steps, you are ready to start using your device. Enjoy the power and convenience that comes with owning a cell phone, and make the most out of its features and capabilities.
Step 11: Test the Functionality of the Phone
Now that you have successfully opened and potentially replaced the SIM card in your cell phone, it’s time to test its functionality. Testing the phone will ensure that everything is working properly and that you can make and receive calls, send and receive messages, and access other features without any issues. Here are some steps to follow:
1. Power On: Press and hold the power button until the phone turns on. Once powered on, you’ll usually see the manufacturer’s logo or the phone’s home screen.
2. Check Signal: The first thing you want to do is check the signal strength. Ensure that your phone is connecting to a network by looking for the signal bars or the network name displayed on the screen. If you have low or no signal, try moving to a different location or contacting your service provider for assistance.
3. Make a Call: Test the phone’s calling functionality by dialing a phone number. You can call a friend, family member, or even your own number to verify that the phone rings and that you can hear the other person on the line. Ensure that the microphone and speaker are working properly.
4. Send a Message: Try sending a text message to someone to check if the messaging feature is functioning correctly. Note whether the message is sent successfully and if you receive any incoming messages as well.
5. Connect to Wi-Fi: If your phone supports Wi-Fi connectivity, try connecting to a Wi-Fi network. This will test if the phone can detect and connect to available networks. Open a web browser or any app that requires internet access to see if the connection is working smoothly.
6. Test Apps and Features: Explore different apps and features on your phone to ensure they are functioning as expected. Open the camera app to take a photo or video, test the GPS functionality, try accessing your email, and so on.
7. Test Battery Life: Keep an eye on the battery life and how it holds up during normal usage. Charge the phone to full capacity and observe how long it lasts with regular use, such as making calls, sending messages, and using apps.
8. Check Sound and Display Settings: Adjust the volume settings to verify that both the ringer and media volume are working correctly. You can also test the phone’s display brightness, color accuracy, and touch sensitivity.
9. Test Additional Hardware: If your phone has additional hardware components, such as a fingerprint sensor, stylus, or external memory card, test their functionality to ensure they are working properly.
10. Backup Your Data: Before proceeding with further use of your phone, it’s always recommended to backup your important data. You can use cloud storage, an external hard drive, or your computer to create a backup of your photos, contacts, messages, and other important files.
By following these steps to test the functionality of your cell phone, you can ensure that it is in proper working condition. If any issues arise during the testing process, refer to your phone’s user manual or contact the manufacturer or service provider for assistance.
The process of opening a cell phone can seem daunting at first, but with the right tools and instructions, it can be a manageable task. Whether you need to open your phone for a repair, to replace a component, or simply out of curiosity, following the proper steps is crucial to avoid damaging your device.
Throughout this article, we have explored various methods of opening a cell phone, ranging from using the phone’s manufacturer-specific tools to utilizing common household items. We have highlighted the importance of research, preparation, and caution to ensure a successful and safe opening process.
Remember to always follow the manufacturer’s guidelines and instructions, as each phone model may have specific nuances. If you are uncomfortable with the process or unsure about any step, it’s best to seek professional help from a certified technician.
By understanding how to open a cell phone correctly, you can gain valuable insights into the inner workings of your device and potentially perform repairs or upgrades on your own. Just remember to proceed with caution and ensure you have the necessary tools before diving into the process.
FAQs
Q: How do I open my cell phone?
A: Opening a cell phone requires the right tools and techniques. Start by locating the screws or latches that hold the phone’s back cover in place. Use a small screwdriver or a plastic opening tool to carefully remove the screws or gently pry open the latches. Be cautious not to apply too much force or damage any internal components.
Q: Can I open my cell phone without damaging it?
A: It is possible to open a cell phone without causing damage, but it requires precision and knowledge. If you are unsure or inexperienced, it is recommended to seek the assistance of a professional technician who has the expertise and proper tools to handle the task safely.
Q: What tools do I need to open a cell phone?
A: The tools you need to open a cell phone may vary depending on the model and manufacturer. However, some common tools include a small screwdriver set, a plastic opening tool or a spudger, tweezers, and a SIM card ejector tool. It is advisable to research the specific tools required for your cell phone model before attempting to open it.
Q: Can I replace the battery of my cell phone by opening it?
A: Yes, in most cases, you can replace the battery of your cell phone by opening it. However, it is important to note that not all cell phone models have easily removable batteries. Some phones have sealed battery compartments, making battery replacement more challenging. It is recommended to check the manufacturer’s instructions or consult a professional if you are unsure about replacing the battery.
Q: Is it legal to open a cell phone?
A: Generally, it is legal to open a cell phone that you own. However, it is crucial to comply with any applicable laws and regulations in your jurisdiction. It is also important to remember that opening a cell phone may void the warranty or any insurance coverage you have. Therefore, it is advisable to check the manufacturer’s guidelines or consult with a professional technician before proceeding.