
Welcome to the 2023 update on how to put a filter on a photo or video on Mac! If you’re looking to enhance your visuals and add a touch of creativity to your images or videos, you’ve come to the right place. Whether you’re a professional photographer, a video content creator, or just someone who loves capturing moments, applying filters can instantly transform your media and make them stand out.
In this article, we will explore various methods and tools available on Mac that allow you to effortlessly add filters to your photos and videos. From built-in options in popular editing software to standalone apps specifically designed for filter effects, we will cover it all. So, without further ado, let’s dive into the world of filters and learn how to bring out the best in your visuals with just a few clicks!
Inside This Article
- # How to Put a Filter on a Photo or Video on Mac (2023 Update)
- Adding Filters in Photos app
- Applying Filters in iMovie
- Using Third-Party Apps for Filters
- Customizing Filter Settings in Photos or iMovie
- Conclusion
- FAQs
# How to Put a Filter on a Photo or Video on Mac (2023 Update)
Adding filters to photos and videos can greatly enhance their visual appeal, allowing you to transform ordinary shots into stunning works of art. If you’re a Mac user and wondering how to put a filter on a photo or video, you’re in luck! In this comprehensive guide, we’ll explore various methods and techniques to help you achieve the desired effects on your Mac in 2023.
Adding Filters in Photos app
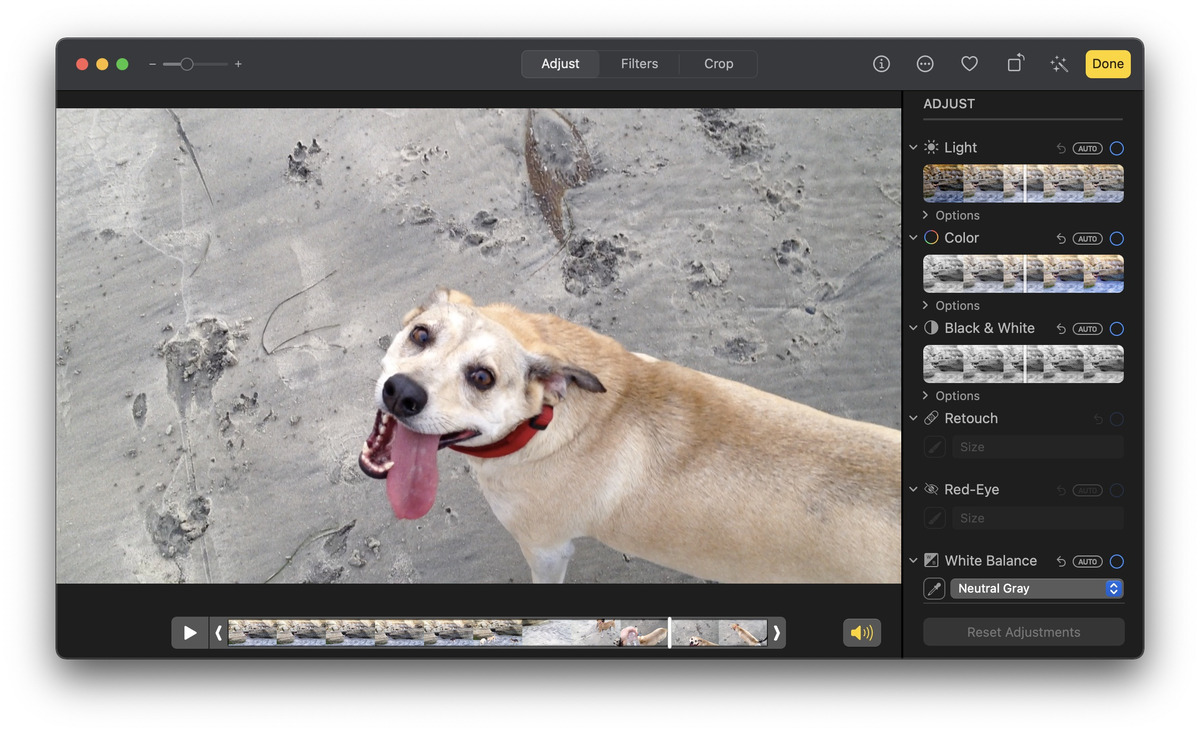
The Photos app on Mac provides a simple and straightforward way to add filters to your photos. Here’s how you can do it:
- Launch the Photos app on your Mac.
- Select the photo you want to edit and click on the “Edit” button.
- In the top toolbar, click on the “Adjust” icon, which looks like three horizontal sliders.
- On the right-hand side, you’ll find a list of available filters. Simply click on a filter to apply it to your photo.
- Adjust the intensity of the filter using the slider located below the list of filters.
- Once you’re satisfied with the results, click on “Done” to save the changes.
By following these steps, you can easily add filters to your photos using the built-in Photos app on your Mac.
Applying Filters in iMovie
If you’re looking to add filters to videos on your Mac, iMovie is the perfect tool for the job. Here’s how you can apply filters in iMovie:
- Open iMovie on your Mac and create a new project or open an existing project.
- Import your video clip into iMovie by clicking on “Import Media” and selecting the desired video file.
- Drag the video clip from the media library to the timeline at the bottom of the screen.
- Select the video clip in the timeline and click on the “Settings” icon in the top-right corner of the iMovie interface.
- In the “Video Overlay Settings” window, click on the “Clip Filter” tab.
- Here, you’ll find a variety of filters to choose from. Click on a filter to apply it to your video.
- Adjust the intensity of the filter using the slider provided.
- Preview the filtered video by clicking on the play button in the iMovie preview window.
- Once you’re satisfied with the results, click on the “Apply” button to save the changes.
With iMovie, adding filters to your videos and customizing their settings is a breeze.
Using Third-Party Apps for Filters
If you’re looking for more advanced or specialized filters, you can explore the wide range of third-party apps available for Mac. These apps offer a plethora of filters, effects, and editing tools to take your photo and video editing to the next level. Some popular third-party apps for filters include Adobe Photoshop, Lightroom, and Final Cut Pro.
Simply download and install the app of your choice from the Mac App Store or the developer’s website. Once installed, you can follow the respective app’s instructions to apply filters to your photos and videos.
Customizing Filter Settings in Photos or iMovie
If you want more control over the filter settings, both the Photos app and iMovie offer customization options. In the Photos app, you can fine-tune the intensity of the filter and make additional adjustments using the editing tools. In iMovie, you can adjust the intensity, as well as add additional effects and adjustments to create a unique look for your video.
Experiment with different settings and filters to find the perfect balance and achieve the desired visual effects.
Now that you have a clear understanding of how to put a filter on a photo or video on your Mac, you can unleash your creativity and give your visual content a boost. Whether you’re using the built-in Photos app, iMovie, or third-party apps, the possibilities are endless.
Adding Filters in Photos app
The Photos app on Mac provides a convenient way to enhance your photos with filters. Follow these steps to add filters to your photos:
1. Open the Photos app on your Mac.
2. Select the photo you want to apply a filter to.
3. Click on the “Edit” button located at the top of the Photos app.
4. In the editing toolbar, you’ll find a button that looks like three overlapping circles. Click on it to open the Filters panel.
5. The Filters panel will display a range of filter options. Click on a filter to preview it on your photo.
6. Adjust the strength of the filter using the slider located below the list of filters. Drag the slider to the left for a subtle effect or to the right for a more pronounced filter.
7. Once you’re satisfied with the filter settings, click on the “Done” button to apply the filter to your photo.
8. To save the edited photo, click on the “Save” button located at the top right corner of the Photos app.
That’s it! You’ve successfully added a filter to your photo using the Photos app on your Mac.
Applying Filters in iMovie
iMovie is a powerful video editing software that allows you to add various effects, including filters, to your videos. Applying filters in iMovie is a simple and straightforward process that can instantly transform the look and feel of your footage.
To apply filters in iMovie, follow these steps:
- Launch iMovie on your Mac.
- Open your project or create a new one.
- Import the video clip or select the existing one in the timeline where you want to apply the filter.
- Select the video clip by clicking on it.
- Click on the “Adjust” button located at the top right corner of the iMovie window.
- In the “Adjust” panel, you will see various editing options including Brightness, Contrast, Saturation, and more.
- To apply a filter, click on the “Video Filters” option.
- A list of available filters will appear. Scroll through the options and click on the filter you want to apply.
- The filter will be applied to the video clip immediately.
- You can adjust the intensity of the filter by dragging the slider below the filters list.
- Preview the applied filter by playing the video in the iMovie preview window.
- Make further adjustments if needed, such as applying multiple filters or adjusting other settings in the “Adjust” panel.
- Once you are satisfied with the applied filter, you can continue editing your video or export it to your desired format.
Applying filters in iMovie gives you the ability to enhance the visual aesthetics of your videos, whether you want to add a vintage look, create a dramatic atmosphere, or simply make your footage more vibrant and eye-catching.
Experimenting with different filters in iMovie allows you to unleash your creativity and give your videos a unique and professional touch.
Using Third-Party Apps for Filters
While the built-in Photos app and iMovie offer a decent range of filters, you may want to explore third-party apps to unlock even more creative possibilities. These apps often provide a wider selection of filters and advanced editing tools that can take your photos and videos to the next level. Here are a few popular third-party apps you can consider:
1. VSCO: VSCO is known for its impressive collection of filters that emulate film photography aesthetics. With VSCO, you can choose from a variety of preset filters or customize your own to create a unique look for your photos and videos.
2. Snapseed: Snapseed is a powerful editing app developed by Google. It not only offers a wide range of filters, but also allows you to adjust various parameters like brightness, contrast, saturation, and more. The app also features selective editing tools, allowing you to apply filters to specific areas of your photo or video.
3. Adobe Lightroom: Adobe Lightroom is widely used by professional photographers and offers a comprehensive set of editing tools and filters. It allows you to fine-tune your photos and videos with advanced controls, such as exposure, color grading, and tonal adjustments.
4. ProCam: ProCam is a versatile camera app that not only provides a wide range of filters but also offers manual controls for exposure, focus, and white balance. It’s a great option if you want more control over the editing process.
5. Filmmaker Pro: If you’re looking for advanced video editing capabilities, Filmmaker Pro is a fantastic choice. It offers a variety of filters specifically designed for videos, along with features like chroma keying, transitions, and overlays.
Remember to explore the App Store for more options and read user reviews to find apps that suit your specific needs and preferences. Once you’ve installed your preferred third-party app, you can easily apply filters to your photos or videos directly within the app’s interface.
Using third-party apps for filters opens up a world of creative possibilities, allowing you to experiment with different styles and enhance the visual appeal of your photos and videos effortlessly. So don’t hesitate to explore these apps and take your editing skills to new heights!
Customizing Filter Settings in Photos or iMovie
When it comes to adding filters to your photos or videos on Mac, the built-in Photos and iMovie apps offer a wide array of options. However, you may find that the default filter settings don’t quite match the look and feel you’re going for. That’s where customizing filter settings in Photos or iMovie comes in handy. By tweaking the filter parameters, you can achieve the perfect aesthetic for your project.
In the Photos app, customizing filter settings allows you to fine-tune various aspects of the filter, such as brightness, contrast, saturation, and more. To do this, simply open the desired photo in the Photos app and click on the “Edit” button. Then, click on the “Filters” icon, which resembles three overlapping circles. From there, you can choose a filter and adjust its settings using the sliders provided. Experiment with different combinations until you achieve the desired result. Once you’re satisfied, click “Done” to save your changes.
In iMovie, the process of customizing filter settings is just as simple. First, import your video into iMovie and select it in the timeline. Then, click on the “Adjust” button located in the top-left corner of the Viewer window. This will reveal a range of adjustment options, including the “Filters” tab. Clicking on this tab will display a variety of filters to choose from. Select a filter, and you will have the ability to customize its settings using sliders for things like intensity, saturation, and more. Play around with the settings until you achieve the desired look for your video.
Customizing filter settings can truly transform the mood and atmosphere of your photos and videos. Whether you want to enhance the vibrant colors of a landscape or add a vintage feel to a family video, the ability to customize filter settings gives you the creative freedom to achieve your vision. By experimenting with different combinations and adjustments, you can create stunning visuals that truly stand out.
Conclusion
Filtering photos and videos on your Mac has never been easier. With the advancements in technology and software updates, there are numerous options available to enhance your visual content.
Whether you’re a professional photographer or just looking to add a touch of creativity to your personal media, Mac offers a wide range of tools and applications to put filters on your photos and videos. From built-in software like Photos and iMovie, to third-party apps like Adobe Photoshop and Final Cut Pro, the possibilities are endless.
By following the steps outlined in this guide, you can easily apply filters to your photos and videos on your Mac. Experiment with different filters, adjust the settings, and bring your visual content to life with a touch of your personal style.
Now that you have the knowledge and tools at your disposal, go ahead and transform your ordinary photos and videos into stunning pieces of art with just a few simple clicks.
FAQs
Here are some frequently asked questions about putting filters on photos or videos on Mac:
1. Can I put filters on photos and videos on Mac?
Yes, you can! Mac offers a variety of applications and tools that allow you to apply filters to photos and videos with just a few clicks. From built-in editing software like Photos to third-party applications like iMovie and Final Cut Pro, Mac users have plenty of options to enhance their visuals.
2. How do I put filters on photos on Mac?
To put filters on photos on Mac, you can use the built-in Photos app. Simply open the app, select the photo you want to edit, and click on the Edit button. From there, you’ll find a range of editing tools, including filters. Choose the filter that suits your desired aesthetic, and voila! Your photo will be transformed.
3. Can I put filters on videos on Mac?
Absolutely! If you want to put filters on videos on Mac, you can utilize video editing software such as iMovie or Final Cut Pro. These applications allow you to import your videos, apply various filters, adjust settings, and even customize transitions for a professional touch.
4. Are there any third-party applications for advanced filter effects on Mac?
Yes, there are several third-party applications that offer advanced filter effects for both photos and videos on Mac. Some popular options include Adobe Photoshop, Lightroom, and DaVinci Resolve. These applications provide a wide range of filters and editing features to take your visuals to the next level.
5. Can I remove filters from photos or videos on Mac?
Yes, you can remove filters from photos or videos on Mac. In the Photos app, simply select the edited photo, click on Edit, and choose the Revert to Original option. For videos edited in software like iMovie or Final Cut Pro, you can remove filters by selecting the clip, going to the Effects tab, and removing the applied filter.