
In this day and age, cell phones have become an integral part of our lives. Whether we use them for communication, entertainment, or work, these devices have truly revolutionized the way we interact with the world. One of the latest innovations in the mobile phone industry is the inclusion of eSIM technology. eSIM, short for embedded SIM, provides users with a more seamless experience by eliminating the need for a physical SIM card. While eSIM offers numerous benefits, such as the ability to switch carriers without changing a SIM card, there may come a time when you need to remove the eSIM from your Samsung phone. In this article, we will guide you through the steps to remove the eSIM from your Samsung phone effectively.
Inside This Article
- Precautions before Removing eSIM
- Method 1: Removing eSIM through Settings
- Method 2: Removing eSIM using SIM card removal tool
- Method 3: Removing eSIM through Samsung official service center
- Conclusion
- FAQs
Precautions before Removing eSIM
Before you proceed to remove the eSIM from your Samsung phone, there are a few important precautions you should keep in mind. These precautions will help ensure a smooth and hassle-free process:
1. Backup your data: It’s always a good idea to back up your data before making any changes to your device. This includes contacts, photos, videos, and any important files you may have stored on your phone. By creating a backup, you can prevent any loss of data during the eSIM removal process.
2. Disconnect from the network: Prior to removing the eSIM, it’s crucial to disconnect your phone from any cellular network or Wi-Fi connection. This will prevent any interruptions during the removal process and ensure that your phone operates smoothly without any network conflicts.
3. Turn off your phone: To avoid any potential damage to your phone, it is advisable to power it off before removing the eSIM. This step will minimize the risk of accidental data loss or disruptions to your device’s internal components.
4. Read the device manual: It’s always beneficial to refer to the user manual or online guides provided by Samsung for your specific device model. These resources can offer step-by-step instructions and tips for safely removing the eSIM without causing any damage to your phone.
5. Use a SIM card removal tool: Most Samsung phones come with a SIM card removal tool that helps in safely ejecting the eSIM tray. If you don’t have the tool, you can use a small needle or a paperclip, making sure to apply gentle pressure to avoid any damage to the eSIM tray or surrounding components.
6. Be cautious with delicate components: When removing the eSIM, be mindful of delicate components such as the SIM tray, pins, and connectors. Handle these parts with care, ensuring that you don’t apply excess force or cause any bending or damage that could affect the functionality of your phone.
By following these precautions, you can minimize the risk of encountering any issues or damaging your Samsung phone while removing the eSIM. It’s always better to be safe than sorry when handling delicate electronic devices like mobile phones.
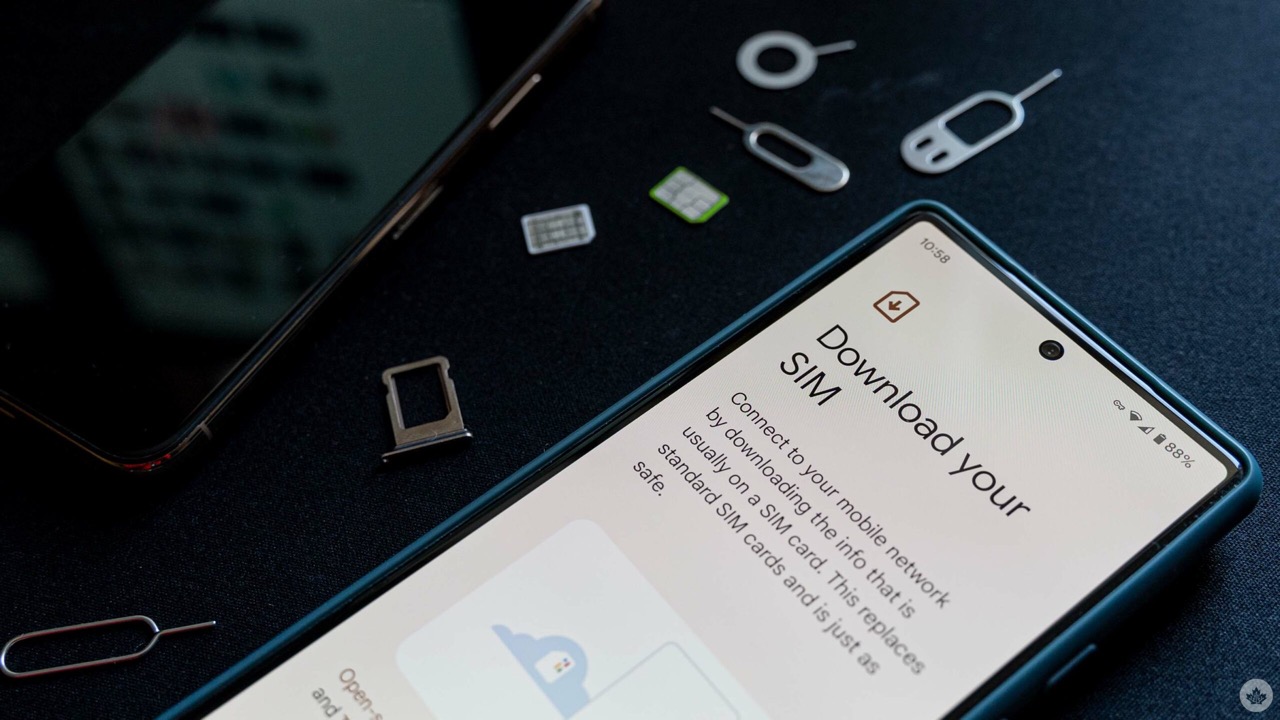
Method 1: Removing eSIM through Settings
If you are looking to remove the eSIM from your Samsung phone, one of the easiest ways to do so is through the settings menu. This method allows you to conveniently manage your eSIM settings and deactivate or remove it entirely.
To begin, open the settings menu on your Samsung phone. You can access this by swiping down from the top of the screen and tapping on the gear icon, or by finding the settings app in your app drawer.
Once you are in the settings menu, scroll down and look for the “Connections” or “Network & Internet” option. Tap on it to access the network settings.
Within the network settings, you may find a variety of options depending on the model of your Samsung phone. Look for an option related to “SIM cards” or “SIM card manager.” Tap on it to proceed.
Here, you should see the eSIM listed as one of the available SIM cards. Tap on the eSIM option to view its settings.
In the eSIM settings, you should find an option to remove or deactivate the eSIM. Tap on this option to initiate the removal process.
You may be prompted to enter a security PIN or pattern to confirm the removal of the eSIM. This is to ensure that only the authorized user can make these changes.
Once you have entered the necessary security information, the eSIM will be removed from your Samsung phone. You can verify this by checking the list of SIM cards in the SIM card manager.
It is worth noting that removing the eSIM will disable any services or connections associated with it. If you wish to use the eSIM again in the future, you will need to re-enable it and set it up again.
By following these steps, you can easily remove the eSIM from your Samsung phone through the settings menu. This method provides a straightforward and hassle-free approach to managing your eSIM settings and ensuring the smooth functioning of your device.
Method 2: Removing eSIM using SIM card removal tool
If you’re looking to remove the eSIM from your Samsung phone, one of the easiest and most effective methods is by using a SIM card removal tool. This small, pin-shaped tool is usually included when you purchase your phone and can be found in the box or the SIM card tray. If you can’t locate the tool, don’t worry! You can also use a straightened paperclip or a thin needle as an alternative.
To begin the process, turn off your Samsung phone to avoid any potential damage or data loss. Once it’s powered off, locate the SIM card tray. The tray is typically found on the side or top of the device, depending on the model. Use the SIM card removal tool to gently push into the small hole near the tray, applying slight pressure until the tray pops out.
With the tray out, carefully remove the SIM card by sliding it out. Take a moment to inspect the SIM card and the tray for any damage or debris, ensuring that everything is clean and in good condition. Now, here’s where you’ll find the eSIM. Look for a smaller slot, usually located next to the SIM card slot or on the opposite side of the tray. Use the same SIM card removal tool or a paperclip to gently push into the hole, releasing the eSIM tray.
Once the eSIM tray is released, slide it out and remove the eSIM from the tray. Take care not to touch the gold contacts on the eSIM, as any residue or dirt can disrupt its performance. Inspect the eSIM for any signs of damage and make sure it’s clean before reinserting it securely into the tray.
Now that you have removed the eSIM, simply put the eSIM tray back into the SIM card tray slot. Gently push the tray in until it locks into place. Make sure it sits flush with the device, ensuring a secure fit. Finally, power on your Samsung phone and check that everything is working properly, including the removal of the eSIM.
Removing the eSIM using the SIM card removal tool is a straightforward process that allows you to easily switch to a physical SIM card or troubleshoot any eSIM-related issues. It’s a handy method that can be done quickly and efficiently, giving you flexibility and control over your phone’s connectivity options.
Method 3: Removing eSIM through Samsung official service center
If you’re not comfortable removing the eSIM from your Samsung phone on your own, or if you encounter any difficulties during the process, you can always rely on the expertise of the Samsung official service center. These certified professionals are trained to handle various technical tasks related to Samsung devices, including eSIM removal.
Bringing your Samsung phone to an official service center ensures that the removal process will be done correctly and without any risk of damaging your device. They have the necessary tools and knowledge to safely remove the eSIM without causing any harm to the internals or affecting the performance of your phone.
When you visit a Samsung official service center, the technicians will carefully inspect your device and verify your ownership. They will then proceed with the eSIM removal procedure using the appropriate tools and techniques. The process usually takes a short amount of time, and you can wait at the service center while it’s being done.
One of the main advantages of getting your eSIM removed at a Samsung official service center is that they can also assist you with any other issues you may be experiencing with your device. Whether it’s a software glitch, hardware malfunction, or any other technical problem, the technicians at the service center can provide the necessary support and solutions.
Additionally, by getting your eSIM removed through the official service center, you can have peace of mind knowing that any warranty or guarantee on your Samsung phone will remain intact. This ensures that you’re covered in case of any future issues with your device.
It’s important to note that there may be a service fee associated with getting your eSIM removed at the Samsung official service center. The exact cost will depend on various factors, such as the specific service center you visit and the nature of the task. Therefore, it’s advisable to inquire about the charges beforehand to avoid any surprises.
Overall, removing the eSIM through the Samsung official service center is a hassle-free and reliable option. It allows you to ensure the safety of your device while taking advantage of the expertise and support provided by certified Samsung technicians. So, if you prefer to leave the eSIM removal to the professionals, visiting the official service center is the way to go.
Removing an eSIM from your Samsung phone is a simple process that can be done in a few easy steps. Whether you want to switch to a physical SIM or upgrade your device, knowing how to remove the eSIM is essential. By following the guidelines provided in this article, you can confidently remove the eSIM from your Samsung phone without any hassle.
Remember to back up any important data before removing the eSIM, as it may be erased during the process. Additionally, ensure that you have a physical SIM card ready if you wish to continue using cellular services on your device.
With the increasing popularity of eSIM technology, it’s important to stay informed about its usage and removal procedures. By knowing how to remove the eSIM from your Samsung phone, you have the flexibility to switch between different SIM cards and tailor your mobile experience to your needs.
So, go ahead and explore the world of eSIMs with confidence, knowing that you have the knowledge to remove and replace them as needed.
FAQs
1. Can I remove the eSIM from my Samsung phone?
Yes, you can remove an eSIM from your Samsung phone. However, the process may vary depending on the model and specific settings on your device. It is recommended to refer to the user manual or contact the manufacturer’s customer support for detailed instructions tailored to your phone.
2. Why would I want to remove the eSIM from my Samsung phone?
There can be several reasons why you might want to remove the eSIM from your Samsung phone. One of the most common reasons is to switch to a different mobile carrier or change your phone number. Removing the eSIM allows you to replace it with a new one and activate a different cellular plan.
3. How do I remove the eSIM from my Samsung phone?
To remove the eSIM from your Samsung phone, you will typically need to access the SIM card tray, which is usually located on the side or top of the device. Follow these general steps:
- Power off your Samsung phone to avoid any potential damage.
- Locate the SIM card tray and use a SIM ejector tool or a small paperclip to gently press into the small hole next to the tray.
- The tray should pop out slightly. Carefully pull it out using your fingers or a pair of tweezers.
- The eSIM card should be visible in the tray. Hold it and gently slide it out.
It’s important to note that these steps may vary slightly depending on your specific Samsung phone model. Always consult the user manual or contact customer support if you are unsure.
4. Do I need to deactivate the eSIM before removing it from my Samsung phone?
In most cases, it is recommended to deactivate the eSIM before removing it from your Samsung phone. Deactivating the eSIM ensures a smoother transition when activating a new eSIM or switching to a physical SIM card. To deactivate the eSIM, go to the settings menu on your device, select “SIM card and mobile networks,” and follow the on-screen instructions to deactivate the eSIM.
5. Can I reuse the eSIM after removing it from my Samsung phone?
Yes, you can reuse the eSIM after removing it from your Samsung phone, provided it is not damaged or blocked by your mobile carrier. You can insert the eSIM into a different compatible device or reactivate it on the same device if required. However, keep in mind that the process of reactivating an eSIM may vary depending on your carrier’s policies and the device you intend to use.