
Welcome to our comprehensive guide on how to set up the Jitterbug Flip Phone. If you’re new to this user-friendly and accessible flip phone, this article will walk you through the setup process step-by-step. Whether you’re a senior looking for a simplified cell phone experience or simply prefer the classic flip phone design, the Jitterbug Flip Phone offers a range of features and functions tailored to your needs. In this guide, we’ll cover everything from activating your phone to customizing settings and accessing essential features. By the end of this article, you’ll be equipped with the knowledge and confidence to make the most of your Jitterbug Flip Phone. So, let’s dive in and get started!
Inside This Article
- Overview of Jitterbug Flip Phone
- Step 1: Unboxing and assembling the Jitterbug Flip Phone
- Step 2: Inserting the SIM card and battery
- Step 3: Powering on and setting up the Jitterbug Flip Phone
- Step 4: Navigating the menu and adjusting phone settings
- Step 5: Adding contacts to the Jitterbug Flip Phone
- Step 6: Making and receiving phone calls
- Step 7: Sending and receiving text messages
- Step 8: Using additional features and settings
- Conclusion
- FAQs
Overview of Jitterbug Flip Phone
The Jitterbug Flip Phone is a user-friendly and reliable mobile phone that is specifically designed for seniors. It offers a simple and intuitive interface, making it easy for older individuals to stay connected with their loved ones and access essential features without the complexity typically associated with modern smartphones.
With its large buttons, clear display, and powerful speaker, the Jitterbug Flip Phone ensures that seniors can easily make phone calls and send text messages, even with limited eyesight or hearing. The phone also has enhanced sound quality and volume, making conversations loud and clear.
One of the standout features of the Jitterbug Flip Phone is its built-in emergency response system. With the touch of a button, users can quickly connect with highly trained agents who can assist in emergencies or provide immediate medical attention. This feature provides peace of mind for both the user and their loved ones.
The Jitterbug Flip Phone also offers a long-lasting battery life, allowing seniors to go about their day without worrying about constantly recharging the device. Additionally, it has a robust and durable design, providing added protection against accidental drops.
Overall, the Jitterbug Flip Phone is a reliable and user-friendly device tailored to the needs of seniors. It combines essential features, ease of use, and enhanced safety measures, ensuring that older individuals can stay connected, informed, and secure in their daily lives.
Step 1: Unboxing and assembling the Jitterbug Flip Phone
Unboxing a new phone is always an exciting experience, and the Jitterbug Flip Phone is no exception. Here are the steps to unbox and assemble your Jitterbug Flip Phone:
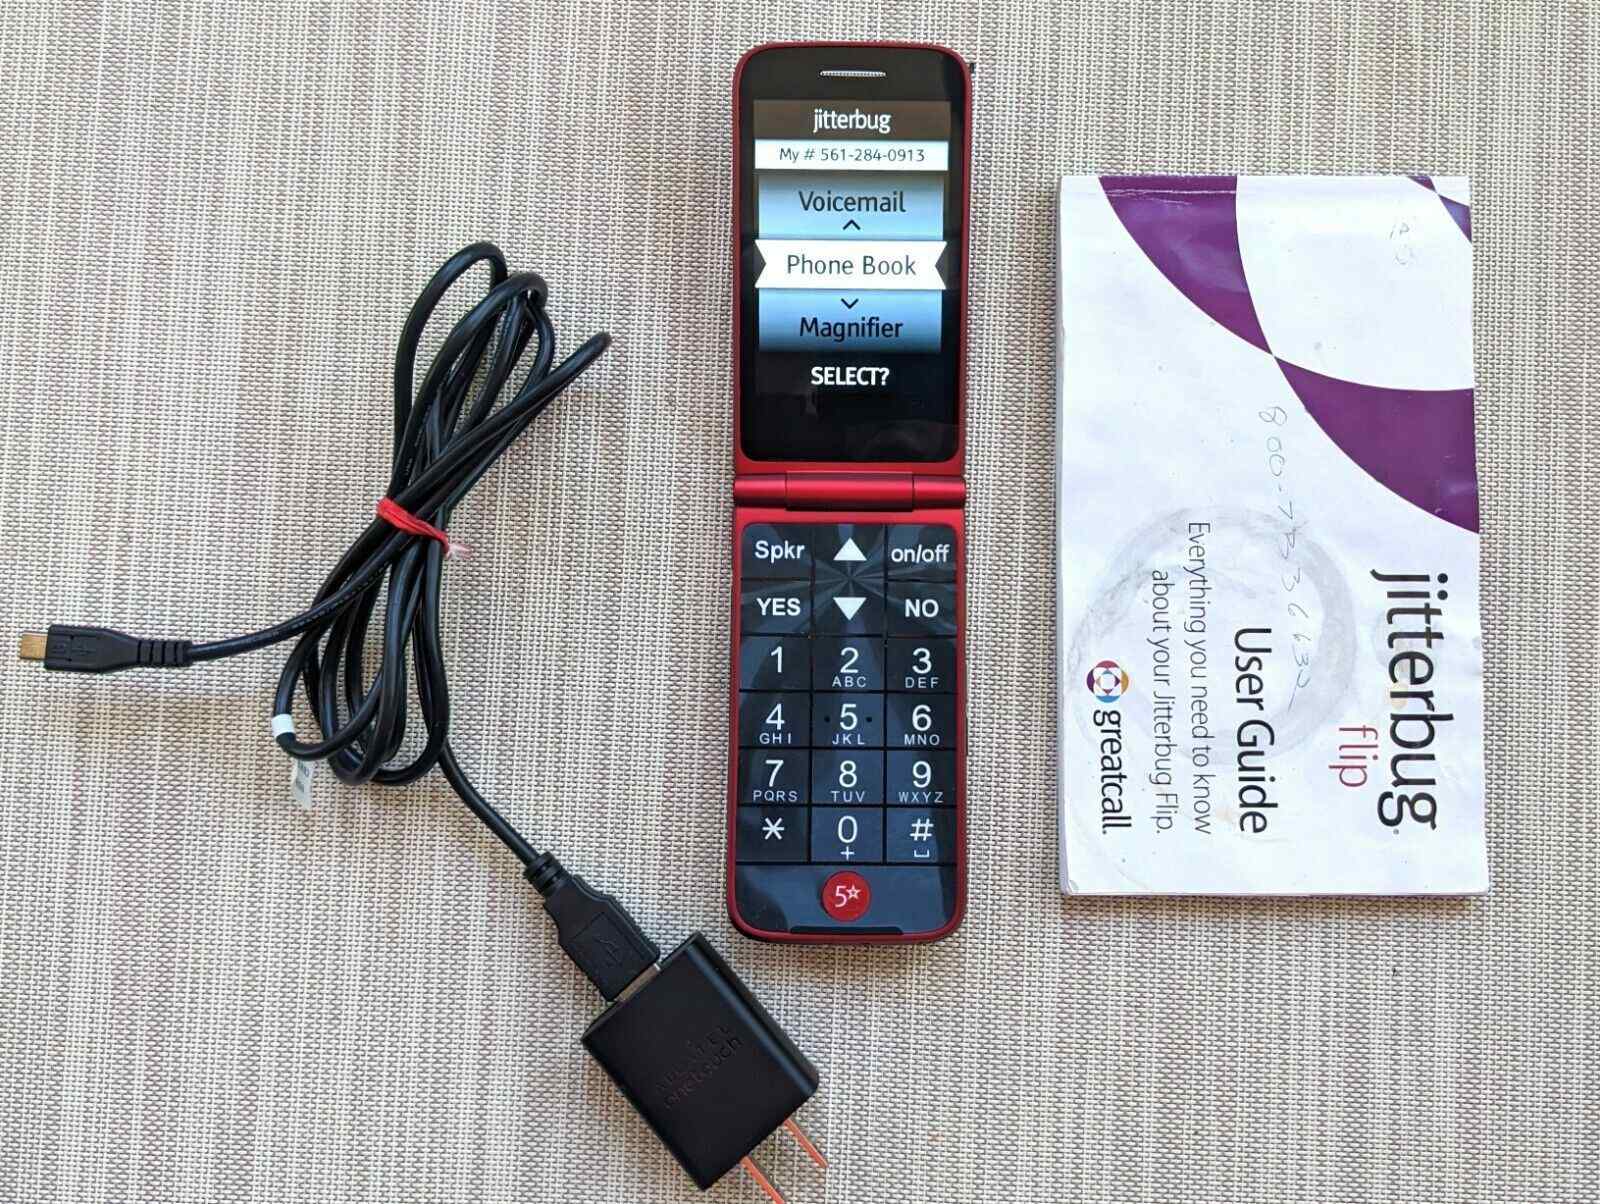
1. Carefully open the box and remove all the contents. You should find the Jitterbug Flip Phone, a battery, a charger, a quick start guide, and any other included accessories.
2. Insert the battery into the phone. The battery is usually located on the back of the phone and can be easily inserted by aligning the contacts and gently pushing it into place.
3. Connect the charger to the phone. Plug one end of the charger into the phone’s charging port, which is typically found on the bottom of the device. Plug the other end into a wall socket or a USB port on your computer.
4. Allow the phone to charge for a while. It is recommended to fully charge the battery before using the Jitterbug Flip Phone for the first time. This helps ensure optimal performance and battery life.
5. While the phone is charging, familiarize yourself with the quick start guide. It will provide you with essential information on how to navigate the phone’s interface, make calls, send messages, and use other features.
6. Once the phone is charged, press and hold the power button to turn it on. The power button is usually located on the side of the phone. Follow the on-screen prompts to set up the initial settings, such as language preference and date/time.
7. Congratulations! You have successfully unboxed and assembled your Jitterbug Flip Phone. Now, it’s time to explore its features and start using it to stay connected with your loved ones!
Step 2: Inserting the SIM card and battery
Once you have unboxed and assembled your Jitterbug Flip Phone, the next step is to insert the SIM card and battery. This ensures that your phone is able to connect to the cellular network and power up properly.
To begin, locate the SIM card and battery slots on the back of the phone. They are usually located underneath the back cover or behind a small external panel. Refer to the phone’s user manual or documentation if you need help identifying these slots.
Start by removing the back cover of your Jitterbug Flip Phone. This can usually be done by gently sliding the cover downwards or unlatching it using the designated buttons or levers. The back cover is typically designed to be easily removed without the need for tools.
Once the back cover is off, you will see a slot labeled “SIM card.” Take your SIM card, which is usually provided by your mobile service provider, and carefully insert it into the slot. Make sure the gold contacts on the SIM card are facing down and align with the corresponding contacts in the slot.
After inserting the SIM card, it’s time to insert the battery. Locate the battery slot, which is usually located near the top or bottom of the phone, depending on the model. Take the battery provided with your Jitterbug Flip Phone and align it with the metal contacts inside the battery slot.
Gently press the battery into place until you hear a click or feel it securely lock into position. Ensure that the battery is inserted correctly and that it sits flush with the phone’s body. This ensures a proper connection and prevents the battery from becoming loose during use.
Once the SIM card and battery are properly inserted, you can proceed to close the back cover of your Jitterbug Flip Phone. Align the cover with the phone’s body and gently press it until you hear it snap or lock into place. Check that the cover is securely attached to prevent any accidental opening.
With the SIM card and battery successfully inserted, you are now ready to power on your Jitterbug Flip Phone and proceed with the initial setup. Follow the manufacturer’s instructions to turn on the phone and complete the necessary activation steps.
Remember, if you experience any difficulties or have questions regarding the SIM card or battery insertion, consult the user manual or reach out to the manufacturer’s customer support for assistance. They will be able to guide you through the process and ensure that your Jitterbug Flip Phone is ready for use.
Step 3: Powering on and setting up the Jitterbug Flip Phone
After unboxing and assembling your Jitterbug Flip Phone, the next step is to power it on and set it up. Here’s a step-by-step guide to help you get started:
1. To power on the Jitterbug Flip Phone, press and hold the red power button located on the right side of the phone until the screen lights up. You may need to hold the button for a few seconds.
2. Once the phone is turned on, you may be prompted to enter the date and time. Use the keypad to input the correct information and press the “OK” button.
3. Next, you’ll be asked to select your language preference. Use the navigation keys to scroll through the available options and press “OK” when your desired language is highlighted.
4. The Jitterbug Flip Phone will then guide you through a series of setup screens. This includes setting up your network connection and configuring other basic settings. Follow the on-screen instructions and press “OK” or “Next” when prompted.
5. If you have a SIM card inserted into your phone, you may need to enter the SIM PIN to unlock the device. The default SIM PIN is usually provided by your carrier. If you’re unsure, contact your carrier for assistance.
6. The final step in setting up your Jitterbug Flip Phone is to create or log in to your GreatCall account. This account allows you to manage your phone settings, services, and contact information online. Follow the prompts to either create a new account or sign in with your existing credentials.
That’s it! Once you’ve completed these steps, your Jitterbug Flip Phone will be powered on and set up, ready for you to start using its features and functionality.
Step 4: Navigating the menu and adjusting phone settings
Once you have successfully powered on your Jitterbug Flip Phone, you are ready to explore its menu and customize the phone settings according to your preferences. Navigating the menu is straightforward and intuitive, allowing you to easily access various features and options.
To navigate the menu, you can use the navigation keys located just below the screen. The up and down arrows allow you to scroll through the menu options, while the center button acts as the selection key to enter a specific menu or option.
As you navigate through the menu, you will come across various settings that you can adjust to personalize your Jitterbug Flip Phone. Let’s take a look at some of the key phone settings you can modify:
- Display settings: You can adjust the brightness, font size, and contrast of the screen to ensure optimal visibility.
- Sound settings: Customize the ringtone, volume levels, and vibration settings to suit your preferences.
- Language settings: Choose the language in which you want the phone’s menu and messages to appear.
- Time and date settings: Set the correct time and date on your Jitterbug Flip Phone. This is particularly important for accurate call logs and message timestamps.
- Security settings: Protect your phone and personal data by configuring features such as PIN lock, auto-lock, and security codes.
- Network settings: Adjust network settings, such as Wi-Fi and Bluetooth connectivity, to seamlessly connect to other devices and networks.
It’s important to explore these settings and adjust them according to your preferences to optimize your user experience with the Jitterbug Flip Phone. Additionally, keep in mind that the menu structure may vary slightly depending on the specific model and software version of your phone.
If you ever need assistance or have any questions about adjusting the phone settings, consult the user manual that came with your Jitterbug Flip Phone. The manual provides detailed instructions on navigating the menu and customizing various settings.
Now that you have a good understanding of navigating the menu and adjusting phone settings on your Jitterbug Flip Phone, you can move on to the next step: adding contacts to your phonebook!
Step 5: Adding contacts to the Jitterbug Flip Phone
Adding contacts to your Jitterbug Flip Phone is a simple and essential step to ensure that you can easily reach out to your friends, family, and colleagues. With this user-friendly device, managing your contacts has never been easier. Here’s a step-by-step guide on how to add contacts to your Jitterbug Flip Phone:
1. Open the contacts menu on your Jitterbug Flip Phone. You can usually access this menu by pressing the “Menu” button and navigating to the Contacts or Address Book option. Once you find it, select it to open the contacts menu.
2. Select the option to add a new contact. This can vary depending on the specific model and software version of your Jitterbug Flip Phone. Look for a button or menu option that says “Add New,” “New Contact,” or something similar. Click on it to start adding a new contact.
3. Enter the contact’s name. Use the keypad or navigation buttons to enter the first and last name of the contact. Each key on the Jitterbug Flip Phone’s keypad typically corresponds to multiple alphabet letters. Press the key repeatedly until the desired letter appears on the screen. Repeat this process until you have entered the contact’s full name.
4. Enter the contact’s phone number. After entering the name, you will be prompted to enter the phone number. Use the keypad to input the digits of the contact’s phone number. Make sure to include the area code if necessary. Press the appropriate keys to type in each digit, and move to the next field or option when finished.
5. Save the contact. Once you have entered the name and phone number, look for the option to save the contact. It is often labeled as “Save,” “Done,” or “OK.” Select this option to save the contact to your Jitterbug Flip Phone’s address book. Some devices may also allow you to assign a specific ringtone or personalize the contact further.
6. Repeat steps 3 to 5 for additional contacts. If you have multiple contacts to add, simply repeat steps 3 to 5 for each contact. Take your time to ensure that you accurately enter the names and numbers to avoid any errors.
7. Access your contacts. Once you have added your contacts, you can easily access them by opening the contacts menu as mentioned in step 1. From there, you can scroll through your contacts list, search for specific names, and select a contact to view their details or call them directly.
By following this step-by-step guide, you can quickly add contacts to your Jitterbug Flip Phone and have them readily available for calls and messages. Managing your contacts will become a breeze, allowing you to stay connected with your loved ones and reach out to the people who matter most.
Step 6: Making and receiving phone calls
Now that your Jitterbug Flip Phone is set up and ready to use, you can start making and receiving phone calls. The Jitterbug Flip Phone offers a user-friendly interface designed specifically for seniors, making it easy to place and answer calls with just a few simple steps.
To make a phone call, follow these steps:
- Open the phone app by pressing the “Yes” button located on the keypad.
- Using the arrow keys, navigate to the “Dial” option and press the “Yes” button.
- Enter the phone number you want to call using the keypad. Make sure to include the area code if necessary.
- Once you have entered the phone number, press the “Yes” button to initiate the call.
- To end the call, simply press the “End” button located below the “Yes” button.
Receiving phone calls on the Jitterbug Flip Phone is just as easy. When someone calls you, the phone will ring and display the caller’s information on the screen. To answer the call, simply press the “Yes” button. If you want to decline the call, press the “No” button.
While on a call, you can adjust the volume by using the up and down arrow keys. You can also enable the speakerphone function by pressing the speakerphone button located on the keypad. This can be particularly useful if you want to have a hands-free conversation.
Additionally, the Jitterbug Flip Phone offers a 5Star Urgent Response button located on the keypad. This button allows you to quickly connect with a certified response agent who can provide immediate assistance in case of an emergency. Simply press and hold the 5Star button for several seconds to initiate the call.
With these simple steps, you’ll be able to confidently make and receive phone calls on your Jitterbug Flip Phone. Whether you’re staying connected with loved ones or reaching out for help in an emergency, the Jitterbug Flip Phone has you covered.
Step 7: Sending and receiving text messages
Text messaging is a popular and convenient way of communication, and the Jitterbug Flip Phone allows you to send and receive text messages with ease. Follow the steps below to start exchanging messages with your contacts:
- From the home screen, press the Menu button using the large Yes/Up button.
- Navigate to the Messages option using the navigation buttons and select it by pressing the Yes/Up button.
- Select the “Create New Message” option and press the Yes/Up button.
- Using the keypad, enter the recipient’s phone number. Review the number and press the Yes/Up button to confirm.
- Compose your message using the keypad, utilizing the number keys to cycle through letters and symbols. Press the Yes/Up button after each character to select it.
- Once the message is complete, press the Options button (represented by the softkey labeled “Options”) to access additional messaging features like adding attachments or changing the message priority.
- To send the message, press the Send button (typically represented by a softkey labeled “Send” or an icon with an envelope) and confirm by pressing the Yes/Up button.
Receiving text messages on your Jitterbug Flip Phone is just as straightforward:
- When a new text message arrives, a notification will appear on the screen. Press the Yes/Up button to view the message.
- The message will be displayed on the screen. Use the navigation buttons to scroll through the message if necessary.
- To reply to the message, press the Options button and select the “Reply” option. Compose your response using the keypad, following the same steps outlined above.
- To delete the message after reading it, press the Options button and select the “Delete” option.
With these simple steps, you can effortlessly send and receive text messages on your Jitterbug Flip Phone. Stay connected with friends, family, and loved ones through the power of texting.
Step 8: Using additional features and settings
Once you have set up your Jitterbug Flip Phone and familiarized yourself with the basic functions, you can begin exploring the additional features and settings that this versatile device offers. Whether you need to customize your phone to your preferences or take advantage of advanced functionalities, the Jitterbug Flip Phone has got you covered.
Here are some of the additional features and settings that you can utilize:
- Adjusting the volume: To control the volume of incoming calls, alerts, and media playback, simply press the volume buttons located on the side of the phone. Adjust the volume to a comfortable level by increasing or decreasing it as per your preference.
- Setting up speed dial: If you frequently call certain contacts, you can save time by setting up speed dial. This feature allows you to assign specific numbers to quick dial keys. To set up speed dial, navigate to the “Contacts” menu, select the contact you want to assign a speed dial number to, and follow the on-screen instructions to assign a speed dial key.
- Enabling emergency SOS: The Jitterbug Flip Phone comes with an emergency SOS feature that provides peace of mind and quick access to help in case of an emergency. To enable this feature, navigate to the “Settings” menu, select “Emergency SOS,” and follow the prompts to set up your emergency contacts and configure the SOS settings.
- Using the camera: Capture special moments with the built-in camera on the Jitterbug Flip Phone. Access the camera by selecting the camera icon from the main menu. Use the arrow keys to adjust settings such as brightness and zoom, and press the OK button to take a photo. You can also review and delete captured photos in the “Photos” menu.
- Accessing the internet: Stay connected with the internet using the Jitterbug Flip Phone’s web browser. Navigate to the “Internet” menu and enter the website address using the keypad. Use the arrow keys to scroll and select options, and press the OK button to open a webpage. Please note that the internet browsing experience on the Jitterbug Flip Phone may be limited compared to smartphones.
- Managing calendar and reminders: The Jitterbug Flip Phone allows you to keep track of important events and set reminders. Access the “Calendar” menu to view and add events and appointments. Set reminders to receive alerts for upcoming events or tasks. Stay organized and never miss an important date or appointment again.
- Customizing display settings: Personalize the appearance of your Jitterbug Flip Phone by customizing the display settings. You can adjust the screen brightness, font size, wallpaper, and backlight duration to suit your preferences. Navigate to the “Settings” menu and select “Display” to access the display customization options.
- Activating hearing aid compatibility: If you wear a hearing aid device, you can activate the hearing aid compatibility feature on your Jitterbug Flip Phone for improved sound quality during phone calls. Navigate to the “Settings” menu, select “Accessibility,” and follow the prompts to enable hearing aid compatibility.
Explore these additional features and settings on your Jitterbug Flip Phone to further enhance your user experience and tailor the device to your specific needs. Remember to refer to the phone’s user manual for detailed instructions and additional information about each feature.
In conclusion, setting up a Jitterbug Flip Phone is a straightforward process that provides simple and reliable communication for seniors. The easy-to-use interface, large buttons, and clear display make it a perfect choice for those who are new to cell phones or have limited dexterity.
By following the step-by-step guide provided, users can quickly activate their phones, personalize settings, and start making calls with ease. The Jitterbug Flip Phone also offers essential safety features such as emergency contacts and a built-in flashlight, giving seniors peace of mind.
With its user-friendly design and accessibility features, the Jitterbug Flip Phone empowers seniors to stay connected with friends and family and enjoy greater independence. So, whether it’s for staying in touch, accessing emergency services, or simply having a reliable communication tool, the Jitterbug Flip Phone is an excellent choice for seniors who want simplicity and ease of use in their cell phone.
FAQs
-
Can I use a Jitterbug Flip phone with any cellphone carrier?
The Jitterbug Flip phone is designed to work exclusively with GreatCall, a service provider that offers affordable plans designed for seniors. It cannot be used with other carriers. -
What are the features of the Jitterbug Flip phone?
The Jitterbug Flip phone comes with a variety of features tailored to the needs of seniors. It has a large keypad with well-spaced buttons for easy dialing. The display is bright and easy to read, and the phone also includes a powerful speaker for clear audio. Other features include a camera, flashlight, a dedicated 5Star button for emergency assistance, and a long-lasting battery. -
How do I set up voicemail on the Jitterbug Flip phone?
To set up voicemail on the Jitterbug Flip phone, simply press and hold the 1 key on the dial pad. This will connect you to the voicemail system, where you can follow the prompts to set up your voicemail greeting and access your messages. -
Can I send and receive text messages on the Jitterbug Flip phone?
Yes, the Jitterbug Flip phone supports text messaging. To send a text message, navigate to the Menu option on the home screen and select “Messages.” From there, you can compose a new message and enter the recipient’s phone number or choose a contact from your address book. To receive text messages, you can simply open the Messages app and view your inbox. -
Is the Jitterbug Flip phone compatible with hearing aids?
Yes, the Jitterbug Flip phone is compatible with hearing aids. It has an M4/T4 hearing aid rating, which means it meets the Federal Communications Commission’s standards for compatibility with hearing aids, ensuring clear and audible sound for users with hearing loss.