
Are you thinking about switching phones on your AT&T Go Phone plan? The process of switching phones on AT&T Go Phone is simple and can be done in just a few easy steps. Whether you want to upgrade to the latest model or just switch to a different device, AT&T Go Phone allows you the flexibility to make the switch hassle-free. In this article, we will guide you through the process of switching phones on AT&T Go Phone, ensuring that you can seamlessly transition from your current device to your new one. With AT&T’s wide range of mobile phone options, you’ll have no shortage of choices when it comes to finding the perfect phone to suit your needs. So let’s dive in and discover how you can switch phones on your AT&T Go Phone plan.
Inside This Article
- Overview
- Step 1: Check phone compatibility
- Step 2: Gather necessary information
- Step 3: Backup your current phone
- Step 4: Purchase new phone and SIM card
- Step 5: Activate your new phone
- Step 6: Set up your new phone
- Step 7: Transfer contacts and data
- Step 8: Test your new phone
- Conclusion
- FAQs
Overview
Switching phones on AT&T Go Phone is a relatively simple process that allows you to upgrade to a new device while keeping your existing phone number and plan. Whether you’re looking to switch to a newer model or just want to try out a different phone, AT&T Go Phone provides flexibility and convenience. In this article, we will guide you through the step-by-step process of switching phones on AT&T Go Phone so you can enjoy your new device hassle-free.
Before diving into the steps, it’s important to note that AT&T Go Phone is a prepaid service offered by AT&T. This means that you’ll need an active AT&T Go Phone account and a compatible device to switch phones. Make sure you have a device that supports AT&T’s network bands and works with their SIM cards.
Now, let’s get started with the process of switching phones on AT&T Go Phone.
Step 1: Check phone compatibility
Before making the switch to a new phone on AT&T Go Phone, it’s important to ensure that your desired phone is compatible with the network. This step is crucial as it determines whether or not you will be able to use the new phone with your existing AT&T Go Phone plan.
The first thing you should do is check the phone’s compatibility by visiting the AT&T website or contacting AT&T customer support. They will provide you with a list of compatible devices or a tool to check if your current phone is compatible with their network. Make sure to have the device’s IMEI or MEID number ready, as AT&T will require this information to determine compatibility.
If your current phone is not compatible with AT&T’s network or if you are looking to upgrade to a new phone, it’s important to research and choose a phone that is compatible. This can be done by looking at AT&T’s list of certified devices or consulting with sales representatives at AT&T stores.
Keep in mind that checking phone compatibility is not only about ensuring it works on the AT&T network, but also that it supports the necessary frequencies and technologies to provide reliable coverage and access to AT&T’s services.
Remember, choosing a phone that is compatible with AT&T Go Phone will ensure a smooth transition and allow you to fully enjoy the benefits of their network without any compatibility-related issues.
Step 2: Gather necessary information
Before you switch phones on AT&T Go Phone, it is important to gather all the necessary information to ensure a smooth transition. Here are some key pieces of information you will need:
- Account information: Make sure you have your AT&T Go Phone account information handy, including your account number, PIN, and any other login credentials.
- Current phone details: Take note of the make, model, and specifications of your current phone. This will help you determine if your new phone is compatible and if any additional steps are required for setup.
- New phone details: Research and gather information about the new phone you plan to switch to. Consider factors such as the phone’s compatibility with AT&T’s network, the features and specifications it offers, and any additional accessories you may require.
- Warranty and insurance: Check if your current phone has any warranty or insurance coverage. If so, make sure to understand the terms and conditions, as well as the steps you need to take to transfer the coverage to your new phone.
- Contact information: Ensure that you have the contact information of AT&T customer support readily available. In case you encounter any issues during the phone switch process, having their contact details handy can help you get the necessary assistance quickly.
By gathering all the necessary information upfront, you will be well-prepared to navigate the phone switch process without any unexpected hurdles. So take the time to collect all the information mentioned above before moving on to the next step.
Step 3: Backup your current phone
Before you make the switch to a new phone on AT&T Go Phone, it’s crucial to backup all the data and settings from your current device. Creating a backup ensures that you don’t lose any important information and allows for a seamless transition to your new device.
Here are some steps you can follow to successfully backup your current phone:
1. Cloud Backup: One of the easiest and most convenient ways to backup your phone is by utilizing the cloud storage services provided by your device’s operating system. Both Android and iOS offer built-in cloud backup options that automatically save your contacts, photos, videos, messages, and app data to a secure online server. Make sure that the backup setting is enabled on your device so that the data is continuously synced and backed up.
2. USB Cable Connection: Another method of backing up your phone is by connecting it to a computer using a USB cable. Once connected, you can use software like iTunes for iPhones or Android File Transfer for Android devices to transfer and create a backup of your files. This method allows for more control over the backup process and gives you the flexibility to select specific files and folders to backup.
3. Third-Party Backup Apps: There are also several third-party backup apps available that offer comprehensive backup solutions. These apps usually provide additional features like cross-platform compatibility, scheduled backups, and the ability to backup specific apps and data. Some popular backup apps include Google Drive, Dropbox, and OneDrive.
4. SIM Card Contacts: If you have been storing your contacts on your SIM card, it’s essential to export them before you make the switch. Most smartphones have an option to copy contacts from the SIM card to the device’s internal memory or sync them with a cloud service. Make sure to check the settings on your phone to ensure that your SIM card contacts are backed up before removing the SIM card.
By following these steps, you can safeguard your precious photos, important contacts, and other valuable data, ensuring a smooth transition to your new phone without any loss or inconvenience.
Step 4: Purchase new phone and SIM card
Once you have determined the compatibility of your phone with the AT&T Go Phone network, it’s time to purchase a new phone and a SIM card. The new phone will act as a replacement for your current device, allowing you to enjoy the latest features and improved performance.
When choosing a new phone, consider your budget, preferred brand, and desired features. Whether you’re looking for a sleek smartphone with advanced camera capabilities or a basic flip phone for simple communication, AT&T offers a wide range of options to suit your needs.
Visit your local AT&T store or browse their website to explore the available phone models. You can also compare prices and customer reviews to make an informed decision. Once you have narrowed down your choices, proceed with the purchase.
Along with the new phone, you will also need to acquire a new SIM card. The SIM card is a small, removable chip that stores your phone number and other identifying information. It is essential for connecting to the AT&T network and accessing voice, text, and data services.
When buying a new SIM card, ensure that it is compatible with your chosen phone model and the AT&T Go Phone network. Most new phones will come with a SIM card included, but if not, you can purchase one separately.
Once you have purchased the new phone and SIM card, keep them in a safe place until you are ready to activate your new device. Make sure to read the instructions provided by AT&T on how to install the SIM card properly, as improper installation can result in connectivity issues.
Now that you have purchased a new phone and SIM card, you are one step closer to switching phones on your AT&T Go Phone plan. The next step will be to activate your new phone and start enjoying the benefits of your upgraded device.
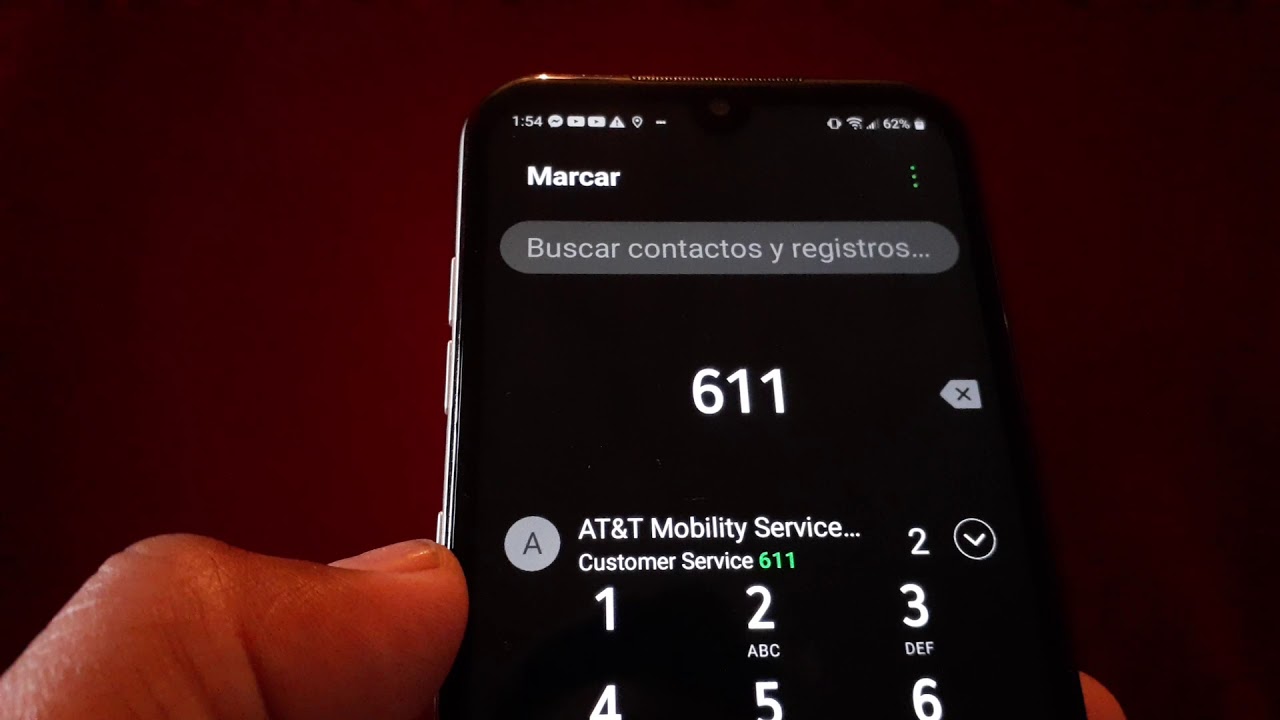
Step 5: Activate your new phone
After purchasing your new phone and SIM card, the next step is to activate your new device. Activating your phone is crucial as it allows you to connect to your AT&T Go Phone service and start making calls, sending texts, and using data.
To activate your new phone, follow these simple steps:
- Insert the SIM card: Locate the SIM card slot on your new phone and carefully insert the SIM card that came with your AT&T Go Phone package. Make sure that the gold contacts on the SIM card are facing down and aligned with the contacts in the phone.
- Power on your phone: Press and hold the power button on your new phone until it turns on. You may need to enter your phone’s passcode or unlock pattern if prompted.
- Connect to a network: Once your phone is powered on, it will search for available networks. Select the AT&T network from the list and wait for your phone to establish a connection.
- Follow the on-screen prompts: Your new phone will guide you through the activation process with a series of on-screen prompts. These prompts may vary depending on the make and model of your phone, but typically include entering your IMEI number, selecting a data plan, and setting up your voicemail.
- Verify activation: Once you have completed the activation process, your new phone should display a message or notification confirming that it is activated and ready to use. You can also try making a test call or sending a text to ensure that your phone is functioning correctly.
It’s important to note that the activation process can take a few minutes to complete. If you encounter any issues or error messages during activation, double-check that you have followed the steps correctly or consult the AT&T Go Phone customer support for assistance.
Once your new phone is activated, you can start enjoying all the features and benefits it offers. Make sure to explore the settings, download your favorite apps, and personalize your device to suit your needs.
Now that your new phone is activated, let’s move on to the next step: setting up your new phone.
Step 6: Set up your new phone
Now that you have your new phone in hand, it’s time to set it up and personalize it to your liking. The setup process will vary depending on the make and model of your phone, but here are some general steps to follow:
1. Power on your new phone: Press and hold the power button until the device turns on.
2. Select your language and region: Follow the on-screen prompts to choose your preferred language and region settings.
3. Connect to Wi-Fi: If you have access to a Wi-Fi network, connect your new phone to it. This will enable faster download speeds and allow you to download apps and updates without using cellular data.
4. Sign in with your Google or Apple ID: Depending on whether you’re using an Android or iOS device, sign in with your Google or Apple ID. This will allow you to access your contacts, calendar, and other personalized settings.
5. Restore from backup (optional): If you backed up your previous phone, you may have the option to restore your data and settings to your new phone. Follow the instructions on the screen to restore from a backup.
6. Set up fingerprint or face recognition (optional): If your new phone supports fingerprint or face recognition, you can set it up for added security and convenience. Follow the on-screen instructions to scan your fingerprint or set up facial recognition.
7. Customize your home screen: Arrange your apps, add widgets, and set your preferred wallpaper to make your home screen your own. You can also personalize notification settings and adjust other display options to suit your preferences.
8. Install necessary apps: Visit the app store on your new phone to download and install any essential apps that you regularly use. This includes social media apps, productivity tools, and any other apps you rely on.
9. Transfer data from your old phone (optional): If you haven’t already transferred your data and contacts, you may have the option to do so using a data transfer feature. Check the instructions specific to your phone to see if this option is available.
10. Set up email accounts and messaging apps: Add your email accounts and configure your messaging apps to stay connected with friends, family, and work contacts. Enter your login information for each account and follow the prompts to complete the setup process.
11. Explore additional settings and features: Take some time to familiarize yourself with the various settings and features of your new phone. This may include adjusting sound settings, enabling or disabling notifications, setting up a new voicemail greeting, and more.
By following these steps, you can quickly and efficiently set up your new phone and have it ready to use in no time. Enjoy exploring all the features and possibilities that your new device has to offer!
Step 7: Transfer contacts and data
One of the most important aspects of switching phones is transferring your contacts and data. Thankfully, with AT&T Go Phone, this process is relatively simple. Here’s how you can transfer your contacts and data from your old phone to your new AT&T Go Phone:
1. Export your contacts: Start by exporting your contacts from your old phone. This can typically be done through your phone’s settings or contacts app. Look for options such as “Import/Export” or “Share Contacts”. Choose the option to export your contacts as a vCard (VCF) file. Save the file to a convenient location, such as your computer or cloud storage.
2. Import your contacts to your new phone: Once you have the vCard file saved, it’s time to import your contacts to your new AT&T Go Phone. Depending on the operating system of your new phone, the process may vary slightly.
– For Android phones: Open the Contacts app on your new phone. Look for the “Import” or “Import Contacts” option. Choose the vCard file that you exported from your old phone and follow the prompts to import your contacts.
– For iPhone: On your iPhone, open the Contacts app. Tap on “Settings” and scroll down to find the “Mail, Contacts, Calendars” option. Tap on it and choose “Import SIM Contacts”. Select the vCard file that you saved and let the iPhone import your contacts.
– For other devices: The process may differ for other phone models. Check the user manual or consult the manufacturer’s support website for specific instructions on importing contacts.
3. Transfer other data: Besides contacts, you may have other important data on your old phone that you want to transfer, such as photos, videos, and documents. There are several methods you can use to transfer this data:
– Use a cloud storage service: If you have a cloud storage account, such as Google Drive or Dropbox, you can upload your data from your old phone and then download it onto your new AT&T Go Phone.
– Transfer via Bluetooth: Some phones allow you to transfer data to another phone using Bluetooth. Pair your old phone with your new phone and select the files you want to transfer. Keep in mind that this method may be slower for larger files.
– Use a computer: If you have access to a computer, you can connect your old phone to it using a USB cable and then transfer your files to the computer. Once the files are on your computer, you can connect your new AT&T Go Phone and transfer them over.
4. Verify your data transfer: After transferring your contacts and data, it’s important to verify that everything transferred correctly. Double-check your contacts to ensure all the names, phone numbers, and other details transferred accurately. Open your photos, videos, and documents to confirm that they are intact and accessible.
By following these steps, you can smoothly transfer your contacts and data to your new AT&T Go Phone. This will ensure that you have all your important information readily available on your new device.
Step 8: Test your new phone
After successfully setting up your new phone and transferring all your data, it’s time to test the device to ensure everything is working as expected. This final step is crucial to ensure a smooth transition and that you can seamlessly continue using your AT&T Go Phone.
The first thing you should do is check whether you can make and receive calls. Dial a few numbers to verify that the phone’s calling functionality is working properly. If you encounter any issues, refer to the troubleshooting section or contact AT&T customer support for assistance.
Next, test your phone’s messaging capabilities by sending a text message to a friend or family member. Make sure you’re able to compose, send, and receive messages without any problems. This step is essential, especially if texting is a major part of your communication routine.
Furthermore, check the internet connectivity on your new phone. Open your preferred web browser and load a few different websites to ensure you can access the internet without any issues. Try streaming a video or downloading a file to test the speed and stability of the connection.
If your new phone has a camera, take a few test photos to ensure that the camera is functioning properly. Capture some images in different lighting conditions and check if the quality meets your expectations. This will allow you to document your experiences and memories with confidence.
Test the audio features of your new phone by playing some music or watching videos. Make sure that the speakers are producing clear and crisp sound, and that there are no issues with volume or distortion. If you’re using headphones, check if they are working properly as well.
Lastly, go through the settings menu of your new phone and familiarize yourself with the various options and features available. Ensure that all the settings are configured according to your preferences and that you can customize your phone to suit your needs.
By following these steps and thoroughly testing your new phone, you can ensure a seamless transition and a great user experience. In case you encounter any difficulties or have any questions, refer to the AT&T Go Phone documentation or contact their customer support for assistance. Enjoy your new phone!
Switching phones on AT&T Go Phone is a straightforward process that allows you to upgrade or replace your current device while keeping your existing phone number and plan. Whether you’re looking for the latest smartphone or simply want to switch to a different device, AT&T Go Phone offers flexibility and convenience.
By following the steps outlined above, you can easily transfer your contacts, apps, and other important data to your new phone. Remember to back up your data before initiating the switch to ensure a smooth transition.
With a wide range of phones available, you can find the perfect device to suit your needs and preferences. Whether you’re a tech enthusiast, a social media lover, or someone who values functionality and durability, AT&T Go Phone has options to cater to every lifestyle.
So why wait? Upgrade your phone today and experience the seamless performance and connectivity that AT&T Go Phone offers. Stay connected, stay updated, and enjoy the convenience of a new phone with AT&T Go Phone.
FAQs
1. Can I switch phones on AT&T Go Phone?
Yes, you can switch phones on AT&T Go Phone. AT&T Go Phone offers flexibility when it comes to using different devices with your plan. Whether you want to upgrade to a newer model or switch to a different device altogether, you have the option to transfer your service to a new phone. However, there are a few important things to keep in mind before making the switch.
2. How do I switch phones on AT&T Go Phone?
To switch phones on AT&T Go Phone, you first need to ensure that the new device is compatible with AT&T’s network. Once you have a compatible phone, you can follow these steps:
- Insert your AT&T Go Phone SIM card into the new device.
- Power on the new phone and make sure it has a signal.
- If needed, contact AT&T customer service to activate the new device on your Go Phone plan.
- Transfer any data (such as contacts, photos, and apps) from your old phone to the new one.
3. Are there any fees or charges for switching phones on AT&T Go Phone?
AT&T Go Phone may charge a one-time activation fee when you switch phones. The fee amount may vary depending on the specific plan and device you are switching to. It’s always a good idea to check with AT&T customer service or visit their website for the most up-to-date information on fees and charges associated with phone switching.
4. Can I keep my existing phone number when switching phones on AT&T Go Phone?
Yes, you can usually keep your existing phone number when switching phones on AT&T Go Phone. The process is known as porting, where you transfer your number from your old phone to the new device. During the activation process or when speaking to AT&T customer service, make sure to let them know that you want to keep your current phone number. They will guide you through the necessary steps to complete the porting process.
5. What happens to my remaining balance or data when switching phones on AT&T Go Phone?
When you switch phones on AT&T Go Phone, your remaining balance and data should transfer over to the new device. However, it’s always a good idea to double-check with AT&T customer service or refer to the terms and conditions of your specific plan to confirm that your balance and data will carry over seamlessly. In some cases, there may be limitations or restrictions on data transfer, so it’s best to clarify beforehand to avoid any surprises.