
Are you struggling to upload a picture from your phone to your Chromebook? Don’t worry, we’ve got you covered! With the increasing prevalence of Chromebooks as a popular alternative to traditional laptops, many users find it challenging to transfer images from their phones to these devices. In this article, we will guide you through the step-by-step process of uploading a picture from your phone to your Chromebook, ensuring that you can effortlessly access and share your favorite photos. Whether you’re documenting a special moment or simply want to add some flair to your online presence, uploading pictures to your Chromebook has never been easier. So, let’s dive in and discover how you can conveniently transfer images and make the most out of your Chromebook experience!
Inside This Article
- Methods for Uploading a Picture from your Phone to your Chromebook
- Method 1: Using Google Drive
- Method 2: Using Bluetooth
- Method 3: Using a USB Cable
- Method 4: Using a Cloud Storage Service
- Conclusion
- FAQs
Methods for Uploading a Picture from your Phone to your Chromebook
Chromebooks have gained popularity for their simplicity and efficiency, making them a great choice for both work and personal use. If you’re wondering how to upload a picture from your phone to your Chromebook, you’re in luck! We have several methods to help you effortlessly transfer your photos. Whether you prefer a wired connection or wireless syncing, there’s an option that suits your needs.
Method 1: Connecting your phone to your Chromebook
The first method involves directly connecting your phone to your Chromebook using a USB cable. This method is straightforward and requires no additional tools.
1. Start by plugging one end of the USB cable into your phone and the other end into an available USB port on your Chromebook.
2. Once connected, your Chromebook should recognize the phone as an external device.
3. Open the “Files” app on your Chromebook and locate the connected phone in the sidebar.
4. Click on the phone’s name to access its storage.
5. Navigate to the folder where your desired picture is saved on your phone.
6. Select the picture and drag it to a desired location on your Chromebook’s internal storage or an external storage device, if connected.
7. The picture will be copied to the selected location, allowing you to access it on your Chromebook.
Method 2: Transferring the picture via USB connection
If you prefer a faster data transfer method or have a larger number of pictures to transfer, you can use the USB connection to transfer the entire photo album.
1. Connect your phone to your Chromebook using a USB cable, as mentioned in Method 1.
2. On your Chromebook, open the “Files” app and locate the connected phone.
3. Access the phone’s storage and navigate to the folder containing the pictures you wish to transfer.
4. Press and hold the “Ctrl” key on your Chromebook’s keyboard.
5. Select the desired pictures by clicking on them individually.
6. Once selected, right-click on any of the highlighted pictures.
7. Choose “Copy” from the context menu.
8. Navigate to the location where you want to save the pictures on your Chromebook.
9. Right-click on the desired location and select “Paste” to transfer the selected pictures.
10. The pictures will be copied to the chosen location on your Chromebook, allowing easy access.
Method 3: Using Google Drive to sync the picture
If you want to sync your pictures seamlessly across multiple devices, consider using Google Drive. This method requires an active internet connection.
1. Install the Google Drive app on your phone from the Play Store (Android) or App Store (iPhone).
2. Sign in to Google Drive using your Google account.
3. Open the app and locate the picture you want to upload to your Chromebook.
4. Tap and hold the picture to bring up the options menu.
5. Select “Upload” from the menu and choose the destination folder within your Google Drive.
6. On your Chromebook, open Google Drive by clicking on its icon in the shelf or accessing it through the app launcher.
7. Sign in to your Google account if prompted.
8. Locate the uploaded picture in Google Drive and double-click on it to open and view it.
Method 4: Sending the picture to your Chromebook via email or messaging apps
If you prefer to send the picture directly to your Chromebook without any physical connections, you can use email or messaging apps to achieve this.
1. Open the email or messaging app on your phone and create a new message.
2. Attach the picture you want to transfer to the message.
3. Enter the email address associated with your Chromebook or the recipient’s email address.
4. Send the email or message.
5. On your Chromebook, open the email or messaging app and sign in to your account if required.
6. Locate the received message and open it.
7. Download the attached picture to save it on your Chromebook.
With these methods, you can easily upload pictures from your phone to your Chromebook, allowing you to enjoy your photos on a larger screen or share them with others. Choose the method that suits your preferences and start transferring your favorite memories to your Chromebook today!
Method 1: Using Google Drive
One of the easiest and most convenient ways to upload a picture from your phone to your Chromebook is by using Google Drive. Google Drive is a cloud storage service that allows you to store, access, and share files across multiple devices.
Here is a step-by-step guide on how to use Google Drive to upload a picture:
- Open the Google Drive app on your mobile phone. If you don’t have the app installed, you can download it from the App Store (for iOS) or Google Play (for Android).
- Sign in to your Google account or create a new one if you don’t have one already.
- Once you’re signed in, tap on the “+” button or the “Add” button, depending on your device, to start uploading a picture.
- From the options presented to you, select “Upload” or “Upload Files” to choose the picture you want to upload from your phone’s gallery or file manager.
- Navigate to the location where your picture is stored, select it, and tap “Upload” or “Done” to begin the uploading process.
- Wait for the upload to complete. The time it takes will depend on the size of the picture and the speed of your internet connection.
- Once the upload is finished, open your Chromebook and launch a web browser.
- Go to the Google Drive website (drive.google.com) and sign in with the same Google account you used on your phone.
- Locate the uploaded picture in your Google Drive, right-click on it, and select “Download” or “Save” to save it to your Chromebook’s local storage.
That’s it! You have successfully uploaded a picture from your phone to your Chromebook using Google Drive. You can now access and edit the picture on your Chromebook whenever you want.
Method 2: Using Bluetooth
If you’re looking for a wireless method to transfer a picture from your phone to your Chromebook, using Bluetooth is a great option. Bluetooth technology allows devices to connect and exchange data wirelessly without the need for cables or an internet connection.
Here’s how you can use Bluetooth to upload a picture from your phone to your Chromebook:
- Start by ensuring that Bluetooth is enabled on both your phone and Chromebook. On your phone, go to the settings menu and toggle on the Bluetooth option. On your Chromebook, click on the clock in the bottom-right corner of the screen, then click on the Bluetooth icon and make sure it’s turned on.
- Next, on your Chromebook, click on the clock again and select the “Bluetooth” option. This will open the Bluetooth settings menu.
- On your phone, go to the picture gallery or file manager where the picture you want to transfer is located. Select the picture and tap on the share icon.
- In the share menu, look for the Bluetooth icon or the option to “Share via Bluetooth.” Tap on it. The phone will start searching for available Bluetooth devices nearby.
- On your Chromebook, you should see your phone as a discoverable device in the list of available devices. Click on your phone’s name to pair it with your Chromebook.
- Once the pairing process is complete, a notification will appear on your phone, asking you to accept the connection from the Chromebook. Confirm the pairing on your phone.
- On your Chromebook, you will see a file transfer dialog box, showing the progress of the picture transfer. Wait for the transfer to complete.
- After the transfer is finished, you can find the picture in the designated folder on your Chromebook, such as the “Downloads” folder.
Using Bluetooth to transfer a picture from your phone to your Chromebook provides a wireless and convenient option. However, it’s important to note that Bluetooth transfer speed may not be as fast as other methods, especially for larger files. If you’re transferring multiple or larger files, it may be more efficient to use alternative methods such as USB or cloud storage.
Now that you know how to use Bluetooth to upload a picture from your phone to your Chromebook, you can easily transfer photos and enjoy them on a larger screen. Give it a try, and enjoy the seamless wireless transfer experience!
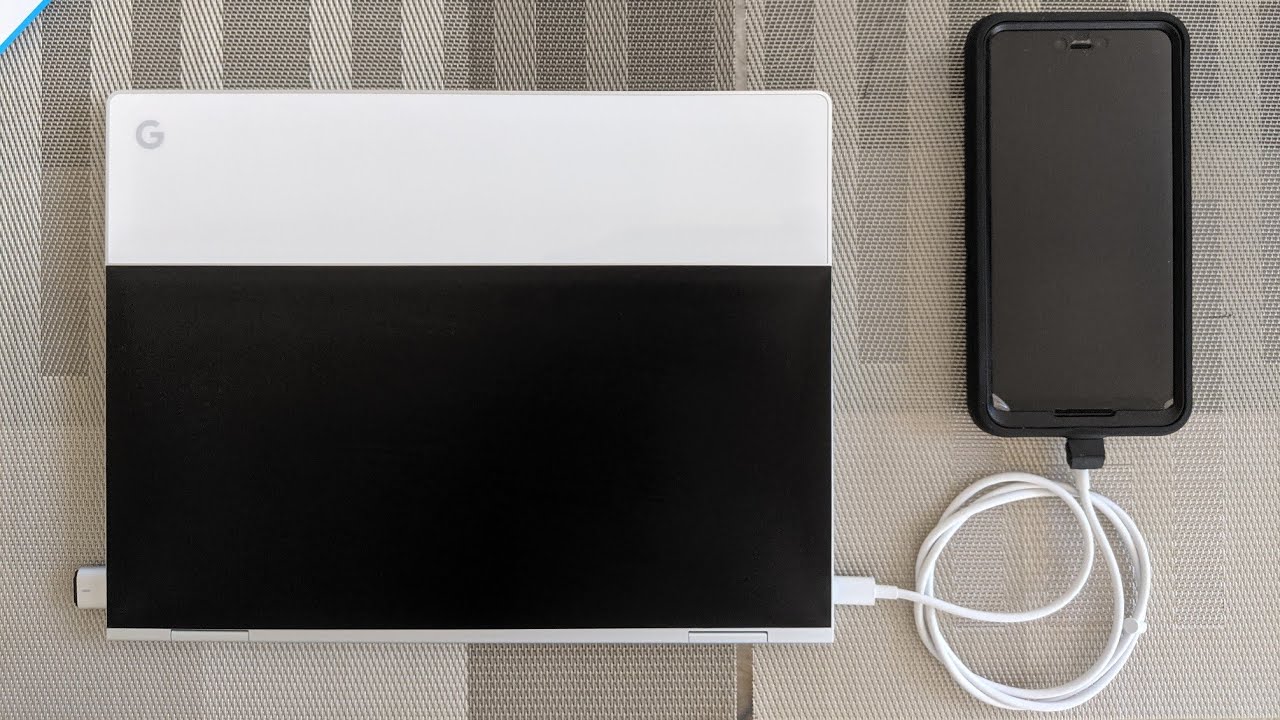
Method 3: Using a USB Cable
If you prefer a direct and reliable method to transfer pictures from your phone to your Chromebook, using a USB cable is the way to go. This method allows for a quick and secure transfer of your pictures with the advantage of high transfer speeds.
Here’s how you can upload a picture from your phone to your Chromebook using a USB cable:
- Connect your phone to your Chromebook using a compatible USB cable. Make sure the cable is properly plugged into both devices.
- On your Chromebook, you will see a notification indicating that your phone is connected via USB. Click on the notification to open the ‘Files’ app.
- In the ‘Files’ app, you will see your phone listed under the ‘Devices’ section on the left-hand side. Click on your phone’s name to access its contents.
- Navigate to the location on your phone where the picture you want to upload is stored. It could be in the ‘Pictures’ folder or any other location.
- Once you have located the picture, simply click and drag it from your phone’s folder and drop it into a folder on your Chromebook’s storage. Alternatively, you can right-click on the picture and select ‘Copy’ and then navigate to the desired folder on your Chromebook and select ‘Paste’.
- The picture will now be transferred from your phone to your Chromebook. You can access it by opening the ‘Files’ app and navigating to the folder where you saved it.
Using a USB cable is an efficient and straightforward method to transfer pictures from your phone to your Chromebook. It eliminates the need for an internet connection and ensures a secure transfer of your files. Just make sure to use a reliable USB cable and follow the steps carefully to ensure a successful transfer.
Method 4: Using a Cloud Storage Service
If you’re looking for a convenient way to upload a picture from your phone to your Chromebook, using a cloud storage service is an excellent option. Cloud storage allows you to store and access your files from anywhere, making it a perfect solution for transferring pictures between devices. Here’s how you can use a cloud storage service to upload a picture from your phone to your Chromebook.
Step 1: Choose a Cloud Storage Service
The first step is to choose a cloud storage service that suits your needs. Popular options include Google Drive, Dropbox, and OneDrive. These services offer free storage space and have intuitive interfaces that make it easy to upload and access files.
Step 2: Install the App on Your Phone and Chromebook
Once you’ve chosen a cloud storage service, you’ll need to install the app on both your phone and your Chromebook. Go to the Play Store on your phone and search for the app. Download and install it. On your Chromebook, open the Chrome Web Store and search for the cloud storage service’s app. Install it as a Chrome extension.
Step 3: Sign in to Your Account
Open the cloud storage app on your phone and sign in to your account. If you don’t have an account, you’ll need to create one. On your Chromebook, open the cloud storage app from the Chrome App Launcher and sign in with the same account credentials.
Step 4: Upload the Picture
Now that you’re signed in on both your phone and Chromebook, you can start uploading the picture. In the app on your phone, locate the picture you want to upload. Tap on the picture and look for the upload icon (usually represented by an arrow pointing upward). Tap on the icon to initiate the upload. The picture will then be uploaded to your cloud storage account.
Step 5: Access the Picture on Your Chromebook
After the upload is complete, go to your Chromebook and open the cloud storage app. You should see the uploaded picture in your file list. Click on the picture to view or download it to your Chromebook’s local storage if needed.
Using a cloud storage service is a convenient and efficient way to upload pictures from your phone to your Chromebook. It eliminates the need for physical connections or email transfers, allowing you to access your files seamlessly across different devices. Choose a reliable cloud storage service, follow the steps outlined above, and you’ll be able to transfer pictures effortlessly.
Conclusion
Uploading a picture from your phone to your Chromebook is a simple and convenient process that allows you to easily transfer your photos between devices. By following the steps outlined in this article, you can effortlessly share and access your favorite memories on your Chromebook.
Whether you’re uploading a picture for work, personal use, or simply to share with your friends and family, this guide has provided you with the necessary steps to accomplish this task. Now you can enjoy the flexibility and versatility of using your Chromebook to manage and edit your photos.
Remember to always check for any device compatibility issues and ensure that your phone and Chromebook are connected to the same network for a seamless transfer experience. With these tips, you can make the most out of your Chromebook’s capabilities and enjoy the convenience of accessing your pictures anywhere, anytime.
So go ahead and start uploading those pictures from your phone to your Chromebook, and embrace the unlimited possibilities of digital creativity right at your fingertips!
FAQs
Q: Can I upload a picture from my phone to my Chromebook?
A: Absolutely! In fact, uploading pictures from your phone to your Chromebook is a breeze. Let me walk you through the process.
Q: What is the easiest way to upload a picture from my phone to my Chromebook?
A: The easiest way to do this is by using a cloud storage service, such as Google Drive or Dropbox. Simply upload the picture from your phone to the cloud storage, and then access it on your Chromebook to download or edit it.
Q: Can I connect my phone directly to my Chromebook using a cable?
A: Yes, you can connect your phone to your Chromebook using a USB cable. Once connected, you can access your phone’s storage on your Chromebook and transfer pictures or other files.
Q: Are there any apps that can help me upload pictures from my phone to my Chromebook?
A: Yes, there are several apps available on the Google Play Store that can assist you in transferring pictures from your phone to your Chromebook. Some popular apps include AirDroid, Pushbullet, and Join.
Q: Can I upload pictures from an iPhone to a Chromebook?
A: Absolutely! While Chromebooks are primarily designed to integrate with Google services, you can still upload pictures from an iPhone to a Chromebook. The easiest way to do this is by using a cloud storage service or by connecting your iPhone to your Chromebook using a USB cable.