
Welcome to the ultimate guide on how to utilize Apple Pay cards on your Apple Watch! With the increasing popularity of mobile payments, Apple Pay has revolutionized the way we make purchases. And now, with the convenience of having Apple Pay right on your wrist, making secure and contactless payments has never been easier.
In this article, we will walk you through the step-by-step process of setting up and using Apple Pay cards on your Apple Watch. Whether you’re a seasoned Apple Watch user or just getting started, this guide will equip you with all the information you need to make seamless transactions with a simple flick of your wrist.
So, if you’re ready to experience the convenience and security of Apple Pay on your Apple Watch, let’s dive in and get started!
Inside This Article
- Adding Apple Pay Cards to Your Apple Watch
- Setting your Default Card
- Making Payments with your Apple Watch
- Viewing Transaction History
- Conclusion
- FAQs
Adding Apple Pay Cards to Your Apple Watch
With the convenience of Apple Pay, you can now make secure and easy payments directly from your Apple Watch. To get started, you’ll need to add your credit or debit cards to your device. Here’s a step-by-step guide on how to do it:
Step 1: Open the Apple Watch app on your iPhone.
Step 2: Tap on the “My Watch” tab at the bottom of the screen.
Step 3: Scroll down and select “Wallet & Apple Pay.
Step 4: Tap on “Add Card”.
Step 5: You’ll be prompted to enter your card details manually or use the device’s camera to scan the card.
Step 6: Follow the on-screen instructions to verify your card with your bank or card issuer.
Step 7: Once verified, your card will be added to your Apple Watch.
It’s important to note that not all banks or card issuers support Apple Pay, so if you encounter any issues, it’s best to reach out to them for assistance.
By adding your cards to your Apple Watch, you’ll have the convenience of making contactless payments right from your wrist. It’s a quick and secure way to pay for your purchases without having to fumble for your wallet or phone.
Setting your Default Card
When it comes to using Apple Pay on your Apple Watch, setting a default card is essential for a smooth and convenient payment experience. By designating a default card, you can avoid the hassle of selecting a payment method every time you make a purchase.
To set your default card on the Apple Watch, follow these simple steps:
- Open the Apple Watch app on your iPhone and select the My Watch tab.
- Scroll down and tap on “Wallet & Apple Pay”.
- Under the “Default Card” section, choose the card you want to set as your default.
- You can also change your default card by tapping “Default Card” and then selecting a different card.
Once you have set your default card, making payments with Apple Pay becomes even more effortless. Your default card will automatically be used for transactions, eliminating the need to manually select a payment method each time.
If you ever need to change your default card, simply follow the aforementioned steps to update your preferences.
Remember that while your default card is automatically used for payments, you can still choose a different card for individual transactions if needed. When making a purchase, simply double-click the side button on your Apple Watch, and scroll through your available cards to select the one you want to use. This flexibility allows you to tailor your payment method to fit your needs in any given situation.
By setting your default card on the Apple Watch, you can streamline your payment process and enjoy the convenience of Apple Pay with just a quick tap of your wrist.
Making Payments with your Apple Watch
With the convenience of Apple Pay, making payments has never been easier, especially when using your Apple Watch. Here’s a step-by-step guide on how to make payments using your device:
1. Double-click the side button: The first step is to double-click the side button on your Apple Watch. This will activate Apple Pay and bring up your default card.
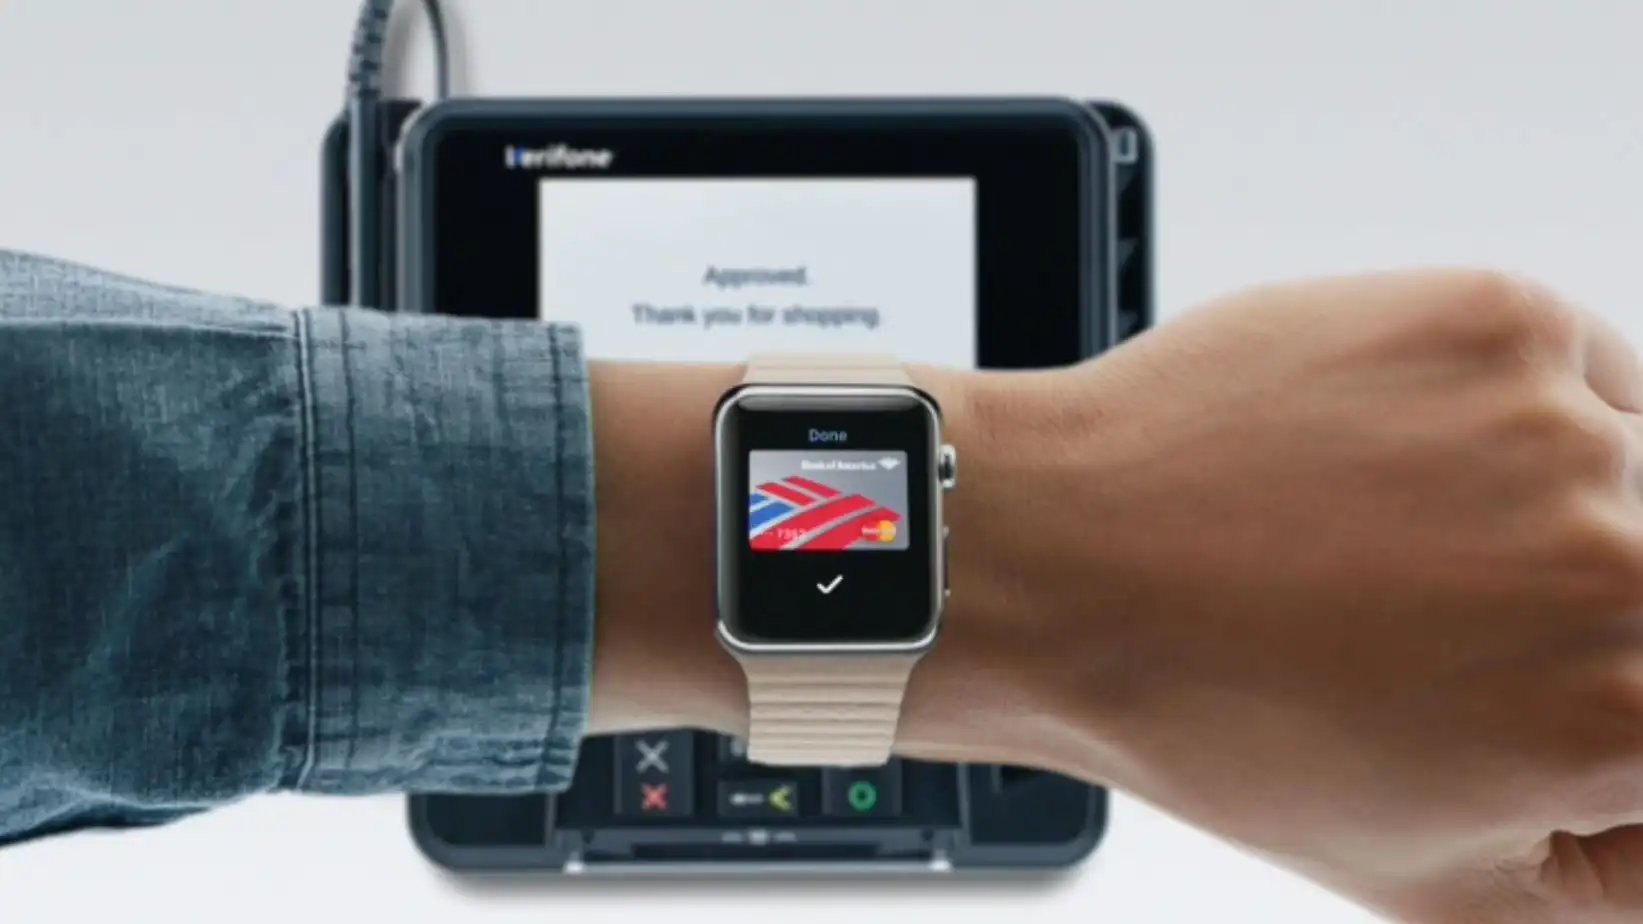
2. Position your Apple Watch: After double-clicking the side button, position your Apple Watch near the contactless payment reader. This can be a payment terminal at a store or a point-of-sale device.
3. Authenticate with Face ID or passcode: To complete the payment, you’ll need to authenticate yourself using Face ID or your passcode. For Face ID, simply glance at your Apple Watch’s display, and it will authenticate your identity. If Face ID is not available, you can enter your passcode on the watch face.
4. Wait for the Payment Complete notification: Once the payment is processed successfully, you’ll receive a “Payment Complete” notification on your Apple Watch. This notification serves as a confirmation that the payment was successful.
5. Keep your Apple Watch secure: It’s important to keep your Apple Watch secure while making payments. Be mindful of where you place your wrist during payment to avoid accidental transactions. Additionally, consider enabling the passcode feature on your watch to add an extra layer of security.
6. Enjoy the convenience of contactless payments: By using your Apple Watch for payments, you can enjoy the convenience of contactless transactions. No more fumbling for your wallet or cards. Simply double-click, authenticate, and make your payment with ease.
Remember, Apple Pay works with various financial institutions and credit cards, so you have the flexibility to use the cards that work best for you.
By following these steps and keeping your Apple Watch secure, you can confidently make payments using Apple Pay. Harness the power of your wearable device and embrace the convenience of contactless transactions.
Viewing Transaction History
Keeping track of your spending is an essential part of managing your finances. With Apple Pay on your Apple Watch, you can easily view your transaction history at any time. By accessing your transaction history, you can review your purchases, track your expenses, and ensure that all transactions are accurate.
To view your transaction history on your Apple Watch, follow these simple steps:
- Open the Wallet app on your Apple Watch by pressing the side button.
- Scroll down or use the Digital Crown to find the card that you want to check the transaction history for.
- Tap on the card to bring up the payment card details.
- Swipe left on the watch screen to navigate to the Transactions tab.
- Here you will see a list of your recent transactions, including the date, time, and location of each purchase.
By default, the transaction history will show the most recent transactions, but you can also scroll down to view earlier purchases.
If you want to see more details about a specific transaction, simply tap on it. This will expand the transaction to show additional information, such as the merchant name, the total amount, and more.
It’s worth noting that your Apple Watch transaction history syncs with your iPhone’s Wallet app. So, if you prefer to view your transaction history on a larger screen or access more advanced features, you can open the Wallet app on your iPhone and find the same transaction details there.
Having quick and easy access to your transaction history on your Apple Watch provides convenience and peace of mind. Whether you’re double-checking a recent purchase or monitoring your overall spending, the Wallet app on your Apple Watch makes it effortless to stay on top of your financial transactions.
Conclusion
In conclusion, using Apple Pay cards on your Apple Watch is a convenient and secure way to make payments on the go. The seamless integration of the Apple Watch with Apple Pay allows you to leave your wallet behind and simply use your wrist for transactions. With just a few taps, you can make purchases at thousands of stores, online retailers, and even within apps.
Not only does Apple Pay offer a fast and hassle-free checkout experience, but it also provides an added layer of security. Your sensitive payment information is stored securely and is never shared with merchants. Instead, Apple Pay creates a unique device account number for each transaction, ensuring that your card details remain protected.
With the popularity of contactless payments on the rise, Apple Pay offers a futuristic and convenient way to make purchases. So, why not take advantage of this innovative technology and start using your Apple Watch as your go-to payment device?
FAQs
1. Can I use my Apple Pay cards on my Apple Watch to make payments?
Yes, you can use your Apple Pay cards on your Apple Watch to make payments. Apple Pay is a convenient and secure way to pay with just a tap of your wrist.
2. How do I set up Apple Pay on my Apple Watch?
To set up Apple Pay on your Apple Watch, open the Apple Watch app on your iPhone and navigate to the “My Watch” tab. From there, select “Wallet & Apple Pay” and follow the instructions to add your cards.
3. Can I add multiple cards to my Apple Watch?
Yes, you can add multiple cards to your Apple Watch. Apple Pay supports various credit and debit cards from major banks and payment providers. Just follow the steps to add each card to your Wallet.
4. How do I use Apple Pay on my Apple Watch?
Using Apple Pay on your Apple Watch is simple. Just double-click the side button on your watch and hold it near the payment terminal until you feel a vibration and see a checkmark on the display. Your payment will be complete, and you can go about your day.
5. Is Apple Pay on the Apple Watch secure?
Yes, Apple Pay on the Apple Watch is highly secure. Each transaction is authenticated with either Face ID or Touch ID, depending on the model of your Apple Watch. Additionally, your card information is never shared with the merchant, making it a secure and private way to pay.