
Are you tired of dealing with slow and unreliable Wi-Fi signals in your home or office? Do you want to extend your wireless network coverage to reach every corner of your space? If the answer is yes, then you need to connect a wireless access point (WAP) to your existing network. A wireless access point acts as a central hub that wirelessly connects your devices to the internet. Whether you want to stream videos, play online games, or simply browse the web, a WAP can provide a strong and stable Wi-Fi connection. In this article, we will guide you on how to connect a wireless access point, step by step. So, get ready to strengthen your Wi-Fi signals and enjoy seamless connectivity throughout your premises.
Inside This Article
- Point 1: Understanding Wireless Access Points
- Point 2: Setting Up the Wireless Access Point
- Point 3: Connecting Devices to the Wireless Access Point
- Point 4: Troubleshooting Common Issues
- Conclusion
- FAQs
Point 1: Understanding Wireless Access Points
A wireless access point (WAP) is a device that allows multiple devices to connect to a wired network wirelessly. In simple terms, it acts as a bridge between the wired network and wireless devices, enabling them to access the network and the internet without the need for physical cables.
Wireless access points are commonly used in homes, offices, and public spaces to provide Wi-Fi connectivity. They work by broadcasting wireless signals, which devices such as smartphones, laptops, and tablets can detect and connect to.
One important thing to note is that a wireless access point is not the same as a wireless router. While a wireless router combines the functionality of a router and a wireless access point, a dedicated access point focuses solely on providing wireless connectivity.
Wireless access points are typically connected to a wired network through an Ethernet cable. They can be placed strategically to ensure optimal coverage and signal strength throughout the desired area.
Multiple access points can be deployed in larger areas to create a wireless network infrastructure capable of serving a large number of devices simultaneously. This is often referred to as a wireless network or WLAN (Wireless Local Area Network).
Understanding the basics of wireless access points is crucial for anyone looking to set up a wireless network or troubleshoot connectivity issues. In the following sections, we will explore how to set up a wireless access point, connect devices to it, and troubleshoot common problems that may arise.
Point 2: Setting Up the Wireless Access Point
Setting up a wireless access point is a straightforward process that requires a few important steps. By following these guidelines, you can have your wireless network up and running in no time.
1. Determine the optimal location: The first step in setting up a wireless access point is to find the best location for it. Consider factors such as signal strength, interference, and coverage area. Ideally, you want to place the access point in a central location, away from physical obstructions.
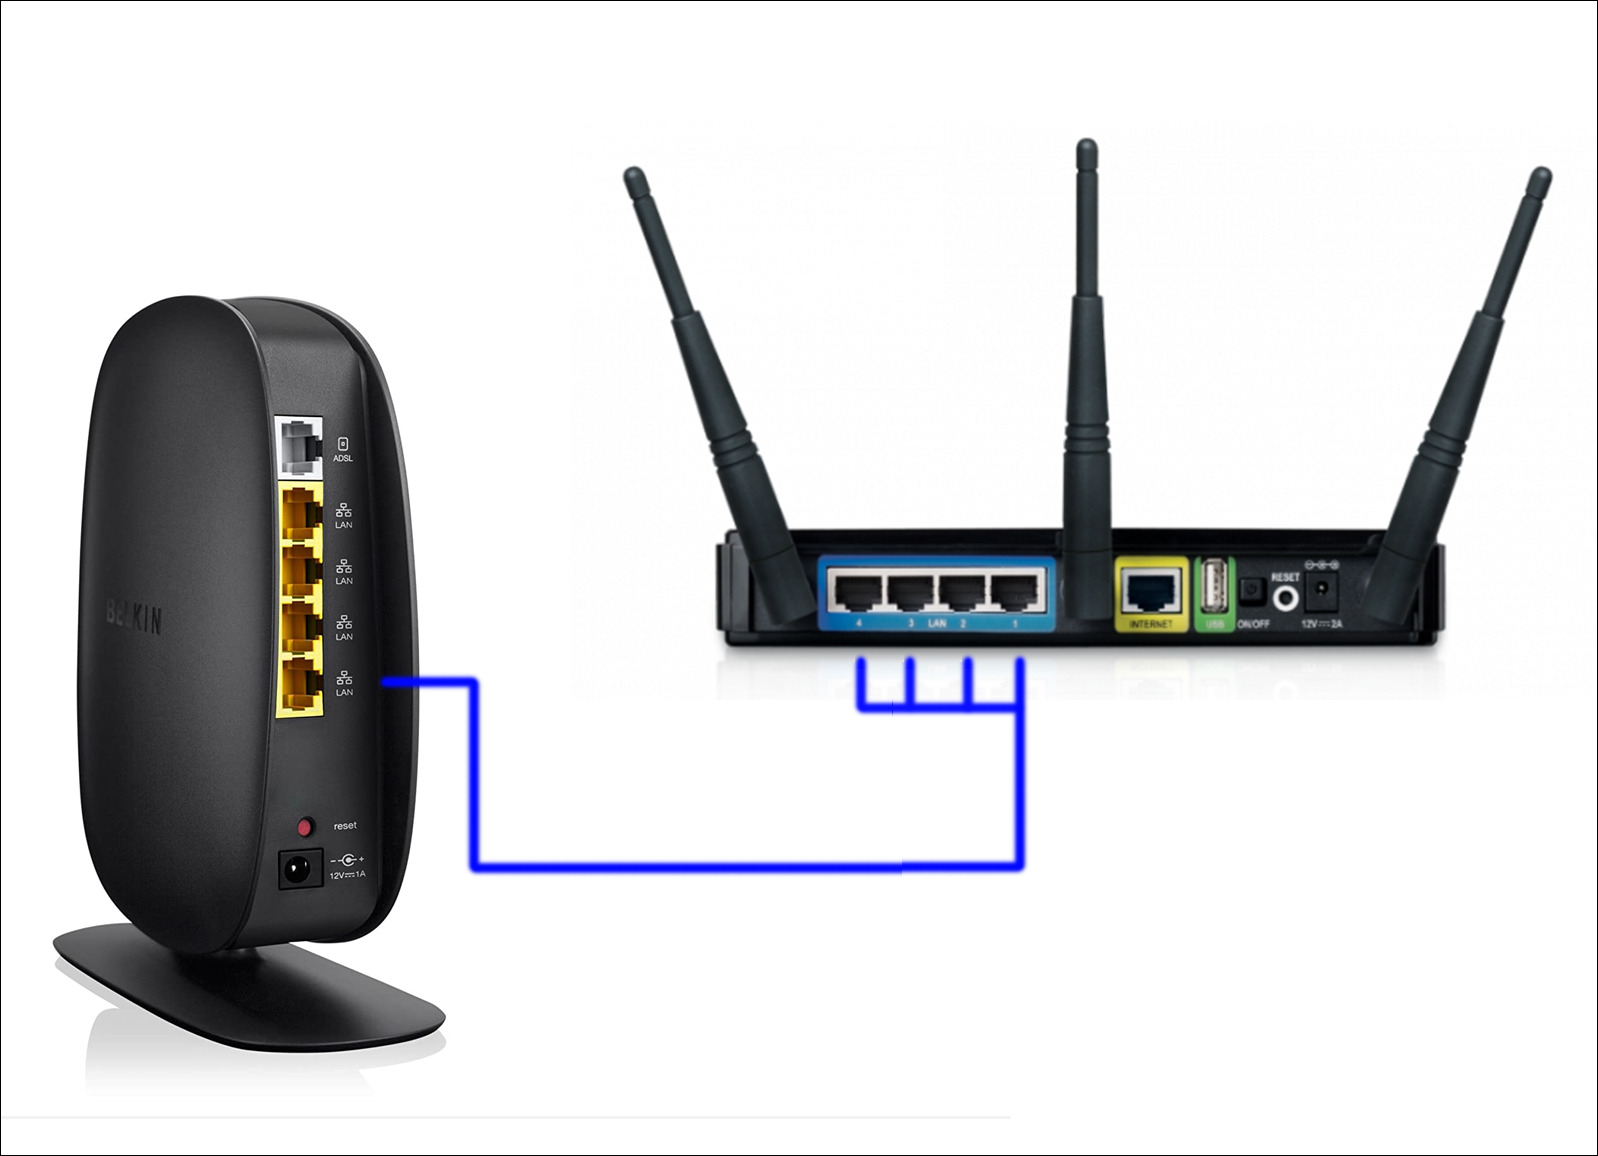
2. Connect the access point to your router: Once you have determined the ideal location, connect the access point to your router using an Ethernet cable. Most access points have a designated Ethernet port for this purpose. Simply plug one end of the cable into the access point and the other end into an available LAN port on your router.
3. Power up the access point: After connecting the access point to your router, plug it into a power outlet. Ensure that the power indicator light on the access point turns on, indicating that it is receiving power.
4. Configure the access point settings: To access the configuration settings of your access point, you need to know its IP address. Typically, the IP address is printed on the device itself or found in the user manual. Open a web browser on your computer and enter the access point’s IP address in the address bar. This will take you to the configuration page of the access point.
5. Modify the wireless network settings: Once you are in the configuration page, you can modify various settings to customize your wireless network. This includes setting the network name (SSID), security type, and password. Choose an SSID that is unique and easy to identify, and select a security type that offers adequate protection for your network.
6. Save and apply the settings: After making the desired changes, save and apply the settings. The access point will apply the new configuration and restart. Allow it a few moments to complete this process.
7. Test the connection: Once the access point has restarted, use a device (such as a smartphone or laptop) to connect to the wireless network you just set up. Enter the network password if prompted and check if you have a stable connection. Test the connection in different areas of your home or office to ensure good coverage.
Setting up a wireless access point may require some trial and error to find the optimal settings for your specific environment. However, by following these steps, you can ensure a smooth and successful setup process.
Point 3: Connecting Devices to the Wireless Access Point
Now that you have successfully set up your wireless access point, it’s time to connect your devices and enjoy the benefits of a wireless network. Connecting your devices to the wireless access point is a straightforward process that can be done in a few simple steps.
To begin, ensure that the wireless network on the access point is activated and broadcasting a signal. You can typically find this information on the access point’s settings page or through the manufacturer’s documentation. Once you have confirmed the presence of the wireless network, follow the steps outlined below to connect your devices:
1. Locate the Wi-Fi Settings: On your device, whether it’s a smartphone, tablet, or computer, navigate to the Wi-Fi settings menu. This can usually be found in the settings app or through a quick shortcut in the system tray.
2. Scan for available networks: Within the Wi-Fi settings menu, scan for available networks. Your device should display a list of nearby networks, including the one being broadcasted by your wireless access point.
3. Select the correct network: Look for the name of your wireless network in the list and select it. Make sure to choose the correct network name as specified during the setup process. If you haven’t changed it, the default network name may be something like “MyHomeNetwork”.
4. Enter the network password: If your wireless access point is secured with a password, you will need to enter it to establish a connection. Ensure that you enter the password correctly, as it is case-sensitive. If you don’t have the password, refer to the access point’s documentation or contact the network administrator.
5. Wait for the connection: After entering the password, your device will attempt to connect to the wireless network. It may take a few moments for the connection to be established, so be patient. Once connected, you should see a confirmation message or an icon indicating a successful connection.
6. Test the connection: Finally, test the connection by opening a web browser or using an internet-based application. If you can successfully access websites or use online services, then congratulations! Your device is now connected to the wireless access point.
Repeat these steps for each device you want to connect to the access point. Remember that most wireless access points have a limited number of simultaneous connections, so be mindful of the number of devices you connect to ensure optimal performance.
Note: Some devices may have different terminology or slightly different steps for connecting to a wireless network. However, the general process should remain similar across various devices and operating systems.
Point 4: Troubleshooting Common Issues
While setting up and connecting to a wireless access point is generally a straightforward process, there may be some common issues that you could encounter along the way. Here are a few troubleshooting tips to help you resolve these problems:
1. No Internet connection: If you have successfully connected to the wireless access point but are unable to access the internet, check your modem and router. Ensure that they are powered on and functioning properly. Restarting them may also help restore the connection. Additionally, check if your internet service provider has any reported outages in your area.
2. Weak or inconsistent signal: If you are experiencing a weak or inconsistent signal from your wireless access point, try repositioning the device. Ensure that it is placed in a central location in your home or office, away from obstructions such as walls or other electronic devices that may interfere with the signal. You can also try adjusting the antenna, if applicable.
3. Incorrect SSID or password: If you are unable to connect to the wireless access point, double-check the SSID (network name) and password you are using. Ensure that they are entered correctly, paying attention to uppercase and lowercase letters. If you are unsure of the correct credentials, you can usually find them on the back or underside of the access point.
4. Limited or no connectivity: If you have limited or no connectivity to the wireless access point, try restarting both the access point and the device you are connecting to it with. This often resolves minor connectivity issues. If the problem persists, try connecting another device to the access point to determine if the issue is specific to one device.
5. Interference from other devices: Wireless signals can be affected by other electronics in the vicinity, such as baby monitors, cordless phones, or microwave ovens. If you are experiencing interference, try moving the access point away from these devices or switching to a different wireless channel to reduce interference.
6. Firmware or driver updates: To ensure optimal performance and compatibility, regularly check for firmware updates for your wireless access point. These updates often include bug fixes and improvements that can help resolve common issues. Additionally, update the drivers for your devices’ wireless network adapters to the latest versions.
7. Resetting the access point: If all else fails, you can try resetting the wireless access point to its factory default settings. This will erase all customized settings, including the SSID and password, so make sure you have this information before proceeding. Consult the user manual or manufacturer’s website for instructions on how to perform a factory reset.
By following these troubleshooting tips, you can quickly identify and resolve common issues when setting up and connecting to a wireless access point. Remember to consult the user manual or contact the manufacturer’s support if you need further assistance with any specific problems.
Conclusion
In conclusion, connecting a wireless access point is an essential step in expanding your network coverage, improving signal strength, and enhancing your overall wireless experience. By following the steps outlined in this article, you can effectively set up and connect a wireless access point to enjoy seamless connectivity throughout your home or office. Remember to choose an access point that meets your specific needs and offers the desired range, speed, and security features. Additionally, always take into consideration the placement and positioning of your access point for optimal coverage and performance. Whether you’re a tech enthusiast or a novice user, connecting a wireless access point is a straightforward process that can greatly enhance your wireless network capabilities.
FAQs
1. What is a wireless access point?
A wireless access point (WAP) is a networking device that allows wireless devices to connect to a wired network. It acts as a bridge between the wired network and wireless devices, enabling them to access the internet or other resources on the network.
2. How do I connect a wireless access point to my network?
To connect a wireless access point to your network, you will typically need to follow these steps:
- Ensure that your wired network is properly set up and functioning.
- Connect the access point to a power source.
- Use an Ethernet cable to connect the access point to your network switch or router.
- Access the access point’s configuration settings via a web browser on a connected device.
- Configure the access point according to your network requirements, such as setting a network name (SSID) and security protocols.
- Save the settings, and the access point will be ready to provide wireless connectivity to devices within its range.
3. What are some common wireless access point settings?
Some common settings you may need to configure on a wireless access point include:
- Network Name (SSID) – This is the name that will be broadcasted by the access point and seen by devices when they search for available networks.
- Security Settings – You can choose from various security protocols, such as WEP, WPA, or WPA2, to protect your wireless network from unauthorized access.
- Channel Selection – Choosing the right channel can help minimize interference from other wireless devices in the area.
- IP Address Settings – The access point will need an IP address to communicate with other devices on the network. You can set it manually or configure it to obtain an IP address automatically via DHCP.
4. Can I connect multiple wireless access points to the same network?
Yes, you can connect multiple wireless access points to the same network to extend its coverage. This is commonly known as creating a wireless mesh network. Each access point should be connected to the network via an Ethernet cable and properly configured to work together. The access points should have the same network name (SSID) and security settings for seamless roaming between them.
5. Can I install a wireless access point myself, or do I need professional help?
Installing a wireless access point is generally a straightforward process and can be done by following the manufacturer’s instructions. However, if you are unsure about network configurations or need assistance with advanced settings, it may be helpful to seek professional help. They can ensure proper placement of the access point, optimize network performance, and provide guidance tailored to your specific network requirements.