
Setting up multiple wireless access points on the same network can greatly improve the coverage and performance of your wireless network. Whether you have a large home, an office space, or a retail store, having multiple access points ensures that you have a reliable and seamless wireless connection throughout the area.
But how do you go about setting up multiple access points? What factors should you consider? And what equipment do you need? In this article, we will guide you through the process of setting up multiple wireless access points on the same network, step by step.
So, if you want to eliminate those frustrating dead zones and enjoy a fast and stable wireless connection everywhere, read on to learn how to set up multiple wireless access points on the same network.
Inside This Article
- Setting up Multiple Wireless Access Points
- Overview
- Step 1: Planning Your Network
- Step 2: Configuring the Main Router
- Step 3: Choosing Access Points
- Step 4: Connecting Access Points to the Network
- Step 5: Configuring Access Points
- Step 6: Extending Network Coverage
- Step 7: Testing and Troubleshooting
- Conclusion
- FAQs
Setting up Multiple Wireless Access Points
Setting up multiple wireless access points on the same network can significantly improve your Wi-Fi coverage and provide seamless connectivity throughout your home or office. Whether you’re dealing with dead zones or simply looking to enhance your network performance, this guide will walk you through the process of setting up multiple access points for a robust and reliable wireless network.
Before diving into the setup, it’s crucial to have a clear understanding of your network requirements and layout. Proper planning will ensure that you choose the right equipment and configure it correctly to achieve optimal results.
The first step in setting up multiple wireless access points is configuring your main router. This involves accessing the router’s settings through a web browser and configuring the wireless network name (SSID) and password to your preference. Additionally, you may want to enable features such as WPA2 encryption to secure your network.
Once the main router is configured, the next step is to choose the additional access points that will be installed to extend the network coverage. Consider factors such as coverage range, compatibility with your main router, and the number of devices that will be connected to each access point.
After selecting the access points, connect them to your network. This can be done by running Ethernet cables from the main router to each access point, or by using a wireless mesh system that allows for easier installation and flexibility.
Configuring the access points involves accessing their settings through a web interface and configuring them to operate in access point mode. This mode enables the access points to broadcast the same network SSID and utilize the same DHCP server as the main router, ensuring a seamless roaming experience for connected devices.
To maximize network coverage, strategically place the access points in different areas of your home or office. Consider factors such as walls, obstructions, and distance to ensure optimal signal strength and coverage throughout your space.
Once the access points are installed and configured, conduct thorough testing to verify the network’s performance. Use tools like speed tests and signal strength meters to measure the network speed and coverage range. In case of any issues or inconsistencies, troubleshoot by adjusting the placement of the access points or reconfiguring their settings.
Overview
Setting up multiple wireless access points on the same network can greatly improve your Wi-Fi coverage and ensure a stable and reliable connection throughout your home or office. Whether you have a large space to cover, experience dead zones, or simply want to boost your Wi-Fi signal, this step-by-step guide will help you navigate the process with ease.
By strategically placing multiple access points, you can extend your network coverage and eliminate Wi-Fi dead zones. Each access point acts as a relay, allowing devices to connect to the network seamlessly as they move from one area to another. This not only enhances the user experience but also ensures consistent performance across the entire network.
Before diving into the setup process, it’s important to note that the exact steps may vary depending on your router manufacturer and model. However, the basic principles remain the same. This guide will provide a general overview to help you understand the key concepts involved in setting up multiple access points.
Now, let’s explore the steps involved in setting up multiple wireless access points on the same network.
Step 1: Planning Your Network
When it comes to setting up multiple wireless access points on the same network, careful planning is essential. Here are a few key considerations to keep in mind during the planning phase:
1. Determine the coverage area: Begin by identifying the areas where you want to provide wireless coverage. This might include different floors, rooms, or outdoor spaces. By determining the coverage area, you can better gauge the number and placement of access points.
2. Analyze your network requirements: Consider the number of devices that will be connecting to the network and the bandwidth requirements of each. This will help you determine the capacity and capabilities needed from your access points.
3. Assess the physical environment: Take note of any obstacles that might impact the wireless signal, such as walls, large objects, or interference from other devices. Understanding the physical environment will help you decide on the best placement for your access points.
4. Determine the type of access points: There are different types of access points available, including indoor, outdoor, and mesh access points. Consider the specific needs of your network and choose the appropriate type for your setup.
5. Plan the network architecture: Decide on the network architecture that suits your needs. For example, you might opt for a centralized architecture, where all access points are connected to a central switch, or a distributed architecture, where each access point functions independently.
6. Consider scalability and future growth: Anticipate future network growth and ensure that your planned setup can accommodate additional access points if needed. This will help future-proof your network and save you from potential headaches down the line.
By carefully planning your network, you can lay a solid foundation for setting up multiple wireless access points. This will ensure optimal performance, coverage, and usability for your wireless network setup.
Step 2: Configuring the Main Router
Configuring the main router is a crucial step in setting up multiple wireless access points on the same network. The main router acts as the central hub that connects all the access points and provides internet connectivity to the entire network.
To begin the configuration process, you will need to access the router’s web-based interface. This is usually done by opening a web browser and typing in the router’s IP address in the address bar. The IP address can usually be found on the back of the router or in the router’s manual.
Once you have entered the router’s IP address, you will be prompted to enter a username and password. These credentials are often provided by the manufacturer, but if not, you may need to refer to the router’s manual or contact the manufacturer for assistance.
After logging in, you will be taken to the router’s configuration page. Here, you will have access to a variety of settings that you can customize to suit your network requirements. Some of the key settings to consider are:
- Network Name (SSID): This is the name that will be displayed when users search for available Wi-Fi networks. Choose a unique and easily identifiable name for your network.
- Wireless Security: Enable security measures such as WPA2 encryption to protect your network from unauthorized access.
- Channel Selection: Choose the appropriate wireless channel to avoid interference from neighboring networks.
- IP Address Range: Specify the range of IP addresses that the router will assign to devices on the network. This ensures that each device has a unique IP address.
- DHCP Settings: Enable the DHCP server to automatically assign IP addresses to devices on the network.
Once you have configured these settings, be sure to save the changes and restart the router for the new settings to take effect. At this point, your main router is ready to connect to the access points and extend the network coverage.
It’s important to note that the configuration process may vary slightly depending on the make and model of your router. Therefore, it’s always a good idea to refer to the router’s manual or consult the manufacturer’s website for specific instructions.
Step 3: Choosing Access Points
Choosing the right access points for your network is crucial to ensure seamless connectivity and efficient network performance. Here are a few key factors to consider when selecting access points:
1. Coverage: Evaluate the size and layout of your space to determine the coverage area needed. Access points come with different coverage capabilities, so choose ones that can effectively cover your desired range without any dead zones.
2. Wi-Fi Standards: Consider the Wi-Fi standards supported by the access points. The most common standards are 802.11n, 802.11ac, and the latest 802.11ax (also known as Wi-Fi 6). Higher standards offer faster speeds and better performance, so select access points that are compatible with your devices.
3. Bandwidth Requirements: Assess the bandwidth demands of your network. If you have multiple users engaging in data-intensive activities such as streaming or online gaming, ensure that the access points you choose can handle the required bandwidth without any degradation in performance.
4. Number of Users: Determine the number of users who will be connecting to the network simultaneously. Access points have limitations on the maximum number of concurrent connections they can support. Select access points that can accommodate your expected user load without causing network congestion.
5. Security Features: Security is paramount in any network setup. Look for access points that offer robust encryption methods such as WPA2 or WPA3, as well as additional security features like guest network isolation and firewall protection.
6. Scalability: Consider future growth and scalability. If you anticipate an increase in the number of devices or users in the future, opt for access points that can be easily expanded or added to the network without disrupting the existing setup.
7. Budget: Finally, factor in your budget constraints. Access points vary in price based on their features and capabilities. Assess your budget and prioritize the features that are most important for your network needs.
By considering these factors, you can choose the access points that align with your network requirements and provide optimal performance and coverage. It’s essential to evaluate different access point options and seek expert advice if needed to make an informed decision.
Step 4: Connecting Access Points to the Network
Once you have selected the access points for your network, the next step is to connect them to your existing network infrastructure. This will ensure that all the access points are properly integrated and can provide seamless coverage throughout your desired area.
The first thing you need to do is to identify the optimal locations for the access points. These locations should be strategically placed to maximize coverage and minimize signal interference. You can use tools like wireless site survey software or apps to help you identify the best spots for installation.
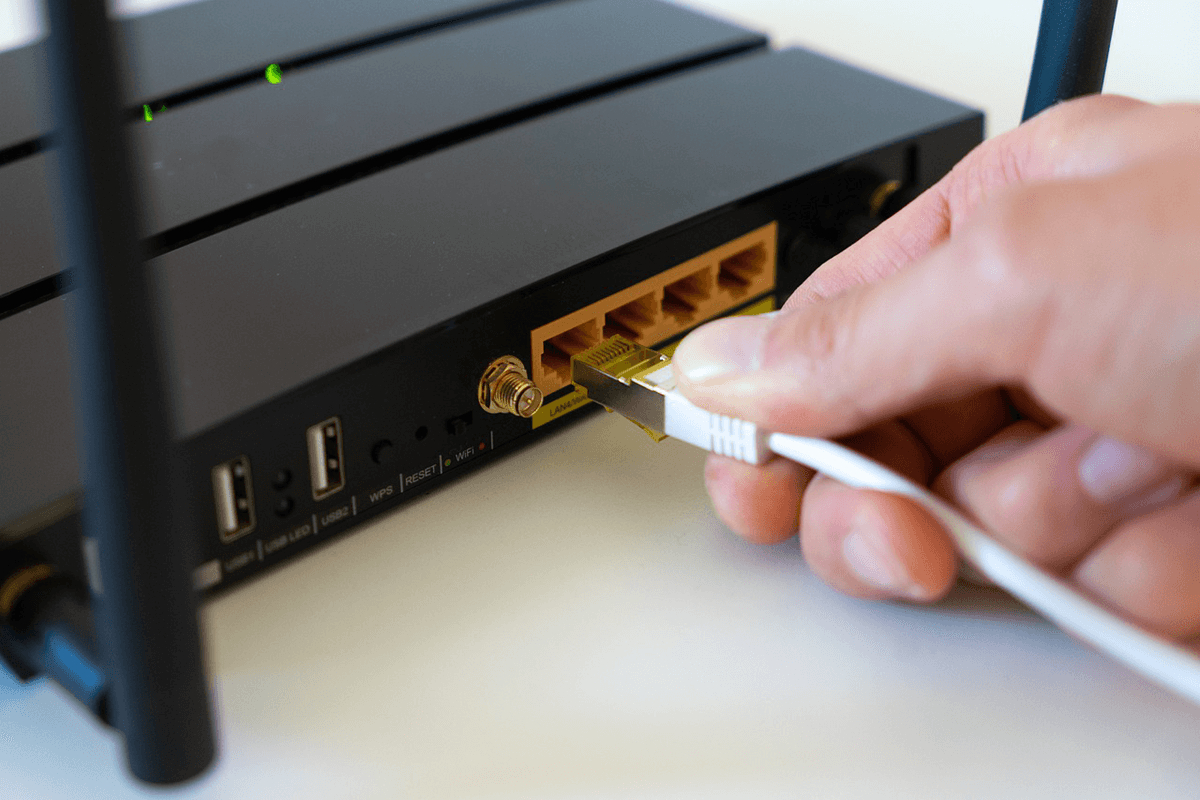
After determining the access point locations, you will need to connect them to your network. This is usually done using Ethernet cables. Most access points have an Ethernet port that allows you to establish a wired connection with your network switch or router.
Start by connecting one end of the Ethernet cable to the LAN port of your access point and the other end to an available LAN port on your router or network switch. If you are using a PoE (Power over Ethernet) access point, make sure to connect the cable to a PoE switch or use a PoE injector if your switch does not support PoE.
Once the physical connections are made, you will need to configure the access points to communicate with your network. This includes setting up the IP address, subnet mask, and gateway on each access point. Refer to the manufacturer’s documentation or the access point’s configuration interface for specific instructions on how to do this.
It is important to ensure that the access points are on the same network subnet as your main router or switch. This will allow devices connected to the access points to seamlessly communicate with devices on the main network.
Once the access points are connected and configured, you can test their connectivity. Connect a device to one of the access points and try accessing the Internet or other resources on your network. If everything is set up correctly, you should be able to access the network without any issues.
If you encounter any problems during the setup or testing process, refer to the troubleshooting section of the access point’s documentation or reach out to the manufacturer’s support team for assistance.
By properly connecting access points to your network, you can create a robust and efficient wireless network with extended coverage. This will ensure that all areas within your desired range have strong and reliable Wi-Fi signals for seamless connectivity.
Step 5: Configuring Access Points
Once you have connected your access points to the network, the next step is to configure them to ensure optimal performance and seamless connectivity. Configuring your access points may vary depending on the make and model, but the general process remains the same. Here are the key steps to follow:
1. Access the Admin Interface: To configure your access point, you will need to access its admin interface. Most access points can be accessed by entering their IP address into a web browser. Consult your access point’s documentation to find the specific IP address.
2. Login and Authentication: Once you have accessed the admin interface, you will be prompted to login with your administrator credentials. This is typically a username and password combination. If you haven’t set up login credentials yet, consult your access point’s documentation for the default username and password.
3. Configure Network Settings: In the admin interface, navigate to the network settings section. Here, you can set the access point to operate in either bridge mode or access point mode. Bridge mode allows the access point to extend the network without creating a separate subnet, while access point mode creates a new wireless network with its own subnet.
4. Wireless Settings: In this section, you can configure the wireless settings of your access point. Set the SSID (network name) to match your main router’s SSID to ensure seamless roaming. Choose the appropriate security protocol, such as WPA2-PSK, and set the passphrase for wireless access. You can also configure other advanced wireless settings, such as channel selection and transmit power.
5. DHCP Settings: If your access point is operating in bridge mode, make sure the DHCP settings are disabled. This will ensure that the main router handles all DHCP assignments on the network. If your access point is operating in access point mode, you can enable the access point to handle DHCP assignments for the devices connecting to it.
6. Save and Reboot: Once you have configured all the necessary settings, make sure to save your changes and reboot the access point. This will apply the new settings and ensure that the access point is functioning correctly.
Repeat this process for each access point on your network. It is important to ensure that all access points are configured with the same SSID, security settings, and network settings to provide a seamless wireless experience for your devices.
By following these steps and configuring your access points correctly, you can create a robust wireless network with excellent coverage and connectivity throughout your home or office.
Step 6: Extending Network Coverage
Once you have set up multiple wireless access points on the same network, the next step is to ensure that you have optimal coverage throughout your desired area. Extending network coverage involves strategically placing additional access points to fill any gaps and boost the signal strength.
Here are some tips to help you extend the network coverage:
- Analyze coverage areas: Start by evaluating the existing coverage areas provided by your main router and access points. Identify any weak spots or areas with poor signal strength.
- Placement of access points: Determine the ideal locations for installing additional access points. Consider areas with weak signals, dead spots, or places where there is a high demand for wireless connectivity.
- Test signal strength: Use tools like Wi-Fi analyzers or smartphone apps to measure the signal strength in different areas. This will help you identify the best spots for placing access points.
- Adjust power levels: Depending on the size and layout of your space, you may need to adjust the power levels of your access points. Increase power levels for wider coverage in large areas, or decrease power levels for smaller, more concentrated coverage.
- Ensure proper channel allocation: Make sure that each access point is using a different wireless channel to minimize interference. Use a Wi-Fi analyzer to identify the least congested channels and assign them to each access point.
- Consider wired connections: If possible, connect the additional access points to the main router using Ethernet cables. This will provide a more stable and faster connection, especially in areas with high data demand.
- Use mesh networking: Consider using mesh networking technology if you have a large space or multiple floors. Mesh systems use a series of access points that work together to provide seamless coverage across the entire network.
- Test and optimize: After installing the additional access points, perform thorough testing to ensure that the network coverage has been extended successfully. Use speed tests and test the coverage in different areas to verify the effectiveness of the new access points.
By following these steps, you can extend the network coverage of your multiple wireless access points, ensuring that you have strong and reliable Wi-Fi signals throughout your space.
Step 7: Testing and Troubleshooting
Once you have completed the previous steps and set up multiple wireless access points on the same network, it’s time to test your setup and address any potential issues that may arise. Testing and troubleshooting are crucial to ensure that your network is functioning optimally and providing seamless connectivity to all devices.
Here are some important steps to follow for testing and troubleshooting:
- Check Connectivity: Start by verifying if all the access points are properly connected to the network. Ensure that they are all powered on and connected to the main router or switch.
- Test Wireless Signal: Connect a wireless device, such as a laptop or smartphone, to each access point and check the signal strength and internet connection. Move around your space and ensure that there are no dead spots or areas with weak signal strength.
- Perform Speed Tests: Use online tools or applications to measure the internet speed on different access points. This will help you identify any performance issues and determine if there are any bottlenecks in your network.
- Address Signal Interference: If you experience signal interference, such as signal dropping or reduced speed, consider changing the channel or adjusting the channel width on your access points. This can minimize interference from other devices or neighboring networks.
- Check IP Addressing: Ensure that each access point has a unique IP address and is properly assigned within your network’s IP range. This prevents conflicts and allows for smooth communication between devices.
- Update Firmware: Check for firmware updates for both your main router and access points. Keeping the firmware up to date can resolve compatibility issues and improve overall performance.
- Monitor Network Traffic: Use network monitoring tools to track the traffic and bandwidth usage on each access point. This can help identify any devices or applications consuming excessive bandwidth and affecting the network performance.
- Consult Manufacturer Documentation: If you encounter persistent issues or require specific troubleshooting steps, refer to the manufacturer’s documentation or support resources for guidance. They may have troubleshooting tips or firmware upgrades specific to your access points.
By following these testing and troubleshooting steps, you can ensure that your multiple wireless access points are functioning optimally and providing reliable connectivity to all devices on your network. Regularly monitoring and maintaining your network will help identify and address any issues promptly, ensuring a smooth and seamless wireless experience for all users.
Setting up multiple wireless access points on the same network can greatly improve your Wi-Fi coverage and provide a seamless and reliable connection throughout your home or office. By strategically placing access points in different areas, you can eliminate dead zones and ensure that all your devices have excellent signal strength.
During the setup process, it is important to consider factors such as the location of the access points, network name, wireless channel selection, and security settings to optimize performance and security. Additionally, using a single network name and password across all access points will enable seamless roaming, allowing your devices to connect to the strongest signal automatically.
Whether you are expanding your existing network or setting up a new one, following the proper steps and best practices will ensure a successful installation. With a well-designed and well-implemented multi-access point network, you can enjoy fast and reliable Wi-Fi connectivity throughout your entire space.
FAQs
**Q: Can I set up multiple wireless access points on the same network?**
A: Yes, it is possible to set up multiple wireless access points on the same network. This can help improve the coverage and provide a stronger signal throughout your space.
**Q: Why would I need multiple wireless access points?**
A: Multiple access points are beneficial in scenarios where one access point cannot cover the entire area effectively. By strategically placing multiple access points, you can ensure consistent and strong Wi-Fi coverage across large homes, offices, or other spaces.
**Q: How do I set up multiple wireless access points?**
A: To set up multiple access points, you need to follow a few steps. Firstly, determine the optimal locations for the access points, considering factors such as range and obstacles. Next, connect each access point to the network using Ethernet cables. Finally, configure each access point with a unique SSID (network name) and ensure they are all on the same wireless channel.
**Q: Can I use different brands of wireless access points for my network?**
A: Yes, it is possible to use different brands of wireless access points for your network. However, it is important to ensure that all the access points support the same wireless standards (e.g., 802.11ac) and have similar configurations to ensure seamless roaming and compatibility.
**Q: Do I need to configure each access point separately?**
A: Yes, each access point within your network configuration needs to be individually configured. This includes setting up the SSID, security settings, and ensuring they operate on the same wireless channel. It is recommended to use the same login credentials for all access points to simplify the administration process.