
Are you struggling with weak Wi-Fi signals in certain areas of your home or office? Frustrated with the constant buffering and slow internet speeds? Don’t worry, because we have the perfect solution for you – a wireless extender! Wi-Fi extenders, also known as wireless repeaters or range extenders, are devices that can boost and extend your Wi-Fi coverage to reach those hard-to-reach areas.
In this comprehensive guide, we will walk you through the process of connecting a wireless extender to your existing Wi-Fi network. Whether you’re a tech-savvy individual or a novice, we’ve got you covered. By the end of this article, you’ll be able to enjoy seamless internet connectivity throughout your entire space. So, let’s dive in and learn how to connect a wireless extender to optimize your Wi-Fi experience!
Inside This Article
- Choosing the Right Wireless Extender
- Setting Up the Wireless Extender
- Connecting the Wireless Extender to Your Network
- Troubleshooting Tips for Wireless Extender Connectivity Issues
- Conclusion
- FAQs
Choosing the Right Wireless Extender
When it comes to extending the range and improving the coverage of your wireless network, choosing the right wireless extender is crucial. With so many options available in the market, it can be overwhelming to make the right decision. However, by considering a few key factors, you can select a wireless extender that best suits your needs. Here are some important factors to keep in mind:
1. Compatibility: Ensure that the wireless extender you choose is compatible with your current router or access point. It should support the same Wi-Fi standards (e.g., 802.11ac, 802.11n) to ensure seamless integration.
2. Coverage: Assess the size of the area that needs Wi-Fi coverage extension. Look for a wireless extender with enough range to cover the intended area without any dead spots. Consider factors like walls and interference that may affect the coverage.
3. Speed: Check the maximum data transfer speed offered by the wireless extender. Make sure it can handle the bandwidth requirements of your connected devices, especially if you engage in activities that demand high-speed internet, such as streaming or online gaming.
4. Dual-Band or Tri-Band: Decide if you need a dual-band or tri-band wireless extender. Dual-band extenders operate on both 2.4GHz and 5GHz frequency bands, offering more flexibility in terms of device compatibility. Tri-band extenders, on the other hand, have an additional 5GHz band, which can provide even faster speeds and reduced interference.
5. Easy Setup: Look for a wireless extender that offers easy setup and configuration options. Some devices come with mobile apps or web interfaces that make the setup process hassle-free and user-friendly.
6. Brand Reputation: Consider the reputation of the brand. Look for well-established brands with a track record of providing reliable and high-quality wireless extenders. Reading customer reviews and checking ratings can give you valuable insights.
By considering these factors and doing thorough research, you can select the right wireless extender that meets your network extension needs. Remember, the choice you make will significantly impact the performance and efficiency of your extended Wi-Fi network.
Setting Up the Wireless Extender
Setting up a wireless extender is a straightforward process that can greatly enhance the Wi-Fi coverage in your home or office. Follow these steps to get your wireless extender up and running in no time:
1. Determine the Ideal Placement
The first step in setting up your wireless extender is to find the best location for it. You’ll want to place it within range of your existing Wi-Fi router but also close enough to the area where you need better coverage. It’s recommended to position the extender halfway between your router and the dead zones you want to eliminate.
2. Power Up the Extender
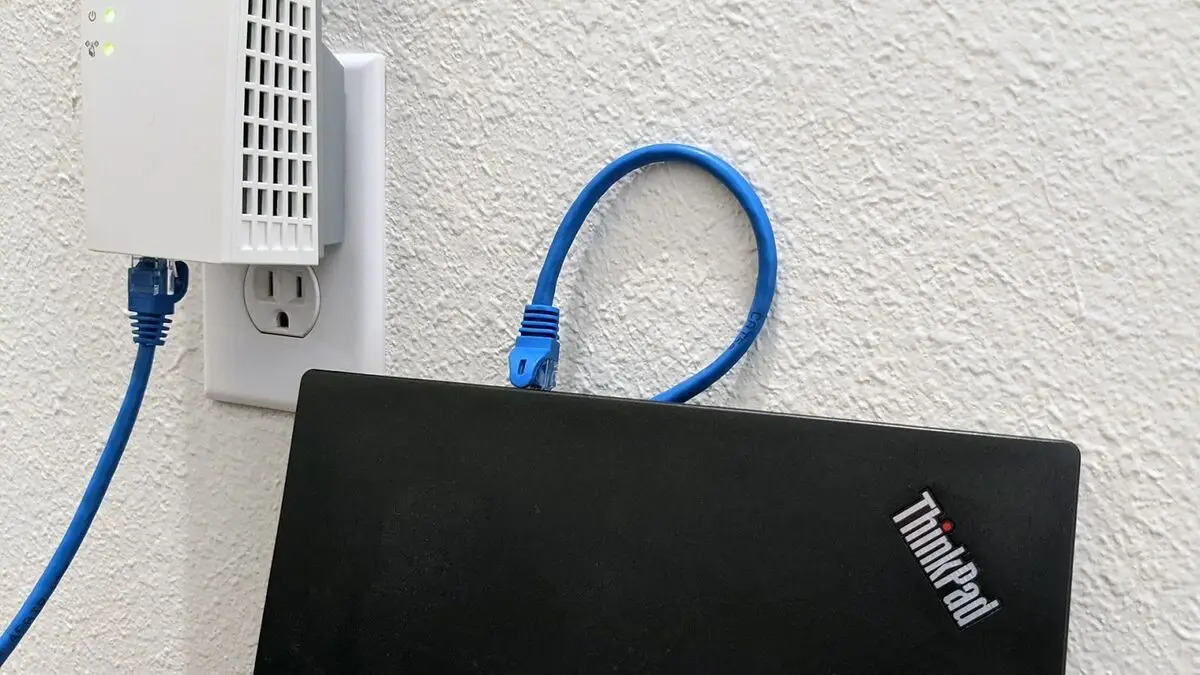
Once you’ve found the ideal spot for your wireless extender, connect it to a power outlet. Ensure that the extender is receiving power and the indicator lights are on. Wait for the extender to fully boot up before proceeding.
3. Connect to the Extender’s Network
To configure the setup of your wireless extender, you’ll need to connect to its network. Open the Wi-Fi settings on your device and look for the network name (SSID) of the extender, which is typically labeled with the manufacturer’s name or model number. Connect to this network.
4. Launch the Setup Wizard
Most wireless extenders come with a setup wizard that guides you through the installation process. Open a web browser on your device and the setup wizard should launch automatically. If it doesn’t, type in the default IP address of the extender into the browser’s address bar.
5. Follow the Setup Wizard Instructions
The setup wizard will present you with a series of prompts to configure your wireless extender. Follow the instructions on the screen, which may include selecting your existing Wi-Fi network, entering the network password, and configuring other settings such as network name and security type.
6. Test the Extended Wi-Fi Coverage
Once you’ve completed the setup process, it’s time to test the extended Wi-Fi coverage. Move to the areas of your home or office that previously had weak or no signal. Connect your devices to the extender’s network and ensure that you now have a strong and stable internet connection.
7. Optimize the Extender Placement and Settings
If you encounter any performance issues or dead zones, you may need to tweak the placement or settings of your wireless extender. Try adjusting the position of the extender to achieve better coverage. You can also experiment with different settings, such as channel selection or adjusting transmit power, to optimize the signal strength.
8. Secure Your Wireless Extender
Finally, it’s crucial to secure your wireless extender to protect your network and your data. Change the default admin username and password for the extender to prevent unauthorized access. Additionally, ensure that you have strong Wi-Fi encryption enabled on both your router and extender to safeguard your network.
With these steps, you can successfully set up your wireless extender and enjoy improved Wi-Fi coverage throughout your home or office. Remember to refer to the user manual provided with your specific extender model for detailed setup instructions and troubleshooting tips.
Connecting the Wireless Extender to Your Network
Once you have chosen the right wireless extender for your needs and have completed the initial setup, it’s time to connect it to your network. This step is crucial in ensuring that your wireless extender functions correctly and provides a stable and reliable connection.
Here are the steps to connect your wireless extender to your network:
- Find a suitable location for your wireless extender. It should be placed within range of your existing Wi-Fi router, but not too far away that it cannot receive a strong signal.
- Power on the wireless extender by plugging it into a power outlet. Make sure it is turned on and the indicator lights are functioning.
- Access the settings of your wireless extender. This can usually be done by connecting your computer or mobile device to the extender’s Wi-Fi network. Look for the network name and password in the extender’s documentation or on the device itself.
- Open a web browser and enter the IP address of the wireless extender into the address bar. This will bring up the login page for the extender’s settings.
- Enter the login credentials for the wireless extender. This information can also be found in the documentation or on the device itself. Once logged in, you will have access to the extender’s settings.
- Look for the option to connect the wireless extender to your network. This may be labeled as “Wireless Setup” or something similar. Click on this option to begin the process.
- The wireless extender will scan for available Wi-Fi networks. Select your existing network from the list and enter the password when prompted. This will establish a connection between the extender and your network.
- Once the connection is established, the extender will reboot and apply the settings. This may take a few minutes.
- After the extender has rebooted, reconnect your computer or mobile device to your regular Wi-Fi network. You should now have extended coverage and a stronger signal throughout your home or office.
It is important to note that the exact steps may vary depending on the brand and model of your wireless extender. Always refer to the manufacturer’s instructions for specific guidance.
If you are experiencing any issues during the process, consult the troubleshooting section of the extender’s documentation or contact the manufacturer’s customer support for assistance.
By following these steps, you can successfully connect your wireless extender to your network and enjoy enhanced Wi-Fi coverage in your home or office.
Troubleshooting Tips for Wireless Extender Connectivity Issues
If you’re experiencing connectivity issues with your wireless extender, don’t worry – you’re not alone. These devices can sometimes face challenges when it comes to maintaining a stable and reliable connection. However, there are several troubleshooting tips you can try to resolve these issues and get your wireless extender up and running smoothly again.
1. Check the placement of your wireless extender. The location of your extender plays a crucial role in its performance. Ensure that it is placed in an area where it can receive a strong signal from your main router. Avoid placing it near obstacles such as walls, furniture, or appliances that can potentially interfere with the signal.
2. Verify the correct configuration. Double-check if you have configured your wireless extender correctly. Make sure that it is set up with the same network name (SSID) and password as your main router. Incorrect settings can lead to connectivity issues.
3. Restart your extender and router. Sometimes, a simple restart can resolve connectivity problems. Turn off both your extender and router, wait for a few seconds, and then turn them back on. This process can help refresh the connection and establish a stable link.
4. Update the firmware. Outdated firmware can cause compatibility issues and performance problems. Check if your wireless extender has the latest firmware version available. Visit the manufacturer’s website for instructions on how to update the firmware.
5. Reset the extender to factory settings. If all else fails, you can try resetting your wireless extender to its factory settings. This will erase all previous configurations and allow you to start fresh. Refer to the user manual or manufacturer’s website for specific instructions on how to perform a factory reset.
6. Check for wireless interference. Other electronic devices in your home, such as cordless phones, baby monitors, or microwave ovens, can interfere with the wireless signal. Keep your extender away from these devices or try changing the wireless channel on your router to minimize interference.
7. Contact your internet service provider (ISP). If you’ve tried all the troubleshooting tips above and are still experiencing connectivity issues, it may be time to reach out to your ISP. They can perform diagnostics and provide assistance in resolving any underlying issues with your internet connection.
By following these troubleshooting tips, you can increase the chances of resolving connectivity issues with your wireless extender. Remember to be patient and thorough in your troubleshooting efforts. In most cases, these steps should help you get your extender back online and enjoy a seamless and uninterrupted wireless connection throughout your home.
Conclusion
In conclusion, connecting a wireless extender is a simple and effective way to boost your Wi-Fi signal and eliminate dead zones in your home or office. Whether you’re dealing with poor connectivity in certain areas or struggling to reach the far corners of your space, a wireless extender can provide the coverage you need for uninterrupted internet access.
By following the steps outlined in this article, you can easily set up and connect your wireless extender to enhance your Wi-Fi experience. Remember to choose an ideal location for your extender, ensure proper connectivity between your devices, and implement necessary security measures to safeguard your network.
With a properly connected wireless extender, you can enjoy seamless internet connectivity throughout your space, stream high-definition videos, play online games, and work remotely without any disruptions. Don’t let weak Wi-Fi signals hold you back – take advantage of wireless extenders to optimize your internet connection today!
FAQs
Below are some frequently asked questions about connecting a wireless extender:
1. Why do I need a wireless extender?
A wireless extender is used to extend the range and coverage of your existing Wi-Fi network. It is especially useful in large homes or offices where the signal from the router may not reach every corner. By using a wireless extender, you can eliminate dead zones and ensure a strong and reliable Wi-Fi connection throughout your space.
2. How does a wireless extender work?
A wireless extender works by receiving the Wi-Fi signal from your router and then rebroadcasting it to areas with weak signal or no coverage. It acts as a bridge between your router and devices, allowing them to connect to the extender to access the internet. It effectively increases the coverage range of your Wi-Fi network.
3. How do I set up a wireless extender?
The exact setup process may vary depending on the brand and model of your wireless extender, but generally, the steps involve:
- Plug in the extender in a location between the router and the area with a weak signal.
- Connect your computer or mobile device to the extender’s Wi-Fi network.
- Open a web browser and enter the setup URL provided in the extender’s manual.
- Follow the on-screen instructions to configure the extender with your existing Wi-Fi network settings.
- Once the setup is complete, disconnect from the extender’s network and reconnect to your Wi-Fi network to enjoy the extended coverage.
4. Can I use multiple wireless extenders in my network?
Yes, you can use multiple wireless extenders in your network to further extend the coverage range. However, it is important to plan the placement of the extenders strategically to ensure optimal performance and avoid interference. Ideally, each extender should be placed within the coverage range of the previous one and in areas where the Wi-Fi signal is weak.
5. How do I know if my wireless extender is working?
To determine if your wireless extender is working properly, you can:
- Check if the extender’s LED lights are indicating a solid or blinking connection.
- Use a Wi-Fi analyzer app on your mobile device to check signal strength and identify any dead zones.
- Try connecting to your Wi-Fi network from different areas of your home or office to see if the signal is stronger and more consistent.