
In today’s digital world, connecting our devices wirelessly has become an essential part of our daily lives. Whether it’s sharing content, giving presentations, or simply wanting a larger screen for our devices, the ability to connect to a wireless display is a game-changer. And with the release of Windows 11, Microsoft has introduced new features and improvements to make this process even more seamless and user-friendly. But how exactly do you connect to a wireless display in Windows 11? In this article, we will delve into the step-by-step guide to help you connect your Windows 11 device to a wireless display effortlessly. So, get ready to unlock the power of wireless connectivity and take your viewing experience to new heights!
Inside This Article
- Prerequisites for Connecting to a Wireless Display
- Steps to Connect to a Wireless Display in Windows 11
- Troubleshooting Tips for Wireless Display Connections in Windows 11
- Conclusion
- FAQs
Prerequisites for Connecting to a Wireless Display
Before you embark on the journey of connecting to a wireless display in Windows 11, there are a few prerequisites you need to ensure are in place. These prerequisites will ensure a seamless and successful connection, allowing you to enjoy the benefits of a wireless display.
1. Compatible Device: Firstly, make sure that your device is compatible with wireless display connections. Check if your device has built-in wireless display capabilities or if you need an external wireless display adapter.
2. Updated Windows 11: Ensure that your Windows 11 operating system is up to date. Microsoft often releases updates to improve compatibility and performance with wireless display connections. To check for updates, go to Settings > Windows Update and click on “Check for updates.
3. Compatible Wireless Network: Connect your device to a Wi-Fi network that is compatible with wireless display connections. This means that both your device and the wireless display need to be connected to the same Wi-Fi network for a successful connection.
4. Strong and Stable Wi-Fi Signal: A stable and strong Wi-Fi signal is crucial for a smooth wireless display experience. Make sure that your device is in close proximity to the wireless display and that there are no physical obstructions or interference that could hinder the signal. Additionally, if you’re using a wireless adapter, ensure that it is within range of your device.
5. Updated Graphics Drivers: To ensure optimal performance, it’s important to have the latest graphics drivers installed on your device. Check the manufacturer’s website for any driver updates specific to your graphics card.
By ensuring these prerequisites are met, you’ll be well-prepared to connect to a wireless display in Windows 11. Now that you’re ready, let’s dive into the steps required to establish a wireless display connection.
Steps to Connect to a Wireless Display in Windows 11
Connecting your Windows 11 device to a wireless display allows you to mirror or extend your screen, making it convenient for presentations or enjoying content on a larger screen. Here, we will guide you through the step-by-step process of connecting to a wireless display in Windows 11.
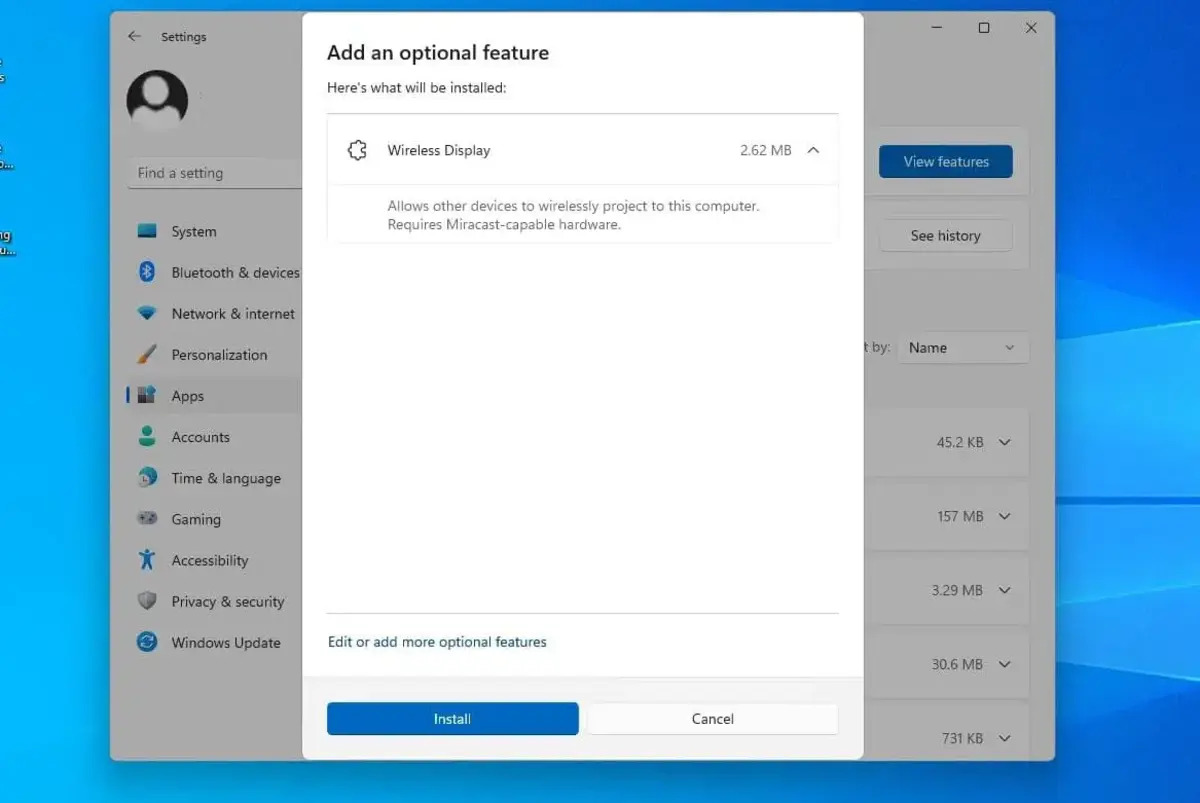
Step 1: Ensure Your Device Supports Miracast
Before proceeding, make sure that your Windows 11 device supports Miracast, which is the industry standard for wireless display connections. Most modern devices come with Miracast support, but it’s always good to double-check.
Step 2: Open the Settings App
Click on the Windows Start button, and then click on the gear icon to open the Settings app. You can also use the keyboard shortcut “Windows key + I” to quickly access the Settings app.
Step 3: Navigate to the System Settings
Within the Settings app, click on the “System” category to enter the System settings.
Step 4: Select the Display Option
In the System settings, click on the “Display” option in the left sidebar.
Step 5: Scroll Down and Click on the “Connect to a Wireless Display” Option
Scroll down the Display settings until you find the “Connect to a Wireless Display” option. Click on it to proceed.
Step 6: Wait for Your Device to Detect Available Wireless Displays
Windows 11 will now search for available wireless displays within range. This process may take a few moments. Once the search is complete, a list of available devices will be displayed.
Step 7: Select the Wireless Display You Want to Connect To
From the list of available devices, click on the wireless display you want to connect to. If prompted, enter the necessary PIN or passcode provided by the display.
Step 8: Choose Your Connection Preference
Windows 11 will give you the option to either “Duplicate” or “Extend” your screen. Choose the desired preference based on your needs. If you choose “Extend,” you can use the wireless display as a secondary monitor.
Step 9: Wait for the Connection to be Established
After selecting your connection preferences, Windows 11 will establish a wireless connection between your device and the display. This may take a few moments. Once the connection is established, your device’s screen will be mirrored or extended on the wireless display.
Step 10: Enjoy Your Wireless Display
Congratulations! You have successfully connected to a wireless display in Windows 11. Now you can enjoy your content on a larger screen or make impressive presentations without the hassle of cables.
Keep in mind that the steps to connect to a wireless display may vary slightly depending on your specific device and the version of Windows 11 you are using. However, the general process remains the same.
Now that you know how to connect to a wireless display in Windows 11, make the most out of your device’s capabilities and enhance your multimedia experience.
Troubleshooting Tips for Wireless Display Connections in Windows 11
Connecting your Windows 11 device to a wireless display can greatly enhance your productivity and entertainment experience. However, like any technology, there may be instances where you encounter issues or face difficulties when establishing a wireless display connection. In this guide, we will provide you with some troubleshooting tips to help you overcome these obstacles and enjoy a seamless wireless display experience on your Windows 11 device.
1. Ensure the compatibility of your device and display: Before attempting to connect to a wireless display, make sure that your Windows 11 device and the display you’re trying to connect to are compatible. Check the manufacturer’s documentation or website to confirm that both devices support wireless display functionality.
2. Check your Wi-Fi connection: A stable and reliable Wi-Fi connection is crucial for establishing a wireless display connection. Ensure that your Windows 11 device is connected to a Wi-Fi network and that the signal strength is strong. Weak Wi-Fi signals can cause interruptions and lead to a poor wireless display experience. Consider moving closer to the wireless router or using Wi-Fi extenders to improve signal strength.
3. Update your drivers: Outdated or incompatible drivers can often cause issues when connecting to a wireless display. To ensure smooth and trouble-free connections, regularly check for updates for your graphics card, Wi-Fi adapter, and other relevant drivers. Visit the manufacturer’s website or use device manager to download and install the latest driver versions.
4. Restart your devices: Sometimes, a simple restart can resolve connectivity issues. Restart both your Windows 11 device and the wireless display you’re trying to connect to. This can help refresh the system and establish a fresh connection between the devices.
5. Check display settings: Incorrect display settings on your Windows 11 device might prevent it from connecting to a wireless display. Go to “Settings” > “System” > “Display” and ensure that the display mode is set to “Extend” or “Duplicate.” Also, verify that the resolution and refresh rate are compatible with the wireless display.
6. Disable third-party software: Some third-party software, such as antivirus or firewall programs, can interfere with wireless display connections. Temporarily disable these programs to see if they are causing any conflicts. If the connection works after disabling the software, consider adding exceptions or adjusting the settings to allow the wireless display connection.
7. Reset the wireless display: If you’re having trouble connecting to a specific wireless display, try resetting it. Refer to the manufacturer’s instructions on how to reset the display to its factory settings. After resetting, attempt to connect to the display again and see if the issue persists.
8. Consult the manufacturer’s support: If you’ve exhausted all the troubleshooting steps and are still unable to establish a wireless display connection, reach out to the manufacturer’s support. They can provide specific guidance and further assistance to resolve any issues you may be encountering.
By following these troubleshooting tips, you can overcome common obstacles and successfully connect your Windows 11 device to a wireless display. Enjoy the larger screen, improved productivity, and immersive multimedia experience that wireless display technology offers!
Conclusion
Connecting to a wireless display in Windows 11 opens up a world of possibilities for improved productivity, entertainment, and collaboration. With just a few simple steps, you can wirelessly mirror your screen or extend your display to a larger TV or monitor.
Windows 11 offers a seamless and user-friendly experience when it comes to connecting to wireless displays. The built-in feature allows you to easily access and control your display settings, making it convenient for both personal and professional use.
Whether you want to stream your favorite movies and TV shows on a big screen, deliver a presentation with larger visuals in a meeting, or simply enjoy a more immersive gaming experience, connecting to a wireless display in Windows 11 opens up a world of possibilities.
So go ahead and explore the wireless display feature in Windows 11 today. With its ease of use and versatility, you’ll wonder how you ever got by without it.
FAQs
Here are some frequently asked questions about connecting to a wireless display in Windows 11:
Q: How do I connect to a wireless display in Windows 11?
A: To connect to a wireless display in Windows 11, follow these steps:
- Make sure your wireless display is turned on and discoverable.
- Open the “Settings” app and go to “System”.
- Select “Display” on the left-hand side.
- Click on “Connect to a wireless display.”
- Choose the wireless display you want to connect to from the list of available devices.
- Follow any additional prompts to complete the connection.
Q: How do I make my wireless display discoverable?
A: The process of making a wireless display discoverable can vary depending on the device. However, most wireless displays have a dedicated button or switch to enable discovery mode. Refer to the user manual or manufacturer”s website for specific instructions on making your wireless display discoverable.
Q: What are the system requirements for connecting to a wireless display in Windows 11?
A: To connect to a wireless display in Windows 11, your device needs to have a compatible wireless adapter and support the Miracast technology. Additionally, both your computer and the wireless display need to be on the same network.
Q: Can I extend my desktop to a wireless display in Windows 11?
A: Yes, you can extend your desktop to a wireless display in Windows 11. This allows you to have different windows and applications on each screen, effectively expanding your workspace.
Q: What if I encounter connection issues when trying to connect to a wireless display in Windows 11?
A: If you encounter connection issues when trying to connect to a wireless display in Windows 11, you can try the following troubleshooting steps:
- Check that both your computer and wireless display are connected to the same network.
- Ensure that your wireless display is powered on and in range.
- Restart your computer and the wireless display.
- Update the drivers for your wireless adapter.
- Disable any VPN or firewall software that may be interfering with the connection.
If the problem persists, refer to the troubleshooting section in the user manual of your wireless display or contact the manufacturer for further assistance.