
When it comes to managing customer relationships and sales data, Salesforce is one of the leading customer relationship management (CRM) platforms in the market. Importing data into Salesforce is a fundamental task for businesses looking to integrate their existing data and workflows into this powerful platform. Whether you’re moving from another CRM system or simply need to update your Salesforce database, knowing the best practices for importing data is essential.
In this article, we will guide you through the process of importing data into Salesforce, covering everything from preparing your data for import to utilizing the data loader tool provided by Salesforce. By following these steps, you’ll be able to seamlessly bring your data into Salesforce and leverage its robust features to drive better business outcomes.
Inside This Article
- # How to Import Data Into Salesforce
- Understanding Data Import in Salesforce
- Preparing Your Data for Import
- Using the Data Import Wizard
- Using Data Loader for Bulk Data Import
- Conclusion
- FAQs
# How to Import Data Into Salesforce
If you want to efficiently manage your data in Salesforce, importing data is a crucial step. Whether you’re migrating from another system or updating existing records, Salesforce provides several tools to make data import a breeze. In this article, we’ll walk you through the process of importing data into Salesforce.
Understanding Data Import in Salesforce
Before diving into the import process, it’s essential to understand how data import works in Salesforce. Salesforce offers two primary methods for importing data: the Data Import Wizard and Data Loader.
The Data Import Wizard is a web-based tool that is perfect for importing small to medium-sized data sets. It’s user-friendly and requires no coding or technical expertise. However, it does have some limitations, such as the maximum limit for data import and the lack of support for some advanced features.
Data Loader, on the other hand, is a robust tool that can handle large volumes of data. It is an offline desktop application that provides advanced functionalities and supports more complex data import scenarios. However, it may require technical expertise or training to use effectively.
Preparing Your Data for Import
Before importing data into Salesforce, it’s crucial to ensure that your data is clean, accurate, and well-structured. Start by organizing your data in a format that Salesforce can recognize, such as CSV or Excel files.
Next, review your data for any duplicates, inconsistencies, or missing values. It’s important to standardize your data and ensure that it aligns with Salesforce’s data model. Create backup copies of your data to avoid any potential data loss during the import process.
Additionally, make sure that you have the necessary permissions to import data into Salesforce. Permission levels determine what actions you can perform and what data you can access within your Salesforce org.
Using the Data Import Wizard
The Data Import Wizard is a user-friendly tool that allows you to import data into Salesforce without the need for coding. Here’s how you can use it:
- Login to your Salesforce org and navigate to the Data Import Wizard.
- Select the type of data you want to import, such as accounts, contacts, or leads.
- Upload your data file in CSV or Excel format.
- Map the fields in your data file to the corresponding Salesforce fields.
- Choose how you want to handle duplicate records.
- Review and confirm the import settings.
- Start the import process and track its progress.
Once the import is complete, Salesforce will provide you with a summary of the imported records and any potential errors or issues encountered during the process.
Using Data Loader for Bulk Data Import
If you have a large volume of data to import or require more advanced functionalities, Data Loader is the preferred choice. Here’s how you can use Data Loader for bulk data import:
- Download and install Data Loader on your computer.
- Configure the settings and log in to your Salesforce org.
- Prepare your data file in CSV or XML format.
- Map the fields in your data file to the corresponding Salesforce fields.
- Specify the import operation, such as insert, update, or upsert.
- Start the import process and monitor its progress.
Data Loader provides more options for data manipulation, such as mapping relationships, performing complex transformations, and handling large data volumes more efficiently.
Understanding Data Import in Salesforce
Importing data into Salesforce is a crucial process for businesses looking to consolidate and manage their customer data efficiently. Salesforce provides various tools and methods to facilitate this data import process, catering to different requirements and preferences of users.
When it comes to understanding data import in Salesforce, it’s important to grasp the concept of data objects. In Salesforce, data objects represent the different types of information you can store, such as contacts, accounts, leads, opportunities, and more. These data objects have predefined fields that define the attributes and characteristics of the data being stored.
Before diving into the data import process, it’s crucial to ensure that your data is well-prepared. This includes cleaning up any duplicates, organizing the data in a consistent format, and validating the data to ensure its accuracy. You should also have a clear understanding of the data mapping, which involves matching the fields of your source data with the corresponding fields in Salesforce.
Salesforce offers a powerful tool called the Data Import Wizard, which is ideal for small to medium-sized data imports. This web-based tool provides a user-friendly interface and guides you through each step of the data import process. It allows you to map fields, perform automated duplicate checks, and even update existing records as needed.
For larger-scale data imports, Salesforce provides another tool called Data Loader. This desktop application is capable of handling high-volume data imports and exports. It supports the import of CSV files and can be customized to match complex data mapping requirements. Data Loader is especially useful when dealing with large data sets or when you require more advanced data manipulation capabilities.
Understanding data import in Salesforce is essential for businesses seeking to leverage the full potential of their CRM system. By efficiently importing and organizing your data, you can enhance your sales, marketing, and customer service efforts, ultimately driving growth and success for your organization.
Preparing Your Data for Import
Before you can import data into Salesforce, it is crucial to ensure that your data is properly prepared. This will help to avoid any errors or issues during the import process. Here are some key steps to follow when preparing your data:
1. Clean and Validate your Data: Start by cleaning up your data to remove any inconsistencies, duplicates, or outdated information. Validate the accuracy of your data by checking for any missing or incorrect values. It’s important to have clean and reliable data before importing it into Salesforce.
2. Map your Data Fields: Create a mapping between your source data and the corresponding fields in Salesforce. This will ensure that the data is imported into the correct fields and that the information is accurately transferred. Take the time to review your mappings and ensure that they align with your specific needs and data structure.
3. Format your Data: Make sure that your data is formatted correctly according to the requirements of Salesforce. This includes formatting phone numbers, dates, and other fields to match the expected format in Salesforce. Failure to properly format your data may result in errors during the import process.
4. Determine the Import Method: Decide on the import method that best suits your needs. Salesforce provides multiple options such as the Data Import Wizard and Data Loader. Consider factors such as the volume of data, complexity of mappings, and desired automation level when choosing the appropriate import method.
5. Create Data Backup: Before proceeding with the import process, it is highly recommended to create a backup of your data. This will serve as a safety net in case any issues arise during or after the import. Having a backup ensures that you can revert to the previous state if needed.
6. Test the Import: Before importing the entire dataset, perform a test import with a subset of your data. This will allow you to identify and resolve any issues or errors that may occur. By testing the import process, you can ensure a smoother and more successful full-scale import.
7. Review Data Security: As you prepare your data for import, consider the security and privacy aspects of the information you are importing. Ensure that you comply with any legal or internal policies regarding data protection. It is important to safeguard the integrity and confidentiality of your data throughout the import process.
By following these steps to prepare your data for import, you can ensure a smooth and successful process. Taking the time to clean, validate, and format your data, as well as properly mapping your fields, will help to avoid any potential challenges and ensure the accuracy and integrity of your data in Salesforce.
Using the Data Import Wizard
If you’re new to Salesforce or have a smaller dataset to import, the Data Import Wizard is a simple and user-friendly option. It allows you to import data by providing a step-by-step process that guides you through the data import process.
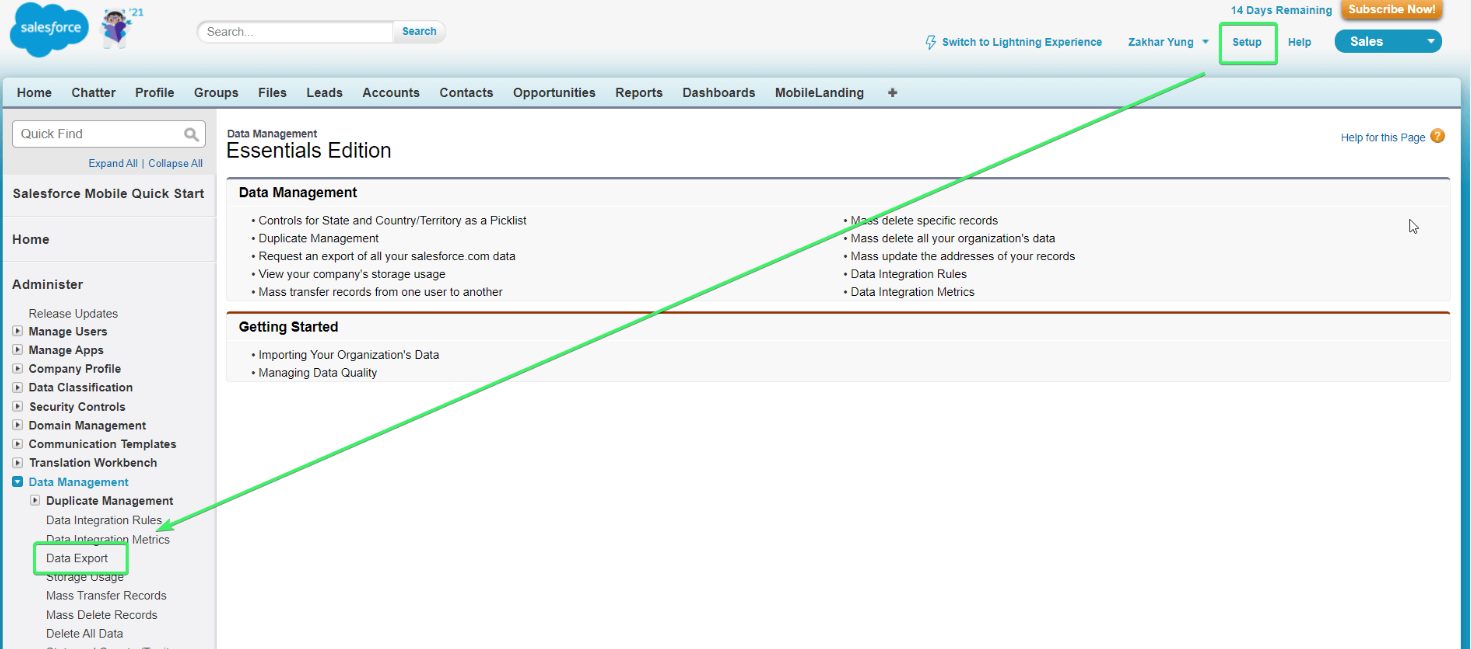
To access the Data Import Wizard, navigate to the Setup area in your Salesforce account. From there, search for and select the “Data Import Wizard” option. This will take you to the Data Import Wizard page where you can start the import process.
Before importing data, it’s important to ensure that your data is prepared and organized correctly. Take the time to clean up your data, remove any duplicates, and ensure that it is in the correct format for import. This will help avoid any errors or issues during the import process.
Once your data is ready, follow these steps to import it using the Data Import Wizard:
- Click on the “Launch Wizard” button on the Data Import Wizard page.
- Select the object you want to import data into. This could be standard objects, such as Accounts or Contacts, or custom objects that you have created.
- Choose the file that contains the data you want to import. The Data Import Wizard supports several file formats, including CSV, XLS, and XML.
- Map the fields in your file to the corresponding fields in Salesforce. This step ensures that the data is accurately mapped and imported into the correct fields.
- Review the import summary to ensure everything is correct. If needed, you can make changes to the mapping or cancel the import.
- Click the “Start Import” button to begin the data import process.
During the import process, the Data Import Wizard will validate the data and identify any errors or issues that need to be resolved. It will provide detailed information about the errors, allowing you to correct them before completing the import.
Once the import is complete, you will receive a confirmation email from Salesforce with the status of the import. You can also view the import results directly in the Data Import Wizard.
The Data Import Wizard is a convenient tool for importing smaller datasets and getting started with data import in Salesforce. However, for larger datasets or more complex import requirements, you may need to explore other options, such as using Data Loader for bulk data imports.
Using Data Loader for Bulk Data Import
Data Loader is a powerful tool provided by Salesforce that allows you to quickly and efficiently import large amounts of data into your Salesforce org. Whether you’re migrating from another system or updating existing records, Data Loader is the go-to solution for bulk data imports. Here’s a step-by-step guide on how to use Data Loader for your data import needs.
Step 1: Install and Launch Data Loader
To get started, you’ll need to download and install Data Loader on your computer. Once installed, launch the application and enter your Salesforce login credentials to establish a connection with your org.
Step 2: Prepare Your Data
Before importing your data, make sure it is properly formatted and meets the Salesforce data requirements. Ensure that you have organized your data into CSV or database files, with each field mapped correctly to the corresponding Salesforce object and field.
Step 3: Configure the Data Loader Settings
Next, configure the settings in Data Loader to ensure a smooth and successful data import. Set the operation to “Insert” or “Upsert” depending on whether you are creating new records or updating existing ones. Specify the mapping file, which defines how your CSV or database fields map to Salesforce objects and fields.
Step 4: Map the Fields
In this step, you will need to map the fields in your data source to the corresponding fields in Salesforce. Data Loader allows you to easily map fields using a simple graphical interface. Ensure that all fields are correctly mapped to avoid any data mismatches during the import process.
Step 5: Prepare for Import
Once your fields are mapped, review the settings and prepare for the import process. Check that your data files are in the correct format and verify the mapping file. Take the time to double-check all settings and ensure everything is accurately configured before proceeding.
Step 6: Begin the Data Import
Once you’re ready, click the “Next” button to start the data import process. Data Loader will begin processing your files, creating new records or updating existing ones based on your specified operation. You can monitor the progress and check for any errors or warnings that may occur during the import.
Step 7: Review the Import Results
After the import process is complete, Data Loader will provide you with a detailed report of the import results. It will show you the number of successful records, any records with errors, and the reason for the errors. Review this report to ensure the data import was successful and address any errors if necessary.
By following these steps, you can utilize Data Loader for bulk data imports into Salesforce. This powerful tool saves you time and effort, allowing you to efficiently manage large amounts of data and keep your Salesforce org up-to-date.
Conclusion
In conclusion, importing data into Salesforce is a crucial task for businesses that want to effectively manage their customer information and enhance their sales and marketing strategies. By following the steps outlined in this article, you can ensure a smooth and successful data migration process.
Remember to thoroughly analyze and clean your data before importing it into Salesforce to avoid any data inconsistencies or duplicates. Use the data import wizard or data loader tools to import large volumes of data, and don’t forget to map your fields correctly to ensure accurate data mapping.
Regular data updates and maintenance are essential to keep your Salesforce database up-to-date and reliable. With a well-organized and updated database, you can gain valuable insights, improve customer relationships, and drive business growth.
So, whether you’re a small business or a large enterprise, take advantage of Salesforce’s data import capabilities and unlock the potential of your customer data. Start importing your data today and experience the benefits of a streamlined and efficient CRM system.
FAQs
1. Can Salesforce import data from different file formats?
Yes, Salesforce supports the import of data from various file formats such as CSV (Comma-Separated Values), XLSX (Microsoft Excel), and XML (eXtensible Markup Language). This allows users to easily import data from different sources and formats into their Salesforce org.
2. How do I import data into Salesforce?
To import data into Salesforce, you can use the built-in data import wizard or data loader. The data import wizard is a web-based tool that allows you to import data from CSV files directly into Salesforce, while data loader is a desktop application that provides more advanced features and supports larger data volumes.
3. What are the key considerations before importing data into Salesforce?
Before importing data into Salesforce, it’s important to ensure the data is clean and deduplicated. This includes removing any duplicate records, correcting formatting errors, and ensuring data integrity. Additionally, you should have a clear understanding of the relationships and dependencies between different data objects in Salesforce to ensure a successful import.
4. Can I update existing records during the data import process?
Yes, Salesforce allows you to update existing records during the data import process by matching them based on a unique identifier, such as a record ID or an external ID. This feature is particularly useful when you need to perform bulk updates or data merges in Salesforce.
5. Can I schedule regular data imports into Salesforce?
Yes, you can schedule regular data imports into Salesforce using tools such as data loader or Salesforce’s integration capabilities. This allows you to automate the import process and ensure that your Salesforce org is always up to date with the latest data from external sources.