
Are you looking for an efficient and user-friendly way to handle your data in Salesforce? Look no further than Salesforce Data Loader. Whether you’re an experienced Salesforce user or just getting started, Data Loader is a powerful tool that can help you manage your data with ease.
With Salesforce Data Loader, you can perform bulk data imports, exports, updates, and deletions. Whether you need to migrate data from an external system, update records in bulk, or extract data for reporting purposes, Data Loader has got you covered.
In this article, we will explore the ins and outs of Salesforce Data Loader. We will walk you through the process of installing and setting up Data Loader, as well as provide useful tips and tricks to help you make the most out of this powerful tool. So, let’s dive in and discover how to use Salesforce Data Loader to streamline your data management tasks.
Inside This Article
- Overview of Salesforce Data Loader
- Installing and Setting up Salesforce Data Loader
- Importing data using Salesforce Data Loader
- Exporting data using Salesforce Data Loader
- Conclusion
- FAQs
Overview of Salesforce Data Loader
Salesforce Data Loader is a powerful tool provided by Salesforce for importing and exporting data in bulk. It is a standalone application that can be installed on your computer, allowing you to quickly and easily move data between your Salesforce org and external systems. Whether you need to migrate data from a legacy system, update existing records, or create new records in Salesforce, Data Loader simplifies the process and saves you time and effort.
With Salesforce Data Loader, you can work with a variety of data types such as standard and custom objects, attachments, documents, and more. The tool supports both simple and complex data transformations, ensuring that your data is accurately loaded into Salesforce with the correct relationships and field values. Data Loader also provides built-in error handling and logging, allowing you to identify and resolve any issues during the data import or export process.
One of the key advantages of Salesforce Data Loader is its scalability. Whether you have a few hundred records or millions of records to process, Data Loader can handle the load efficiently, making it suitable for organizations of any size. It also offers a command-line interface, giving you the flexibility to automate data loading tasks and schedule them to run at specific intervals.
Furthermore, Salesforce Data Loader is compatible with both Windows and Mac operating systems, making it accessible to a wide range of users. It supports various data sources, including CSV files, relational databases, and enterprise systems like SAP and Oracle. This versatility ensures that you can import and export data from different sources seamlessly, helping you maintain the integrity and accuracy of your data within Salesforce.
Overall, Salesforce Data Loader is an essential tool for any Salesforce user who needs to perform data import and export tasks. It provides a user-friendly interface, robust functionality, and scalability, making it a reliable solution for managing your data in Salesforce.
Installing and Setting up Salesforce Data Loader
If you’re looking to import or export data in Salesforce, Salesforce Data Loader is a powerful and versatile tool that can get the job done. In this guide, we’ll walk you through the process of installing and setting up Salesforce Data Loader to effectively manage your data operations.
Step 1: Download Salesforce Data Loader
The first step is to download Salesforce Data Loader from the official Salesforce website. Simply visit the Salesforce AppExchange and search for “Data Loader.” Once you find it, click on the “Get It Now” button to start the download.
Step 2: Choose the Right Version
When downloading Salesforce Data Loader, make sure to select the version that is compatible with your operating system. Whether you’re using Windows or Mac, there are specific versions available for each. Choose the appropriate version and proceed with the download.
Step 3: Install Salesforce Data Loader
Once the download is complete, locate the installation file on your computer and run it. Follow the on-screen prompts to install Salesforce Data Loader. The installation process is straightforward and should only take a few minutes.
Step 4: Configure Salesforce Data Loader
After installing Salesforce Data Loader, it’s time to configure it for use. Launch the application and you will be prompted to enter your Salesforce credentials. Provide your Salesforce username and password, and click on the “Log in” button to proceed.
Step 5: Select Settings and Connections
Once logged in, you will be presented with the main interface of Salesforce Data Loader. From here, click on the “Settings” tab to access the various configuration options. You can customize settings such as the directory to store CSV files, error files, and success files.
Step 6: Define Connections
In the “Settings” tab, you can also define your Salesforce connections. This includes specifying the Salesforce object you want to import or export data from, as well as mapping the fields between the source and target systems. The mapping process ensures that the data is transferred accurately.
Step 7: Test the Connection
Before you start importing or exporting data, it’s a good idea to test the connection to ensure everything is set up correctly. Click on the “Test Connection” button in the Salesforce Data Loader interface. If the connection is successful, you will see a confirmation message.
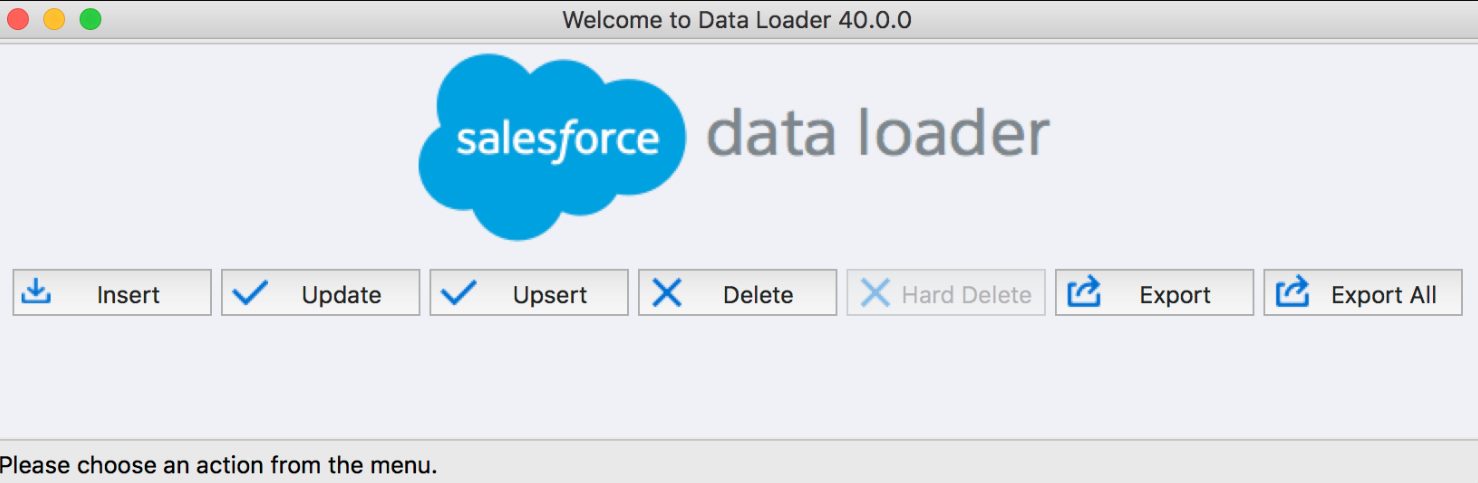
Step 8: Use Salesforce Data Loader
Now that you have installed and configured Salesforce Data Loader, you’re ready to start using it. Whether you need to import data from external sources or export data from Salesforce, the tool provides a user-friendly interface to perform these operations efficiently.
By following these steps, you can easily install and set up Salesforce Data Loader, empowering you to effectively manage your data operations in Salesforce with ease and accuracy.
Importing data using Salesforce Data Loader
Importing data is a crucial step in managing your Salesforce database effectively. With Salesforce Data Loader, you can easily import large volumes of data from external sources into your Salesforce organization. Whether you need to import leads, contacts, accounts, opportunities, or any other custom objects, Salesforce Data Loader simplifies the process.
Here’s a step-by-step guide on how to import data using Salesforce Data Loader:
- Prepare your data: Before importing, ensure that you have your data in a suitable format, such as a CSV or Excel file. Make sure the columns in your file match the corresponding fields in Salesforce.
- Download and install Salesforce Data Loader: Visit the Salesforce AppExchange and download the Data Loader tool. Follow the installation instructions to set it up on your computer.
- Set up the Data Loader: Open the Data Loader and enter your Salesforce login credentials. Once logged in, you’ll need to specify the settings for your import operation, such as the object you want to import data into and the operation type (insert, update, or upsert).
- Map the fields: Data Loader provides a mapping feature that allows you to associate the columns in your data file with the corresponding fields in Salesforce. This ensures that the data is correctly matched and imported into the appropriate Salesforce fields.
- Import the data: After mapping the fields, you’re ready to import the data. Data Loader offers various options for controlling the import process, such as inserting records in batches, enabling duplicate rules, and handling errors.
- Monitor the import: During the import process, Data Loader provides real-time progress updates, allowing you to monitor the status and track any errors that may occur. This helps ensure the accuracy and completeness of the imported data.
Using Salesforce Data Loader for data imports offers several advantages. Firstly, it allows you to import large volumes of data quickly and efficiently. Secondly, it provides a user-friendly interface for mapping fields and controlling the import process, making it accessible to both technical and non-technical users.
Additionally, Data Loader includes error handling capabilities, giving you the ability to identify and resolve any data inconsistencies or duplicates during the import process. This helps maintain the integrity of your Salesforce database.
Overall, Salesforce Data Loader is a powerful tool that streamlines the data import process, saving you time and effort. By following the steps outlined above, you can easily import data into Salesforce and keep your database up to date.
Exporting data using Salesforce Data Loader
Exporting data from Salesforce is a common requirement for many organizations. Salesforce Data Loader is a powerful tool that allows you to extract data from your Salesforce org and save it to a local file. Whether you need to create backups, perform data analysis, or migrate data to another system, Salesforce Data Loader is your go-to solution.
To get started with exporting data, follow these steps:
- Launch Salesforce Data Loader: Open Salesforce Data Loader on your computer. If you haven’t installed it yet, make sure to download and install the latest version from the Salesforce website.
- Login to Your Salesforce Org: Enter your Salesforce username, password, and security token (if required) to log in to your Salesforce org. Make sure you have the necessary permissions to access and export the data you need.
- Select the Object and Export Operation: Choose the Salesforce object you want to export data from and select the “Export” operation in Salesforce Data Loader.
- Configure the Export Settings: Set the export settings according to your requirements. You can specify the query criteria to filter the data, select the fields you want to export, and choose the output file format (e.g., CSV, Excel, or XML).
- Choose the Destination: Specify the location where you want to save the exported file. You can choose a local folder or a cloud storage service such as Dropbox or Google Drive.
- Run the Export: Click on the “Next” button and review the export summary. If everything looks good, click on “Finish” to start the export process.
- Monitor the Export Progress: Salesforce Data Loader will display the progress of the export process. You can keep an eye on the number of records exported and any errors encountered during the process.
- Save the Export Results: Once the export is complete, Salesforce Data Loader will provide a summary of the export results. You can save this information for future reference.
Salesforce Data Loader offers a straightforward and efficient way to export data from your Salesforce org. By following the above steps, you can easily extract the required data and save it to a local file for further analysis or integration with other systems.
Conclusion
Utilizing Salesforce Data Loader effectively can significantly streamline and enhance your data management processes. Whether you are a small business owner or a large enterprise, Data Loader provides a user-friendly solution for importing, exporting, and deleting data in Salesforce.
By following the steps outlined in this article, you can confidently navigate through the Data Loader interface and perform various operations with ease. From the initial setup and configuration to the actual data migration and manipulation, Data Loader offers a robust set of features to handle your data management needs efficiently.
Remember to always test your operations on a smaller data set before executing them on a larger scale to ensure accuracy and avoid any potential data discrepancies. With the right understanding and application of Salesforce Data Loader, you can save time, improve data integrity, and optimize your overall Salesforce experience.
FAQs
Q: What is Salesforce Data Loader?
Salesforce Data Loader is a powerful tool provided by Salesforce that allows users to import, export, and delete large volumes of data in Salesforce. It provides a simple and efficient way to manipulate data and perform bulk operations within Salesforce.
Q: How can I download Salesforce Data Loader?
You can download the Salesforce Data Loader directly from the Salesforce website. Simply go to the Data Loader page and click on the appropriate download link based on your operating system.
Q: Is Salesforce Data Loader a free tool?
Yes, Salesforce Data Loader is a free tool provided by Salesforce for its users. It is available for download and use at no additional cost.
Q: Can I schedule data loads with Salesforce Data Loader?
Yes, Salesforce Data Loader offers a scheduling feature that allows you to automate data loads at specific intervals. You can set up recurring data loads to import or export data automatically without manual intervention.
Q: What are the file formats supported by Salesforce Data Loader?
Salesforce Data Loader supports various file formats, including CSV (Comma Separated Values), XLS (Excel), XLSX (Excel Open XML), and ODBC data sources. This allows you to work with different types of data files based on your preference and requirements.