
In today’s digital age, businesses are constantly seeking ways to streamline their processes and improve efficiency. Payroll management is one of the critical areas where organizations are always on the lookout for seamless solutions. QuickBooks Desktop has emerged as a popular accounting software that provides users with robust features and functionalities. One area where QuickBooks Desktop shines is its ability to import payroll data, saving time and minimizing the chances of manual errors.
In this article, we will explore the step-by-step process of importing payroll data into QuickBooks Desktop. Whether you are a small business owner or an accountant, this guide will help you leverage the power of QuickBooks Desktop and effortlessly import your payroll data. So, let’s dive in and discover how you can automate and simplify the payroll process with QuickBooks Desktop.
Inside This Article
- Overview
- Step 1: Prepare the Payroll Data
- Step 2: Set Up QuickBooks Desktop
- Step 3: Choose the Import Method
- Step 4: Map Payroll Data Fields
- Step 5: Import the Payroll Data
- Step 6: Review and Verify Data
- Troubleshooting Tips
- Conclusion
- FAQs
Overview
Importing payroll data into QuickBooks Desktop is a crucial step to streamline your payroll management process. By importing the data, you can easily update employee records, track expenses, and generate accurate financial reports. This article will guide you through the necessary steps to import payroll data into QuickBooks Desktop seamlessly.
With QuickBooks Desktop, you have the flexibility to import payroll data from various sources, such as Excel spreadsheets or other payroll software. This ensures a smooth transition and minimizes data entry errors. Whether you have a handful of employees or a large workforce, this guide will help you simplify the payroll import process.
Before diving into the step-by-step process, it is crucial to ensure that you have prepared the payroll data accurately. Double-check the data to make sure it is complete, up-to-date, and error-free. This will save you time and effort later on during the import process.
Once you have verified the payroll data, the next step is to set up QuickBooks Desktop. Ensure that you have the latest version of QuickBooks installed on your computer. This will ensure compatibility and access to the latest features and updates.
After setting up QuickBooks Desktop, the next step is to choose the import method that suits your needs. QuickBooks Desktop provides different options to import payroll data, such as using integrated payroll services or importing from Excel or other external sources. Evaluate your requirements and select the method that is most convenient for you.
Once you have chosen the import method, the next step is to map the payroll data fields. Mapping allows you to match the data fields in your payroll data with the corresponding fields in QuickBooks Desktop. This ensures that the data is imported accurately and in the right format. Take your time to carefully map the fields to avoid any inconsistencies or errors.
Now that you have mapped the payroll data fields, it is time to import the data into QuickBooks Desktop. Follow the prompts and instructions provided by QuickBooks to complete the import process. Make sure to carefully review and verify the imported data to ensure its accuracy.
If you encounter any issues during the payroll data import, don’t worry. QuickBooks offers troubleshooting tips and resources to help you resolve any problems. Refer to the QuickBooks support documentation, online forums, or reach out to their customer support for assistance.
By following these steps and best practices, you can successfully import payroll data into QuickBooks Desktop, saving you time, reducing errors, and improving your overall payroll management process. Now, let’s dive into the detailed step-by-step guide to import payroll data into QuickBooks Desktop.
Step 1: Prepare the Payroll Data
Before you can import the payroll data into QuickBooks Desktop, it is important to ensure that the data is properly prepared. This will help to minimize errors and ensure a smooth import process. Here are some steps to follow when preparing your payroll data:
1. Gather the necessary information: Collect all the required payroll data, such as employee details, wages, deductions, and taxes. Make sure you have accurate and up-to-date information for each employee.
2. Verify data accuracy: Double-check your data to ensure that there are no errors or discrepancies. This includes reviewing employee names, social security numbers, and tax information.
3. Organize data in a compatible format: QuickBooks Desktop supports various file formats for importing payroll data, such as Excel (.xls, .xlsx), CSV, and IIF. Convert your payroll data into one of these compatible formats to ensure a seamless import.
4. Clean up the data: Remove any unnecessary columns or rows from your payroll data to streamline the import process. It’s also a good idea to format the data consistently for better readability.
5. Ensure data security: Payroll data contains sensitive information, so it’s crucial to take measures to protect it. Ensure that your payroll data is securely stored and encrypted to prevent unauthorized access.
By following these steps to prepare your payroll data, you can save time and minimize errors during the import process. Now you’re ready to move on to the next step of setting up QuickBooks Desktop for the import.
Step 2: Set Up QuickBooks Desktop
Once you have prepared your payroll data, the next step is to set up QuickBooks Desktop for importing the data. This involves configuring the necessary settings and ensuring that your payroll preferences are correctly configured. Follow these steps to set up QuickBooks Desktop:
1. Install QuickBooks Desktop: If you haven’t already, download and install QuickBooks Desktop on your computer. Make sure to choose the appropriate version based on your needs.
2. Launch QuickBooks Desktop: Once you have installed QuickBooks Desktop, launch the software by double-clicking the icon on your desktop or by searching for QuickBooks in the Start menu.
3. Set Up Company Information: When you launch QuickBooks Desktop for the first time, you will be prompted to set up your company information. This includes entering your company name, address, and contact information. Fill in these details accurately.
4. Configure Payroll Preferences: To import payroll data successfully, it is crucial to configure the payroll preferences correctly. Click on “Edit” in the top menu bar, then select “Preferences.” Navigate to the “Payroll & Employees” section and customize the settings according to your requirements.
5. Set Up Payroll Items: Payroll items are used to categorize different types of compensation and deductions for your employees. You will need to create payroll items to match your payroll data. To do this, go to the “Lists” menu, select “Payroll Item List,” and click on “Payroll Item” followed by “New.” Follow the prompts to create the necessary payroll items.
6. Create Employee Records: Before importing payroll data, you need to create employee records in QuickBooks Desktop. Click on “Employees” in the top menu bar and select “Employee Center.” Click on the “New Employee” button and fill in the required information for each employee.
7. Set Up Payroll Schedules: Payroll schedules determine how often payroll is processed for your employees. Set up the appropriate payroll schedules for your company by going to “Employees” in the top menu bar, selecting “Payroll Schedule Setup,” and following the instructions.
8. Enable Time Tracking (optional): If you track employee hours for payroll purposes, enable time tracking in QuickBooks Desktop. Click on “Edit” in the top menu bar, select “Preferences,” and navigate to the “Time & Expenses” section. Enable time tracking and customize the settings as needed.
By following these steps, you will have successfully set up QuickBooks Desktop for importing payroll data. It is important to ensure that all the settings and preferences are correctly configured to avoid any issues during the data import process.
Step 3: Choose the Import Method
Now that you have prepared your payroll data and set up QuickBooks Desktop, it’s time to choose the import method that best suits your needs. QuickBooks Desktop offers multiple ways to import payroll data, so you can select the method that works best for you.
Here are a few import methods available in QuickBooks Desktop:
- Excel or CSV File Import: If you have your payroll data in an Excel or CSV file format, this method allows you to import the data directly into QuickBooks Desktop. You will need to ensure that your file is properly formatted and matches the required fields in QuickBooks Desktop.
- Connect with Payroll Service: If you are using a payroll service provider that is compatible with QuickBooks Desktop, you can connect directly to their service within QuickBooks to import your payroll data. This method streamlines the import process and ensures accurate data transfer.
- Manual Data Entry: If you have a small number of employees or prefer to enter the payroll data manually, you can choose this method. While it may be time-consuming, it gives you more control over the data entry process.
- Third-Party Integration: QuickBooks Desktop also offers integration with certain third-party applications that specialize in payroll management. If you are already using one of these applications, you can use their import feature to transfer payroll data into QuickBooks Desktop.
Consider the size and complexity of your payroll data, the ease of use, and your preference for automation when choosing the import method. If you have a large number of employees and complex payroll calculations, using a payroll service provider or an Excel/CSV file import may be more efficient. However, if you prefer more control over the data and have a smaller payroll, manual data entry could be a viable option. Ultimately, the choice depends on your unique business needs.
Once you have decided on the import method, proceed to the next step, where we will guide you on how to map the payroll data fields in QuickBooks Desktop.
Step 4: Map Payroll Data Fields
Mapping the various payroll data fields is a crucial step in importing payroll data into QuickBooks Desktop. By mapping the fields, you ensure that the data from your payroll system aligns correctly with the corresponding fields in QuickBooks Desktop. This ensures accurate and seamless importation of payroll data.
Here are the steps to map payroll data fields:
- Open QuickBooks Desktop and navigate to the “File” menu.
- Select “Utilities” and then choose “Import” from the drop-down menu.
- Click on “Payroll” and then select the option for importing payroll data.
- QuickBooks Desktop will prompt you to map the fields. The software will display a list of available payroll data fields on one side and the corresponding QuickBooks fields on the other.
- Go through each field and select the corresponding QuickBooks field from the drop-down menu.
While mapping the fields, make sure to pay attention to the details. Ensure that the payroll data field and the QuickBooks field have the correct data type. For example, if you are importing employee names, make sure you map it to the appropriate field in QuickBooks where the names are stored.
If you encounter any fields that don’t have a corresponding match in QuickBooks Desktop, you may need to create a new field in QuickBooks to accommodate the data. This can be done by selecting the “Add New” option and specifying the details of the new field.
Once you are done mapping the fields, review your selections to ensure accuracy. Incorrect mapping can result in data errors and inconsistencies in your payroll records. Take your time and double-check to ensure everything is mapped correctly.
After mapping the fields, click on the “Next” or “Import” button to proceed with the payroll data importation process. QuickBooks Desktop will automatically match the data from your payroll system to the corresponding fields in QuickBooks.
Remember, mapping the payroll data fields is a one-time setup process. Once you have accurately mapped the fields, you can reuse the mapping for future imports, saving you time and effort in the long run.
Pro Tip: If you are unsure about mapping a particular field or need guidance, refer to the QuickBooks Desktop Help Center or consult an expert with experience in importing payroll data into QuickBooks Desktop.
Step 5: Import the Payroll Data
After you have prepared your payroll data and set up QuickBooks Desktop, it’s time to import the payroll data into the software. This step is crucial to ensure that all the relevant information is accurately recorded in your accounting system. Follow the steps below to import the payroll data:
1. Open QuickBooks Desktop and navigate to the “Employees” menu.
2. Select “Payroll Center” from the drop-down menu.
3. In the Payroll Center, click on the “Transactions” tab.
4. Choose the “Payroll Import” option from the list of transactions.
5. Select the source from which you want to import the payroll data. You can choose to import from a file, such as a spreadsheet or text file, or directly from a supported payroll software.
6. Follow the on-screen instructions to browse and locate the payroll data file or connect to the payroll software.
7. Once the file or software is selected, QuickBooks Desktop will prompt you to map the payroll data fields. This step is crucial to ensure that the information in the imported file matches the corresponding fields in QuickBooks.
8. Carefully review the mapping and make any necessary adjustments. It’s essential to match the correct data fields to avoid any discrepancies or errors in the imported data.
9. Once you are satisfied with the mapping, click on the “Import” button to start the import process.
10. QuickBooks Desktop will begin importing the payroll data. Depending on the size of the file and the complexity of the data, this process may take some time. Be patient and allow the software to complete the import process.
11. Once the import process is complete, you will receive a notification confirming the successful import of the payroll data. Take note of any warning or error messages, if applicable, and address them accordingly.
12. After the import is complete, it is crucial to review and verify the imported data. Check for any discrepancies or errors and make the necessary corrections. This step is vital to ensure the accuracy of your payroll records.
13. Congratulations! You have successfully imported the payroll data into QuickBooks Desktop. You can now proceed with other payroll-related tasks, such as generating reports or processing payroll payments.
Remember, importing payroll data requires attention to detail and accuracy. Ensure that the payroll data is properly prepared and that the mapping of fields is done correctly to prevent any errors or issues with your payroll records.
Step 6: Review and Verify Data
Once you have imported the payroll data into QuickBooks Desktop, it is crucial to review and verify the data to ensure its accuracy and integrity. This step is essential to avoid any discrepancies or errors in your financial records.
Here are some important tasks to consider during the review and verification process:
- Double-Check Employee Information: Take a close look at the imported employee data to ensure that all the necessary details, such as names, addresses, social security numbers, and tax information, are accurately entered. Any discrepancies should be corrected promptly to avoid future issues.
- Verify Payroll Items: Payroll items such as wages, deductions, and benefits play a crucial role in accurate payroll processing. Review the imported payroll items, ensuring that they match your company’s payroll policies and regulations. Make any necessary adjustments or additions to ensure proper calculation and reporting.
- Compare YTD Figures: One of the most critical aspects of verifying payroll data is comparing the Year-to-Date (YTD) figures. Cross-check the imported YTD amounts with your previous payroll records to ensure that they align. Any major discrepancies should be investigated and rectified.
- Verify Tax Withholding: Payroll includes various tax withholdings, such as federal income tax, state income tax, and Social Security withholdings. Review the imported tax withholding data to ensure that it matches the rates and regulations applicable to your employees. Any inconsistencies should be corrected immediately.
- Reconcile Bank Accounts: If you pay employees through direct deposit, it is essential to reconcile your bank accounts to ensure that the payroll data matches the recorded transactions. This step helps identify any discrepancies that may have occurred during the import process or errors in your financial records.
- Run Reports: Utilize QuickBooks Desktop’s reporting capabilities to generate various payroll reports for further review and analysis. These reports can provide valuable insights into employee expenses, payroll liabilities, tax obligations, and more. Analyzing these reports can help identify any anomalies or discrepancies that need to be addressed.
By thoroughly reviewing and verifying the imported payroll data, you can ensure the accuracy of your financial records and minimize the risk of errors or compliance issues. Taking the time to perform this step diligently will contribute to the overall efficiency and effectiveness of your payroll process in QuickBooks Desktop.
Troubleshooting Tips
Importing payroll data into QuickBooks Desktop may sometimes encounter issues or errors. Here are some troubleshooting tips to help you resolve common problems:
1. Check the file format: Ensure that the payroll data file you are importing is compatible with QuickBooks Desktop. It should be in a supported file format such as CSV or Excel.
2. Verify the file structure: Double-check that the data file has the correct structure and format required by QuickBooks Desktop. Make sure that the columns and headers match the fields in QuickBooks.
3. Review field mapping: During the import process, ensure that you have correctly mapped the fields in your payroll data file to the corresponding fields in QuickBooks Desktop. Any mismatch or incorrect mapping can cause errors.
4. Check data integrity: Before importing, thoroughly review the payroll data for any irregularities or missing information. Verify that the data is accurate, complete, and free from any discrepancies.
5. Restart QuickBooks: If you encounter any technical issues or error messages during the import process, try restarting QuickBooks Desktop. Sometimes, a simple restart can resolve minor glitches.
6. Update QuickBooks: Ensure that you are using the latest version of QuickBooks Desktop. Keeping your software up to date helps to avoid compatibility issues and improves overall performance.
7. Seek assistance: If you are unable to resolve the problem on your own, don’t hesitate to reach out to QuickBooks support. They have experienced professionals who can provide guidance and help troubleshoot the issue.
8. Test with a sample file: If you are uncertain about the import process or want to avoid any potential risks, it’s recommended to test the import with a small sample file first. This allows you to evaluate and ensure that the data is imported correctly before proceeding with larger files.
9. Log and record errors: If you encounter any errors during the import process, take note of the error codes, messages, and any other relevant details. This information will be helpful when seeking assistance or troubleshooting further.
10. Consider professional services: If you find the process of importing payroll data into QuickBooks Desktop too complex or time-consuming, consider hiring professional services that specialize in data migration. They can ensure a smooth and error-free transfer of your payroll data.
By following these troubleshooting tips, you can overcome common challenges and successfully import your payroll data into QuickBooks Desktop. Remember to carefully review and verify the imported data to ensure accuracy and completeness.
Importing payroll data into QuickBooks Desktop is a crucial task for businesses that want to efficiently manage their payroll and accounting processes. By following the steps outlined in this guide, you can seamlessly import your payroll data into QuickBooks Desktop and ensure accurate financial records.
This process not only saves time but also reduces the risk of errors and inconsistencies that can occur when manually entering data. QuickBooks Desktop offers a user-friendly interface and robust features that make the import process smooth and hassle-free.
Remember to carefully review your data before proceeding with the import to ensure its accuracy. Additionally, regularly backing up your QuickBooks data is essential to safeguard against any unexpected issues that may arise.
With this comprehensive guide, you now have the knowledge and tools to import payroll data into QuickBooks Desktop with ease. Streamline your payroll management, enhance your accounting practices, and make your business operations more efficient than ever before.
FAQs
1. Can I import payroll data into Quickbooks Desktop?
Yes, you can import payroll data into Quickbooks Desktop. Quickbooks Desktop offers a feature that allows you to import data from various sources, including payroll software.
2. What formats are supported for importing payroll data?
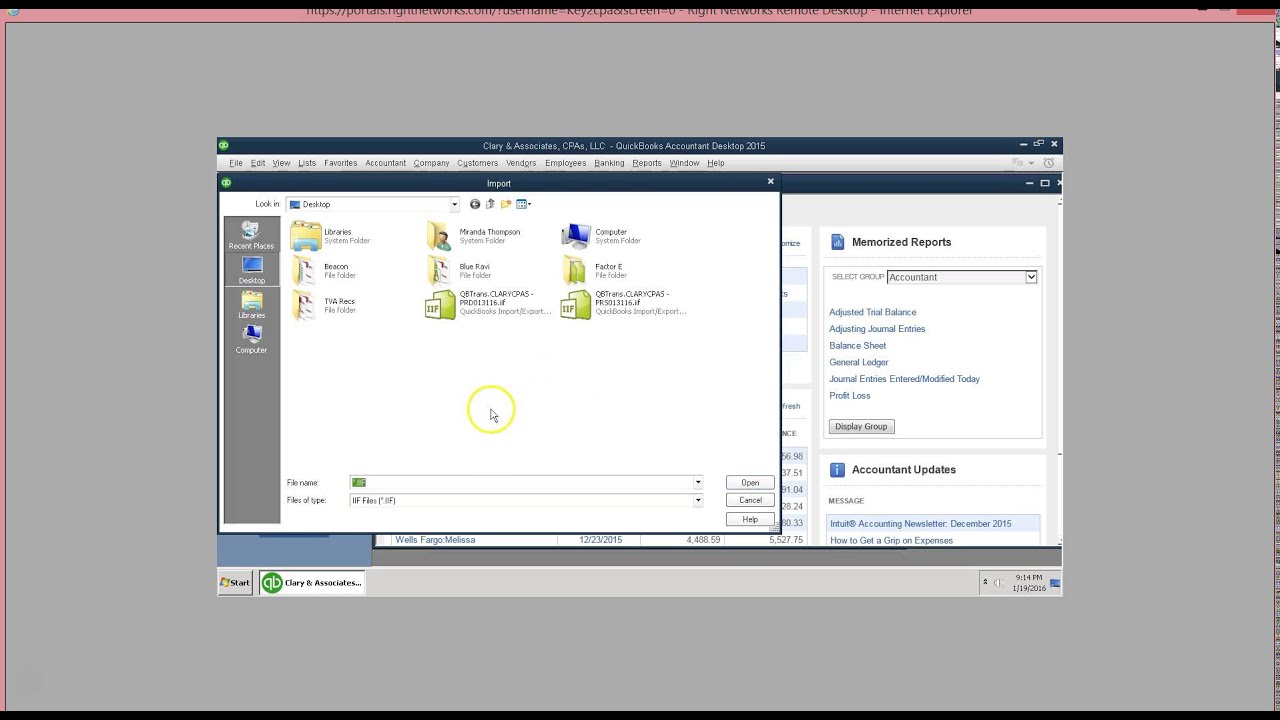
Quickbooks Desktop supports various file formats for importing payroll data. The most commonly used formats include CSV (comma-separated values), Excel spreadsheets, and IIF (Intuit Interchange Format) files.
3. How can I import payroll data into Quickbooks Desktop?
To import payroll data into Quickbooks Desktop, you can follow these steps:
- Open Quickbooks Desktop and navigate to the File menu.
- Select Utilities, then Import, and choose the desired file format.
- Follow the on-screen prompts to select the payroll data file and map the data fields to the corresponding Quickbooks fields.
- Review the mapped data and confirm the import process.
4. Can I customize the imported payroll data in Quickbooks Desktop?
Yes, after importing the payroll data into Quickbooks Desktop, you can customize it according to your needs. Quickbooks Desktop provides various tools and features to modify, categorize, and analyze your payroll data, allowing you to create detailed reports and track important financial information.
5. Is it possible to update the imported payroll data in Quickbooks Desktop?
Yes, you can update the imported payroll data in Quickbooks Desktop. If any changes occur in your payroll data, such as employee salary adjustments or new hires, you can simply import an updated file containing the modified information. Quickbooks Desktop will process the import and update the existing data accordingly.