
Welcome to our comprehensive guide on how to install a wireless camera! With the advancement of technology, wireless cameras have become increasingly popular for home and business security systems. These cameras offer convenience and flexibility, allowing you to monitor and record activity without the hassle of wiring and cables. Whether you are looking to enhance the security of your property or keep an eye on your loved ones, installing a wireless camera can provide you with peace of mind. In this article, we will walk you through the step-by-step process of installing a wireless camera, from choosing the right location to configuring the camera’s settings. Get ready to level up your security system with our easy-to-follow instructions!
Inside This Article
- Step 1: Check the package contents
- Step 2: Determine camera placement
- Step 3: Mount the camera
- Step 4: Connect the power supply
- Step 5: Connect the camera to Wi-Fi
- Step 6: Set up the camera on your smartphone or computer
- Step 7: Test the camera
- Step 8: Adjust camera settings if needed
- Step 9: Additional tips and considerations
- Conclusion
- FAQs
Step 1: Check the package contents
Before you begin the installation process, it’s essential to make sure you have received all the necessary components in the package. By checking the package contents, you can ensure that you have everything you need to proceed with the installation smoothly.
Here’s a list of items that are typically included in a wireless camera package:
- Wireless camera
- Mounting bracket or stand
- Power supply adapter
- Antenna (if applicable)
- Mounting screws and anchors
- Quick start guide
Take a moment to go through this list and compare it to the items you have received. It’s also a good idea to check for any additional components or accessories that may be specific to your particular camera model.
If you find any missing or damaged items, contact the retailer or the manufacturer’s customer support to resolve the issue. It’s important to have all the necessary components before proceeding with the installation.
Step 2: Determine camera placement
Once you have unpacked your wireless camera and checked the package contents, the next step is to determine the optimal placement for your camera. Finding the right placement is crucial for capturing the desired area and maximizing the camera’s effectiveness. Here are some factors to consider:
1. Coverage area: Carefully assess the area you want to monitor and identify the specific zones that require surveillance. Look for potential blind spots or areas where the camera’s view may be obstructed.
2. Height and angle: Determine the ideal height and angle for the camera to capture the best view. Consider mounting the camera at a height that provides a clear line of sight while ensuring it remains discreet. Experiment with different angles to find the most suitable position.
3. Power source: Choose a location where you can easily access a power source for the camera. If you’re using a battery-operated camera, consider the proximity to a power outlet for charging when needed.
4. Weather conditions: Ensure that the chosen placement is suitable for the camera’s weather resistance capabilities. If the camera is not designed for outdoor use, consider installing it indoors or using weatherproof housing.
5. Wi-Fi connectivity: Verify that the chosen location allows for a reliable Wi-Fi signal. Weak or unstable Wi-Fi connections can affect the camera’s performance and video streaming quality.
Take your time to carefully evaluate these factors and select the optimal camera placement. Remember, the effectiveness of your wireless camera depends greatly on a strategic positioning that covers the desired area and avoids any potential limitations.
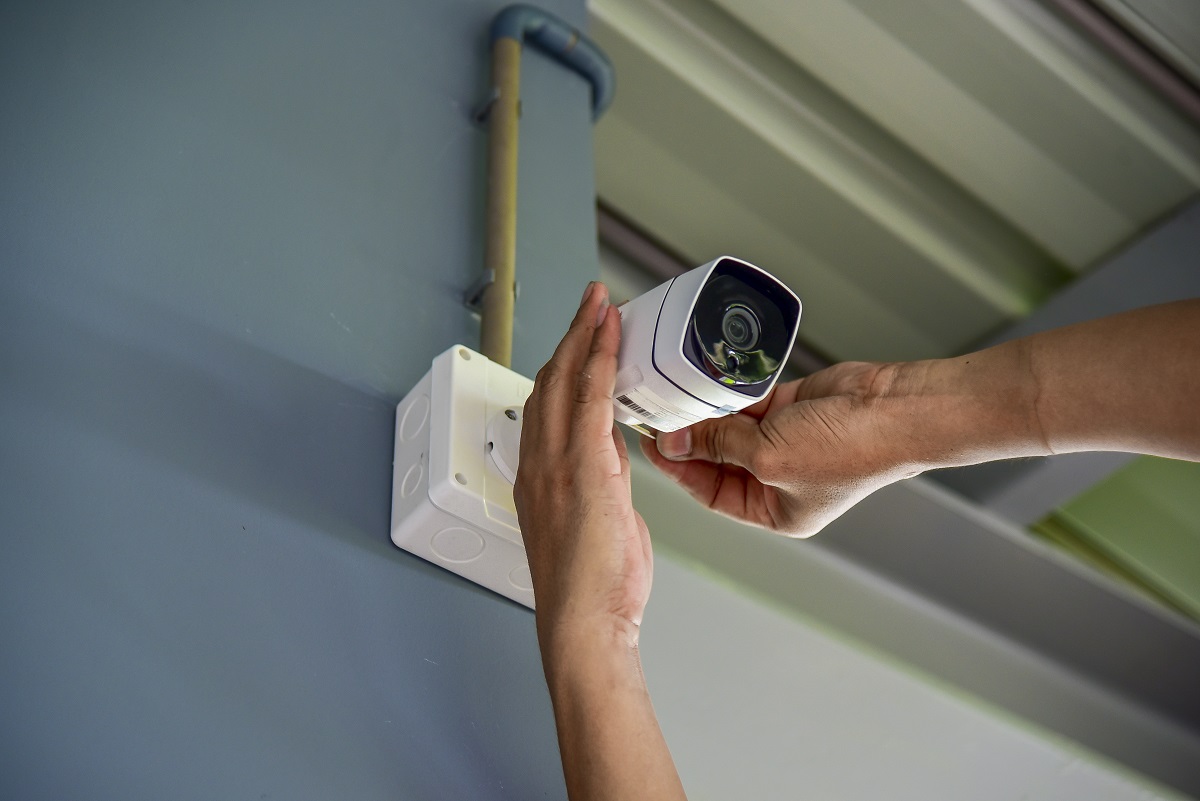
Step 3: Mount the camera
Mounting the camera is a crucial step in ensuring optimal positioning and coverage. Follow these steps to securely mount your wireless camera:
1. Choose the location: Consider the area you want to monitor and identify the best vantage point for the camera. Look for a spot that offers a clear view of the target area while remaining inconspicuous.
2. Gather the necessary tools: Before mounting the camera, gather the tools you’ll need, such as a power drill, screws, and a screwdriver. Make sure you have all the required equipment to avoid interruptions during the installation.
3. Mark the mounting spot: Use a pencil or marker to mark the exact spot where the camera will be mounted. Double-check the position to ensure it covers the desired area and is level with the surface.
4. Drill pilot holes: Using the appropriate drill bit size, carefully drill pilot holes on the marked spot. This will help prevent the surface from cracking or splitting when inserting the screws.
5. Attach the mounting bracket: Align the mounting bracket with the pilot holes and use screws to securely attach it to the surface. Ensure that it is stable and able to support the weight of the camera.
6. Connect the camera to the mounting bracket: Most wireless cameras have a detachable mounting plate or bracket. Attach the camera to the mounting bracket, ensuring it is securely fastened and properly aligned.
7. Adjust the camera position: Once the camera is mounted, adjust its position to achieve the desired angle and coverage. Some cameras allow for pan, tilt, and zoom adjustments, enabling you to fine-tune the view as needed.
8. Secure the camera and cables: To prevent tampering or accidental damage, secure the camera and cables using cable clips or ties. This will help maintain a clean and professional installation.
9. Test the camera’s field of view: Before finalizing the installation, check the camera’s field of view from your smartphone or computer. Make any necessary adjustments to ensure the camera captures the intended area and meets your surveillance needs.
By following these steps, you’ll be able to mount your wireless camera securely and strategically. Remember to check the camera’s user manual for any specific instructions or recommendations from the manufacturer.
Step 4: Connect the power supply
Once you have determined the ideal placement for your wireless camera, it’s time to connect the power supply. This step is crucial as it ensures that your camera receives the necessary power to operate efficiently.
First, locate the power cable that came with your wireless camera. It usually consists of a power adapter and a cable with a plug on one end and a DC jack on the other.
Find an electrical outlet near the camera’s mounting location. It’s important to choose a power source that is easily accessible and within reach of the camera’s power cable.
Insert the plug of the power cable into the electrical outlet. Make sure it is securely connected and the outlet is functioning properly.
Now, take the DC jack end of the power cable and connect it to the corresponding port on the back of the camera. It is typically labeled as “DC IN” or “Power.”
Ensure that the connection is tight and secure to prevent any power disruptions. Loose connections can cause intermittent power supply, resulting in camera malfunctions.
Once you have securely connected the power supply, check the camera to ensure that it is receiving power. Look for any LED indicator lights or signs of activation.
If the camera does not power on, double-check the power connections and troubleshoot any issues. It is important to resolve any power-related problems before moving on to the next steps.
Remember, a reliable power supply is crucial for the smooth functioning of your wireless camera. It ensures uninterrupted surveillance and allows you to monitor your desired area without any interruptions.
Step 5: Connect the camera to Wi-Fi
Once you have mounted the wireless camera in your desired location, the next step is to connect it to your Wi-Fi network. This will enable you to access the camera’s live feed and recordings remotely, using your smartphone or computer.
To connect the camera to your Wi-Fi network, you will typically need to follow these steps:
- Access camera settings: Open the camera’s accompanying mobile app or use a web browser to access the camera’s settings page.
- Go to Wi-Fi settings: Look for the option to connect the camera to a Wi-Fi network. This may be located in the settings menu or within a network or Wi-Fi setup section.
- Select your Wi-Fi network: A list of available Wi-Fi networks should appear. Choose the one you want to connect the camera to.
- Enter Wi-Fi password: If your Wi-Fi network is secured, you’ll need to enter the password for it. Make sure to double-check the password to avoid any connectivity issues.
- Confirm connection: After entering the password, the camera will attempt to connect to the Wi-Fi network. Wait for a few moments as the camera establishes the connection.
- Confirmation message: Once the camera successfully connects to the Wi-Fi network, a confirmation message will appear on the camera’s settings page or within the app.
It’s important to ensure that the camera is within range of your Wi-Fi signal for a stable connection. Make sure there are no obstacles, such as walls or large furniture, blocking the signal between the camera and the Wi-Fi router. If the camera’s signal is weak, consider using a Wi-Fi extender or moving the router closer to the camera’s location.
After connecting the camera to your Wi-Fi network, you can proceed to the next step and set up the camera on your smartphone or computer to access its live feed and recordings.
Step 6: Set up the camera on your smartphone or computer
After mounting the wireless camera and connecting it to the power supply, the next step is to set it up on your smartphone or computer. This will allow you to view the live feed and access additional features offered by the camera.
Here is a step-by-step guide to help you set up the camera:
1.
Download the camera’s dedicated app or software on your smartphone or computer. The app or software name can usually be found in the camera’s user manual or on the manufacturer’s website.
2.
Once downloaded, open the app or software and create an account if required. This account will be used to access the camera remotely and store any recordings.
3.
Follow the on-screen instructions to add the camera to your account. This usually involves scanning a QR code or entering a unique camera ID provided with the camera.
4.
Choose a name for your camera, which will make it easier to identify if you have multiple cameras installed.
5.
If prompted, connect the camera to your Wi-Fi network. Most cameras have a built-in Wi-Fi connection feature that allows you to connect it directly to your home network without the need for any additional devices.
6.
Once connected, you should be able to see the live feed from the camera on your smartphone or computer. Take a moment to ensure that the video quality is satisfactory and adjust any settings if necessary.
7.
Explore the additional features and settings offered by the camera’s app or software. This may include options to customize motion detection, set up scheduled recording, or access cloud storage for recorded footage.
8.
If you want to access the camera remotely while away from home, make sure to enable any necessary settings for remote viewing. Some cameras may require you to set up port forwarding on your router to allow remote access.
By following these steps, you should be able to successfully set up your wireless camera on your smartphone or computer, giving you peace of mind and enhanced security.
Step 7: Test the camera
Now that you’ve installed your wireless camera, it’s time to put it to the test. Follow these steps to ensure that your camera is properly functioning and capturing the desired footage.
1. Check the camera feed: Open the corresponding app on your smartphone or computer and check if the camera feed is displaying correctly. Make sure that the camera is capturing the view you intended it to capture.
2. Test the camera movement: If your wireless camera has pan, tilt, or zoom capabilities, ensure that these functions are working smoothly. Use the app”s controls to move the camera in different directions and zoom in and out. Confirm that the camera responds accurately to your commands.
3. Verify the night vision: Many wireless cameras come with built-in night vision capabilities. To test this feature, dim the lights in the room or test the camera outside during nighttime. Check if the camera is able to capture clear footage in low-light or no-light conditions.
4. Test the motion detection: Enable the motion detection feature on your camera and walk across its field of view. Observe if the camera detects your movement and begins recording or sends you a notification. Adjust the sensitivity settings if necessary to ensure it detects the desired level of motion.
5. Check the audio quality: If your wireless camera has an audio recording feature, test its audio quality. Speak or make noise near the camera while monitoring the feed to ensure that the audio is clear and intelligible.
6. Test the remote access: If you plan to access the camera remotely, outside of your home network, test this capability. Connect your smartphone or computer to a different Wi-Fi network or use cellular data and ensure that you can still view the camera feed and control its functions.
7. Evaluate the recording and storage: If your camera has recording capabilities, check if the footage is being saved properly and if you can access it later. Determine the available storage options, such as cloud-based storage or an SD card, and ensure they are functioning correctly.
8. Test the camera”s alerts and notifications: Enable any alert or notification features on your camera, such as motion alerts or sound alerts. Perform a test event, such as waving your hand in front of the camera, and verify that you receive the corresponding notification in a timely manner.
By following these steps and thoroughly testing your wireless camera, you can ensure that it is performing to your expectations and providing the security and peace of mind you desire.
Step 8: Adjust camera settings if needed
Once your wireless camera is installed and connected, you may find it necessary to adjust some settings to optimize its performance and customize it according to your needs. Here are a few important camera settings that you may want to consider:
1. Image Quality: Most wireless cameras offer different image quality settings, such as low, medium, and high. Adjusting the image quality can help you strike a balance between video clarity and storage space consumption. Keep in mind that higher quality images will take up more storage space.
2. Motion Detection: Many wireless cameras come with motion detection capabilities. You can adjust the sensitivity of the motion sensor to avoid false alerts caused by small movements like pets or tree branches. Finding the right sensitivity level will ensure that you receive accurate motion detection notifications.
3. Night Vision: If your wireless camera has night vision capabilities, you may want to adjust the sensitivity of the infrared sensors to optimize the camera’s performance in low-light conditions. This will enable you to capture clear footage even in the dark.
4. Recording Schedule: Some wireless cameras have a recording schedule feature that allows you to specify the time frames during which the camera should record. Adjusting the recording schedule can help conserve storage space and focus on the hours when activity is more likely to occur.
5. Privacy Settings: It’s essential to review and adjust the privacy settings of your wireless camera to protect your personal and sensitive information. Ensure that your camera is password protected and that you have set up secure access to the camera’s feed.
6. Mobile Notifications: Consider adjusting the notification settings on your smartphone to receive alerts only for important events or specific activities captured by the camera. This will prevent unnecessary notifications and help you stay informed about the things that matter.
Remember that the specific settings available will vary depending on the brand and model of your wireless camera. Refer to the user manual or the manufacturer’s support website for detailed instructions on adjusting the settings for your particular camera.
Step 9: Additional tips and considerations
Installing a wireless camera can enhance the security of your home or office, but there are a few additional tips and considerations to keep in mind to ensure optimal performance and functionality. Here are some helpful suggestions:
1. Check compatibility: Before purchasing a wireless camera, make sure it is compatible with your smartphone, computer, or other devices. This will prevent any compatibility issues and ensure seamless integration.
2. Choose the right camera resolution: Consider your specific needs and choose a camera with the appropriate resolution. Higher resolutions offer clearer and more detailed images, but they may also require more bandwidth and storage space.
3. Positioning for optimal coverage: Take some time to strategically position your wireless camera for optimal coverage. Determine the areas you want to monitor and place the camera at the right angle to capture the desired view.
4. Use a strong Wi-Fi signal: To ensure a stable connection and smooth operation, make sure your wireless camera is placed within the range of a strong Wi-Fi signal. This will minimize connectivity issues and interruptions.
5. Consider weatherproofing: If you plan to install the camera outdoors, make sure it is weatherproof. Look for cameras with an IP65 or higher rating to ensure protection against dust, water, and other outdoor elements.
6. Use a secure Wi-Fi network: Protect your wireless camera’s footage by using a secure Wi-Fi network. Make sure you have a strong password and keep your network secure to prevent unauthorized access.
7. Regularly update firmware: Manufacturers often release firmware updates for wireless cameras to improve performance and address security vulnerabilities. Check for updates regularly and install them to ensure your camera is up to date.
8. Adjust motion detection settings: Fine-tune the motion detection settings of your wireless camera to avoid false alarms. Set the sensitivity level according to your preferences and adjust the motion detection zones if necessary.
9. Consider cloud storage: Some wireless cameras offer cloud storage options for saving and accessing footage remotely. Consider subscribing to a cloud storage plan if you want to securely store and access your camera’s recordings.
10. Regularly clean the lens: Over time, dust and dirt can accumulate on the camera lens, affecting image quality. To maintain clear and sharp footage, regularly clean the lens using a soft cloth or lens cleaning solution.
By keeping these additional tips and considerations in mind, you can ensure a successful and hassle-free installation of your wireless camera. Enjoy the added security and peace of mind that comes with monitoring your property with ease.
Conclusion
Installing a wireless camera is a great way to enhance the security and surveillance of your home or business. With the advancements in technology, setting up a wireless camera has become easier and more convenient than ever before. Whether you are monitoring your property while you are away or keeping an eye on your loved ones, a wireless camera provides peace of mind and added protection.
By following the step-by-step guide outlined in this article, you can successfully install your wireless camera and start enjoying its benefits. Remember to consider factors such as camera placement, Wi-Fi signal strength, and security settings to ensure optimal functionality. With proper installation and the right equipment, you can have a reliable and efficient surveillance system to suit your needs.
So don’t wait any longer! Take the necessary steps to install a wireless camera and protect your home or business today.
FAQs
1. Can I install a wireless camera on my own?
Yes, you can easily install a wireless camera on your own. Most wireless camera systems come with detailed installation instructions that are easy to follow. However, if you are not comfortable with doing it yourself, you can always hire a professional to install it for you.
2. Do I need any special tools to install a wireless camera?
Installing a wireless camera typically doesn’t require any special tools. Most wireless camera kits come with all the necessary mounting brackets, screws, and adhesive tapes you need for installation. However, it’s always a good idea to have a drill, screwdriver, and level handy, just in case.
3. Can I connect multiple wireless cameras to one system?
Yes, you can connect multiple wireless cameras to one system. Many wireless camera systems support the ability to add multiple cameras and view them all from a single control panel or mobile app. Just make sure that your wireless camera system has the capacity to handle the number of cameras you want to connect.
4. How far can a wireless camera transmit its signal?
The transmission range of a wireless camera can vary depending on various factors such as the signal strength, obstacles in the environment, and the specific wireless camera system you are using. However, most wireless cameras have a range of up to a few hundred feet in an open space. If you need to monitor a larger area, you can use range extenders or strategically position the cameras for better coverage.
5. Can I access my wireless camera footage remotely?
Yes, many wireless camera systems offer remote access capabilities. By connecting your wireless camera system to the internet, you can view your camera footage remotely from anywhere using a smartphone, tablet, or computer. This allows you to check on your home or business even when you are away. Just make sure to choose a wireless camera system that offers remote viewing features and follow the necessary setup instructions.