
Are you tired of dealing with messy wiring and complicated installations when it comes to doorbells? Well, we have the perfect solution for you – wireless doorbells! Installing a wireless doorbell is a breeze and can significantly improve your home’s convenience and security. With no wiring required, you can easily place the doorbell in any location you desire, whether it’s by your front door or back gate. In this comprehensive guide, we will walk you through the easy steps of installing a wireless doorbell, ensuring that you can enjoy the benefits of a hassle-free doorbell system in no time. So, let’s dive in and discover how you can easily install a wireless doorbell and elevate your home’s functionality!
Inside This Article
- Prerequisites
- Step 1: Choosing the right wireless doorbell
- Step 2: Preparing the necessary tools
- Step 3: Mounting the doorbell button
- Step 4: Installing the doorbell receiver
- Step 5: Pairing the doorbell button and receiver
- Step 6: Testing the wireless doorbell
- Troubleshooting Common Issues
- Conclusion
- FAQs
Prerequisites
Before you begin installing a wireless doorbell, there are a few essential prerequisites you need to consider. These prerequisites will ensure a smooth and successful installation process. Here’s what you need to know:
1. Verify a compatible doorbell system
Before purchasing a wireless doorbell, make sure that your house is compatible with this type of system. Typically, wireless doorbells work well in most homes, but it’s essential to check for any signal interference that could affect their performance. For example, houses with thick walls or metal frames may have difficulty transmitting signals effectively.
2. Understand the range and transmission frequency
Wireless doorbells have a specific transmission range and frequency. It’s important to evaluate the range required to cover the distance between the doorbell button and the receiver. Consider any obstacles that might hinder the signal, such as walls or other electronic devices. This knowledge will help you choose a wireless doorbell with the appropriate range and transmission frequency for your home.
3. Gather the necessary tools
Installing a wireless doorbell requires a few basic tools. Before you commence the installation process, gather the following tools:
- Screwdriver
- Drill (if required for mounting)
- Pencil or marker
- Tape measure
- Level
- Batteries (if not included with the doorbell)
Having these tools readily available will make the installation process much more convenient and efficient.
4. Read the instruction manual
Every wireless doorbell model has its unique installation instructions. It’s crucial to read and understand the instruction manual that comes with your doorbell. This will provide specific guidelines on how to install and configure the device correctly. Following the manufacturer’s instructions will ensure a hassle-free installation process and prevent any potential damage to the doorbell.
By taking these prerequisites into consideration, you’ll be well-prepared to install your wireless doorbell. Now that you have a clear understanding of what’s required, let’s move on to the step-by-step installation process.
Step 1: Choosing the right wireless doorbell
Choosing the right wireless doorbell is an important first step in the installation process. With a wide range of options available, it’s essential to select a doorbell that meets your specific needs and preferences. Here are some factors to consider:
Range: Determine the distance between your doorbell button and receiver to ensure that the wireless signal can reach the desired location. Take into account any walls or obstructions that may affect the range.
Frequency: Wireless doorbells operate on different frequencies, such as 2.4GHz or 5.8GHz. Check if there are any devices in your home that may interfere with these frequencies, like Wi-Fi routers or baby monitors.
Sound options: Evaluate the sound options available with the wireless doorbell. Some models offer a variety of melodies and volume control, allowing you to customize the doorbell sound to your liking.
Power source: Consider how the wireless doorbell is powered. Some models use batteries, while others may require a power adapter. Decide which option is more convenient for you in terms of maintenance and operation.
Compatibility: If you already have a home automation system in place, check if the wireless doorbell is compatible with it. This ensures seamless integration and allows you to control the doorbell through your existing smart devices.
Design: Lastly, choose a wireless doorbell that matches your home’s aesthetic. Whether you prefer a sleek and modern design or a more traditional look, there are various styles and finishes available to complement your home’s exterior.
By considering these factors, you can find a wireless doorbell that fits your needs and enhances the functionality and convenience of your home.
Step 2: Preparing the necessary tools
Before you begin installing your wireless doorbell, it is essential to gather all the necessary tools. Having the right tools at hand will not only make the installation process smoother but also ensure that you can complete the task correctly. Here are the tools you will need:
- Drill and drill bits: Depending on the surface you will be mounting the doorbell button and receiver, you may need a drill and the appropriate drill bits. This will allow you to create holes for the screws or anchors.
- Screwdriver: A screwdriver is essential for tightening or loosening screws during the installation process. Make sure you have a screwdriver that fits the type of screws included with your wireless doorbell.
- Level: To ensure that your doorbell button and receiver are properly aligned, a level will come in handy. This tool will help you determine if the doorbell is straight and positioned correctly.
- Tape measure: Accurate measurements are necessary when mounting the doorbell button and receiver. A tape measure will allow you to precisely determine the height, distance, or any other measurements required for the installation.
- Pencil or marker: Marking the exact position for the holes is crucial. A pencil or marker will help you make precise marks on the surface where you plan to mount the doorbell button and receiver.
- Batteries: Most wireless doorbells require batteries to power the doorbell button and receiver. Make sure to have the required batteries on hand and ensure they are fully charged or have enough power.
- Screws and anchors: The wireless doorbell package may come with screws and anchors for mounting. If not, make sure to purchase the appropriate size and type of screws and anchors needed for your specific doorbell model and the surface you will be mounting to.
By gathering these tools beforehand, you will avoid unnecessary interruptions and delays during the installation process. Once you have all the tools ready, you can proceed to the next step with confidence.
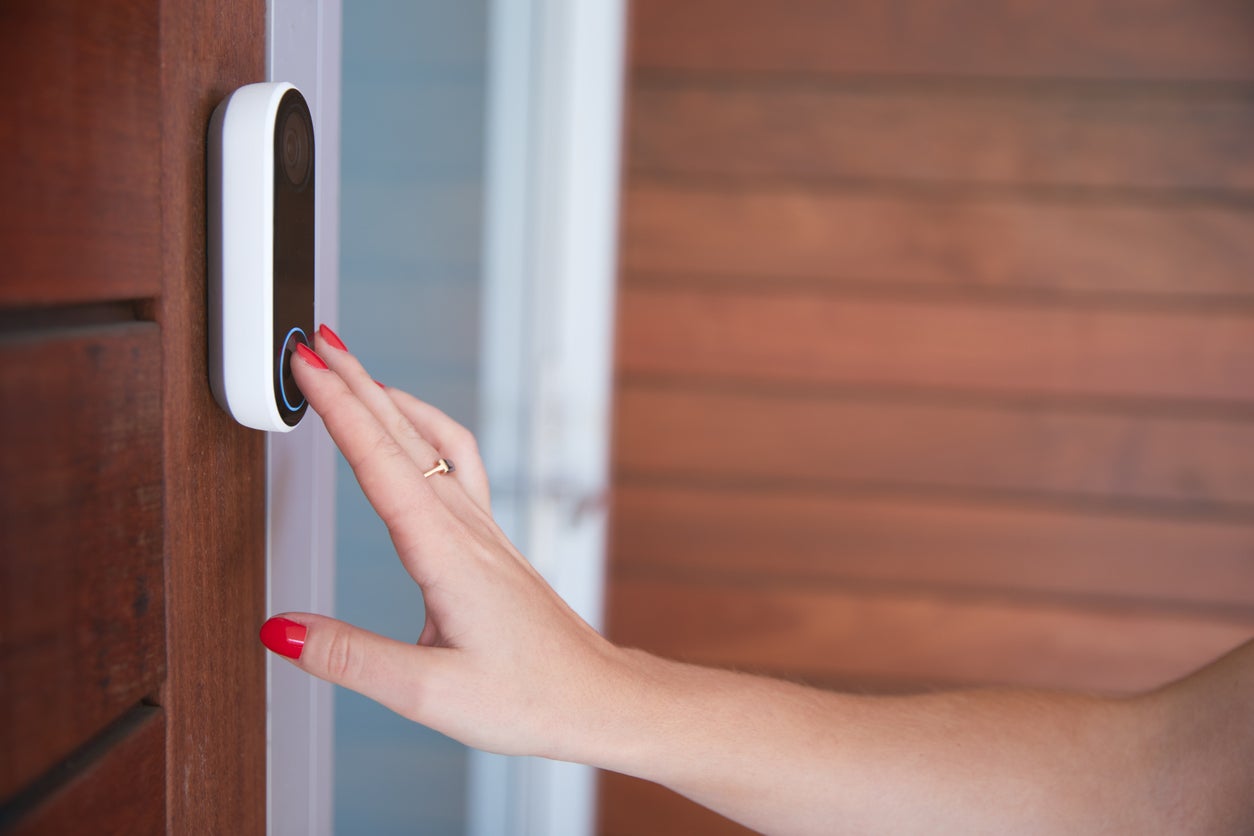
Step 3: Mounting the doorbell button
Now that you’ve chosen the perfect wireless doorbell for your home, it’s time to move on to step 3: mounting the doorbell button. This step is crucial as it determines the accessibility and functionality of your doorbell. Follow these simple instructions to ensure a secure and convenient placement.
Firstly, select an appropriate location for your doorbell button. Consider factors such as visibility, accessibility, and protection from the elements. Ideally, the button should be placed near your front door and within easy reach of visitors.
In most cases, mounting the doorbell button involves attaching it to a wall or the door frame. Ensure that the surface is clean and dry before proceeding. Use a pencil to mark the desired position, and double-check if the button is level.
Next, use a drill to create pilot holes in the marked positions. The size of the holes will depend on the type of screws or anchors provided with your wireless doorbell kit. If necessary, use wall anchors to provide additional stability.
Once the pilot holes are ready, align the doorbell button with the holes and attach it firmly using screws or the provided mounting hardware. Make sure the button is secure and does not wobble. Avoid over-tightening the screw, as it may damage the button or the surface.
If your wireless doorbell offers the option to customize the look of the button, now is the time to do so. Some models come with interchangeable faceplates or decorative covers that can be easily installed to match your personal style or home decor.
Finally, test the doorbell button to ensure it functions properly. Press the button and listen for the chime or check if the connected receiver is receiving the signal. If everything is working correctly, congratulations! You have successfully mounted the doorbell button.
It’s worth noting that if you’re renting or prefer not to drill holes into your walls, there are alternative mounting options available, such as adhesive backing or temporary mounting brackets. These options allow you to easily remove or relocate the doorbell button without leaving any marks or damage.
Remember, the positioning of the doorbell button is essential for its effectiveness. Take some time to consider the best location that suits your needs, and follow the manufacturer’s instructions for proper installation. With the doorbell button securely mounted, you can now move on to the next step in installing your wireless doorbell.
Step 4: Installing the doorbell receiver
Once you have mounted the doorbell button, it’s time to install the doorbell receiver. This is the device that will emit the sound or alert when someone presses the button at your door. Follow these steps to install the receiver:
- Choose a suitable location: Select a location for the receiver where it will be easily audible throughout your home. It can be placed on a table, shelf, or even mounted on a wall. Ideally, it should be located centrally to ensure maximum coverage.
- Prepare the receiver: Unpack the receiver from its packaging and ensure that you have all the necessary components, including the receiver itself, power adapter, and any mounting hardware if applicable.
- Connect the power adapter: Plug the power adapter into an available power outlet. Make sure to position the receiver close enough to the outlet to avoid any strain on the power cord.
- Mount the receiver (if applicable): If the receiver comes with mounting hardware, securely attach it to the desired location using screws or adhesive strips.
- Pair the receiver with the doorbell button: Refer to the manufacturer’s instructions on how to pair the receiver with the doorbell button. This process may involve pressing certain buttons on both devices simultaneously or following a specific sequence of steps.
- Test the receiver: Once the pairing process is complete, test the receiver by pressing the doorbell button. The receiver should emit a sound or alert to indicate that it is functioning correctly.
Installing the doorbell receiver is a crucial step in the setup process, as it allows you to receive notifications when someone is at your door. By following the steps above, you can ensure that your wireless doorbell system is fully functional and ready to use.
Step 5: Pairing the doorbell button and receiver
After successfully mounting the doorbell button and installing the doorbell receiver, the next step is to pair them together. Pairing ensures that the button and receiver are synchronized and can communicate with each other wirelessly.
To begin the pairing process, locate the pairing button or switch on both the doorbell button and the receiver. These buttons are typically small and may be labelled as “pair”, “connect”, or have a specific icon indicating pairing.
First, press and hold the pairing button on the doorbell button for a few seconds until you see an LED light start blinking, indicating that it is in pairing mode. The exact method may vary depending on the model of your wireless doorbell, so refer to the manufacturer’s instructions if necessary.
Next, go to the doorbell receiver and press and hold its pairing button. Again, the LED light should start blinking, indicating that it is also in pairing mode. Keep in mind that the pairing button on the receiver may be located on the back or side, so you might need to remove the receiver from its mount to access the button.
Once both the doorbell button and receiver are in pairing mode, they will search for each other and establish a connection. This process may take a few seconds or up to a minute, depending on the specific wireless doorbell model.
During the pairing process, it’s important to keep the doorbell button and receiver within close proximity to ensure a strong and stable connection. Avoid any obstacles or interference, such as walls or other electronic devices, that may disrupt the pairing process.
Once the pairing is successful, the LED lights on both the doorbell button and receiver will stop blinking and remain solid. This indicates that they are paired and ready to use.
It’s worth noting that some wireless doorbells have advanced pairing features, such as the ability to pair multiple buttons with a single receiver or to assign different chimes for different buttons. Refer to the manufacturer’s instructions for specific details on how to utilize these features.
With the doorbell button and receiver paired, you can now enjoy the convenience of a wireless doorbell system. When someone presses the doorbell button, the receiver will emit a chime or sound, alerting you to the presence of visitors at your door.
Step 6: Testing the wireless doorbell
After successfully completing the installation of your wireless doorbell, it’s time to test it and ensure that it’s working properly. Testing the doorbell will give you peace of mind and assurance that it will function as expected when someone presses the button.
Here are a few simple steps to follow to test your wireless doorbell:
- Make sure that the doorbell button is securely mounted on the desired location near your front door. Check if it is properly aligned and the screws are tightened.
- Double-check the connection between the doorbell button and the receiver. Make sure they are properly paired and connected. If you haven’t paired them yet, refer to the manufacturer’s instructions to pair them correctly.
- Stand at a reasonable distance from the doorbell button. This distance should be within the specified range of your wireless doorbell, usually mentioned in the instruction manual.
- Press the doorbell button firmly to simulate someone ringing the doorbell. You should hear a clear and audible sound coming from the receiver. The sound could be in the form of a chime or a melody, depending on the model you have chosen.
- If you hear the sound, congratulations! Your wireless doorbell is working correctly. You can now proceed to adjust the volume or choose different chime options as per your preferences.
- If you do not hear any sound or the sound is weak, try checking the batteries in both the doorbell button and the receiver. Ensure they are properly inserted and have enough power. Replace the batteries if necessary.
- If the issue persists, consult the troubleshooting section in the user manual provided by the manufacturer. It may offer solutions to common problems or provide contact information for customer support.
- Once you are satisfied that your wireless doorbell is functioning properly, you can test it a few more times to ensure consistent performance.
Remember, testing your wireless doorbell is essential to verify its functionality and troubleshoot any potential issues before relying on it for your home security and convenience. By following these simple steps, you can ensure a seamless experience with your newly installed wireless doorbell.
Troubleshooting Common Issues
While installing a wireless doorbell, you may encounter some common issues that can be easily resolved. Here are some troubleshooting tips to help you overcome these challenges:
1. Doorbell not working: If your wireless doorbell is not working at all, first check the batteries in both the doorbell button and receiver. Ensure that they are properly inserted and functioning. If the batteries are fine, check if the doorbell button and receiver are within the recommended range. Move them closer together to see if that resolves the issue.
2. Poor signal strength: If you notice that the signal strength of your wireless doorbell is weak or intermittent, it could be due to interference from other wireless devices or the distance between the doorbell button and receiver. Try moving the receiver to a different location, away from other electronics, and closer to the doorbell button.
3. False triggers: If your wireless doorbell keeps ringing without anyone pressing the button, it could be caused by interference or an overly sensitive motion sensor. Check if there are any nearby wireless devices or appliances that could be triggering the doorbell. Adjust the motion sensor sensitivity if possible.
4. Unresponsive button: If the doorbell button is not responding when pressed, try replacing the batteries. If that doesn’t work, check if the button is securely mounted and if the wiring connections are intact. Clean any dirt or debris that may be obstructing the button’s functionality.
5. Incompatibility issues: If you purchased a new wireless doorbell and it is not working with your existing receiver or vice versa, it is likely a compatibility issue. Check the specifications of both the doorbell button and receiver to ensure they are compatible. Consider purchasing a compatible set if necessary.
6. Range issues: If you notice that the range of your wireless doorbell is not sufficient to reach all areas of your home, you can try using a range extender or installing additional receivers in strategic locations. This will help enhance the coverage and ensure that you can hear the doorbell from anywhere in your house.
By following these troubleshooting tips, you can quickly identify and resolve common issues that may arise during the installation and use of a wireless doorbell. Remember to consult the manufacturer’s instructions for specific troubleshooting instructions related to your particular doorbell model.
Conclusion
Installing a wireless doorbell is a simple and convenient way to upgrade your home’s security and convenience. By following these step-by-step instructions, you can easily install a wireless doorbell system that will provide you with peace of mind and added functionality. Whether you’re looking to replace an old wired doorbell or want to add a doorbell to a location where wiring is not possible, a wireless doorbell is the perfect solution.
With a wide range of options available on the market, you can choose a wireless doorbell that suits your style and budget. From basic models with simple chimes to advanced systems with video cameras and smartphone integration, there is a wireless doorbell out there for everyone.
So, say goodbye to the limitations of traditional wired doorbells and embrace the flexibility of a wireless doorbell system. With its easy installation, enhanced features, and hassle-free operation, a wireless doorbell will undoubtedly be a valuable addition to your home.
FAQs
**Q:** How do I install a wireless doorbell?
**A:** Installing a wireless doorbell is a simple and straightforward process. First, ensure that you have all the necessary components, including the doorbell button, chime unit, batteries, and mounting hardware. Next, identify the suitable location for the button and chime unit. Generally, the button is installed near the front door, while the chime unit can be placed anywhere within the range of the wireless signal. Once the locations are determined, follow the manufacturer’s instructions to install the button and chime unit securely. Finally, test the doorbell to ensure it is functioning properly.
**Q:** Can I install a wireless doorbell myself, or do I need professional assistance?
**A:** Most wireless doorbells are designed for easy DIY installation, and you should be able to install one yourself without professional assistance. The installation process typically involves simple steps and does not require any special tools. However, it is advisable to carefully read the manufacturer’s instructions and follow the recommended installation guidelines to ensure a successful installation. If you encounter any difficulties or have concerns, it’s always a good idea to consult a professional.
**Q:** What should I consider when choosing a wireless doorbell?
**A:** When choosing a wireless doorbell, there are a few factors to consider. First, decide whether you prefer a battery-operated or plug-in model. Battery-operated doorbells offer more flexibility in terms of placement but require periodic battery replacements. Plug-in doorbells, on the other hand, do not require batteries but need access to a power outlet. Additionally, consider the range of the doorbell to ensure it covers the desired distance between the button and chime unit. Other factors to consider include the sound options, volume control, and any additional features like multiple chime units or smartphone connectivity.
**Q:** What is the range of a wireless doorbell?
**A:** The range of a wireless doorbell can vary depending on the specific model and environmental factors. In general, wireless doorbells have a range of around 100 to 300 feet. However, walls, electrical interference, and other obstacles can reduce the effective range. It’s important to consider the layout of your home and any potential obstructions when choosing a wireless doorbell to ensure reliable performance.
**Q:** Can I use a wireless doorbell if I have a large house or multiple floors?
**A:** Yes, wireless doorbells can be used in large houses or homes with multiple floors. To ensure coverage throughout your entire home, consider purchasing a wireless doorbell system that includes multiple chime units. You can strategically place these units on different floors or areas of your house to ensure that you can hear the doorbell from anywhere. Alternatively, you can opt for a wireless doorbell with adjustable volume levels to ensure it can be heard even in larger spaces.