
Welcome to this comprehensive guide on how to set up the Arlo Wireless Doorbell! If you’re looking for a convenient and user-friendly solution to enhance the security of your home or office, the Arlo Wireless Doorbell is a fantastic choice. This cutting-edge device combines the functionality of a traditional doorbell with the added benefits of wireless connectivity and advanced features. With easy installation and seamless integration with the Arlo app, you’ll have peace of mind knowing you can monitor your front door from anywhere. In this article, we will walk you through the step-by-step process of setting up your Arlo Wireless Doorbell, from unboxing the device to connecting it to your smartphone. Get ready to take control of your home’s security with this simple yet powerful solution!
Inside This Article
- Step 1: Unboxing and checking the contents
- Step 2: Connecting the base station
- Step 3: Installing the doorbell mount
- Step 4: Pairing the doorbell to the base station
- Step 5: Configuring doorbell settings
- Step 6: Testing the doorbell functionality
- Troubleshooting common issues
- Conclusion
- FAQs
Step 1: Unboxing and checking the contents
Once you have purchased your Arlo wireless doorbell, the first step is to unbox and check the contents. This will ensure that you have received all the necessary components and have everything you need to proceed with the installation.
Start by opening the box and removing the doorbell and its accessories. These accessories usually include a base station, mounting bracket, screws, and any additional hardware required for the installation.
Next, carefully inspect each item to ensure there are no visible signs of damage. Check for any scratches, dents, or missing parts. It’s essential to do this before proceeding with the installation to avoid any complications later on.
It is also a good idea to read the user manual or installation guide provided with the Arlo wireless doorbell. This will give you a better understanding of the components and how they should be assembled.
Once you have examined and familiarized yourself with the contents, you are ready to move on to the next step of the installation process.
Step 2: Connecting the base station
After unboxing your Arlo wireless doorbell, the next step is to connect the base station. The base station acts as a central hub for your doorbell, allowing it to communicate with other devices and enabling you to access its features remotely.
To begin, find a suitable location for the base station near your router. This ensures a strong and stable internet connection for optimal performance. Plug in the power adapter provided and connect the base station to your router using an Ethernet cable. Once connected, power on the base station by pressing the power button.
Wait for the base station to initialize. This process may take a few minutes. Once the power light turns solid green or flashes blue, you can move on to the next step.
Now, it’s time to connect the base station to your Arlo account. Open the Arlo mobile app or log in to the Arlo web portal from your computer. Follow the prompts to create an account or sign in if you already have one. Once logged in, select “Add Device” or a similar option to initiate the device pairing process.
In the pairing process, you may be prompted to scan a QR code on the base station or enter a unique device code manually. Follow the on-screen instructions to complete the pairing. Once the pairing is successful, you will see a confirmation message in the app or on the web portal.
Once connected, you can proceed to set up additional settings and customize your Arlo wireless doorbell further. Make sure to explore the various options available in the app or web portal to configure features such as motion sensitivity, notification preferences, and more.
That’s it! You have now successfully connected the base station of your Arlo wireless doorbell. This step is crucial as it establishes the foundation for your doorbell’s functionality. Now you can move on to the next step and install the doorbell mount.
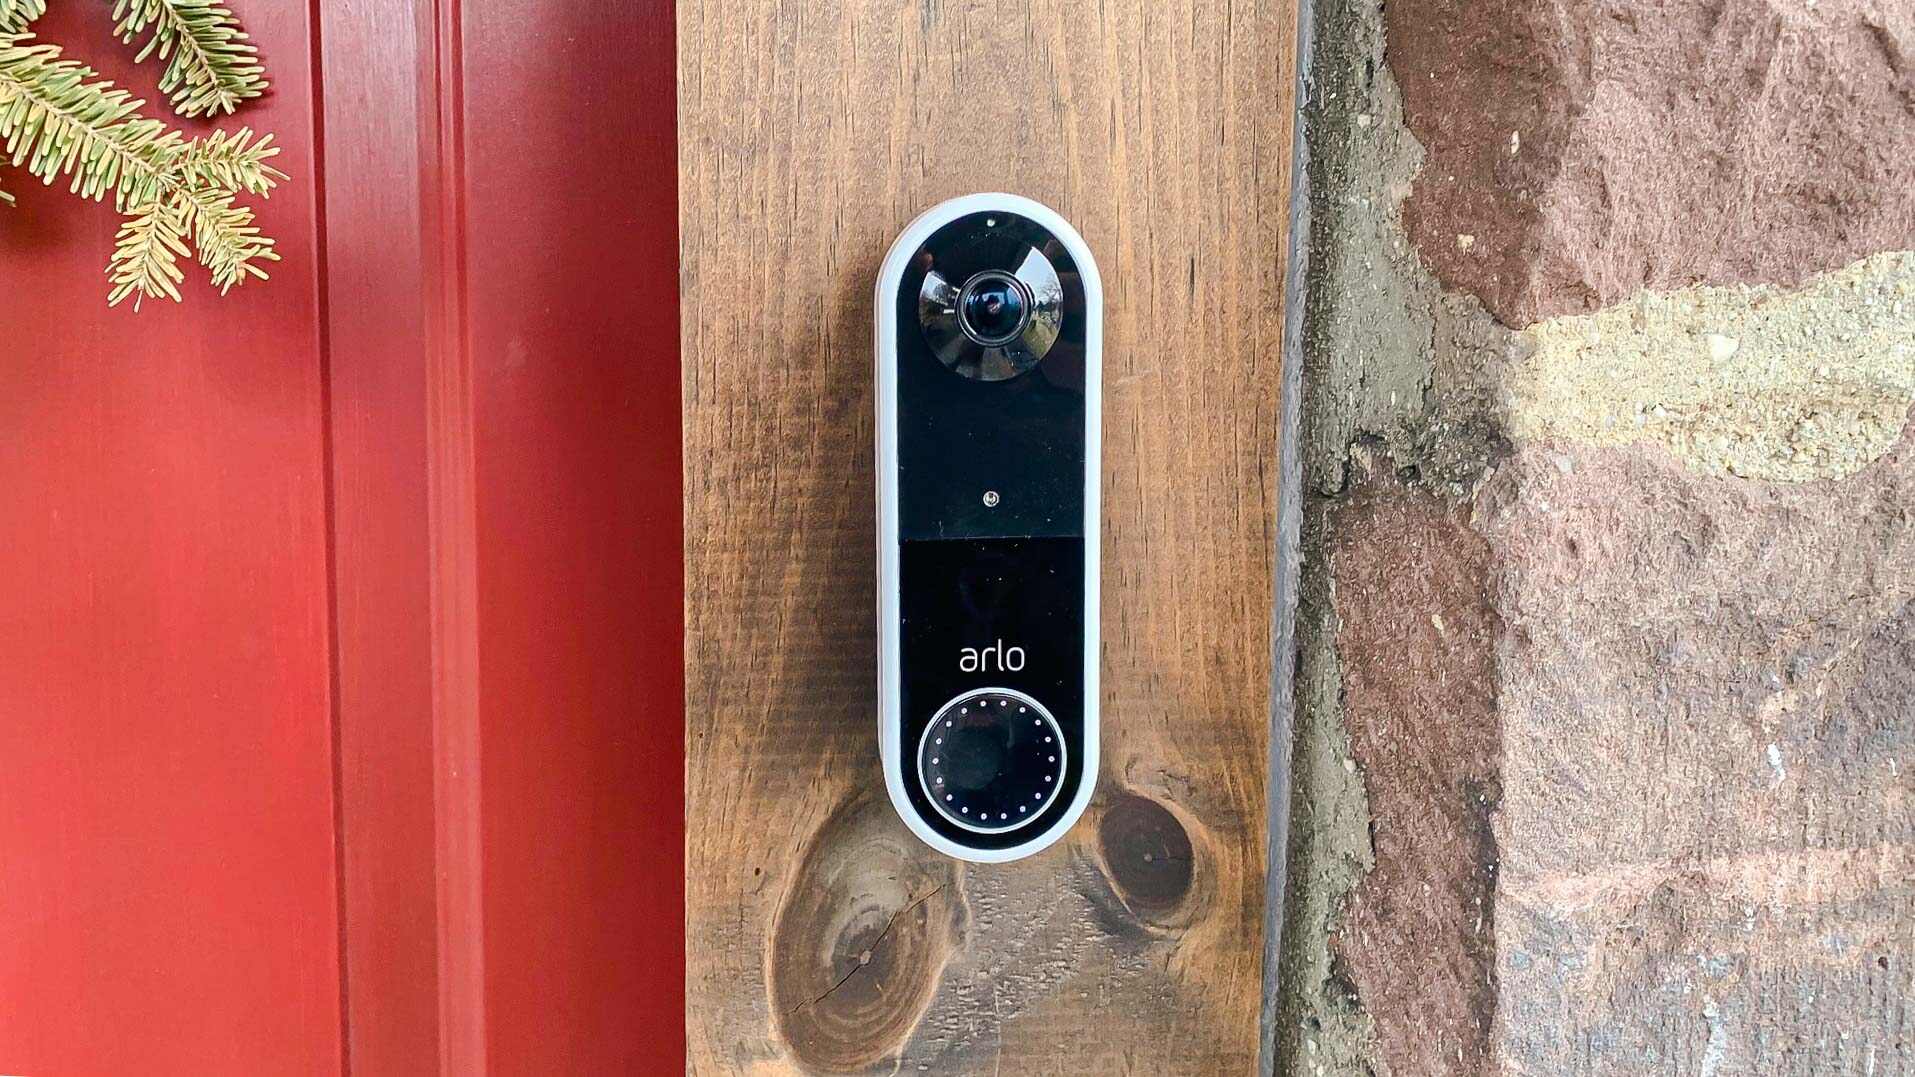
Step 3: Installing the doorbell mount
Once you have unboxed and connected the base station of your Arlo wireless doorbell, the next step is to install the doorbell mount. The doorbell mount acts as a secure foundation for your doorbell, ensuring it stays in place and captures clear video footage.
Here’s a step-by-step guide to help you install the doorbell mount:
- Choose the mounting location: First, select a suitable location near your door where you want to install the doorbell. Make sure the mounting surface is flat and solid, such as a wall or door frame.
- Prepare the mounting surface: Clean the chosen area to remove any dust, dirt, or debris. This will ensure proper adhesion of the mount to the surface.
- Position the doorbell mount: Hold the mount against the mounting surface and align the screw holes or adhesive strips with the desired position. Use a level to ensure the mount is straight and level.
- Mark the mounting holes: Once the mount is correctly positioned, mark the locations of the screw holes or adhesive strips on the mounting surface. This will serve as a guide for drilling or attaching the mount.
- Drill or attach the mount: If your doorbell mount requires screws, use an appropriate drill bit to create pilot holes at the marked locations. Then, secure the mount using the provided screws. If adhesive strips are included, peel off the backing and press the mount firmly against the surface.
- Finalize the installation: After attaching the doorbell mount, double-check its stability and alignment. Make sure it is securely fastened to the wall or door frame.
Once you have completed these steps, the doorbell mount is successfully installed and ready for the next stage: pairing the doorbell to the base station.
Step 4: Pairing the doorbell to the base station
Once you have successfully installed the doorbell mount in the desired location, it’s time to pair the Arlo wireless doorbell to the base station. The pairing process is essential for the doorbell to communicate with the base station and ensure proper functionality.
To begin the pairing process, make sure your Arlo base station is powered on and connected to your Wi-Fi network. Then, follow these simple steps:
1. Open the Arlo app on your smartphone or tablet and navigate to the Devices section.
2. Tap on the “+” button or the “Add Device” option to initiate the pairing process.
3. Select “Doorbell” from the list of available devices. If you don’t see the doorbell option, make sure your base station firmware is up to date.
4. The app will guide you through the pairing process. Press the pairing button located on the back of the doorbell to put it into pairing mode. You may hear a chime or see an LED light flashing to indicate that the doorbell is in pairing mode.
5. Once the doorbell is in pairing mode, the app will search for nearby devices. It may take a few moments to detect the doorbell.
6. When the app successfully discovers the doorbell, select it from the list of available devices.
7. Follow the on-screen instructions to complete the pairing process. This may include selecting your Wi-Fi network and entering your network password.
8. After successfully pairing the doorbell to the base station, you can customize the doorbell settings within the Arlo app. This includes adjusting motion detection sensitivity, setting up notifications, and configuring other features specific to the doorbell.
9. Once you have finished configuring the settings, the doorbell is ready to use. You can now answer visitors remotely, receive notifications when someone rings the doorbell, and even communicate with them through the Arlo app.
Pairing the Arlo wireless doorbell to the base station is a straightforward process, and it ensures that the doorbell functions seamlessly with your existing Arlo security system. Following these steps will help you enjoy all the convenience and security features that the Arlo doorbell has to offer.
Step 5: Configuring doorbell settings
Once you have successfully paired your Arlo wireless doorbell with the base station, it’s time to configure the settings to meet your specific needs and preferences. Follow these step-by-step instructions to get started:
1. Access the Arlo app: Open the Arlo app on your smartphone or tablet. If you haven’t already installed it, you can find it in the App Store or Google Play Store.
2. Log in to your Arlo account: Sign in to your Arlo account using your registered email address and password. If you’re a new user, you’ll need to create an account before proceeding.
3. Select the doorbell: From the Arlo app’s home screen, locate and tap on the doorbell device that you have paired with the base station.
4. Adjust motion detection settings: Fine-tune the motion detection sensitivity and customize the motion detection zones according to your preferences. This ensures that you receive alerts for relevant events and minimize false alarms.
5. Set up notifications: Choose how you want to be notified when someone presses the doorbell or motion is detected. You can opt for push notifications on your mobile device, email alerts, or both.
6. Enable video recording: Decide whether you want the doorbell to start recording automatically when motion is detected or when the doorbell button is pressed. You can also set the duration of the recording.
7. Adjust audio settings: Customize the volume of the doorbell chime sound and adjust the two-way audio settings for optimal communication with visitors at your door.
8. Explore additional settings: Take a look at other settings available in the Arlo app, such as video quality, night vision, and advanced features like package detection and smart alerts.
9. Save your configuration: Once you have made all the desired changes to the doorbell settings, don’t forget to save your configuration. This ensures that your preferences are applied and stored for future use.
By following these steps, you’ll be able to customize the settings of your Arlo wireless doorbell to suit your specific needs and create an enhanced home security experience.
Step 6: Testing the doorbell functionality
After successfully completing the previous steps in setting up your Arlo wireless doorbell, it’s time to assess its functionality and ensure everything is working as expected. Testing the doorbell will give you peace of mind, knowing that you have successfully installed and configured it.
Here are the essential tests you should perform to ensure the doorbell is functioning correctly:
- Ring the doorbell: Press the doorbell button to check if it triggers the chime or smartphone notification. This test ensures that the doorbell is communicating with the base station and sending the signal for incoming visitors.
- Check the audio and video: Once the doorbell is rung, verify if you can hear the audio and see the live video feed on your smartphone or Arlo app. This confirms that the doorbell camera and microphone are functioning correctly, providing you with a clear view and two-way communication with your visitors.
- Test the motion detection: Walk in front of the doorbell to test the motion detection feature. Verify if the doorbell captures the motion, triggers a recording, and sends you a notification. This test ensures that the motion sensors are working correctly, allowing you to stay informed about any activity near your door.
- Review the recorded clips: Access the Arlo app or web portal to review the recorded video clips triggered by the doorbell’s motion detection or when someone rings the doorbell. Make sure you can easily locate, play, and manage these clips, as well as share them if needed. This examination confirms that the doorbell is recording and storing relevant footage reliably.
- Adjust settings as needed: While testing the doorbell, you may identify certain preferences or adjustments you’d like to make. Take the time to explore the doorbell settings and customize them according to your needs. This includes adjusting the camera resolution, audio volume, notification preferences, and configuring any additional features that the doorbell offers, such as scheduling or geofencing.
By performing these tests, you ensure that your Arlo wireless doorbell is fully operational and meets your expectations. Address any issues or concerns you encounter during the testing process to maximize the functionality and benefits of your doorbell. Remember, regular testing and maintenance of your device will help maintain its performance over time.
Troubleshooting common issues
While setting up your Arlo Wireless Doorbell, you may encounter a few common issues. Don’t worry, we’ve got you covered. Here are some troubleshooting tips to help you overcome any challenges:
- No video or audio feed: If you’re not getting a video or audio feed from your Arlo Wireless Doorbell, make sure that it is properly synced with the base station. Check the signal strength between the doorbell and the base station and ensure that they are within range of each other. You may also want to check your internet connection and ensure that it is stable.
- Poor video quality: If you’re experiencing poor video quality, it could be due to a weak Wi-Fi signal or interference. Make sure that your base station is positioned in an optimal location, away from obstructions and other electronic devices that may cause interference. You may also want to consider upgrading your internet plan to improve video streaming quality.
- Inconsistent motion detection: If the Arlo Wireless Doorbell is not consistently detecting motion, check the positioning and angle of the doorbell. Make sure it is installed at the appropriate height and angle to capture motion effectively. You can also adjust the motion sensitivity settings in the Arlo app to optimize detection.
- Notifications not received: If you’re not receiving notifications on your smartphone when someone rings the doorbell, make sure that the Arlo app notifications are enabled. Go to your device’s settings and ensure that the Arlo app has the necessary permissions to send notifications. Additionally, check that your smartphone is connected to the internet and that the Arlo app is running in the background.
- Battery draining quickly: If you’re finding that the battery of your Arlo Wireless Doorbell is draining quickly, check if the doorbell is constantly triggering motion events or if the live view is frequently accessed. Adjust the motion sensitivity settings to reduce unnecessary notifications and conserve battery life. You can also consider using the Arlo Doorbell Charging Cable (sold separately) for continuous power supply.
- Connection issues: If you’re experiencing connection issues between the Arlo Wireless Doorbell and the base station, try restarting both devices. Power the devices off, wait for a few seconds, and then power them back on. This often resolves connectivity issues. If the problem persists, you may need to check your network settings or contact Arlo customer support for further assistance.
Remember, troubleshooting is a normal part of the setup process, and with these tips, you’ll be able to overcome any common issues that may arise with your Arlo Wireless Doorbell.
Conclusion
Setting up the Arlo Wireless Doorbell is a breeze, and it offers a plethora of convenient features that enhance the security of your home. With its sleek design and wireless technology, this doorbell provides an easy way to monitor your front door from anywhere using your smartphone.
The installation process is simple, and the Arlo app guides you step-by-step to ensure a seamless setup. Once installed, you can enjoy the benefits of two-way audio communication, advanced motion detection, and customizable alerts to suit your needs.
The Arlo Wireless Doorbell is a smart addition to any home security system, providing an extra layer of protection and peace of mind. Whether you’re at home or away, you can easily manage and monitor your doorbell activity, ensuring that you never miss a visitor or package delivery.
With its user-friendly interface and advanced features, the Arlo Wireless Doorbell is the perfect solution for anyone looking to enhance the security and convenience of their home. Get yours today and experience the benefits of the Arlo Wireless Doorbell for yourself!
FAQs
**Q: What is the Arlo Wireless Doorbell?**
The Arlo Wireless Doorbell is a smart and convenient solution that allows you to monitor and answer your door remotely. It provides enhanced security and convenience by allowing you to see, hear, and speak to anyone at your front door using your smartphone or other compatible devices.
**Q: How does the Arlo Wireless Doorbell work?**
The Arlo Wireless Doorbell connects to your existing doorbell wiring, allowing you to receive instant notifications when someone rings the doorbell. You can then use the Arlo app on your smartphone to see and interact with the person at your door through live video and two-way audio.
**Q: Does the Arlo Wireless Doorbell require a subscription?**
No, the Arlo Wireless Doorbell does not require a subscription to function. However, if you want to take advantage of advanced features like cloud storage for recorded videos and AI-based person detection, you may choose to subscribe to an Arlo Smart plan for an additional fee.
**Q: Can I integrate the Arlo Wireless Doorbell with other smart home devices?**
Yes, the Arlo Wireless Doorbell is compatible with a wide range of popular smart home platforms, including Amazon Alexa, Google Assistant, and IFTTT. This allows you to integrate it seamlessly with your existing smart home ecosystem and control it using voice commands or automation routines.
**Q: How do I install the Arlo Wireless Doorbell?**
Installing the Arlo Wireless Doorbell is a straightforward process. Simply follow the detailed instructions provided in the user manual or the Arlo app. It typically involves removing your existing doorbell, connecting the doorbell wires to the Arlo Wireless Doorbell, and mounting the device in the desired location. It is recommended to consult a professional if you are not comfortable performing the installation yourself.