
Are you experiencing issues with your Shure wireless microphone? Sometimes, a simple reset can help resolve the problem. Resetting your Shure wireless mic is a quick and easy troubleshooting step that can be done in just a few minutes. Whether you are dealing with connectivity issues, audio dropouts, or other performance problems, a reset can often do the trick. In this article, we will guide you through the process of resetting your Shure wireless microphone, providing you with step-by-step instructions and helpful tips along the way. So, if you’re ready to get your Shure microphone back in working order, let’s dive in and learn how to reset it!
Inside This Article
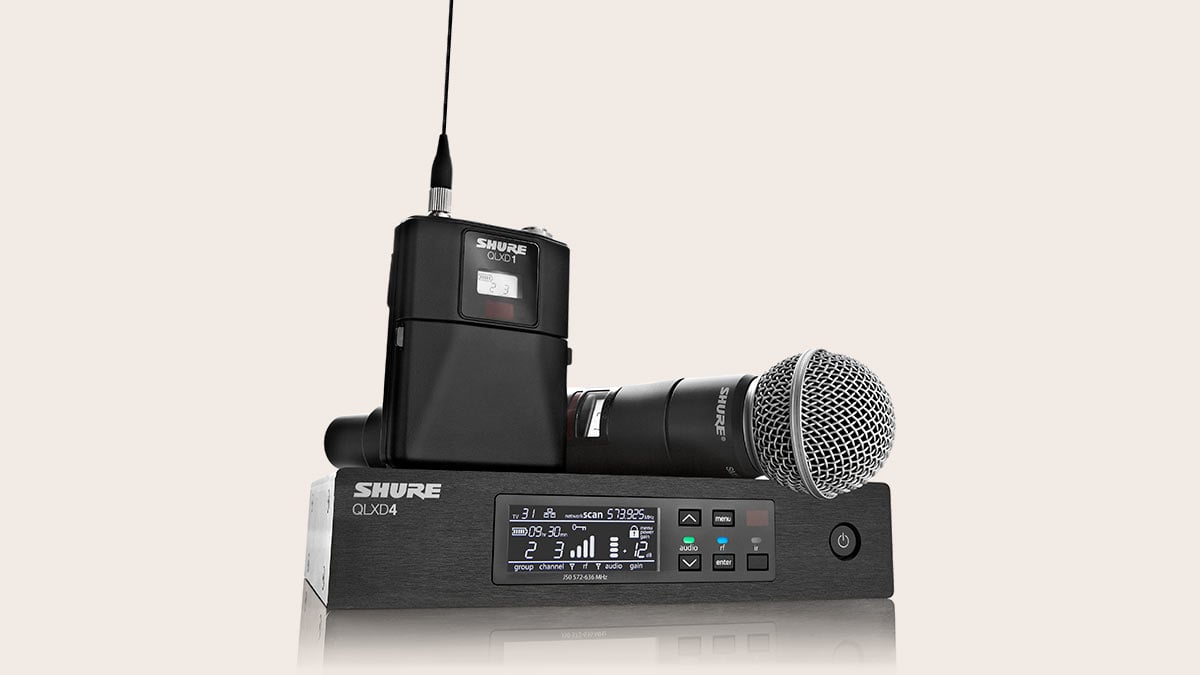
- Point 1: Understanding the Shure Wireless Mic System
- Point 2: Reasons for Resetting the Shure Wireless Mic
- Point 3: Step-by-Step Guide to Resetting the Shure Wireless Mic
- Point 4: Troubleshooting Common Issues After Resetting
- Conclusion
- FAQs
Point 1: Understanding the Shure Wireless Mic System
The Shure Wireless Mic System is a revolutionary audio solution that allows performers, speakers, and presenters to move freely on stage or in a venue without the constraints of cables. It offers unparalleled flexibility, ease of use, and superior audio quality, making it a top choice for professionals in the entertainment industry.
At the heart of the Shure Wireless Mic System is the transmitter, which converts the audio signal from the microphone into a wireless signal that can be transmitted to the receiver. The receiver, on the other hand, captures the wireless signal and converts it back into an audio signal that can be connected to a sound system or mixer.
The Shure Wireless Mic System operates on various frequency ranges, ensuring optimal performance and minimizing interference from other wireless devices. It utilizes advanced technologies such as frequency agility, diversity reception, and automatic frequency selection to provide a reliable and uninterrupted audio transmission.
Shure offers a wide range of wireless microphones to cater to different needs and applications. Each model comes with its unique features, such as interchangeable microphone cartridges, adjustable transmitter power levels, and intuitive controls, allowing users to customize their audio setup according to their specific requirements.
Moreover, the Shure Wireless Mic System prioritizes audio clarity and reliability. It incorporates high-quality microphone capsules, sophisticated antenna systems, and robust construction to deliver crystal-clear sound reproduction and withstand the rigors of professional use.
Whether you are a musician performing on stage, a presenter delivering a keynote speech, or a fitness instructor conducting classes, the Shure Wireless Mic System provides you with the freedom to engage with your audience and deliver a captivating performance without being tethered to a microphone stand or limited by cables.
Point 2: Reasons for Resetting the Shure Wireless Mic
Resetting the Shure Wireless Mic may be necessary for various reasons. Here are the most common ones:
1. Performance Issues: If you’re experiencing dropouts, interference, or poor signal quality with your Shure Wireless Mic, a reset can often resolve these issues. Resetting the mic allows it to recalibrate and establish a fresh connection with its base station or receiver.
2. Configuration Changes: If you have made changes to the settings of your Shure Wireless Mic and they are not working as intended, a reset can revert the mic to its default settings. This can be helpful if you’re unsure which settings may be causing the issue or if you want to start fresh with the original configurations.
3. Connectivity Problems: In some cases, the Shure Wireless Mic may fail to connect to its base station or receiver due to communication errors or firmware glitches. Resetting the mic can often reestablish the connection and resolve any connectivity problems.
4. Firmware Updates: When updating the firmware of the Shure Wireless Mic, a reset may be required to ensure that the new software is properly installed and functioning correctly. Resetting the mic after a firmware update helps to optimize its performance and compatibility with other devices.
5. Troubleshooting: Resetting the Shure Wireless Mic is often a recommended troubleshooting step when encountering persistent issues that cannot be resolved through other means. It can help eliminate any temporary glitches or software conflicts that might be causing the problem.
Whether you’re dealing with performance issues, configuration changes, connectivity problems, firmware updates, or simply troubleshooting, resetting the Shure Wireless Mic can be a useful solution to get your mic back on track.
Point 3: Step-by-Step Guide to Resetting the Shure Wireless Mic
Resetting your Shure Wireless Mic can help resolve various issues such as audio interference, connectivity problems, or configuration errors. Follow these steps to reset your Shure Wireless Mic:
Step 1: Start by locating the power switch on your Shure Wireless Mic. It is usually located either on the microphone itself or on the transmitter.
Step 2: Once you have found the power switch, turn off the Shure Wireless Mic by sliding or pressing the switch to the off position.
Step 3: Next, locate the reset button on the microphone or transmitter. The reset button is typically a small, recessed button that may require a paperclip or a small tool to press.
Step 4: With the power off, press and hold the reset button for about 10-15 seconds. This will initiate the reset process for the Shure Wireless Mic.
Step 5: After holding the reset button, release it and wait for a few seconds. This will allow the Shure Wireless Mic to complete the reset process.
Step 6: Finally, turn the power switch back on for your Shure Wireless Mic. Wait for a few seconds, and the device should be reset and ready to use.
It is important to note that resetting your Shure Wireless Mic will restore the device to its default settings. This means that any customized configurations or preferences you have set up will be lost. Make sure to take note of your previous settings if you wish to restore them later.
If you encounter any issues during the reset process or if the problems persist after resetting, you may need to contact Shure support for further assistance.
Point 4: Troubleshooting Common Issues After Resetting
After resetting your Shure wireless mic, it’s possible that you may encounter some common issues. Don’t worry though, as these issues can usually be resolved with a few troubleshooting steps. Here’s a list of some common problems you may experience and their solutions:
1. No sound: If you’re not getting any sound from your Shure wireless mic after resetting, the first thing to check is the mute button. Make sure it’s not turned on. If the mute button is off and you’re still not hearing any sound, try adjusting the volume control on the mic receiver. Also, ensure that your sound system is properly connected and set up.
2. Interference: Sometimes, after resetting, you may experience interference or static in the audio. This can be caused by various factors such as other electronic devices nearby, crowded radio frequencies, or distance from the receiver. To fix this issue, try adjusting the positioning of your wireless mic or move away from any potential sources of interference. You can also change the frequency settings on both the transmitter and receiver to find a clearer channel.
3. Poor signal range: If you notice that the signal range of your Shure wireless mic has reduced after resetting, it could be due to a weak battery or interference. Swap out the batteries with fresh ones and ensure that the transmitter and receiver are within a reasonable distance from each other. You can also try repositioning the antennas for better signal reception.
4. Audio dropouts: Another common issue that may occur after resetting is audio dropouts or intermittent signal loss. This can be caused by low battery power, weak signal strength, or obstacles blocking the signal path. To resolve this, replace the batteries with new ones, ensure a clear line of sight between the transmitter and receiver, and minimize any obstructions.
5. Connection issues: In some cases, after a reset, you may face difficulties connecting the wireless mic to the receiver or other devices. Double-check that all cables are properly connected and securely in place. If you’re using multiple wireless mics simultaneously, ensure that each one is set to the correct channel and frequency.
By following these troubleshooting steps, you should be able to overcome most common issues that can occur after resetting your Shure wireless mic. Remember to consult the user manual or reach out to Shure customer support if you encounter any unresolved problems.
Conclusion
In conclusion, knowing how to reset your Shure wireless microphone is an essential skill for any user. Whether you encounter technical issues or want to start fresh with your device, performing a reset can help resolve many problems. By following the steps outlined in this article, you can easily reset your Shure wireless mic and get it back to optimal performance.
Remember to consult the user manual or Shure’s official website for specific instructions related to your model. Additionally, be cautious when performing a reset, as it will erase any saved settings or configurations. Always back up any important data before proceeding with a reset.
By familiarizing yourself with the reset process, you can ensure that your Shure wireless microphone continues to provide you with high-quality audio and reliable performance for all your professional or personal needs.
FAQs
Q: How do I reset my Shure wireless mic?
A: To reset your Shure wireless mic, follow the steps below:
1. Turn off the microphone and remove the batteries.
2. Locate the reset button on the microphone receiver, typically found on the back or bottom of the device.
3. Use a small pointed object, such as a paperclip, to press and hold the reset button for about 10 seconds.
4. Release the reset button and reinsert the batteries into the microphone.
5. Turn on the microphone and it should be reset to its factory settings.
Q: Do I need to reset my Shure wireless mic?
A: Resetting your Shure wireless mic can be useful in case you encounter issues such as connectivity problems, audio distortion, or if you’re preparing to sell or transfer the device to someone else. Resetting it to its factory settings can help resolve many common issues.
Q: Will resetting my Shure wireless mic delete all my settings?
A: Yes, resetting your Shure wireless mic will remove all custom settings and restore it to its original factory settings. Make sure to write down any important settings or configurations before performing a reset.
Q: Can I reset my Shure wireless mic without removing the batteries?
A: In most cases, resetting a Shure wireless mic requires removing the batteries from both the microphone and the receiver. This process ensures a complete power cycle, helping to clear any temporary issues or conflicts with the device’s settings.
Q: Is there a specific time duration for holding the reset button?
A: Holding the reset button on your Shure wireless mic for about 10 seconds is typically sufficient to perform a reset. However, it’s always a good idea to consult the user manual or refer to Shure’s official documentation for the specific instructions related to your model of wireless mic.