
Setting up a printer through a wireless router is a convenient and efficient way to print without the need for cables. With the advancement in technology, wireless printing has become a popular choice for home and office use. It allows you to print from anywhere within the range of your wireless network, eliminating the hassle of being physically connected to the printer. In this article, we will guide you through the step-by-step process of setting up a printer through a wireless router. Whether you are a tech-savvy individual or someone new to the world of wireless printing, this guide will help you get your printer up and running in no time. So, let’s dive in and explore the simple and straightforward steps to connect your printer to a wireless router.
Inside This Article
- Step 1: Check Compatibility
- Step 2: Connect Printer to Wireless Router
- Step 3: Install Printer Drivers
- Step 4: Set Up Wireless Printing
- Troubleshooting Tips
- Conclusion
- FAQs
Step 1: Check Compatibility
Before setting up your printer through a wireless router, it’s essential to ensure that your printer is compatible with wireless printing. Not all printers have built-in wireless functionality, so it’s important to verify if your printer model supports wireless connectivity.
To check compatibility, refer to the user manual or visit the manufacturer’s website for your printer’s specifications. Look for indications of wireless connectivity, such as Wi-Fi capabilities or support for mobile printing apps.
If your printer doesn’t support wireless printing, there’s still a possibility to make it work with a wireless router, but it may require additional hardware or alternative setup methods. In such cases, it’s recommended to consult the printer manufacturer or a technical expert for further assistance.
Keep in mind that not all wireless routers are compatible with every printer model. While most modern printers are designed to work with standard wireless routers, there may be compatibility issues with older routers or specific printer brands.
It’s also worth noting that the compatibility of your printer with different operating systems should be considered. Ensure that your printer is compatible with your computer’s operating system, such as Windows, macOS, or Linux, before proceeding with the wireless setup.
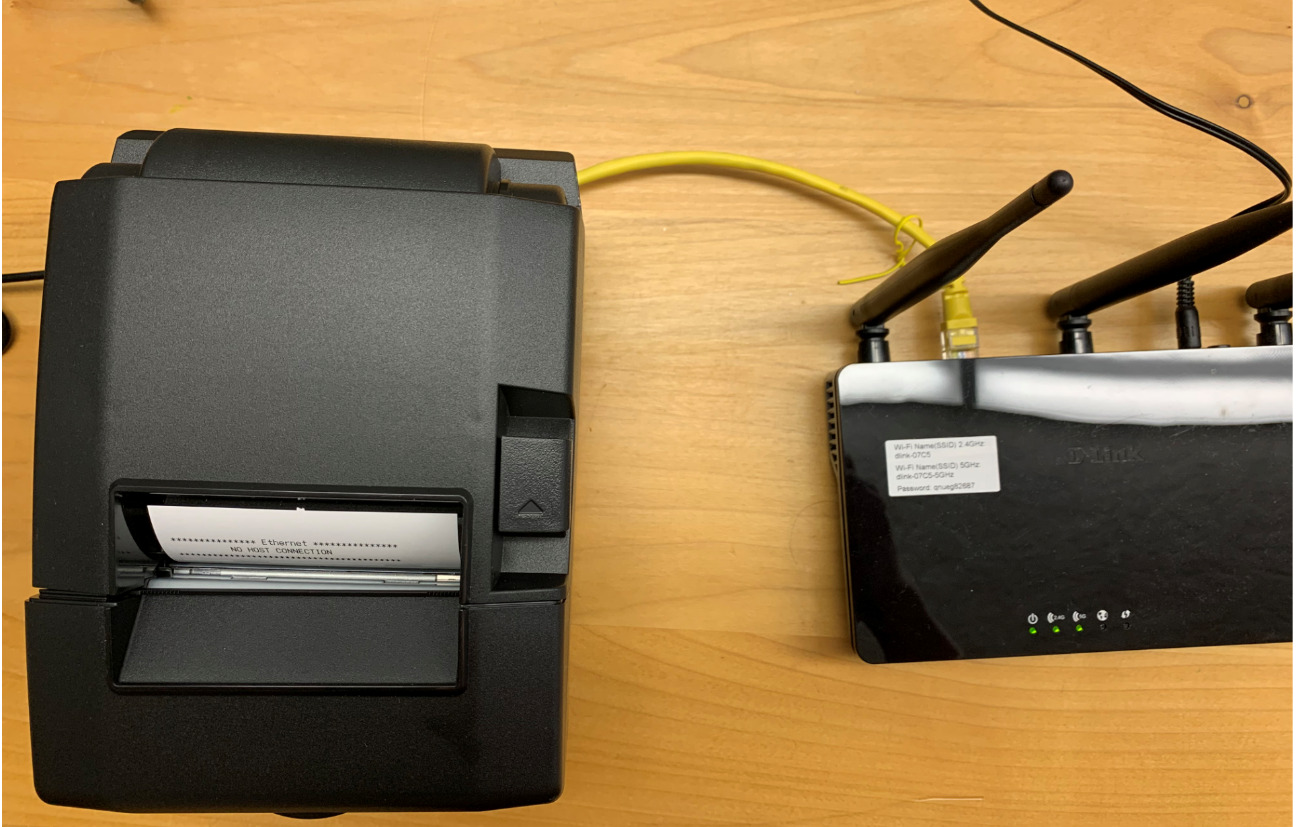
Step 2: Connect Printer to Wireless Router
Connecting your printer to a wireless router is a crucial step in setting up wireless printing. It allows your printer to communicate with devices on the same network and enables seamless printing from anywhere within the router’s range. Follow these easy steps to connect your printer to your wireless router:
1. Power on your printer: Start by turning on your printer and making sure it is in a ready state.
2. Access the printer’s settings menu: Depending on your printer model, navigate to the settings menu. This can usually be done by pressing the Menu button on the printer’s control panel.
3. Locate the network or wireless settings: In the printer’s settings menu, find the network or wireless settings option. It may be labeled as “Network,” “Wireless,” “Wi-Fi,” or something similar.
4. Select your wireless network: Once you are in the network settings, the printer should display a list of available wireless networks. Find and select your wireless network from the list.
5. Enter the network password: If your wireless network is password-protected, you will be prompted to enter the Wi-Fi password. Use the printer’s control panel or onboard keypad to enter the password accurately.
6. Confirm the connection: After entering the password, the printer will attempt to connect to the wireless network. Wait for a few moments while the printer establishes a connection with the router.
7. Print a test page: Once the printer is connected successfully, it’s a good idea to print a test page to ensure that everything is working correctly. Consult your printer’s manual on how to initiate a test print.
8. Connect additional devices (optional): If you want to connect other devices, such as laptops, smartphones, or tablets, to your printer over Wi-Fi, you may need to install the printer software or app on those devices. Follow the instructions provided by the printer manufacturer to download and install the necessary software.
By following these simple steps, you can connect your printer to your wireless router and enjoy the convenience of wireless printing. Once connected, you will be able to print wirelessly from any device on the same network, making document printing a breeze.
Step 3: Install Printer Drivers
Installing the correct printer drivers is an essential step in setting up your printer through a wireless router. Printer drivers are software programs that enable your computer to communicate with the printer and control its functions. Here’s how you can install the required printer drivers:
1. Identify the make and model of your printer: Before you begin the installation process, make sure you know the exact make and model of your printer. You can usually find this information on the printer itself, in the user manual, or on the manufacturer’s website.
2. Visit the printer manufacturer’s website: Once you have the necessary information about your printer, visit the official website of the printer manufacturer. Look for the “Downloads” or “Support” section of the website, where you’ll find a list of available printer drivers.
3. Select the appropriate driver: Locate the driver that corresponds to your specific printer model and the operating system of your computer. Download the driver file to your computer, making sure to save it in an easily accessible location.
4. Run the driver installation file: Once the driver file is downloaded, locate it on your computer and double-click on it to start the installation process. Follow the on-screen instructions to complete the installation. Make sure to carefully read and accept any terms and conditions that may be presented.
5. Connect the printer to your computer: After the driver installation is complete, ensure that your printer is connected to your computer either through a USB cable or wirelessly, depending on the capability of your printer and your preferences.
6. Test the printer: Once your printer is connected, you can test it by printing a test page or any document of your choice. If the printer successfully prints the desired document, it means that the printer drivers have been installed correctly.
7. Install additional software (optional): Depending on your printer and personal preferences, you may also have the option of installing additional software or utilities provided by the manufacturer. This software can offer extra features and functionality, such as scanning or photo editing capabilities.
Installing printer drivers is a crucial step in setting up your printer to work through a wireless router. Following these steps will ensure that your printer is correctly recognized by your computer and can be used seamlessly for all your printing needs.
Step 4: Set Up Wireless Printing
Setting up wireless printing is a convenient way to print documents and photos without the need for a physical connection between your device and the printer. Follow these steps to effortlessly set up wireless printing:
1. Ensure your printer is connected to the wireless network: To begin, make sure your printer is connected to your wireless router. Most modern printers have built-in Wi-Fi capabilities, allowing them to connect to your home or office network. Refer to your printer’s manual for specific instructions on connecting to the wireless network.
2. Install the printer software: Next, install the necessary printer software on your device. This software is usually provided by the printer manufacturer and can be downloaded from their official website. Follow the on-screen prompts to complete the installation process.
3. Add the printer to your device: Once the software is installed, you need to add the printer to your device. This can typically be done by accessing the settings or control panel on your device. Look for the option to add a printer and follow the instructions to detect and connect to your wireless printer.
4. Test the wireless connection: After successfully adding the printer, it’s a good idea to test the wireless connection. Print a test page or document to ensure that the printer is communicating properly with your device. If the printout is successful, then your wireless printing setup is complete.
5. Adjust the printer settings: Lastly, make any necessary adjustments to the printer settings for optimal wireless printing. You can modify the print quality, paper size, or other preferences according to your needs. These settings can usually be accessed through the printer software installed on your device.
By following these steps, you’ll be able to set up wireless printing and enjoy the freedom of wirelessly printing documents and photos from your device to your printer. It’s a convenient solution that eliminates the need for cables and allows you to print from anywhere within the range of your wireless network.
Troubleshooting Tips
Setting up a printer through a wireless router can sometimes be a bit challenging. However, with a few troubleshooting tips, you can resolve common issues and ensure a smooth setup process. Here are some tips to help you troubleshoot any problems you may encounter:
1. Double-check the network connection: Make sure that both your printer and wireless router are properly connected to your network. Check all the cables and ensure that they are securely attached.
2. Restart the printer and router: Sometimes, a simple restart can resolve connectivity issues. Turn off both the printer and the router, wait for a few seconds, and then turn them back on. This can help refresh the network connection and fix any temporary glitches.
3. Update firmware and drivers: Outdated firmware or printer drivers can cause compatibility issues and connectivity problems. Check the manufacturer’s website for any available updates and install them accordingly.
4. Check firewall or security settings: Sometimes, the printer may not be able to communicate with the wireless router due to firewall or security settings. Temporarily disable any firewall or security software to see if it resolves the issue. If it does, adjust the settings accordingly to allow the printer to connect.
5. Assign a static IP address: Ensure that your printer is assigned a static IP address within the same network range as the wireless router. This can help in maintaining a stable connection and avoids issues with IP conflicts.
6. Reset network settings: If you have tried all the above steps and are still facing issues, you can try resetting the network settings on your printer and wireless router. Consult the user manual or manufacturer’s website for instructions on how to do this.
7. Contact customer support: If you have exhausted all troubleshooting options and the printer setup is still not working, it may be beneficial to contact customer support. They can provide you with further assistance and help resolve any complex issues you may be facing.
Remember, every printer and wireless router setup can have unique issues. These troubleshooting tips are a good starting point, but if you encounter any specific error messages or unusual behavior, refer to the printer and router’s user manual or consult the manufacturer’s website for specific troubleshooting instructions.
Conclusion
Setting up a printer through a wireless router may seem like a daunting task, but with the right steps and guidance, it can be a hassle-free process. By following the instructions provided by the printer manufacturer and ensuring that your wireless router is properly configured, you can enjoy the convenience of wireless printing in no time.
Remember to make sure your printer and wireless router are compatible, secure your network with a strong password, and adjust any firewall or antivirus settings that may be blocking the printer connection. With these precautions in place, you can confidently connect your printer to your wireless router and enjoy the convenience of seamless printing from any device connected to your network.
Wireless printing not only eliminates the need for tangled cords and cables, but it also allows you to print from anywhere within the range of your wireless network. So, say goodbye to messy wires and hello to the ease and convenience of wireless printing!
FAQs
1. How do I connect my printer to a wireless router?
To connect your printer to a wireless router, start by turning on your printer and navigating to its settings menu. Look for the “Network” or “Wireless” option, and select it. Then, choose the option to connect to a new network or add a new network. Your printer should start scanning for available Wi-Fi networks. Once the list of available networks appears, select your wireless router from the list. You may be prompted to enter your Wi-Fi password. After entering the password, your printer will establish a connection with the wireless router.
2. How can I find my printer’s IP address?
To find your printer’s IP address, start by accessing the control panel on your printer. Look for the “Network” or “Settings” option and select it. Within the network settings, you should find an option that allows you to view the printer’s IP address. Once located, write down the IP address for future reference. Alternatively, you can print a network configuration page directly from your printer, which will display the IP address along with other network details.
3. Can I connect multiple printers to one wireless router?
Yes, you can connect multiple printers to one wireless router. Most wireless routers support multiple devices connecting to their network simultaneously. To connect multiple printers, follow the same steps mentioned earlier for connecting a single printer to the wireless router. Each printer will need to establish its own Wi-Fi connection with the router by selecting the appropriate network and entering the Wi-Fi password.
4. What should I do if my printer is not connecting to the wireless router?
If your printer is not connecting to the wireless router, there are a few troubleshooting steps you can try. First, ensure that your printer is within range of the wireless router and that there are no physical obstructions blocking the signal. Next, check if the Wi-Fi network name (SSID) and password are entered correctly on the printer. Restart both the printer and the router to refresh the connection. If the issue persists, consult the printer’s manual or contact the manufacturer for further assistance.
5. How do I print a test page to verify the wireless connection?
To print a test page and verify the wireless connection, access the control panel on your printer. Look for the “Settings” or “Utilities” option and select it. Within the settings menu, you should find an option for printing a test page or a network configuration page. Select this option, and the printer will initiate the printing process. If the test page prints successfully, it confirms that your printer is connected to the wireless router and ready to use.