
The Rode Wireless Go 2 is a revolutionary wireless microphone system designed to provide seamless audio recording for a wide range of applications. Whether you’re a content creator, filmmaker, journalist, or vlogger, this compact and versatile device offers an array of features that make it a must-have tool in your arsenal.
With the Rode Wireless Go 2, you can say goodbye to cumbersome cables and enjoy the freedom of wireless audio transmission. This second-generation model boasts improved audio quality, enhanced versatility, and a host of new features that take your recordings to the next level.
In this article, we will explore how to use the Rode Wireless Go 2 and discover its remarkable capabilities. From setup and pairing to adjusting settings and maximizing performance, we will guide you through every step, ensuring that you make the most of this exceptional wireless microphone system.
Inside This Article
- Overview of Rode Wireless Go 2
- Step 1: Unboxing and Setting Up the Rode Wireless Go 2
- Step 2: Pairing the Transmitter and Receiver
- Step 3: Adjusting the Audio Levels
- Step 4: Attaching the Wireless Microphone
- Step 5: Testing and Monitoring the Audio
- Step 6: Troubleshooting Common Issues
- Step 7: Additional Tips and Best Practices
- Conclusion
- FAQs
Overview of Rode Wireless Go 2
The Rode Wireless Go 2 is a cutting-edge wireless microphone system that offers unrivaled convenience and high-quality audio for content creators, filmmakers, and vloggers. This compact and lightweight system consists of a transmitter and receiver, allowing you to capture crystal-clear audio from up to 200 meters away.
With its improved range and enhanced reliability, the Rode Wireless Go 2 is perfect for various applications, whether you’re shooting interviews, podcasts, YouTube videos, or even recording audio for music or live performances. It boasts a host of impressive features that make it a top choice among professionals and amateurs alike.
One of the standout features of the Rode Wireless Go 2 is its dual-channel functionality. This means you can now use two transmitters simultaneously, providing you with the flexibility to record audio from two sources at once. This makes it ideal for capturing interviews or conducting panel discussions without the hassle of multiple microphones and cables.
Another exciting feature is the improved battery life. The Rode Wireless Go 2 boasts an impressive 7-hour battery life, ensuring that you can record uninterrupted for longer periods without worrying about running out of power. Additionally, the USB-C charging port allows for quick and convenient charging, providing you with more time to focus on your content creation.
The Rode Wireless Go 2 also comes with innovative features that make it a breeze to use. The onboard OLED screen provides a clear and intuitive interface for adjusting settings, monitoring audio levels, and checking battery life. The built-in clip on the transmitter allows for easy attachment to clothing or camera straps, offering maximum flexibility during filming.
Furthermore, the Rode Wireless Go 2 offers an impressive range of accessories to enhance your audio recording experience. Optional accessories include lavalier microphones, furry windshields for outdoor use, and even a SC11 cable that enables you to connect the Wireless Go 2 to your smartphone for seamless audio recording while on the go.
Step 1: Unboxing and Setting Up the Rode Wireless Go 2
When you first get your hands on the Rode Wireless Go 2, it’s an exciting moment as you open the package and discover all the components that come with it. The kit includes a transmitter, a receiver, two furry windshields, and various cables for connection.
Start by carefully removing each item from its packaging and placing them on a clean and clutter-free workspace. Take a moment to familiarize yourself with the components before proceeding with the setup.
To set up the Rode Wireless Go 2, you’ll need to connect the transmitter and receiver units. Begin by locating the micro-USB port on both devices. Use the provided USB-C to USB-A cable to connect the transmitter to a power source, such as a power bank or a USB wall adapter.
Next, connect the receiver to your camera or recording device using the included 3.5mm TRS or TRRS cable, depending on your device’s input requirements. Ensure a secure connection on both ends to prevent any audio interruptions during use.
Now that the physical connections are in place, it’s time to power on the devices. Press and hold the power button on both the transmitter and receiver until they power up. You may need to wait a few moments for them to establish a stable connection.
Once powered on, the transmitter and receiver will automatically pair with each other. You will see a solid blue light on both devices, indicating a successful connection. If the lights are blinking or displaying a different color, refer to the user manual for troubleshooting steps.
At this stage, it’s essential to ensure that the transmitter and receiver are set to the same channel. This will prevent interference and ensure optimal audio performance. Use the channel button on both devices to cycle through the available channels until you find one that matches on both.
With the Rode Wireless Go 2 successfully unboxed and set up, you’re now ready to start capturing high-quality audio wirelessly. Remember to perform a sound test before any important recording to ensure everything is working correctly, and adjust the audio levels accordingly for optimal sound quality.
When not in use, it’s a good practice to store the Rode Wireless Go 2 in a protective case or its original packaging to keep it safe and prevent any damage. This will help prolong the lifespan of your device and ensure it’s ready for your next recording session.
Step 2: Pairing the Transmitter and Receiver
After unboxing and setting up your Rode Wireless Go 2, the next step is to pair the transmitter and receiver units. This is a crucial step that ensures seamless communication between the two devices and enables them to work together effectively. Here’s how you can do it:
1. Turn on both the transmitter and receiver units by pressing and holding the power button on each device. You will see the LED indicator lights turn on, indicating that they are ready to pair.
2. Locate the pairing button or menu option on both the transmitter and receiver. Press and hold the respective buttons or navigate through the menu to enter the pairing mode.
3. Once in pairing mode, the transmitter and receiver will search for each other and establish a connection. You will see the LED indicator lights flash or change color to indicate that the devices are pairing.
4. When the devices successfully pair, you will see a solid LED indicator light or a notification on the receiver’s screen. This indicates that the transmitter and receiver are now synchronized and ready to use.
5. Test the connection by speaking into the microphone attached to the transmitter. You should hear the audio coming through in real-time on the receiver, ensuring that the pairing process was successful.
6. If the devices do not pair or if you experience any difficulties, try the following troubleshooting steps:
– Make sure both devices are in close proximity to each other for a stronger signal.
– Ensure that the batteries in both the transmitter and receiver units are fully charged.
– Power off both devices and repeat the pairing process from the beginning.
– Consult the user manual or contact Rode’s customer support for further assistance.
Pairing the transmitter and receiver of the Rode Wireless Go 2 is a simple process that allows you to establish a reliable wireless connection. By following the steps outlined above and troubleshooting any potential issues, you can ensure smooth and uninterrupted audio transmission for your recordings or live performances.
Step 3: Adjusting the Audio Levels
Once you’ve successfully paired the transmitter and receiver of the Rode Wireless Go 2, it’s time to fine-tune the audio levels. Properly adjusting the audio levels is crucial for obtaining high-quality sound without any distortion or clipping. Follow these steps to ensure optimal audio performance:
1. Start with a neutral audio level: Begin by setting both the transmitter and receiver audio levels at a neutral position. This will prevent any sudden volume changes when you start recording.
2. Test the audio signal: Speak into the wireless microphone and monitor the audio signal on your recording device or camera. Ensure that the audio level meters do not peak into the red zone, as this indicates distortion. Ideally, the audio level should peak around -12dB to -6dB, allowing a decent headroom for unexpected spikes in sound.
3. Adjust the transmitter audio gain: If the audio signal is too low, you can increase the transmitter’s audio gain. The Rode Wireless Go 2 features an easily accessible gain control on the transmitter. Gradually increase the gain until the audio level reaches the desired range. Be cautious not to set the gain too high, as it may introduce noise or clipping.
4. Match the audio levels: Ensure that the audio levels of the transmitter and receiver are balanced. The receiver also has an audio gain control, which allows you to fine-tune the levels. Adjust the receiver’s gain until it matches the desired range set on the transmitter. This will ensure consistent audio levels throughout your recording.
5. Monitor the audio during recording: Continuously monitor the audio levels while recording to ensure they remain within the desired range. Make any necessary adjustments if you notice any significant changes in the audio signal or if the levels start to peak too high.
6. Consider using automatic gain control (AGC): The Rode Wireless Go 2 offers an AGC feature that automatically adjusts the audio levels to maintain consistent volume. If you prefer a hands-off approach, you can enable the AGC mode. However, be mindful that using AGC might slightly affect the dynamic range of your audio.
7. Conduct a sound check: Before starting your actual recording, it’s essential to conduct a sound check. Test the audio levels and listen back to ensure everything sounds clear and balanced. Make any necessary adjustments before moving forward with your project.
By following these steps, you can effectively adjust the audio levels of the Rode Wireless Go 2 and achieve optimal audio quality for your recordings. Keep in mind that practice and experimentation are key to finding the perfect audio balance that suits your specific needs.
Step 4: Attaching the Wireless Microphone
After successfully pairing the Rode Wireless Go 2 transmitter and receiver and adjusting the audio levels, the next step is to attach the wireless microphone to your subject. The Rode Wireless Go 2 system comes with two transmitters, each equipped with a built-in microphone, allowing you to capture audio from multiple sources simultaneously.
To attach the wireless microphone, follow these simple steps:
1. Identify the Transmitter: Locate the transmitter unit that corresponds to the subject you want to capture audio from. Each transmitter is labeled with a number (T1 or T2) for easy identification.
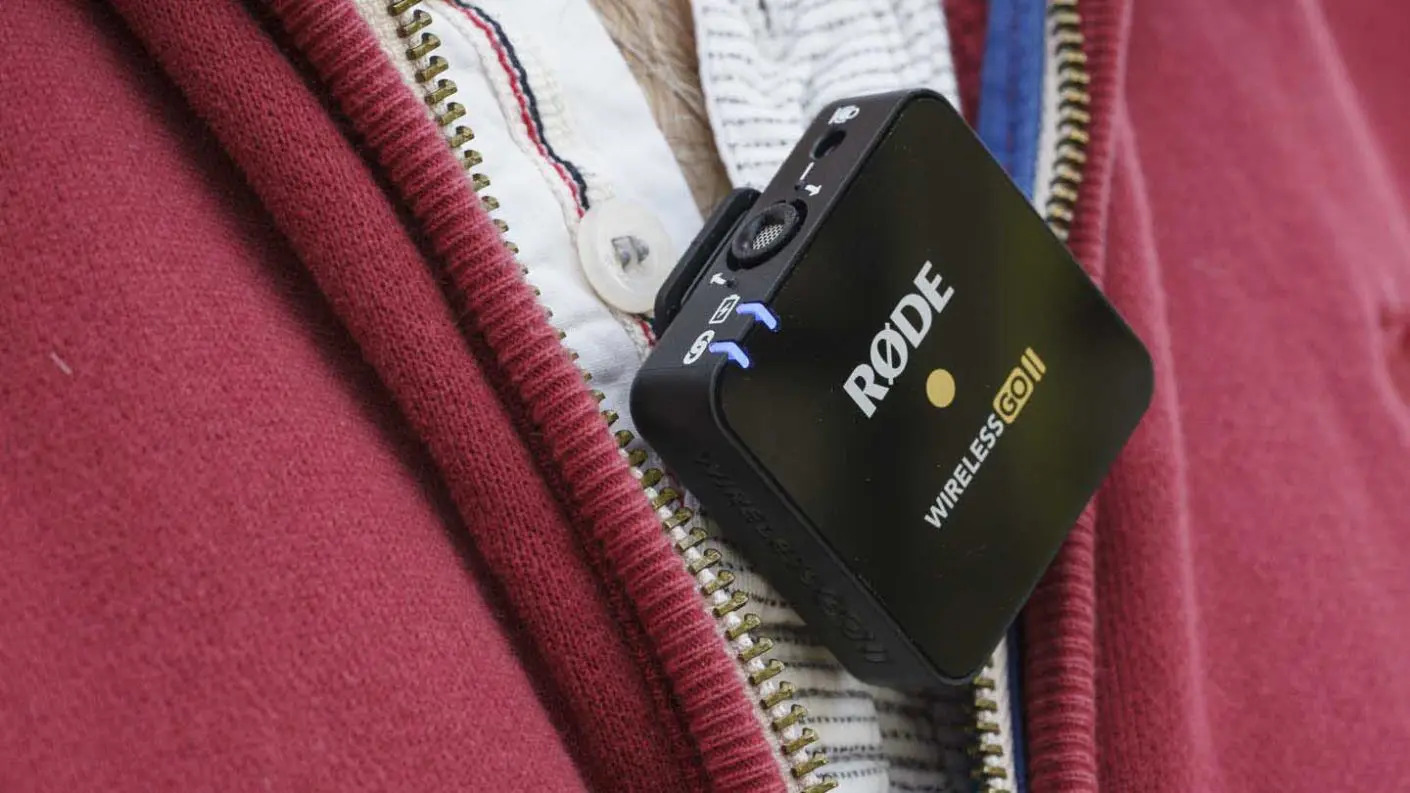
2. Position the Transmitter: Place the transmitter unit near the audio source or clip it onto the subject’s clothing using the included clip. Make sure the microphone is facing the sound source for optimal audio pickup.
3. Secure the Microphone: Use the included fuzzy windshields or deadcat fur windshields to reduce wind noise when recording outdoors. Attach the windshields securely to the transmitter’s built-in microphone to ensure clear sound quality.
4. Check for Interference: Before recording, double-check for any potential interference by monitoring the audio signal strength on the receiver. Adjust the position of the transmitter if there are any signal dropouts or unwanted noise.
5. Test the Audio: Perform a quick test recording to ensure that the wireless microphone is capturing clear and crisp audio. Monitor the audio levels on the receiver and adjust if needed.
6. Consider External Microphones: If you prefer using external microphones instead of the built-in options, you can connect them to the transmitter’s 3.5mm TRS input. This allows you to use a range of microphones such as lavalier mics or shotgun mics for specific recording situations.
Attaching the wireless microphone to the subject is a crucial step in achieving professional audio quality with the Rode Wireless Go 2. By following these steps and considering additional microphone options, you’ll be ready to capture clear and immersive audio in any recording scenario.
Step 5: Testing and Monitoring the Audio
Once you have set up and adjusted the Rode Wireless Go 2, it’s time to test and monitor the audio to ensure the best sound quality possible. Here are some steps to guide you through this process:
1. Start by positioning yourself and the subject at a reasonable distance from the microphone. This will help you evaluate how well the wireless system captures and transmits the audio. Make sure your subject speaks at a normal volume.
2. Turn on both the transmitter and receiver units. The LEDs on both devices should light up, indicating they are powered on and connected. If the LEDs do not light up, double-check the batteries or the connection between the devices.
3. Speak into the wireless microphone while monitoring the audio output. Ensure that the receiver is connected to your recording device or camera and that you can hear the audio coming through the headphones or speakers.
4. Adjust the audio levels on the receiver to find the optimal settings. The Rode Wireless Go 2 features a built-in gain control, which allows you to adjust the input levels. Pay attention to any distortion or clipping and make adjustments accordingly.
5. Perform a range test by slowly moving away from the receiver while speaking into the microphone. Observe how far you can go before the audio quality starts to deteriorate. This will give you an idea of the maximum range for reliable wireless transmission.
6. Pay attention to any interference or signal dropouts during the test. If you experience any issues, try changing the placement of the transmitter or receiver, or switch to a different frequency if available. Keep in mind that obstacles such as walls or other electronic devices can affect the signal quality.
7. Record a sample audio clip or conduct a live test to ensure that the audio is clear and well-balanced. Check for any background noise, echo, or other audio issues that may need to be addressed.
8. If necessary, make further adjustments to the audio levels and monitor the results until you are satisfied with the sound quality.
Remember, testing and monitoring the audio is an essential step in ensuring that the Rode Wireless Go 2 delivers optimal performance. By following these steps and paying attention to the details, you can capture excellent audio for your recordings or live broadcasts.
Step 6: Troubleshooting Common Issues
Inevitably, you may encounter some issues while using the Rode Wireless Go 2. Don’t worry – we’ve got you covered! Here are some common problems you might encounter and their solutions:
1. Poor Signal or Range:
If you’re experiencing a weak signal or limited range, try the following:
- Ensure that the transmitter and receiver have a clear line of sight with minimal obstructions.
- Make sure the transmitter and receiver are within the recommended operating range. The Wireless Go 2 has a range of up to 200 meters.
- Check that the batteries are fully charged. Low battery power can weaken the signal.
- Try changing the position of the transmitter or receiver to improve signal strength.
2. Audio Interference:
If you’re experiencing interference or static in the audio, follow these steps:
- Check for any nearby electronic devices that may be causing interference. Move them away from the wireless system.
- Ensure that the transmitter and receiver are on the same frequency or channel. Adjust them if necessary.
- Try using the included furry windshields to reduce wind noise, especially in outdoor settings.
3. Battery Life and Durability:
The Rode Wireless Go 2 boasts a long battery life, but if you’re experiencing shorter-than-expected usage time, consider the following:
- Check that you’re using quality batteries, preferably rechargeable ones, for extended use.
- Make sure to turn off the system when not in use to conserve battery power.
- Handle the Wireless Go 2 with care to avoid any accidental damage. It’s a sturdy device but avoid dropping or exposing it to extreme conditions.
4. Uneven Audio Levels:
If you’re noticing variations in volume between the transmitter and receiver, try these troubleshooting steps:
- Check the audio levels on both the transmitter and receiver. Make sure they are properly balanced.
- Ensure that the microphone is securely attached and positioned correctly for optimal sound capture.
- If you’re using an external microphone, ensure it’s compatible with the Rode Wireless Go 2 system and properly connected.
Remember, it’s essential to familiarize yourself with the user manual and explore Rode’s online support resources for more specific troubleshooting guidance. In case the issues persist, don’t hesitate to reach out to Rode’s customer support for further assistance. They’ll be more than happy to help you get the most out of your Rode Wireless Go 2.
Step 7: Additional Tips and Best Practices
Now that you have mastered the basic setup and operation of the Rode Wireless Go 2, let’s explore some additional tips and best practices to help you get the most out of this versatile wireless microphone system:
1. Choose the Right Audio Source: When using the Rode Wireless Go 2, it is important to select the appropriate audio source for optimal sound quality. Consider using a high-quality lavalier microphone or an external microphone for professional-grade recordings.
2. Position the Transmitter and Receiver Properly: To ensure a strong and reliable signal, it is crucial to position the transmitter and receiver within close proximity of each other. Avoid placing any physical barriers, such as walls or obstacles, between the two devices.
3. Experiment with Placement: While the Rode Wireless Go 2 comes with a built-in clip for easy attachment to clothing, don’t be afraid to experiment with different placement options. For example, attaching the transmitter to the brim of a hat or the handle of a handheld device can yield interesting audio perspectives.
4. Consider Using a Windshield: When recording outdoors or in windy conditions, a windshield or foam cover can help minimize unwanted wind noise and improve audio quality. Rode offers compatible windshields specifically designed for the Wireless Go 2.
5. Monitor Your Audio Levels: It is essential to regularly monitor the audio levels during recording to ensure that your sound is clear and free from distortion. Use headphones or an external audio monitor to keep an eye on the levels and make adjustments as necessary.
6. Utilize the Safety Channel: The Rode Wireless Go 2 features a safety channel that helps protect against unexpected interference or dropouts. Enabling this feature provides a backup audio signal, ensuring that you have a reliable recording even in challenging environments.
7. Familiarize Yourself with the Features: Take the time to explore and understand all the features and settings available on the Rode Wireless Go 2. This will allow you to customize the system to your specific needs and make the most out of its capabilities.
8. Practice and Rehearse: Like any other skill, using the Rode Wireless Go 2 effectively requires practice and rehearsal. Take the time to familiarize yourself with its operation and experiment with different recording scenarios to refine your skills and achieve the best results.
9. Keep Spare Batteries Handy: To avoid unexpected power outages during recording sessions, it is always a good idea to have spare batteries on hand for both the transmitter and receiver. This ensures uninterrupted operation and lets you focus on capturing great audio.
10. Seek Professional Advice: If you’re new to using wireless microphone systems or have specific recording requirements, consider seeking advice from industry professionals or Rode support. They can offer valuable insights and recommendations to help you achieve professional-grade audio recordings.
By following these additional tips and best practices, you will be able to maximize the potential of your Rode Wireless Go 2 and capture high-quality audio in a wide range of recording situations.
Conclusion
After exploring the various features and benefits of the Rode Wireless Go 2, it’s clear that this wireless microphone system is a game-changer for anyone in need of professional-grade audio recording on the go. With its compact design, easy setup, and impressive range, the Wireless Go 2 offers unparalleled convenience and versatility.
Whether you’re a content creator, vlogger, journalist, or filmmaker, the Rode Wireless Go 2 provides crystal-clear audio capture, allowing you to focus on your creative endeavors without worrying about technical limitations. With improved transmission stability and dual-channel recording, it opens up possibilities for capturing multiple subjects or using two microphones simultaneously.
With its impressive battery life and intuitive interface, the Rode Wireless Go 2 is a must-have tool for anyone looking to take their audio recording to the next level. So, don’t wait any longer — grab a Rode Wireless Go 2 and unlock the full potential of your mobile recording setup!
FAQs
Q: What is the Rode Wireless Go 2?
The Rode Wireless Go 2 is a versatile wireless microphone system designed for content creators, vloggers, and filmmakers. It allows you to capture high-quality audio wirelessly, making it ideal for recording interviews, podcasts, and other types of videos.
Q: How does the Rode Wireless Go 2 work?
The Rode Wireless Go 2 consists of a transmitter and a receiver. The transmitter is a compact, battery-powered device with a built-in microphone or a 3.5mm input for connecting an external microphone. It wirelessly sends the audio signal to the receiver, which can be attached to the camera or audio recording device. The receiver then captures the audio and outputs it to the recording device.
Q: What are the main features of the Rode Wireless Go 2?
The Rode Wireless Go 2 offers several key features that make it a popular choice among content creators. Some of its main features include dual-channel recording, automatic pairing, built-in rechargeable batteries, up to 200m range, digital audio transmission, safety channel recording, and compatibility with smartphones and cameras.
Q: Can I use the Rode Wireless Go 2 with my smartphone?
Yes, the Rode Wireless Go 2 is compatible with smartphones. It comes with a TRS to TRRS cable, allowing you to connect the receiver directly to your smartphone. This enables you to capture high-quality audio for videos, live streams, or other mobile content creation.
Q: Is the Rode Wireless Go 2 easy to set up and use?
Absolutely! The Rode Wireless Go 2 is designed with ease of use in mind. With its automatic pairing feature, you can simply power on both the transmitter and receiver, and they will automatically connect. The system also has a helpful OLED display, providing you with real-time audio levels and battery status. Whether you’re a beginner or an experienced content creator, you’ll find the Rode Wireless Go 2 incredibly user-friendly.