
In today’s fast-paced world, recording high-quality audio has become essential for content creators, podcasters, and anyone who wants to produce professional-level sound. One popular tool for achieving this is the Rode Wireless Go 2 – an upgraded version of the highly acclaimed Rode Wireless Go. This compact and versatile wireless microphone system offers superior convenience and exceptional audio performance, making it a favorite amongst creators.
But where do you start when it comes to using the Rode Wireless Go 2 for your recordings? In this article, we will guide you through the process step-by-step and provide you with expert tips and tricks to ensure you achieve optimal results. Whether you’re a beginner or an experienced audio enthusiast, by the end of this article, you’ll have everything you need to know to start recording with the Rode Wireless Go 2.
Inside This Article
- Overview of the Rode Wireless Go 2
- Setting up the Rode Wireless Go 2
- Adjusting the microphone settings
- Recording with the Rode Wireless Go 2
- Conclusion
- FAQs
Overview of the Rode Wireless Go 2
The Rode Wireless Go 2 is a compact and versatile wireless microphone system that offers high-quality audio recording for a wide range of applications. Whether you are a content creator, filmmaker, journalist, or vlogger, the Wireless Go 2 provides a convenient and reliable solution for capturing clear and professional sound.
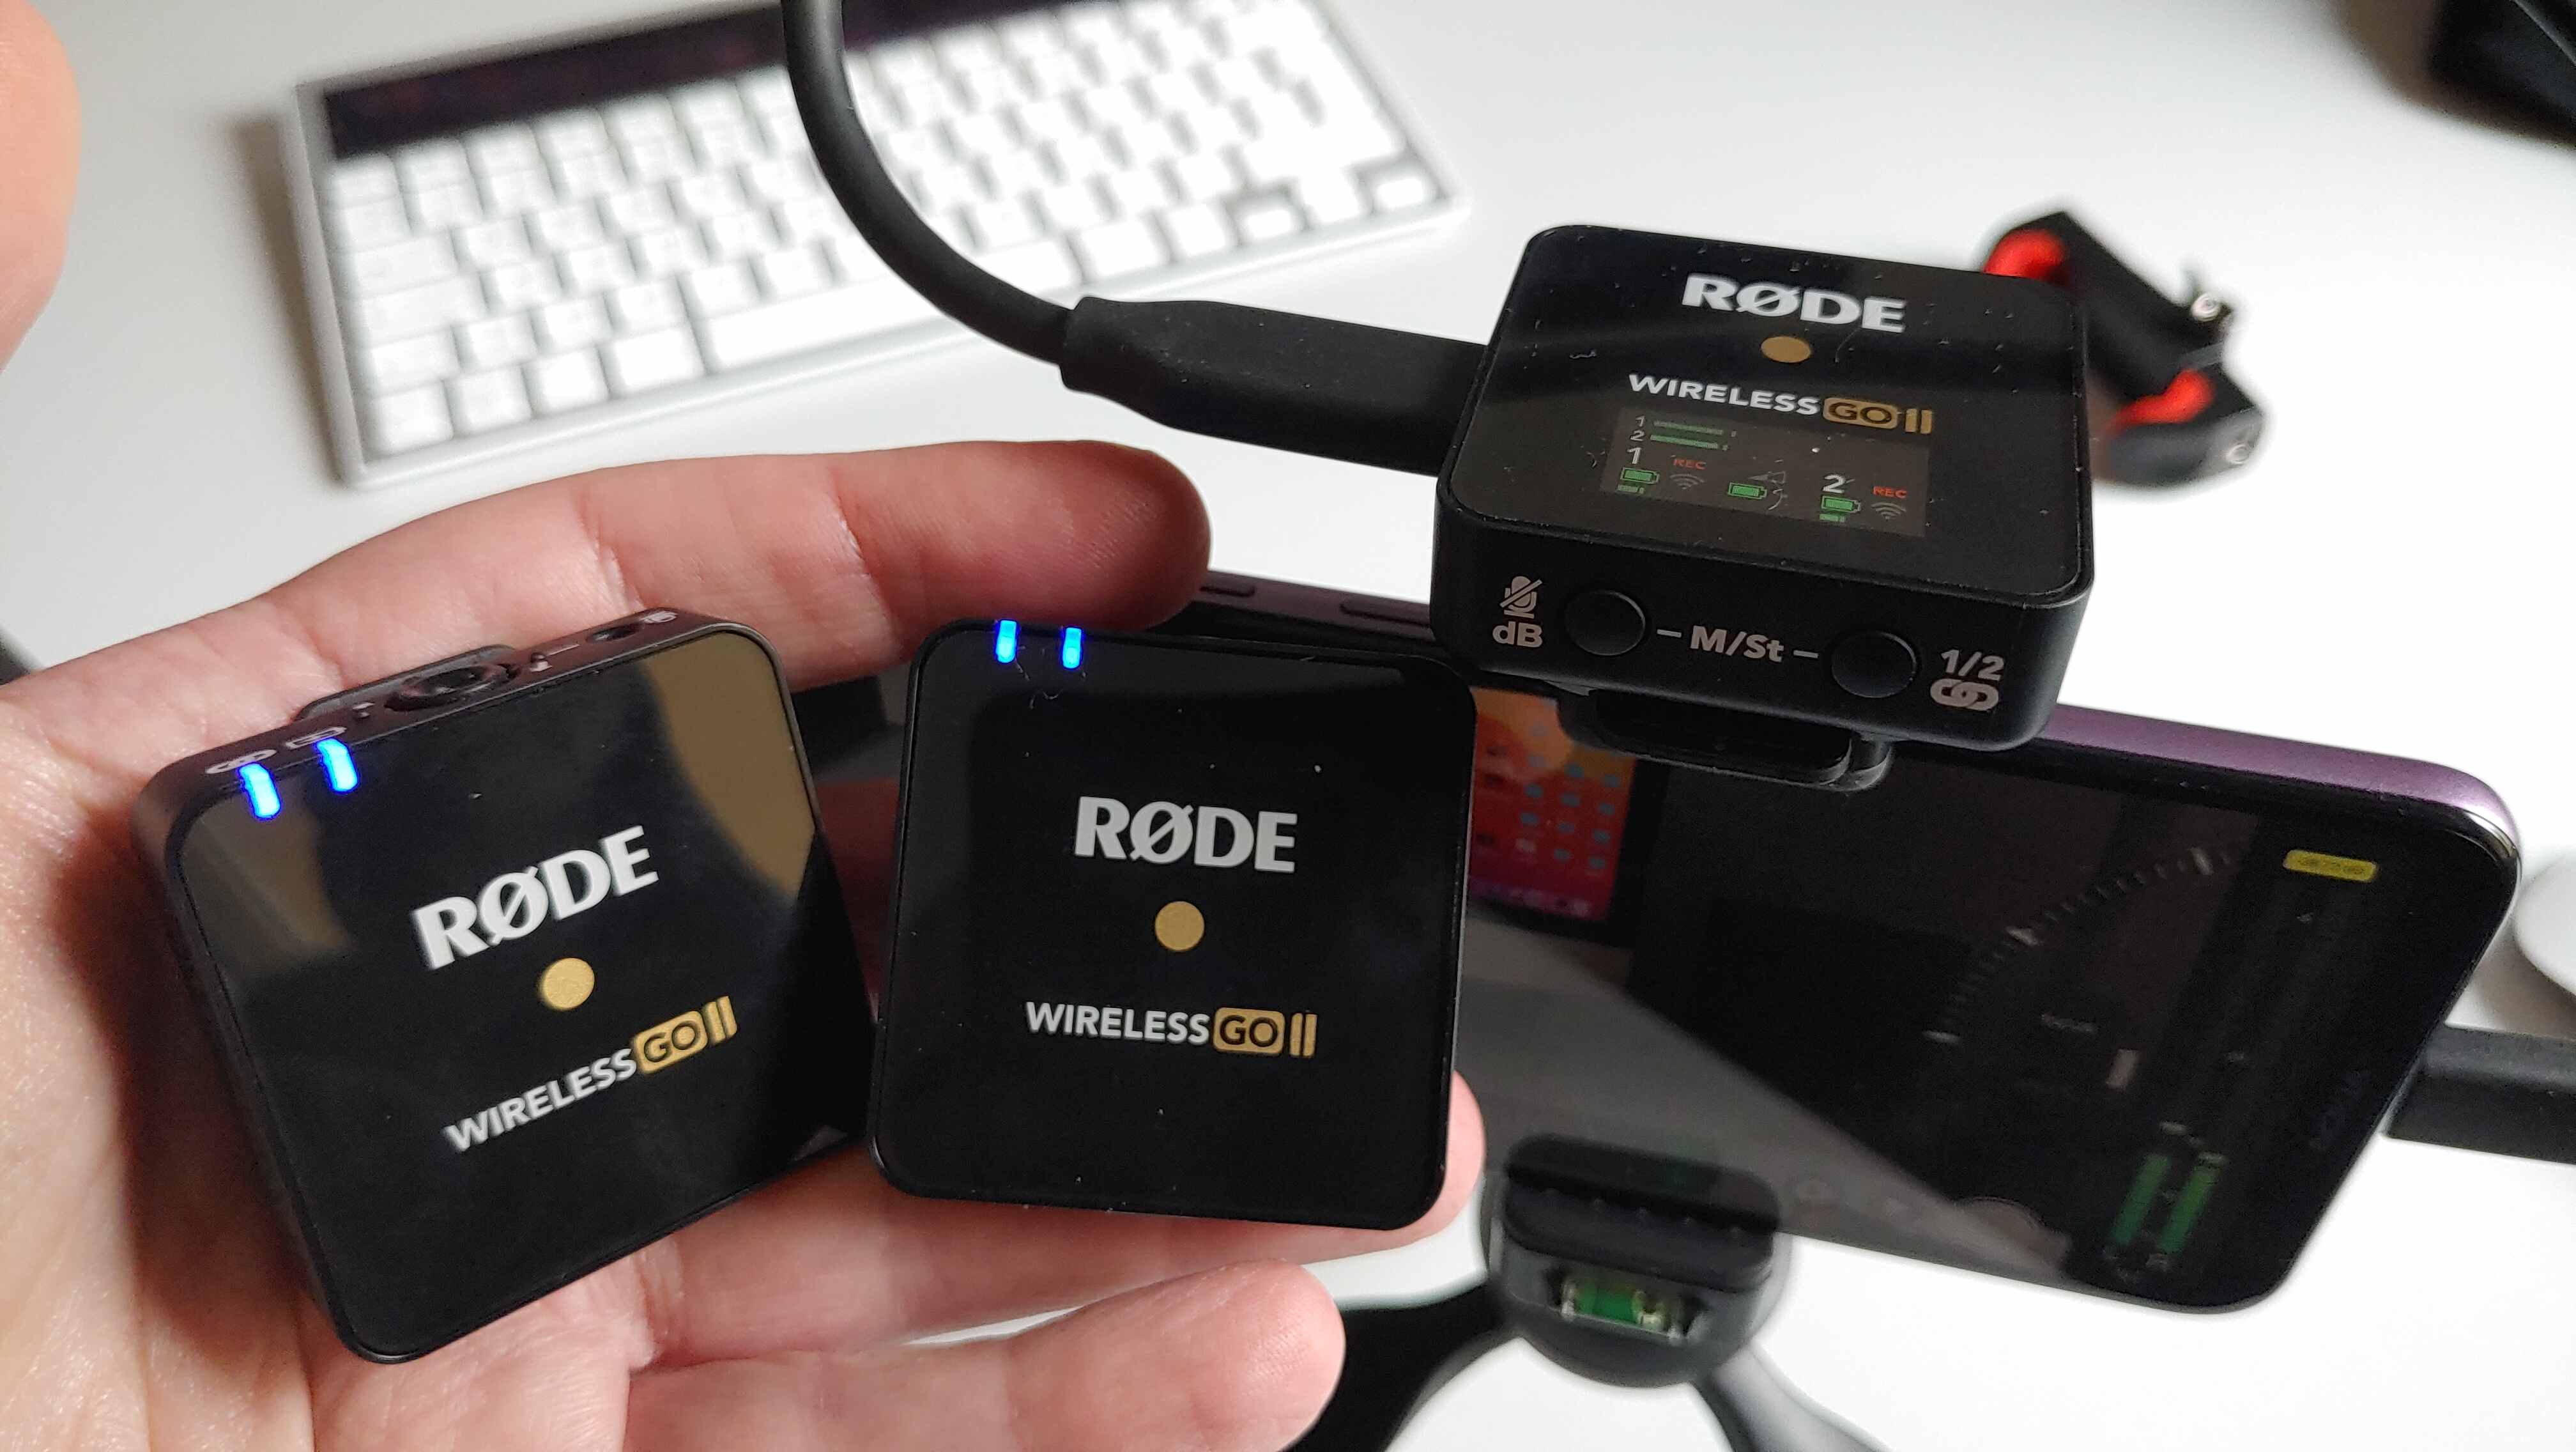
The Rode Wireless Go 2 consists of two compact transmitter units and a receiver. The transmitters are equipped with built-in microphones, making them perfect for recording interviews, podcasts, or solo performances without the need for additional equipment. The receiver unit, on the other hand, connects to your camera, smartphone, or audio recorder, allowing you to capture audio wirelessly with ease.
One of the standout features of the Wireless Go 2 is its versatility. It supports both mono and stereo recording modes, giving you the freedom to capture audio in a way that suits your needs. Additionally, the system has a range of up to 200 meters, ensuring that you can move around freely while still maintaining a strong and reliable connection.
The Wireless Go 2 also boasts an impressive battery life, with each transmitter and the receiver offering up to 7 hours of operation on a single charge. This means you can confidently record for extended periods without worrying about running out of power.
Furthermore, the Rode Wireless Go 2 has a user-friendly interface, featuring an OLED screen on the receiver unit that displays important information such as battery status, audio levels, and the selected channel. This makes it easy to monitor and adjust your recording settings on the go.
Overall, the Rode Wireless Go 2 is a powerful and convenient wireless microphone system that is perfect for content creators and professionals alike. Its compact size, versatility, long battery life, and user-friendly interface make it an excellent choice for capturing high-quality audio in a variety of situations.
Setting up the Rode Wireless Go 2
Setting up the Rode Wireless Go 2 is a quick and simple process that allows you to start recording with this powerful wireless microphone system in no time. Whether you’re a filmmaker, content creator, or musician, the Rode Wireless Go 2 provides professional-grade audio quality and versatility.
The first step in setting up the Rode Wireless Go 2 is to ensure that you have all the necessary components. The package includes two lightweight transmitters, a receiver, and various accessories such as microphones, windshields, and cables. Make sure you have everything in place before proceeding.
Next, you’ll need to power up the devices. The transmitters and receiver are equipped with built-in rechargeable batteries, so make sure they are fully charged before use. Simply connect the included USB-C cables to the devices and plug them into a power source. A full charge ensures a longer recording time, providing you with uninterrupted audio capture.
Once the devices are powered up, it’s time to pair the transmitters with the receiver. The Rode Wireless Go 2 utilizes a simple pairing process that requires minimal effort. On both the transmitter and receiver, you’ll find a pairing button. Press and hold the button on the receiver until it starts searching for available transmitters. Then, press and hold the pairing button on each transmitter until they connect to the receiver. The LED indicators on both devices will confirm successful pairing.
After pairing the devices, it’s important to select the desired audio input. The Rode Wireless Go 2 offers two audio input options – the built-in microphone or the external microphone input. If you prefer to use the built-in microphones on the transmitters, simply select the internal microphone option on the receiver. However, if you want to connect an external microphone, such as a lapel or shotgun microphone, use the provided cable to connect it to the external microphone input on the transmitters.
Lastly, make sure to position the transmitters and receiver in an optimal location. Ideally, place the receiver in a central position to ensure a strong and stable signal reception. The transmitters can be clipped onto clothing or attached to a camera using the included accessories. Experiment with different placements to find the best position for capturing clear and high-quality audio.
With the Rode Wireless Go 2 now set up, you’re ready to start recording. Whether you’re shooting a video, conducting an interview, or recording a musical performance, the Rode Wireless Go 2 will deliver exceptional audio quality with its improved transmission and extended range. Enjoy the freedom and flexibility of wireless recording with this reliable and user-friendly system.
Adjusting the microphone settings
When it comes to recording audio with the Rode Wireless Go 2, it’s important to know how to adjust the microphone settings to get the best sound quality. Here are some key steps to follow:
1. Gain control: The Rode Wireless Go 2 has a built-in gain control that allows you to adjust the input level of the microphone. This is useful for controlling the volume and preventing distortion. To adjust the gain, simply use the dedicated gain knob on the receiver unit.
2. Switching between mono and stereo: The Wireless Go 2 offers the flexibility of recording in both mono and stereo modes. To adjust this setting, locate the mono/stereo switch on the receiver unit and toggle it according to your preference. Mono mode is ideal for interviews or situations where you only need a single audio channel, while stereo mode captures a wider audio field, perfect for capturing ambient sounds or immersive recordings.
3. Frequency selection: The Rode Wireless Go 2 operates on a 2.4GHz frequency range, which provides a stable and interference-free signal. However, in some cases, you may encounter interference from other wireless devices operating in the same frequency range. To mitigate this, the Wireless Go 2 offers 3 frequency channels to choose from. Simply use the channel selection button on the receiver unit to switch between channels and find the one with the clearest signal.
4. Audio output level: To ensure that your audio signal is compatible with your recording device or camera, it’s important to adjust the output level accordingly. The Wireless Go 2 provides a 3.5mm output jack on the receiver unit. You can use the output level control on the receiver to adjust the audio level to match the input requirements of your recording device.
5. Monitoring: Monitoring your audio while recording is crucial to ensure that you’re capturing clear and high-quality sound. The Wireless Go 2 features a headphone output on the receiver unit, allowing you to plug in headphones and monitor the audio in real time. This allows you to detect any issues such as background noise or audio clipping and make necessary adjustments on the fly.
Remember, adjusting the microphone settings on the Rode Wireless Go 2 will greatly impact the quality of your recordings. Experimenting with different settings and understanding their effects will help you achieve the best audio results for your specific recording needs.
Recording with the Rode Wireless Go 2
The Rode Wireless Go 2 is a versatile and user-friendly wireless microphone system that allows you to capture high-quality audio while on the go. Whether you’re a content creator, filmmaker, or vlogger, this compact and lightweight device is designed to meet your recording needs.
To start recording with the Rode Wireless Go 2, follow these simple steps:
- Power on the transmitter and receiver: Make sure both the transmitter and receiver are powered on. The transmitter is the device that you attach to your subject, while the receiver is the device that you connect to your camera or recording device.
- Pair the transmitter and receiver: The Rode Wireless Go 2 uses a simple pairing process. Press and hold the pairing button on the receiver until the LED lights start flashing. Then, press and hold the pairing button on the transmitter until the LED lights on both devices turn solid, indicating a successful pairing.
- Set the desired microphone input level: Depending on the recording situation, you may need to adjust the microphone input level. The Rode Wireless Go 2 features a three-position gain switch (-20dB, 0dB, +20dB) that allows you to optimize the audio level for different scenarios.
- Position the microphone and transmitter: Attach the transmitter to the subject you want to record. The Rode Wireless Go 2 comes with a built-in omnidirectional microphone, so you have the option to use it without any additional external microphone. However, if you prefer using an external microphone, simply plug it into the transmitter’s 3.5mm microphone input.
- Connect the receiver to your recording device: Plug the receiver into your camera or recording device using the included cable. The Rode Wireless Go 2 provides both TRS and TRRS output options, making it compatible with a wide range of devices.
- Check the audio levels: Before you start recording, monitor the audio levels on your camera or recording device. Adjust the volume if necessary to ensure optimal audio quality. You can also use the built-in output control on the receiver to fine-tune the audio level.
- Start recording: Once you’ve completed the setup process, you’re ready to start recording with the Rode Wireless Go 2. Press the record button on your camera or recording device, and the wireless microphone will capture clear and crisp audio from the subject.
With the Rode Wireless Go 2, you have the freedom to move around and record professional-grade audio without the limitations of cables. Its reliable wireless transmission and high-quality sound make it a valuable tool for various recording applications. So, whether you’re capturing interviews, vlogs, podcasts, or even documenting your outdoor adventures, the Rode Wireless Go 2 is a reliable companion that ensures you never miss a moment of clear and pristine audio.
Conclusion
Recording with the Rode Wireless Go 2 is a game-changer for content creators and professionals alike. With its compact design, improved audio quality, and user-friendly features, this wireless microphone system offers an unparalleled recording experience. Whether you’re capturing interviews, vlogs, podcasts, or any other type of content, the Rode Wireless Go 2 provides clear and professional-grade audio without the hassle of cables or complex setups.
By investing in the Rode Wireless Go 2, you’re equipping yourself with a versatile and reliable tool that will elevate the quality of your recordings. With its dual-channel capability, expanded range, and improved battery life, you can confidently capture audio in any environment. Say goodbye to bulky recording equipment and hello to the convenience and freedom of wireless recording.
So, if you’re ready to take your recordings to the next level, don’t hesitate to start using the Rode Wireless Go 2 today. Its exceptional performance, ease of use, and compact design make it a must-have tool for any content creator or professional in need of high-quality audio. Give yourself the freedom to record without limitations and unlock your creative potential with the Rode Wireless Go 2.
FAQs
1. What is the Rode Wireless Go 2?
The Rode Wireless Go 2 is a compact and versatile wireless microphone system designed for content creators, vloggers, filmmakers, and anyone in need of high-quality audio recording on the go. It consists of two transmitters and a receiver, providing a convenient solution for capturing audio in various scenarios.
2. How do I set up the Rode Wireless Go 2?
Setting up the Rode Wireless Go 2 is quick and easy. Start by attaching the transmitters to your subjects using the built-in clips or the included furry windshield for outdoor use. Then, connect the receiver to your camera or recording device using the provided cable or by utilizing the built-in USB-C port for digital audio output. Once connected, power on the transmitters and receiver, and they will automatically pair and start transmitting wireless audio.
3. What are the recording options with the Rode Wireless Go 2?
The Rode Wireless Go 2 offers three recording modes: stereo, mono, and extended range. In stereo mode, both transmitters record audio independently on separate channels, allowing for a rich and immersive sound experience. In mono mode, one transmitter acts as a primary audio source, while the other serves as a backup or secondary input. The extended range mode increases the transmission distance up to 200 meters, ideal for scenarios where maximum mobility is required.
4. Can I use the Rode Wireless Go 2 with my smartphone?
Yes, the Rode Wireless Go 2 is compatible with smartphones. You can connect the receiver to your smartphone using the appropriate adapter or cable, such as a TRRS to TRS adapter or USB-C to 3.5mm adapter, depending on the input options available on your device. This enables you to record high-quality wireless audio directly to your smartphone during interviews, vlogs, or any content creation where mobility is essential.
5. What accessories are available for the Rode Wireless Go 2?
Rode offers a range of accessories to enhance the functionality and versatility of the Wireless Go 2 system. Some popular accessories include the SC11 cable, which allows for direct connection to professional cameras with XLR inputs, and the Lavalier Go, a compact and discreet lapel microphone designed specifically for the Wireless Go 2 system. Additionally, Rode provides various adapters, mounts, and cases to suit different recording scenarios and needs.