
Sure, here's the introduction wrapped in a paragraph tag:
html
Are you wondering how to take a screenshot on your iPhone 12? You’re in the right place! Capturing what’s on your screen can be incredibly useful, whether you want to save a memorable conversation, share an important piece of information, or simply keep a record of something special. In this article, we’ll explore the step-by-step process of taking a screenshot on your iPhone 12, along with some additional tips and tricks to make the most of this feature. By the time you finish reading, you’ll be a screenshot pro on your iPhone 12!
Inside This Article
- How to Take a Screenshot on iPhone 12
- Using Physical Buttons
- Using AssistiveTouch
- Using Siri
- Using Third-Party Apps
- Conclusion
- FAQs
How to Take a Screenshot on iPhone 12
So, you’ve just experienced a hilarious conversation or received an important confirmation message, and you want to capture the moment. Fortunately, taking a screenshot on your iPhone 12 is a breeze. Whether you prefer using physical buttons, AssistiveTouch, Siri, or third-party apps, there’s a method that suits your style.
Let’s dive into the various ways you can capture your screen on the iPhone 12.
Using Physical Buttons
The most common and straightforward method to take a screenshot on your iPhone 12 is by using the physical buttons. Simply press the side button and the volume up button simultaneously. You’ll see a brief flash, and the screenshot will be captured. The image will appear in the bottom left corner of the screen, allowing you to edit or share it immediately. It’s quick, convenient, and doesn’t require any additional setup.
Using AssistiveTouch
If you find it challenging to press the side button and volume up button simultaneously, or if these buttons are not easily accessible, you can use AssistiveTouch to take a screenshot. Simply enable AssistiveTouch in the Accessibility settings and customize it to include the “Screenshot” function. Once set up, tapping the AssistiveTouch button and selecting “Screenshot” will capture the screen, providing an alternative method for taking screenshots without using physical buttons.
Using Siri
Did you know that Siri can also help you take a screenshot? By simply saying, “Hey Siri, take a screenshot,” Siri will instantly capture the screen, offering a hands-free approach to screenshotting. This feature is particularly useful for individuals with limited mobility or those who prefer voice commands over manual actions.
Using Third-Party Apps
If you’re looking for additional features or advanced editing options, third-party apps can enhance your screenshotting experience. Apps like Lightshot, Skitch, or Snapseed provide a range of editing tools and sharing options, allowing you to personalize and distribute your screenshots effortlessly. While the built-in methods are sufficient for most users, exploring third-party apps can offer a more tailored experience based on your specific preferences.
Now that you’re equipped with various methods to take a screenshot on your iPhone 12, capturing and sharing memorable moments or important information is just a few taps or voice commands away. Whether you opt for the traditional button combination, embrace the convenience of AssistiveTouch, utilize Siri’s assistance, or venture into third-party apps, the choice is yours. Happy screenshotting!
Using Physical Buttons
One of the quickest and most straightforward methods to capture a screenshot on your iPhone 12 is by using the physical buttons. This classic technique has been a staple of iPhone screenshot functionality since the early models, and it remains just as effective on the iPhone 12.
To take a screenshot using the physical buttons, simply press and release the Side Button and the Volume Up button simultaneously. You’ll hear a distinctive camera shutter sound, and the screen will briefly flash white to indicate that the screenshot has been successfully captured.
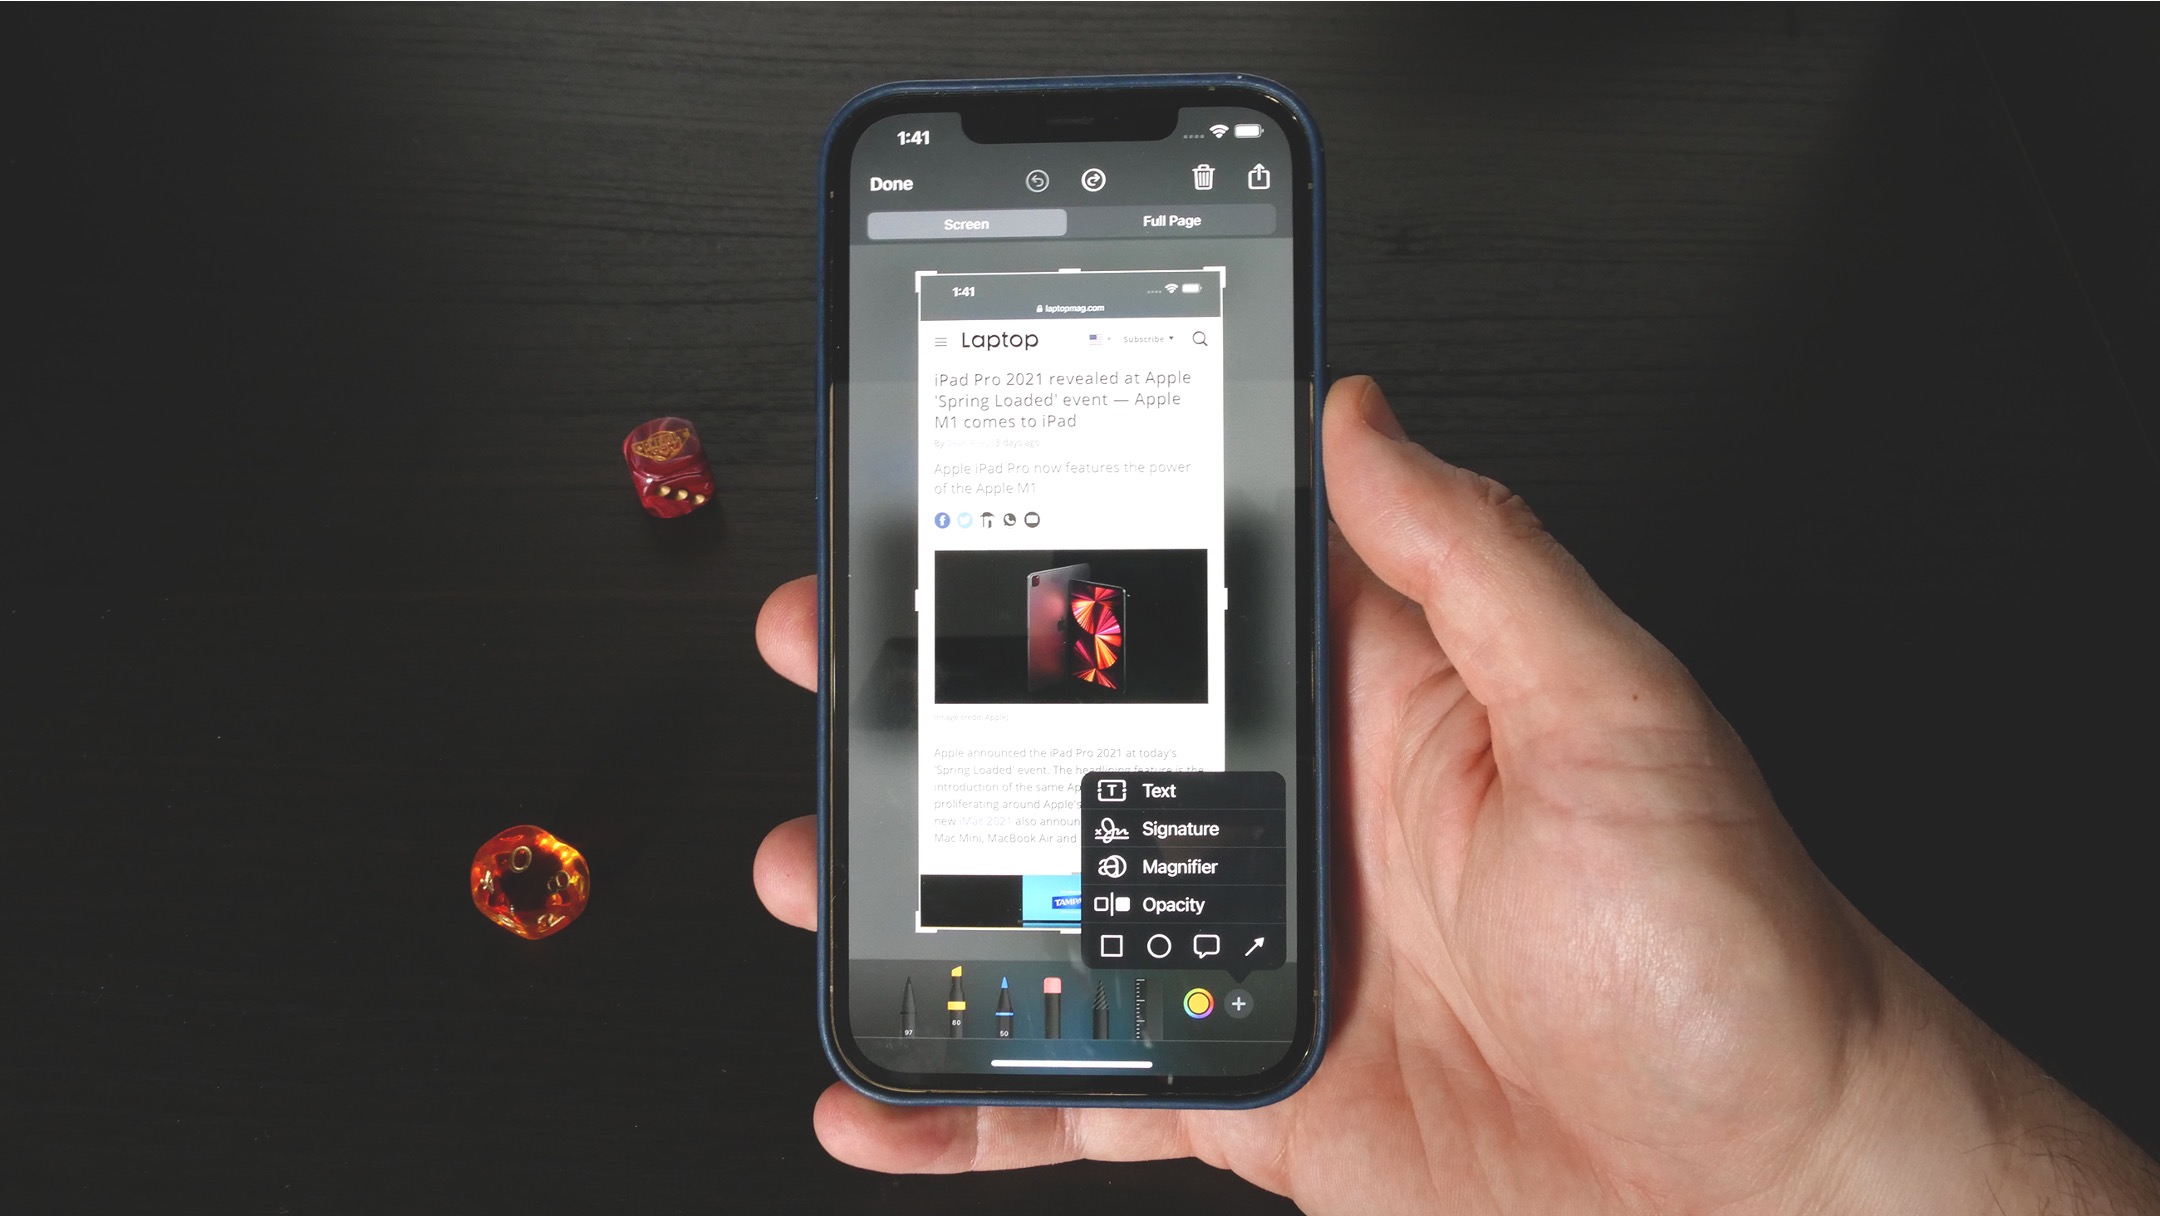
After taking the screenshot, a small preview of the image will appear in the bottom left corner of the screen. You can tap on the preview to make edits, add annotations, or share the screenshot directly. Alternatively, you can swipe the preview to the left to dismiss it, and the screenshot will be automatically saved to your Photos app.
Using AssistiveTouch
If using the physical buttons to take a screenshot on your iPhone 12 isn’t your preferred method, you can utilize the AssistiveTouch feature. This feature is particularly handy for individuals with motor skill impairments or those who find it challenging to press the physical buttons simultaneously.
To use AssistiveTouch for taking a screenshot, you need to enable it first. Simply go to Settings, then Accessibility, and tap on Touch. From there, you can activate AssistiveTouch. Once it’s enabled, a small virtual button will appear on your screen, allowing you to access various functions with just a tap.
After enabling AssistiveTouch, taking a screenshot is a breeze. Simply tap the virtual button, select Device, then tap More, and finally, choose the Screenshot option. Your iPhone 12 will capture the screen instantly, and the screenshot will be saved in your Photos app for easy access.
Using Siri
Another way to take a screenshot on your iPhone 12 is by using Siri. Siri is the voice-activated virtual assistant on Apple devices, and it can help you with a variety of tasks, including capturing your screen. To take a screenshot using Siri, simply activate Siri by saying “Hey Siri” or by pressing and holding the side button. Once Siri is active, you can simply say “Take a screenshot,” and Siri will automatically capture the contents of your screen. This hands-free method can be especially useful if you’re unable to use physical buttons or prefer using voice commands.
Keep in mind that using Siri to take a screenshot requires a stable internet connection, as Siri relies on Apple’s servers to process voice commands. Additionally, ensure that your device’s microphone is not muted or obstructed for Siri to accurately recognize your voice commands. While using Siri to take a screenshot can be convenient, it’s important to be mindful of your surroundings, especially if you’re in a public or noisy environment, as Siri may have difficulty understanding your commands in such conditions.
Using Third-Party Apps
While the built-in screenshot functionality on the iPhone 12 is robust, some users may prefer the added features and customization options available through third-party screenshot apps. These apps often offer advanced editing tools, cloud integration, and seamless sharing options, making them popular among users looking to enhance their screenshot-taking experience.
One popular third-party app for capturing and editing screenshots on the iPhone 12 is “Snapseed.” This app provides a wide range of editing tools, allowing users to enhance their screenshots with precision and creativity. Additionally, “Lightshot” is another well-regarded app that offers a user-friendly interface and intuitive editing features, making it a favorite among iPhone 12 users seeking a seamless screenshot experience.
Moreover, third-party apps such as “Skitch” and “Markup” provide users with diverse annotation and markup tools, enabling them to add personalized elements to their screenshots with ease. These apps often integrate seamlessly with popular cloud storage services, allowing users to store and share their screenshots effortlessly.
It’s important to note that while third-party screenshot apps offer enhanced functionality, users should exercise caution when granting permissions and accessing sensitive data. Prior to downloading and using third-party apps, it’s advisable to review their permissions and user agreements to ensure the security of personal information and device integrity.
Conclusion
Mastering the art of taking screenshots on your iPhone 12 is a valuable skill that can enhance your productivity and simplify communication. Whether you’re capturing memorable moments, saving important information, or troubleshooting technical issues, the ability to swiftly and confidently take screenshots is a fundamental feature of your iPhone experience. With the variety of methods available, including using the physical buttons or leveraging the AssistiveTouch feature, you have the flexibility to choose the approach that best suits your preferences and needs. By familiarizing yourself with these techniques and exploring their potential applications, you can fully harness the power of visual communication and seamlessly integrate screenshots into your daily routine.
FAQs
Q: How do I take a screenshot on my iPhone 12?
A: To take a screenshot on an iPhone 12, simply press the side button and the volume up button simultaneously. You'll hear a camera shutter sound, and the screenshot preview will appear at the bottom left of the screen.
Q: Where can I find my screenshots after taking them?
A: After taking a screenshot, it will appear as a small preview in the bottom left corner of the screen. You can tap on the preview to edit or share the screenshot immediately. Additionally, all screenshots are saved in the "Screenshots" album in the Photos app.
Q: Can I take a scrolling screenshot on my iPhone 12?
A: Yes, you can take a scrolling screenshot on your iPhone 12. After taking a regular screenshot, tap on the preview at the bottom left of the screen, then tap on "Full Page" at the top of the screen to capture a scrolling screenshot of the entire page.
Q: Are there any settings to customize the screenshot feature on iPhone 12?
A: Yes, you can customize the screenshot feature on your iPhone 12 by going to Settings > General > Accessibility > AssistiveTouch, and then enabling the "AssistiveTouch" feature. This allows you to take a screenshot using a virtual button on the screen, which can be customized to your preference.
Q: Can I annotate my screenshots on iPhone 12?
A: Yes, you can annotate your screenshots on iPhone 12 by tapping on the screenshot preview and selecting "Markup". This feature allows you to draw, add text, and highlight content on the screenshot before saving or sharing it.