
The OnePlus Nord is a popular and feature-rich smartphone that has garnered a strong following in the tech community. This mid-range device offers impressive specs, a sleek design, and a user-friendly experience. One of the key features that sets the OnePlus Nord apart from its competitors is its ability to create folders for better organization and accessibility. Whether you want to group your apps by category, create a folder for work-related applications, or simply keep your favorite apps within easy reach, knowing how to create folders on your OnePlus Nord is essential. In this article, we will walk you through the step-by-step process of creating folders on your OnePlus Nord, ensuring that you can optimize your device’s layout and maximize its functionality. Let’s dive in and discover how to create folders in the OnePlus Nord.
Inside This Article
- Create Folder Using the Default File Manager
- Create Folder Using a Third-Party File Manager App
- Create Folder on the Home Screen
- Create Folder in the App Drawer
- Conclusion
- FAQs
Create Folder Using the Default File Manager
If you’re an owner of the OnePlus Nord smartphone, you’ll be pleased to know that creating folders using the default file manager is a breeze. This built-in feature allows you to organize your files and documents in a way that suits your preferences. Whether you want to group similar files together or simply declutter your storage, creating folders with the default file manager is a convenient solution.
To begin, open the default file manager app on your OnePlus Nord. You can typically find it in the app drawer or on the home screen. Once you’ve opened the file manager, navigate to the location where you want to create the folder. This can be the internal storage or an external SD card, depending on your device settings.
Next, tap on the “New Folder” option or the “+” symbol, usually at the top or bottom of the screen. A dialogue box will appear, prompting you to enter a name for your folder. Choose a descriptive and meaningful name that reflects the content you’ll be storing inside. For example, if you’re creating a folder for your vacation photos, you could name it “Vacation 2021.”
After entering the folder name, press the “OK” button to create the folder. Congratulations, you’ve successfully created a folder using the default file manager on your OnePlus Nord! Now you can start moving files into the newly created folder by long-pressing on a file and selecting the “Move” or “Cut” option, then navigating to the folder and tapping “Paste.”
It’s important to note that the exact steps may vary slightly depending on the version of OxygenOS installed on your OnePlus Nord and any customizations made by the device manufacturer. However, the general process of creating a folder using the default file manager should remain consistent.
Now that you know how to create a folder using the default file manager on your OnePlus Nord, you can easily organize your files and keep your device clutter-free. Whether you’re a productivity enthusiast or a photography enthusiast, having a well-organized file structure can greatly enhance your user experience and make finding specific files a breeze.
Create Folder Using a Third-Party File Manager App
If you’re looking for a more advanced and customizable solution to create folders on your OnePlus Nord, you can turn to third-party file manager apps available on the Google Play Store. These apps offer additional features and options to organize your files and folders efficiently. Here’s a step-by-step guide on how to create folders using a third-party file manager app:
- First, head to the Google Play Store on your OnePlus Nord and search for a reliable file manager app. Some popular options include ES File Explorer, Solid Explorer, and Files by Google.
- Once you’ve chosen and installed the file manager app, open it to access its main interface.
- Navigate to the directory where you want to create the folder. This could be your internal storage, SD card, or any other location.
- Look for an option that allows you to create a new folder. In most file manager apps, this option is represented by a “+” or “New” button.
- Tap on the “Create New Folder” option.
- A pop-up window will appear, prompting you to enter a name for the folder. Choose a name that reflects the contents of the folder, such as “Photos,” “Documents,” or “Music.”
- After entering the folder name, click on the “Create” or “OK” button.
- The file manager app will create the folder in the selected directory. You can now start moving or copying files into the newly created folder to keep your files organized.
Using a third-party file manager app gives you more control over your file organization system. You can customize the folder icons, sort files based on various criteria, and even password-protect sensitive folders. Explore the settings and features of the file manager app to make the most out of its functionality.
Remember to regularly clean up and organize your folders to keep your OnePlus Nord running smoothly and to easily locate your files. With the help of a reliable file manager app, you can effortlessly manage your files and access them whenever you need them.
Create Folder on the Home Screen
Creating folders on your home screen is a convenient way to organize and declutter your Oneplus Nord smartphone. With folders, you can group similar apps together, making it easier to find and access them. Follow these simple steps to create a folder on your Oneplus Nord’s home screen:
1. Start by finding an empty space on your home screen. Long press on the screen until the options menu appears.
2. Look for the “Widgets” option and tap on it. This will bring up a list of available widgets and shortcuts.
3. Scroll through the list of widgets until you find the “Folder” widget. Tap and hold the folder widget, then drag it to the desired location on your home screen.
4. Once the folder widget is placed on the home screen, it will prompt you to choose the apps you want to add to the folder. Tap on the apps you want to include, and they will be added to the folder.
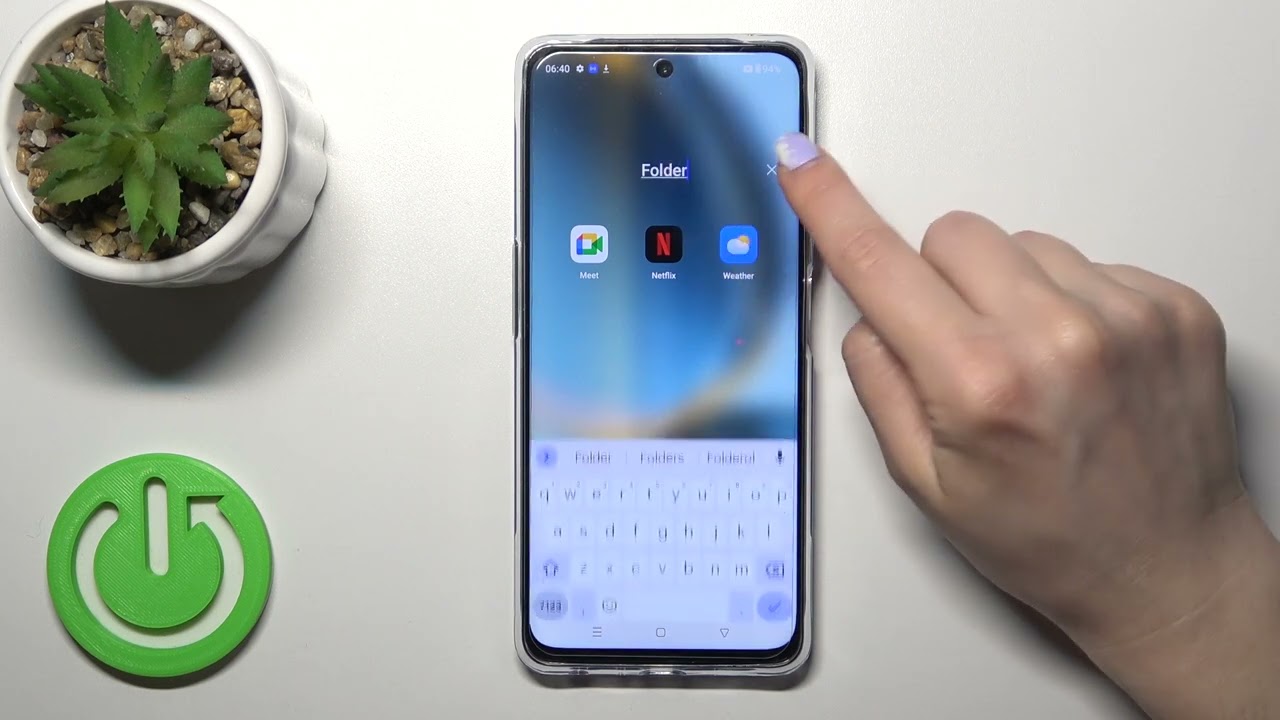
5. You can also rename the folder by tapping on the folder’s name at the top and entering a new name for it.
6. To add more apps to the folder, simply drag and drop them onto the folder icon on the home screen. You can add as many apps as you want to the folder.
7. To remove an app from the folder, open the folder and long press on the app icon you want to remove. Drag it out of the folder and release it on the home screen.
8. If you want to delete the entire folder, long press on the folder icon and drag it to the “Remove” or “Delete” option that appears at the top or bottom of the screen.
And that’s it! You’ve successfully created a folder on your Oneplus Nord’s home screen. Now you can easily access your grouped apps and keep your home screen organized.
Create Folder in the App Drawer
To keep your apps organized and easily accessible, creating folders in the app drawer is a great option. With a folder, you can group similar apps together and reduce clutter on your phone screen. Here’s how you can create a folder in the app drawer on your OnePlus Nord:
1. Start by accessing the app drawer on your device. To do this, swipe up from the bottom of the screen or tap on the “Apps” button located at the center of the bottom navigation bar.
2. Once you are in the app drawer, locate the app that you want to create a folder for.
3. Long-press on the app icon until a menu appears. Some devices might show a pop-up menu, while others may display options at the top or bottom of the screen.
4. Look for the “Create folder” option and select it. The name of the folder will usually default to the category of the apps you are grouping together.
5. A new folder will be created, and the app you selected will be automatically placed inside it. To add more apps to the folder, simply drag and drop them onto the folder icon.
6. If you want to remove an app from the folder, tap and hold the desired app icon within the folder, then drag it out of the folder and release it.
7. You can also rename the folder to something more specific. To do this, tap and hold the folder icon, then select “Edit name” or “Rename” from the pop-up menu. Enter the desired name on the keyboard and tap “OK” or “Save” to confirm the changes.
8. Repeat the above steps to create more folders in the app drawer. You can organize your apps in various categories according to your preference.
Creating folders in the app drawer can significantly improve the efficiency and organization of your OnePlus Nord. It allows you to declutter the screen and easily locate your apps when you need them. Experiment with different folder combinations to find the organization style that works best for you.
Conclusion
In conclusion, creating a folder in the OnePlus Nord is a simple and effective way to organize your apps and declutter your home screen. With just a few easy steps, you can group related apps together and make it easier to find and access them. Whether you want to categorize your social media apps, games, or productivity tools, creating folders on the OnePlus Nord provides a seamless solution.
This feature not only helps you stay organized but also enhances the overall user experience. By reducing the clutter on your home screen, you can have a cleaner and more streamlined interface, making it easier to navigate and locate your favorite apps. With the ability to customize folder names and rearrange apps within them, you have complete control over how your home screen is organized.
Don’t let a cluttered home screen slow you down. Take advantage of the folder creation feature on the OnePlus Nord and enjoy a more efficient and personalized smartphone experience.
FAQs
Q: Can I create folders on my OnePlus Nord?
A: Absolutely! You can easily create folders on your OnePlus Nord to organize your apps, photos, and other files. Creating folders is a great way to keep your home screen clean and clutter-free.
Q: How do I create a folder on my OnePlus Nord?
A: To create a folder on your OnePlus Nord:
- Long-press on any app icon or widget on your home screen.
- Drag and drop the app icon or widget on top of another app icon or widget.
- Release your finger to create the folder.
- You can then customize the folder by renaming it and adding more apps or widgets inside.
Q: Can I customize the appearance of the folder on my OnePlus Nord?
A: Yes, you can customize the appearance of the folder on your OnePlus Nord. After creating the folder, you can long-press on it to access various customization options such as changing the folder name, selecting a different folder icon, and even changing the folder color.
Q: How do I add apps to a folder on my OnePlus Nord?
A: To add apps to a folder on your OnePlus Nord:
- Open the folder by tapping on it.
- Tap on the “+” or “Add” button to choose the apps you want to add to the folder.
- You can select multiple apps and then tap on “Add” to add them to the folder.
- The selected apps will now appear inside the folder, and you can arrange them however you like.
Q: Can I remove apps from a folder on my OnePlus Nord?
A: Yes, you can remove apps from a folder on your OnePlus Nord. To remove apps from a folder:
- Open the folder that contains the app you want to remove.
- Long-press on the app icon you want to remove.
- Drag and drop the icon outside of the folder.
- The app will be removed from the folder and placed back on the home screen.
Once you become familiar with these steps, you’ll find it incredibly easy to create and manage folders on your OnePlus Nord. So, go ahead and start organizing your device to maximize efficiency and accessibility.