
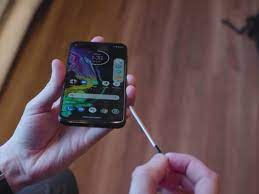
The Moto G, with its stunning camera capabilities, allows users to capture high-quality photos. Whether it’s a breathtaking landscape, a cherished moment with loved ones, or a fun-filled adventure, you may want to download these photos from your Moto G to save, share, or print them. In this article, we will guide you on how to easily download photos from your Moto G to your computer or other devices. By following these simple steps, you’ll be able to preserve your precious memories and enjoy them whenever you want. So, let’s dive into the process of downloading photos from Moto G and unlock the full potential of your smartphone’s camera!
Inside This Article
- Overview
- Method 1: Using USB Cable and File Explorer
- Method 2: Using Google Photos App
- Method 3: Using Motorola Device Manager
- Method 4: Using Third-Party Photo Transfer Apps
- Conclusion
- FAQs
Overview
Downloading photos from your Moto G smartphone is a straightforward process that allows you to transfer your precious memories to your computer or other devices. With various methods available, you can choose the one that suits your preferences and needs. Whether you prefer using a USB cable, utilizing the Google Photos app, or relying on third-party photo transfer apps, this article will guide you through the steps to download photos from your Moto G.
In the following sections, we will explore four different methods to download photos from your Moto G:
- Using a USB Cable and File Explorer
- Using the Google Photos App
- Using the Motorola Device Manager
- Using Third-Party Photo Transfer Apps
By following these methods, you can effortlessly transfer your favorite photos from your Moto G to your desired destination, whether it’s your computer, cloud storage, or another device. Let’s jump right in!
Method 1: Using USB Cable and File Explorer
One of the simplest and most convenient ways to download photos from your Moto G smartphone is by using a USB cable and the file explorer on your computer. This method allows you to directly access and transfer files between your phone and computer.
Here’s a step-by-step guide on how to do it:
- Connect your Moto G to your computer using a USB cable.
- On your Moto G, swipe down from the top of the screen to open the notification panel, then tap on the “USB” option.
- In the USB options, select the “File Transfer” mode.
- On your computer, open your file explorer (e.g., Windows Explorer on Windows or Finder on Mac).
- In the file explorer, you should see your Moto G listed as a connected device. Click on it to open it.
- Navigate to the “DCIM” folder on your Moto G. This folder contains all your photos and videos.
- Select the photos you want to download by either dragging and dropping them to your computer’s desired location or by using the copy-paste method.
- Once the transfer is complete, you can disconnect your Moto G from the computer.
Using the USB cable and file explorer method allows you to have direct control over the transfer process and enables you to choose specific photos to download. It’s a convenient option if you prefer a more hands-on approach to managing your files.
Method 2: Using Google Photos App
Another convenient way to download photos from Moto G is by using the Google Photos app. Here’s how you can do it:
1. Open the Google Photos app on your Moto G.
2. Sign in to your Google account if you haven’t already done so.
3. Once you’re signed in, the app will automatically sync and backup all your photos to your Google account. This may take a few minutes depending on the number of photos you have.
4. Once the sync is complete, go to the main screen of the app and tap on the ‘Photos’ tab.
5. Here, you’ll find all your photos arranged in chronological order. You can browse through them or use the search bar to find specific photos.
6. When you’ve found the photo you want to download, tap on it to open it in full screen.
7. Now, tap on the three-dot menu icon at the top-right corner of the screen.
8. From the menu that appears, select the ‘Download’ option. This will save the photo to your device’s local storage.
9. The downloaded photo will be accessible through your device’s Gallery app or any other file explorer app you have installed.
This method allows you to easily download individual photos from your Moto G using the Google Photos app. However, keep in mind that if you want to download multiple photos or entire albums, it’s more efficient to use a computer and access your Google Photos account through the web interface.
Method 3: Using Motorola Device Manager
If you own a Moto G phone and want to download photos from your device to your computer, one of the easiest ways is by using the Motorola Device Manager. This software allows you to manage and transfer files between your Moto G and your computer with just a few simple steps.
To begin, make sure you have the Motorola Device Manager installed on your computer. If you haven’t installed it yet, you can download it from the official Motorola website.
Once the software is installed, follow these steps:
- Connect your Moto G phone to your computer using a USB cable.
- Open the Motorola Device Manager on your computer.
- Wait for the software to recognize your device. This may take a few moments.
- Once your device is recognized, you will see it listed in the Motorola Device Manager interface.
- Click on the option to “Manage your Moto G” or a similar option, depending on the version of Motorola Device Manager you are using.
- Next, navigate to the “Photos” section or folder within the Motorola Device Manager.
- Select the photos you want to download to your computer. You can either select individual photos by holding down the Ctrl key and clicking on each photo, or you can select all photos by pressing Ctrl+A.
- After selecting the photos, click on the option to “Download” or “Export” the photos.
- Choose the destination folder on your computer where you want to save the downloaded photos.
- Click “OK” or “Download” to initiate the download process.
- Wait for the photos to be transferred from your Moto G to your computer. The time it takes will depend on the size and number of photos you are transferring.
- Once the transfer is complete, you will find the downloaded photos in the destination folder you specified earlier.
Using the Motorola Device Manager is a quick and efficient way to download photos from your Moto G to your computer. Whether you want to save your memories or free up space on your phone, this method allows you to easily transfer photos without the need for any additional apps or tools.
Method 4: Using Third-Party Photo Transfer Apps
If you’re looking for a convenient and efficient way to download photos from your Moto G, using a third-party photo transfer app can be a great option. These apps offer a user-friendly interface and a range of features specifically designed to make the photo transfer process easy and straightforward. Here’s how you can use a third-party photo transfer app to download photos from your Moto G:
1. First, head to the Google Play Store on your Moto G and search for photo transfer apps. There are several popular options available, such as AirDroid, Pushbullet, and Syncios Mobile Manager. Choose one that suits your preferences and download it to your device.
2. Once you’ve installed the app, open it on both your Moto G and your computer. Most photo transfer apps work by establishing a connection between your phone and computer through the same Wi-Fi network. Make sure both devices are connected to the same network.
3. Follow the prompts on the app to set up the connection between your Moto G and computer. This usually requires you to enter a code or scan a QR code displayed on your computer screen using your phone’s camera. Once the connection is established, you’ll be able to access your Moto G’s photos on your computer.
4. Navigate to the photo gallery or album section within the app on your computer. You should see a list of all the photos on your Moto G. From here, you can select the photos you want to download and choose a destination folder on your computer where you want to save them.
5. After selecting the photos and choosing the destination folder, click on the “Download” or “Transfer” button within the app. The app will then initiate the transfer process and start downloading the selected photos from your Moto G to your computer.
6. Once the download is complete, you can safely disconnect your Moto G from the computer and access the downloaded photos in the chosen destination folder. You can now enjoy your precious memories captured on your Moto G!
Using a third-party photo transfer app can provide a streamlined and efficient method to download photos from your Moto G. It eliminates the need for cables or complicated software installations, allowing you to quickly and easily transfer your photos to your computer. Give it a try and experience the convenience for yourself!
The Moto G is a popular smartphone known for its impressive camera capabilities. With its high-resolution sensors and advanced imaging features, capturing stunning photos has never been easier. In this article, we explored various methods and techniques to download photos from your Moto G. Whether you prefer transferring them to your computer via USB, using cloud storage services, or utilizing third-party apps, you have a range of options at your disposal. Remember to keep your device and apps up to date to ensure a smooth downloading experience. Now, armed with this knowledge, you can easily preserve and share your memorable moments captured on your Moto G with friends and family.
FAQs
1. Can I download photos from my Moto G to my computer?
Yes, you can easily download photos from your Moto G to your computer. There are multiple methods available, including using a USB cable, Bluetooth, or cloud storage services.
2. What is the easiest way to transfer photos from my Moto G to my computer?
The easiest way to transfer photos from your Moto G to your computer is by using a USB cable. Simply connect your phone to your computer using the cable, and then access the phone’s storage from your computer. You can copy and paste the photos to your desired location on your computer.
3. Can I transfer photos wirelessly from my Moto G to my computer?
Yes, you can transfer photos wirelessly from your Moto G to your computer using Bluetooth. Make sure both devices have Bluetooth enabled and paired. Then, select the photos you want to transfer on your Moto G and choose the option to share via Bluetooth. On your computer, accept the transfer request and the photos will be saved to your computer.
4. Are there any cloud storage options to transfer photos from my Moto G to my computer?
Yes, there are several cloud storage services like Google Drive, Dropbox, and Microsoft OneDrive that offer automatic photo backup and synchronization. Install the corresponding app on both your Moto G and computer, and enable photo backup. Your photos will be uploaded to the cloud and can be accessed on your computer through the cloud storage website or app.
5. What should I do if I can’t download photos from my Moto G?
If you are facing difficulties downloading photos from your Moto G, try the following troubleshooting steps:
– Ensure that your USB cable is properly connected and functional.
– Restart your computer and Moto G to refresh the connection.
– Update the device drivers on your computer.
– Check if there is enough storage space on your Moto G.
– If using Bluetooth or cloud storage, ensure that both devices are properly connected and paired.
If all else fails, you may consider reaching out to Motorola support or visiting a service center for further assistance.