
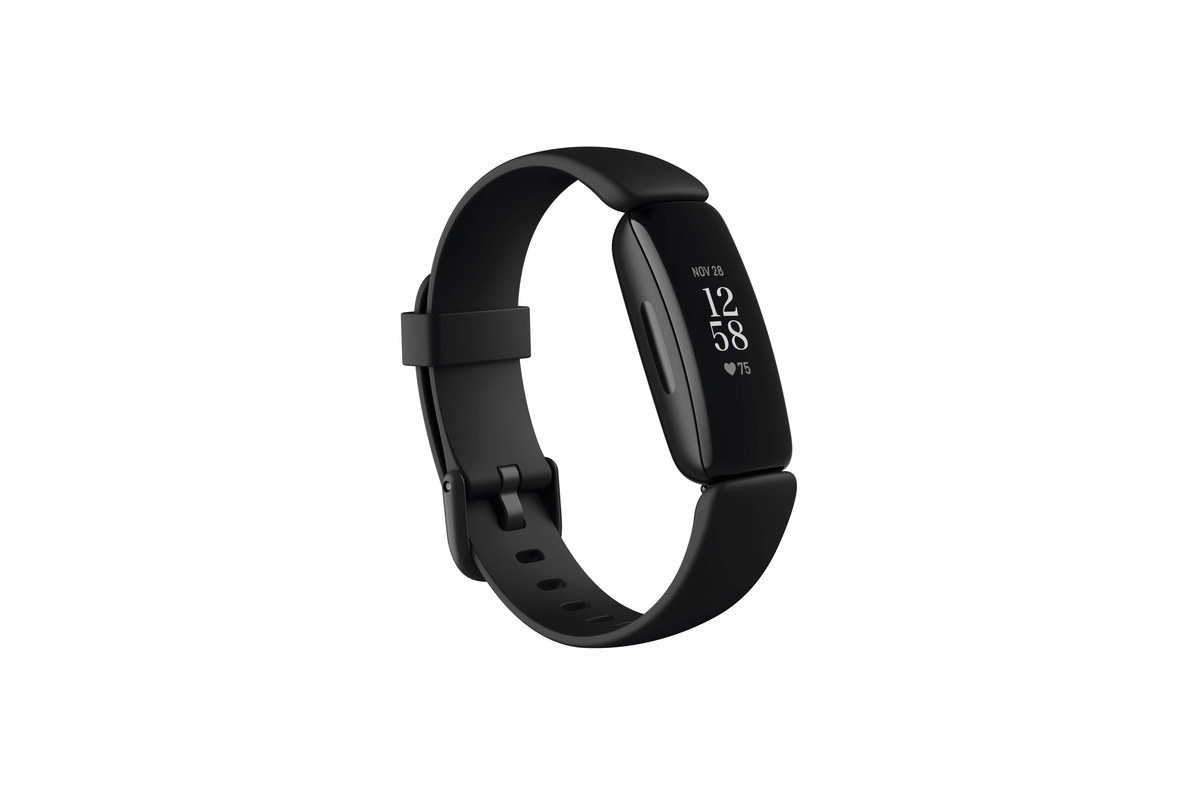
Welcome to our comprehensive guide on how to set the time on your Fitbit HR! Fitbit HR is a popular fitness tracker that not only helps you monitor your daily activity and sleep patterns but also keeps track of time. Setting the correct time on your Fitbit HR is crucial for accurate activity tracking and staying in sync with your daily routine. In this article, we will walk you through the step-by-step process of setting the time on your Fitbit HR, so you can easily stay on top of your fitness goals and make the most of your device. Whether you’re a new Fitbit HR owner or simply need a refresher, we’ve got you covered. Let’s dive in and get your Fitbit HR set up correctly!
Inside This Article
- How to Set Time on Fitbit HR
- Accessing the Settings Menu on Fitbit HR
- Setting the Time on Fitbit HR
- Troubleshooting Time Sync Issues
- Additional Tips and Considerations
- Conclusion
- FAQs
How to Set Time on Fitbit HR
Setting the time on your Fitbit HR is a simple task that can be done using either the device buttons or the Fitbit app on your smartphone. In this guide, we’ll walk you through the step-by-step process to ensure that your Fitbit HR always displays the correct time.
1. Accessing the Settings Menu on Fitbit HR
If you prefer using the device buttons to adjust the time on your Fitbit HR, the first step is to access the Settings menu. You can do this by pressing the button on the side of your Fitbit HR until you see the Settings icon. Once you see the icon, press and hold the button to enter the Settings menu.
Alternatively, you can also use the Fitbit app on your smartphone to access the Settings menu. Simply open the Fitbit app, tap on the device icon at the top left corner of the screen, and select your Fitbit HR from the list of connected devices. From there, you should be able to access the Settings menu.
2. Setting the Time on Fitbit HR
Once you have accessed the Settings menu, you can proceed to set the time on your Fitbit HR. There are two ways to do this: manual time setting and auto-syncing with your smartphone’s time.
If you choose manual time setting, use the device buttons to navigate to the “Time” option in the Settings menu. Press the button to select it, and then use the buttons to adjust the hour and minute values as needed. Confirm your selection by pressing the button again.
To auto-sync the time with your smartphone, ensure that your Fitbit HR has a stable Bluetooth connection with your phone. The time on your Fitbit HR will automatically update to match the time on your smartphone.
3. Troubleshooting Time Sync Issues
If you encounter any issues with time synchronization on your Fitbit HR, there are a few troubleshooting steps you can try. First, make sure that your Fitbit HR is properly connected to your smartphone via Bluetooth. Restarting both devices can sometimes resolve connectivity issues.
Additionally, check the battery level on your Fitbit HR. If the battery is low, the device may have difficulty syncing the time with your smartphone. Charge your Fitbit HR and try syncing again.
4. Additional Tips and Considerations
To ensure that your Fitbit HR always displays the correct time, it’s recommended to regularly sync your device with the Fitbit app on your smartphone. This will update the time automatically and keep it accurate.
You can also customize the time format and time zone in the Fitbit app settings. This is particularly useful if you’re traveling or transitioning between time zones, as it allows you to easily adjust the time displayed on your Fitbit HR.
Accessing the Settings Menu on Fitbit HR
Setting the time on your Fitbit HR is a simple process that can be done in a few different ways. The first step is to access the settings menu, which can be done using either the device buttons or the Fitbit app on your smartphone.
Using the device buttons
To access the settings menu on your Fitbit HR using the device buttons, follow these steps:
- Press the button on the side of your Fitbit HR to wake up the display.
- Swipe left or right until you see the “Settings” option.
- Tap on the “Settings” option to enter the settings menu.
Once you’re in the settings menu, you’ll be able to navigate through the options using the device buttons and make any necessary adjustments to the time.
Using the Fitbit app on your smartphone
If you prefer to use your smartphone to access the settings menu on your Fitbit HR, follow these steps:
- Ensure that your Fitbit HR is connected to your smartphone via Bluetooth.
- Open the Fitbit app on your smartphone.
- Tap on your Fitbit HR device name, usually located at the top of the app’s main screen.
- Scroll down until you see the “Settings” option and tap on it.
Once you’re in the settings menu on the Fitbit app, you’ll have the same options available to adjust the time on your Fitbit HR.
Setting the Time on Fitbit HR
One of the essential features of any fitness tracker is the ability to accurately display the time. Fitbit HR makes it easy for you to set the time to ensure that you stay on schedule and never miss a beat. There are two methods you can use to set the time on your Fitbit HR – manual time setting and auto-syncing with your smartphone’s time.
Manual Time Setting
If you prefer to manually set the time on your Fitbit HR, follow these simple steps:
- On your Fitbit HR, navigate to the settings menu by pressing the button located on the side of the device. The settings menu can typically be accessed by scrolling through the options using the button until you find the “Settings” option.
- Once you are in the settings menu, locate the “Time and Date” option. Select it by pressing the button.
- From there, you can manually adjust the time on your Fitbit HR. Use the buttons to increase or decrease the hours and minutes until you have the correct time.
- After making the necessary adjustments, press the button to save the changes and exit the settings menu. Your Fitbit HR should now display the correct time.
By manually setting the time on your Fitbit HR, you have complete control over ensuring that your device’s time is accurate and in sync with your daily routine.
Auto-syncing with your Smartphone’s Time
If you prefer a more convenient and automated method of setting the time on your Fitbit HR, you can utilize the auto-sync feature with your smartphone’s time. Here’s how:
- Ensure that your Fitbit HR is connected to your smartphone via Bluetooth. This connection is essential for the auto-sync functionality to work.
- Launch the Fitbit app on your smartphone and navigate to the device settings.
- Select your Fitbit HR from the list of connected devices.
- In the device settings, you should find an option to sync the time with your smartphone. Enable this option to allow your Fitbit HR to automatically update its time according to your smartphone’s time.
Now, whenever your smartphone’s time changes due to time zone adjustments or daylight saving time, your Fitbit HR will automatically sync and update its time accordingly.
Using the auto-sync feature ensures that your Fitbit HR always displays the most accurate and up-to-date time without any manual intervention.
Troubleshooting Time Sync Issues
If you’re facing time synchronization issues with your Fitbit HR, there are a couple of troubleshooting steps you can take to ensure the accuracy of the time displayed on your device. Here are two common issues to address:
Ensuring proper Bluetooth connection
One of the main reasons for time sync issues is a weak or unstable Bluetooth connection between your Fitbit HR and your smartphone. To ensure a proper connection:
- Make sure that Bluetooth is enabled on your smartphone and that it is in close proximity to your Fitbit HR.
- If you’ve previously paired your devices, try unpairing and then re-pairing them to refresh the Bluetooth connection.
- Restart both your Fitbit HR and your smartphone to reset any temporary connection issues.
- Ensure that there are no other devices nearby that may interfere with the Bluetooth signal.
Checking Fitbit battery level
Another factor that can affect time synchronization is the battery level of your Fitbit HR. If the battery is low, your device may not be able to sync properly with your smartphone:
- Check the battery level of your Fitbit HR by navigating to the settings menu on your device. If the battery is low, charge it until it reaches an optimal level.
- Ensure that the battery contacts on your Fitbit HR are clean and free from any dirt or debris that may interfere with the charging process.
- If you’ve recently replaced the battery, make sure it is properly installed, and the battery cover is securely closed.
By addressing these common issues, you can troubleshoot and resolve time sync problems with your Fitbit HR, ensuring that the displayed time on your device is accurate and up to date.
Additional Tips and Considerations
When it comes to setting the time on your Fitbit HR, there are a few additional tips and considerations that can help ensure accurate time updates and customize your time format and time zone.
Syncing Fitbit HR regularly: It is essential to sync your Fitbit HR with the Fitbit app regularly to ensure accurate time updates. By syncing your device, it will receive the correct time from your smartphone, making sure it stays aligned with the current time accurately.
Adjusting time format: Fitbit HR offers the flexibility to adjust the time format according to your preference. Whether you prefer the 12-hour format (AM/PM) or the 24-hour format (military time), you can easily customize it in the settings. Simply navigate to the settings menu on your Fitbit HR or through the Fitbit app and locate the time format option to make the desired adjustment.
Adjusting time zone: If you travel frequently or live in a different time zone, it is crucial to adjust the time zone setting on your Fitbit HR for accurate timekeeping. Depending on the model, you can either adjust the time zone directly on the device or through the Fitbit app. Be sure to select the correct time zone to ensure the accurate display of time on your Fitbit HR.
By regularly syncing your Fitbit HR and adjusting the time format and time zone settings, you can ensure that your device consistently displays the correct time, whether you are tracking your workouts or simply checking the time throughout the day.
Remember, keeping your Fitbit HR synced and correctly configured will minimize any potential discrepancies and allow you to stay on top of your daily routine without worrying about the accuracy of the time displayed on your device.
Setting the time on your Fitbit HR is a simple and straightforward process that allows you to keep track of your activities more accurately. By following the provided steps, you can ensure that your Fitbit HR displays the correct time, ensuring that you stay on schedule and make the most of your day.
Remember, if you encounter any issues or have any questions, consult the Fitbit HR user manual or reach out to Fitbit’s customer support for assistance. Now that you know how to set the time on your Fitbit HR, you can focus on achieving your fitness goals and staying connected throughout the day.
So, go ahead and take control of your fitness journey with your Fitbit HR, ensuring that you have the right time information at your fingertips. Set the time, stay active, and make the most of every moment with your trusty Fitbit HR by your side.
FAQs
Q: How do I set the time on my Fitbit HR?
A: Setting the time on your Fitbit HR is simple. Follow these steps:
1. Make sure your Fitbit HR is charged and connected to your smartphone via the Fitbit app.
2. Open the Fitbit app and tap on the “Account” icon at the bottom right corner.
3. Scroll down and tap on your Fitbit HR device.
4. On the device screen, tap on “Clock Faces”.
5. Select the clock face you want to use and tap on it.
6. Tap on “Settings” and then “Time”.
7. Adjust the time settings to match your desired time zone or set the time manually by tapping on “Set Time”.
8. Follow the on-screen instructions to set the time.
9. Once you’ve set the time, tap on the back arrow at the top left corner to save the changes.
Your Fitbit HR will now display the correct time.
Q: Is it possible to set the time on my Fitbit HR without using the app?
A: No, the Fitbit HR relies on the Fitbit app to synchronize and update its time. You need to have the app installed and connected to your Fitbit HR to set the time accurately.
Q: Why is it important to set the correct time on my Fitbit HR?
A: Setting the correct time on your Fitbit HR is crucial for accurate activity tracking and syncing with your smartphone. It ensures that your device records the correct time, date, and other data related to your daily activity, such as steps taken and sleep patterns. Additionally, having the correct time displayed on your Fitbit HR makes it more convenient and reliable as a timekeeping device.
Q: Can I use a different clock face on my Fitbit HR?
A: Yes, you can customize the look of your Fitbit HR by selecting different clock faces. The Fitbit app offers a variety of clock faces to choose from, allowing you to personalize your device’s appearance according to your style and preferences.
Q: Will changing the clock face affect the accuracy of my Fitbit HR’s timekeeping?
A: No, changing the clock face on your Fitbit HR does not impact the accuracy of its timekeeping. The time is synchronized with your smartphone through the Fitbit app, regardless of the clock face you choose. The clock face primarily changes the visual display of time on your device while maintaining the precise timekeeping functionality.