
Applying a screen protector on a smartphone is an essential step to protect the delicate display from scratches, smudges, and cracks. With the increasing popularity of touchscreen devices, having a high-quality screen protector is crucial in extending the lifespan of your smartphone and maintaining its pristine appearance. However, many people find the process of applying a screen protector to be daunting and worry about getting it right. But fear not! In this article, we will guide you through the easy and foolproof steps on how to apply a screen protector on your smartphone. From preparing the surface to aligning and smoothing out any bubbles, we will cover everything you need to know. So, let’s dive in and learn how to safeguard your smartphone’s screen with a perfect fit screen protector.
Inside This Article
- Clean the Smartphone Screen
- Gather Your Supplies
- Position the Screen Protector
- Smooth Out Air Bubbles
- Conclusion
- FAQs
Clean the Smartphone Screen
Before applying a screen protector on your smartphone, it’s crucial to clean the screen thoroughly. Any dust, smudges, or debris on the screen can affect the adhesive and result in a less than perfect application. Follow these steps to ensure a clean surface:
- Power off your smartphone: Start by turning off your smartphone and removing any protective cases or covers.
- Use a microfiber cloth: Gently wipe the screen with a soft microfiber cloth to remove any fingerprints or smudges. Avoid using harsh materials like paper towels or tissues, as they can potentially scratch the screen.
- Apply a cleaning solution: If there are stubborn marks or grease on the screen, dampen a corner of the microfiber cloth with a small amount of screen cleaning solution. Make sure not to spray the cleaning solution directly on the screen to prevent any liquid from seeping into the phone.
- Wipe in a circular motion: Use the dampened corner of the cloth to gently wipe the screen in a circular motion, applying light pressure. Be thorough but careful not to press too hard, as this can damage the screen.
- Dry the screen: Once you’ve cleaned the screen, use a separate dry portion of the microfiber cloth to remove any moisture. Ensure that the screen is completely dry before proceeding to apply the screen protector.
By cleaning the smartphone screen before applying the screen protector, you create an optimal foundation for a smooth and seamless installation. Taking the time to clean the screen thoroughly ensures the best possible outcome and maximizes the effectiveness of the screen protector’s adhesive.
Gather Your Supplies
Before applying a screen protector on your smartphone, it’s essential to gather all the necessary supplies. Having everything ready will ensure a smooth and hassle-free installation process. Here are the supplies you’ll need:
1. Screen Protector: Choose a high-quality screen protector that is specifically designed for your smartphone model. Look for one that offers good clarity, durability, and has a reliable adhesive.
2. Cleaning Solution: A cleaning solution specially formulated for electronics is crucial to remove any dirt, dust, or fingerprints from your phone’s screen. Avoid using household cleaners or alcohol-based solutions, as they can damage the screen or leave residues.
3. Microfiber Cloth: It’s important to have a lint-free and non-abrasive microfiber cloth to clean and dry the screen. This will help avoid scratching or leaving fibers behind during the installation process.
4. Dust Removal Sticker: A dust removal sticker or tape is recommended to remove any lingering dust particles from the screen. This step is crucial to ensure a smooth and bubble-free installation.
5. Squeegee or Card: A small plastic squeegee or a sturdy card can be used to remove air bubbles and smoothen out the screen protector. Make sure it has a straight edge and is not sharp enough to damage the protector or screen.
It’s important to have all these supplies easily accessible before you start the installation process. Be sure to double-check that you have everything you need to avoid interruptions or potential issues. With these supplies in hand, you’re ready to move on to the next step: positioning the screen protector on your smartphone.
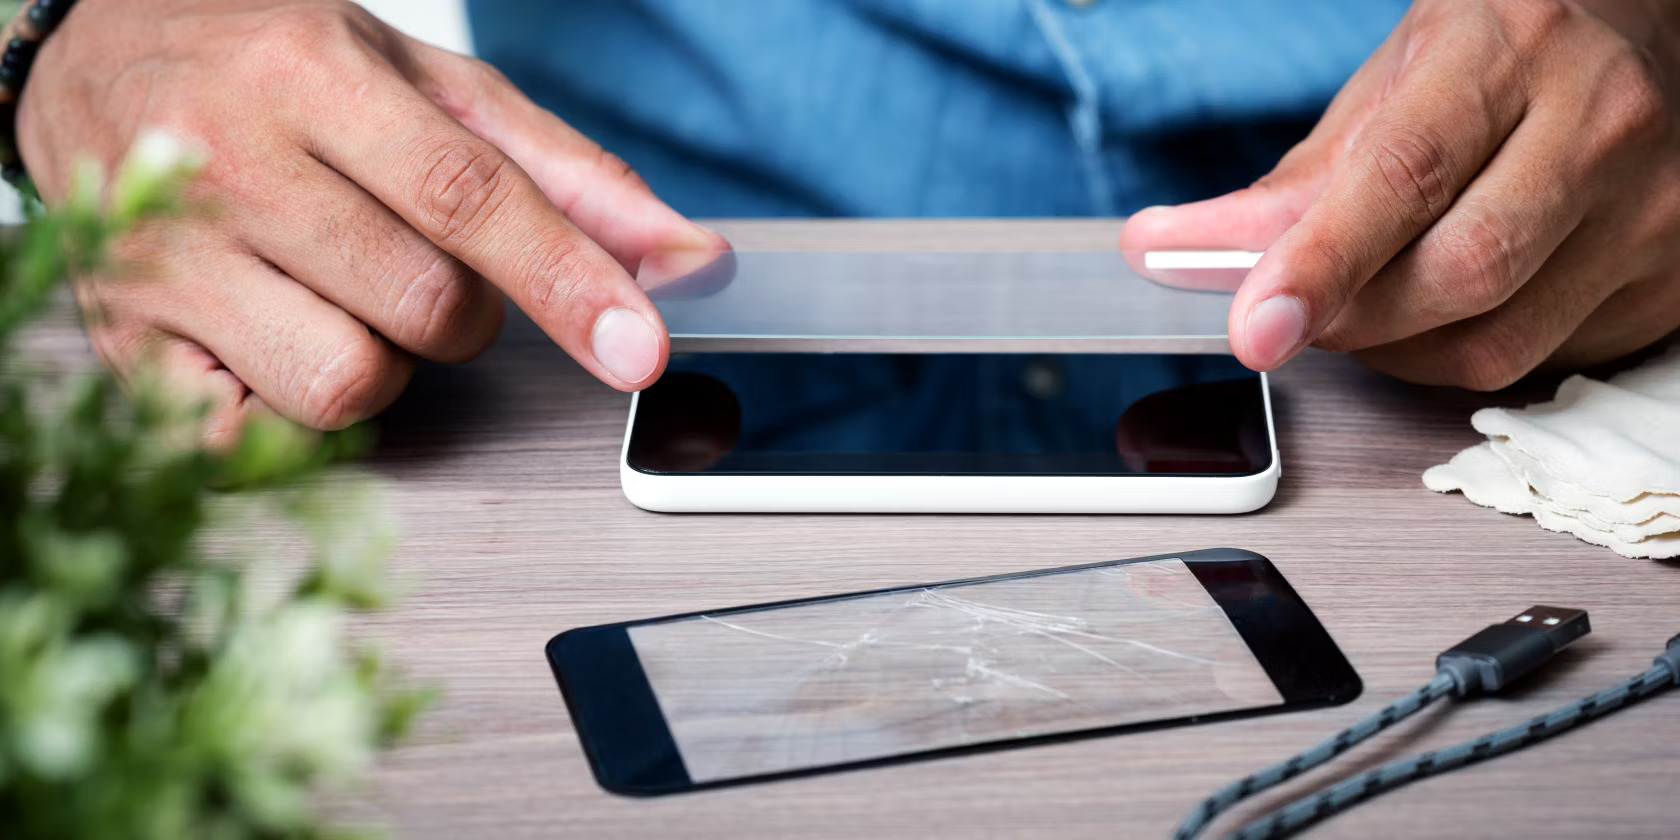
Position the Screen Protector
Once you have properly cleaned your smartphone screen and gathered all the necessary supplies, it’s time to position the screen protector. This step requires precision and patience to ensure a bubble-free and aligned application.
Start by removing the backing of the screen protector, making sure to hold onto the edges and avoiding touching the sticky side. Some screen protectors come with a tab or a sticker to help facilitate this process, so be sure to utilize these if available.

Align the screen protector with the edges of your smartphone screen, making sure to line it up correctly. Look for any cutouts or notches on the screen protector that correspond to the camera, speakers, or buttons on your device. This will help ensure a precise fit.
Once you have aligned the screen protector, slowly lower it onto the screen, starting from one edge and gently pressing it down as you go. Use your fingers or a cleaning cloth to apply even pressure, smoothing out any air bubbles or imperfections as you work across the screen.
If you notice any large air bubbles, you can try gently lifting the screen protector and repositioning it. However, be careful not to touch the adhesive side too much as this can reduce its effectiveness. It’s best to work slowly and methodically to avoid any mistakes.
As you position the screen protector, be mindful of any dust or debris that may have accumulated on the screen or the protector itself. If you notice any particles, use a microfiber cloth or dust remover sticker to remove them before finalizing the application.
Once the screen protector is in position and all air bubbles have been smoothed out, take a close look to ensure that there are no dust specks or trapped air pockets. If you notice any, you can try using a credit card or a similar flat object to gently push them towards the edges and out from under the protector.
After you are satisfied with the placement and overall appearance of the screen protector, give it a final once-over to ensure it is securely adhered to your smartphone screen. If needed, you can lightly press along the edges to ensure a strong bond.
Congratulations! You have successfully positioned the screen protector on your smartphone. Now you can enjoy added protection for your screen without compromising its visibility or touch sensitivity.
Smooth Out Air Bubbles
After successfully applying the screen protector onto your smartphone, you may notice some air bubbles trapped underneath. Don’t worry, this is a common occurrence and can be easily resolved. Follow these steps to smooth out the air bubbles:
- Patience is key: Air bubbles may disappear on their own within a day or two, so it’s worth giving it some time before taking any further action.
- Use a microfiber cloth: Gently press down on the screen protector with a microfiber cloth, starting from the center and moving towards the edges. Apply even pressure to smooth out the bubbles and ensure proper adhesion.
- Push out the bubbles: If the above method does not eliminate the air bubbles, use a credit card or a similar plastic card to push them towards the nearest edge. Apply light pressure and work your way across the screen until the bubbles are pushed out.
- Avoid using excessive force: It’s important not to apply too much pressure or use sharp objects to remove the bubbles. Doing so may damage the screen protector or the smartphone screen.
- Reapply if necessary: If the air bubbles persist and cannot be removed, consider removing the screen protector and applying a new one. Make sure to clean the screen thoroughly before reapplying.
- Consider a professional installation: If you are having difficulty in smoothing out the air bubbles or want a flawless installation, you can visit a mobile accessories store or repair center for professional assistance. They have the expertise and tools to apply the screen protector with precision.
Remember, achieving a bubble-free screen might require a bit of patience and practice. Follow these steps carefully to ensure a smooth and clear display for your smartphone.
Conclusion
In conclusion, applying a screen protector on a smartphone is a simple yet important step to protect your device from scratches, smudges, and cracks. By following the steps outlined in this article, you can ensure a smooth and successful application process. Remember to clean your device thoroughly, align the screen protector properly, and use a squeegee or card to remove any air bubbles. Additionally, consider investing in a high-quality screen protector made with durable materials to provide long-lasting protection. Taking care of your smartphone by applying a screen protector will not only keep it looking brand new, but also maintain its resale value. So don’t wait any longer – get your screen protector today and keep your smartphone protected!
FAQs
1. Why should I use a screen protector on my smartphone?
A screen protector serves as a protective layer for your smartphone’s screen. It helps guard against scratches, smudges, and cracks, ensuring that your device remains in pristine condition. By applying a screen protector, you can prolong the lifespan of your phone and maintain its resale value.
2. How do I choose the right screen protector for my smartphone?
When selecting a screen protector, make sure it is compatible with your specific smartphone model. Look for one that offers high-quality materials, such as tempered glass or film. Consider the level of protection it provides, its clarity, and ease of installation.
3. How do I clean my smartphone screen before applying a screen protector?
To clean your smartphone screen, start by turning off your device and disconnecting any charging cables. Use a microfiber cloth or a screen cleaning solution specifically designed for electronics to wipe away fingerprints, dust, and smudges. Ensure that the screen is completely dry before applying the screen protector.
4. What is the best way to apply a screen protector on my smartphone?
Begin by thoroughly cleaning your smartphone screen as mentioned earlier. Next, align the screen protector with the edges of your device. Slowly and carefully apply it, starting from one edge and gently pressing it down to remove any air bubbles. Use a soft cloth or a credit card to smooth out any remaining bubbles.
5. Can I remove a screen protector once it’s applied?
Yes, screen protectors are usually designed to be easily removable. To remove a screen protector, start by lifting one corner using a fingernail or a small pointed object. As you slowly peel it off, be cautious not to damage your smartphone’s screen. If any residue remains, use a cleaning solution or adhesive remover to clean the surface.