
If you’re the proud owner of a Fitbit Charge 2, you know how important accessories are to personalize your fitness tracker and make it truly your own. One of the best ways to transform the look of your Fitbit Charge 2 is by changing the band. Whether you’re looking to switch up your style for a special occasion or simply want to freshen up your daily fitness routine, changing the band on your Fitbit Charge 2 is a quick and easy process that you can do yourself. In this article, we’ll guide you through the steps on how to change a Fitbit Charge 2 band, so you can enjoy a whole new look for your fitness tracker. So let’s dive in and discover how to transform your Fitbit Charge 2!
Inside This Article
- Tools Required to Change the Fitbit Charge 2 Band
- Step-by-Step Guide to Changing the Fitbit Charge 2 Band
- Tips for Maintaining and Caring for Your Fitbit Charge 2 Band
- Conclusion
- FAQs
To change the Fitbit Charge 2 band, you will need a few essential tools. These tools will make the band replacement process easier and more efficient. Here are the tools you will need:
Tools Required to Change the Fitbit Charge 2 Band
1. Fitbit Charge 2 Replacement Band: Ensure you have a compatible replacement band for the Fitbit Charge 2. There are various options available, including different colors, materials, and styles, so choose one that matches your preferences.
2. Spring Bar Tool: This tool is specifically designed to remove the spring bars that hold the Fitbit Charge 2 band in place. It has a small forked end that can be inserted between the band and the device to release the spring bar tension. The tool makes it easier and safer to detach the old band.
3. Small Flathead Screwdriver: In some cases, a small flathead screwdriver can be used as an alternative to the spring bar tool. The flathead screwdriver can be inserted into the slot between the band and the device to push the spring bar down and release the tension.
4. Tweezers: Tweezers can be helpful for handling small parts and aligning the replacement band with the connectors on the Fitbit Charge 2. They provide precision and control when attaching the new band.
5. Clean Cloth: A clean cloth or microfiber cloth is useful for wiping down the Fitbit Charge 2 and removing any dirt or residue from the band connectors. Keeping the device clean can ensure a more secure connection between the band and the device.
Having these tools on hand will make the process of changing the Fitbit Charge 2 band hassle-free and prevent any damage to the device or the replacement band. With the right tools, you can easily swap out the band and personalize your Fitbit to match your style and preference.
Step-by-Step Guide to Changing the Fitbit Charge 2 Band
If you own a Fitbit Charge 2 fitness tracker, you may have realized that the band it comes with might not always fit your personal style or preferences. The good news is that you can easily change the band on your Fitbit Charge 2 to give it a fresh, new look. In this step-by-step guide, we will walk you through the process of changing the band on your Fitbit Charge 2.
Step 1: Remove the Current Band
The first step is to remove the existing band from your Fitbit Charge 2. Start by flipping your Fitbit over so that the metal clasp is facing up. Locate the two metal pins on the underside of the tracker. Using a small tool, such as a paperclip or a SIM card ejector tool, press down on the metal pin closest to the clasp. This will release one end of the band from the tracker. Repeat this process for the other metal pin to completely detach the band.
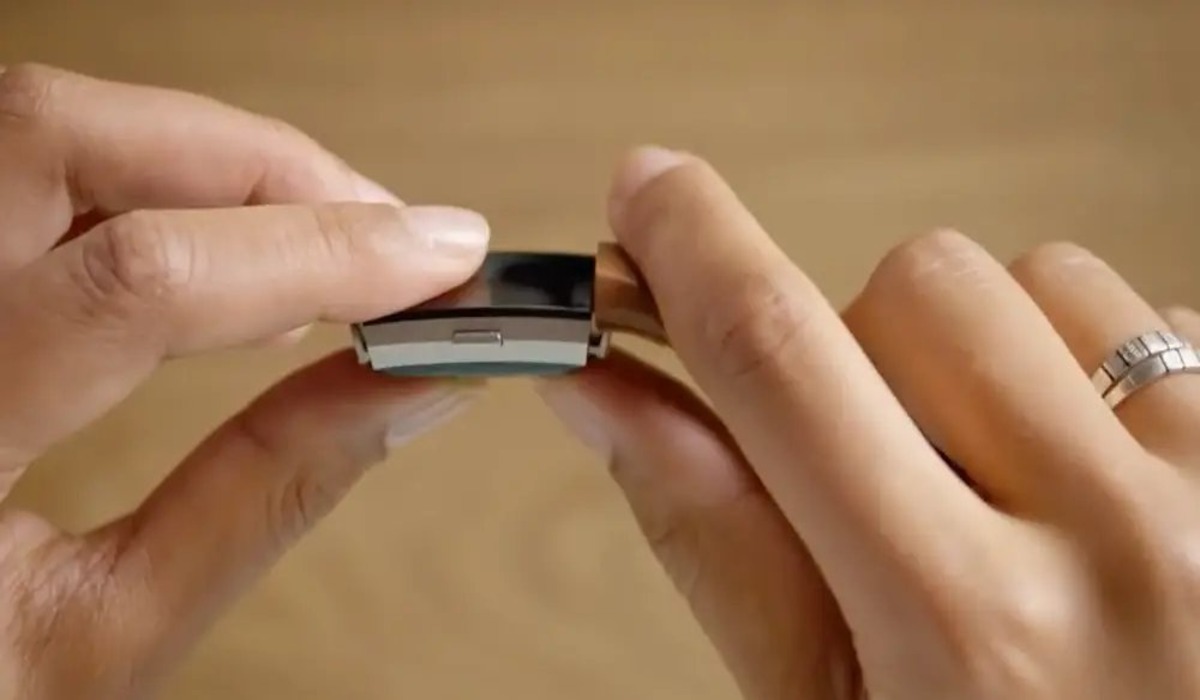
Step 2: Attach the New Band
Now that the old band has been removed, it’s time to attach the new band to your Fitbit Charge 2. Take your new band and align the metal pin connectors with the slots on the tracker. Make sure the band is facing the right way, with the clasp end on the same side as the metal clasp on the tracker. Gently push down on the band until you feel and hear a click, indicating that it is securely attached.
Step 3: Secure the New Band
After attaching the new band, it’s important to ensure that it is securely fastened to your Fitbit Charge 2. Give the band a gentle tug to make sure it doesn’t easily come off. If it feels loose, you may need to reattach it or try a different notch on the band to achieve a better fit. The band should be snug but not uncomfortable or overly tight.
Step 4: Test the Band Connection
Once the new band is securely attached, it’s time to test the connection and make sure everything is working properly. Put your Fitbit Charge 2 on your wrist and securely fasten the band. Navigate to the clock face on your tracker and make sure it displays correctly. Also, check that the heart rate sensor and other features are functioning as usual. If everything is working as expected, congratulations! You have successfully changed the band on your Fitbit Charge 2.
Troubleshooting Tips:
Band Not Detaching: If you’re having trouble removing the old band, ensure that you are pressing down firmly on the metal pins and that the tool you’re using is aligned properly. Sometimes a bit of extra force or wiggling may be required to release the band.
Band Not Attaching Properly: If the new band is not attaching securely, double-check that the metal pin connectors are aligned with the slots on the tracker and try pushing down with a bit more pressure. If the problem persists, try cleaning the metal pin connectors and the slots on the tracker to remove any dirt or debris that may be interfering with the connection.
Changing the band on your Fitbit Charge 2 is a simple process that allows you to personalize your fitness tracker to match your style. Whether you prefer a sleek metal band for a formal occasion or a colorful silicone band for a workout, the option to change the band gives you the freedom to express yourself. Follow the steps outlined in this guide and enjoy a fresh new look for your Fitbit Charge 2.
Tips for Maintaining and Caring for Your Fitbit Charge 2 Band
As a proud owner of a Fitbit Charge 2 band, it’s important to ensure proper maintenance and care to keep it looking and functioning at its best. Here are some valuable tips to help you maintain and care for your Fitbit Charge 2 band:
1. Clean Regularly: It’s essential to clean your Fitbit Charge 2 band regularly to prevent dirt, sweat, and oils from building up. Use a mild soap and water solution, and gently wipe the band with a soft cloth. Avoid using harsh chemicals or abrasive materials, as they can damage the band’s surface.
2. Avoid Excessive Moisture: While Fitbit Charge 2 bands are water-resistant, it’s best to avoid exposing them to excessive moisture. Take off your band before swimming or showering to prevent potential damage. If your band does get wet, make sure to dry it thoroughly before wearing it again.
3. Store Properly: When you’re not using your Fitbit Charge 2 band, store it in a clean and dry place. Avoid placing it in direct sunlight or extreme temperatures, as this can cause discoloration or warping. Additionally, keep it away from sharp objects or rough surfaces to prevent scratches.
4. Handle with Care: Treat your Fitbit Charge 2 band with care to avoid unnecessary wear and tear. Avoid pulling or tugging on the band forcefully, as this can weaken the connections or cause the band to break. Take it off gently and avoid any excessive bending or twisting.
5. Swap Bands with Care: If you want to change your Fitbit Charge 2 band, follow the recommended instructions provided by Fitbit. Be gentle when attaching and detaching the bands to prevent any damage. Make sure the pins are properly aligned before securing the new band in place.
6. Pay Attention to Skin Sensitivity: If you notice any irritation or discomfort on your skin while wearing the Fitbit Charge 2 band, remove it immediately and consult a dermatologist if needed. Some individuals may have skin sensitivities or allergies to certain materials, so it’s important to pay attention to your body’s response.
7. Regularly Check for Damage: Inspect your Fitbit Charge 2 band regularly for any signs of damage, such as cracks, tears, or fraying. If you notice any issues, stop using the band and contact Fitbit’s customer support for assistance. It’s important to address any damages promptly to prevent further issues.
8. Follow Fitbit’s Guidelines: Finally, make sure to follow Fitbit’s guidelines and recommendations for maintaining and caring for your Charge 2 band. They provide valuable information on how to keep your band in optimal condition and maximize its lifespan.
By implementing these tips, you can ensure that your Fitbit Charge 2 band remains clean, comfortable, and functional for a long time. Proper maintenance and care will not only extend the life of your band but also enhance your overall Fitbit experience.
Conclusion
Changing the band on your Fitbit Charge 2 is a simple and straightforward process that allows you to personalize your device and keep it looking fresh. Whether you want to switch up your style, replace a worn-out band, or try a different material, knowing how to change the band is essential.
By following the step-by-step guide provided in this article, you can confidently and easily swap out your Fitbit Charge 2 band in a matter of minutes. Remember to choose a band that suits your preferences and lifestyle, ensuring the best fit and comfort.
With the ability to customize your Fitbit Charge 2 band, you can stay motivated and stylish while tracking your fitness goals. So go ahead, explore the wide range of options available and make your Fitbit Charge 2 truly your own.
FAQs
FAQ 1: Can I change the band on my Fitbit Charge 2?
Answer: Yes, you can change the band on your Fitbit Charge 2. The device is designed to allow for easy band swapping, giving you the flexibility to customize its look according to your personal style and preferences. Whether you want to switch to a different color or try out a new material, changing the band is a simple and straightforward process.
FAQ 2: What tools do I need to change the band on my Fitbit Charge 2?
Answer: You don’t need any special tools to change the band on your Fitbit Charge 2. The device comes with a quick-release mechanism that allows you to effortlessly remove and attach new bands. Simply use your fingers to slide the band in or out of the tracker, and you’ll be able to swap it in seconds. It’s a hassle-free process that doesn’t require any additional accessories.
FAQ 3: Are there different band options available for the Fitbit Charge 2?
Answer: Yes, there are plenty of band options available for the Fitbit Charge 2. Fitbit offers a variety of bands in different colors, materials, and styles. You can choose from classic silicone bands for a sporty look, elegant leather bands for a more sophisticated aesthetic, or metal bands for a sleek and modern touch. Additionally, there are also third-party bands available in the market, giving you even more choices to personalize your device.
FAQ 4: How do I change the band on my Fitbit Charge 2?
Answer: To change the band on your Fitbit Charge 2, follow these simple steps:
- Flip your Fitbit Charge 2 over and locate the two metal pins on the back of the tracker.
- Press down on the release button next to one of the metal pins, and slide the pin towards the opposite end of the tracker.
- Once the pin is released, slide the band out from the metal frame.
- To attach a new band, simply slide it into the metal frame until it clicks into place.
- Repeat the steps for the other side of the band, if necessary, and you’re done!
Changing the band is a quick and easy process that can be done without any tools.
FAQ 5: Can I use third-party bands with my Fitbit Charge 2?
Answer: Yes, you can absolutely use third-party bands with your Fitbit Charge 2. There are many third-party manufacturers that produce bands specifically designed to fit the Fitbit Charge 2 tracker. These bands often come in a wide range of colors and materials, allowing you to find the perfect match for your style. Just make sure to choose a band that is compatible with the Fitbit Charge 2 to ensure a proper fit and functionality.