
Are you tired of your old Fitbit band? Looking to switch things up and give your wearable device a fresh new look? Well, you’re in luck! In this article, we’ll show you how to change the Fitbit band with ease. Whether you want to replace a worn-out band or simply want to match your Fitbit with your outfit for the day, we’ve got you covered. With a few simple steps, you’ll be able to swap out the band on your Fitbit and showcase your personal style. So, let’s dive in and learn how to transform the look of your Fitbit with a brand new band!
Inside This Article
- Overview
- Step 1: Gather the necessary tools
- Step 2: Remove the old Fitbit band
- Step 3: Attach the new Fitbit band
- Step 4: Adjust the fit of the new band
- Troubleshooting tips
- Conclusion
- FAQs
Overview
Changing the Fitbit band is a simple and effective way to customize your wearable device and give it a fresh new look. Whether you’re looking to match your outfit, replace a worn-out band, or simply want to switch up your style, this article will guide you through the process step by step.
Before you begin, it’s important to have the necessary tools on hand. These typically include a replacement Fitbit band, a small screwdriver or pin tool (depending on the Fitbit model), and a clean, flat surface where you can comfortably work on your device.
In this article, we’ll break down the process into easy-to-follow steps. From removing the old band to attaching the new one and making any necessary adjustments, you’ll be able to confidently change your Fitbit band in no time. Plus, we’ll provide troubleshooting tips to help you if you encounter any difficulties along the way.
So, let’s dive in and find out how you can change the Fitbit band and give your wearable device a fresh and stylish makeover!
Step 1: Gather the necessary tools
Before you begin changing the band on your Fitbit device, it’s essential to gather the necessary tools to ensure a smooth and effortless process. Here are the tools you’ll need:
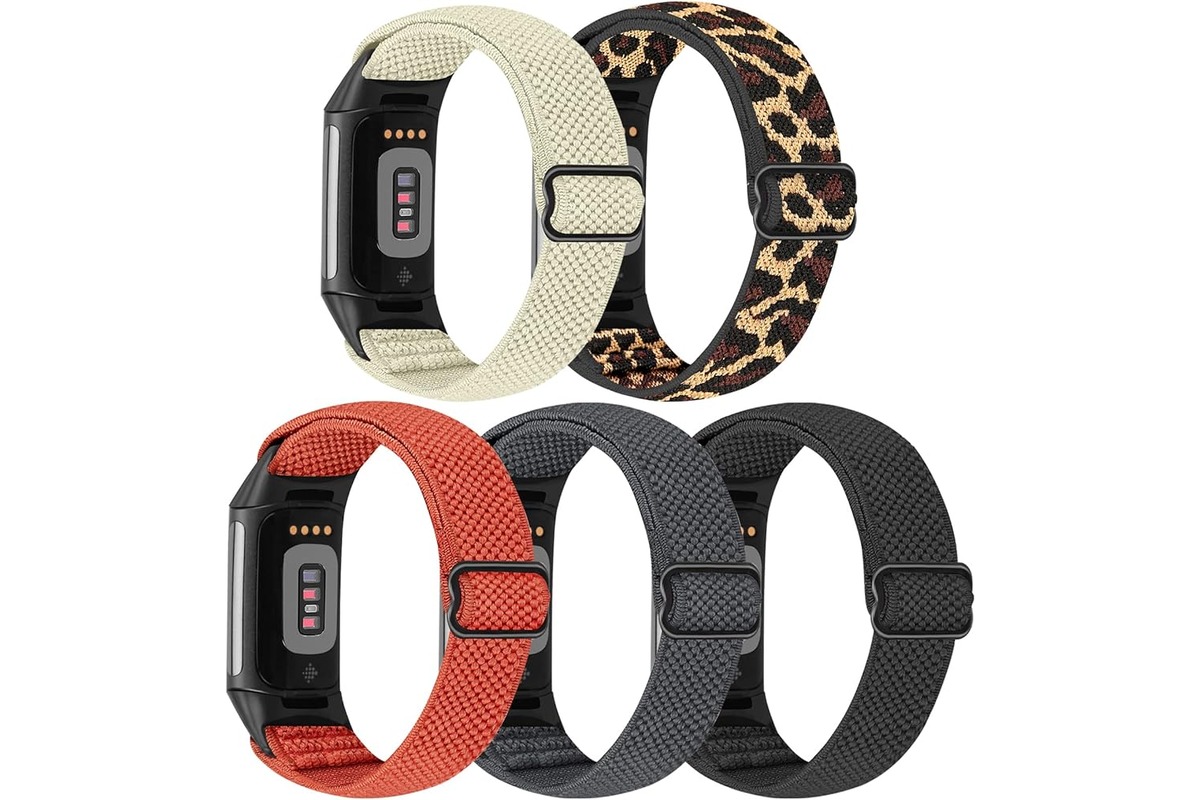
- New Fitbit band: Make sure you have a compatible replacement band for your specific Fitbit model. Choose a band that suits your style and preferences.
- Small screwdriver or tool: Depending on the Fitbit model, you may need a small screwdriver or tool to release the pins or screws that secure the band in place. Check your Fitbit’s user manual to determine the specific tool required.
- Clean cloth: It’s always a good idea to have a clean cloth on hand to wipe down your Fitbit device and keep it free from any dust or debris during the band replacement process.
- Workspace: Find a well-lit and clutter-free workspace where you can comfortably work on your Fitbit. A desk or table with ample space to lay out the tools and components is ideal.
By having these tools readily available, you’ll be well-prepared to change the band on your Fitbit device without any hassle. Now that you have everything you need, it’s time to move on to the next step in the process.
Step 2: Remove the old Fitbit band
When it comes time to give your Fitbit a fresh look with a new band, the first step is to remove the old band. Don’t worry, it’s easier than you might think. Just follow these simple steps:
1. Locate the clasp on the back of the Fitbit band. This is the part that secures the band to your wrist.
2. Push the release button or lever on the clasp. This will loosen the band and allow you to remove it from the tracker.
3. Once the clasp is released, gently pull the band away from the tracker. Be careful not to exert too much force, as this could damage the tracker itself.
4. If you have a Fitbit with a traditional watch-style buckle, you will need to undo the buckle to remove the band. Simply slide the pin or bar out of the holes in the band to release it.
5. Once the old band is removed, take a moment to clean the tracker and any remaining residue from the band. This will ensure a clean surface for attaching the new band.
And that’s it! You have successfully removed the old Fitbit band and are ready to move on to the next step of attaching the new one.
Step 3: Attach the new Fitbit band
Now that you have removed the old Fitbit band, it’s time to attach the new one. Follow these steps to ensure a secure and comfortable fit:
- Identify the attachment points: Look for the small metal pins on the back of your Fitbit device. These pins will correspond with the notches and holes in the new band.
- Align the band: Take the new Fitbit band and line up the attachment points with the metal pins on the device. Make sure they are properly aligned before proceeding.
- Press and slide: Gently press the band against the metal pins and slide it into place. You should feel a satisfying click or snap when it is securely attached.
- Double-check: Once the band is attached, give it a little tug to make sure it is firmly in place. You don’t want it to come loose during physical activity.
That’s it! You have successfully attached the new Fitbit band to your device. You can now move on to the next step, which is adjusting the fit to ensure optimal comfort.
Step 4: Adjust the fit of the new band
Once you have attached the new Fitbit band, it’s important to make sure it fits comfortably on your wrist. Here are some steps to help you adjust the fit:
1. Start by putting the Fitbit on your wrist and fastening the closure. Make sure it is snug but not too tight. You should be able to fit one finger between the band and your skin.
2. If the band feels too loose, you can adjust the fit by moving to a tighter notch on the closure. Most Fitbit bands come with several notches to choose from, allowing you to find the perfect fit for your wrist.
3. On the other hand, if the band feels too tight, you can loosen it by moving to a looser notch on the closure. Remember, the band should be secure enough to prevent it from sliding around on your wrist, but not so tight that it becomes uncomfortable.
4. If your Fitbit band has a clasp or buckle, you can also adjust the fit by changing the position of the clasp. Experiment with different placements to find the most comfortable and secure fit.
5. Once you have adjusted the fit, take a moment to move your wrist around and ensure that the band stays in place. It should neither be too loose nor too tight during movement.
6. If you find that the band is still not fitting properly, you may need to try a different size or style of Fitbit band. Fitbit offers various band options to accommodate different wrist sizes and preferences, so don’t hesitate to explore other options if needed.
Remember, it may take some trial and error to find the ideal fit for your new Fitbit band. Take your time, make adjustments as needed, and listen to your body to ensure a comfortable and secure fit. Enjoy your new band and all the fitness tracking it brings!
Troubleshooting tips
If you’re facing any issues while changing your Fitbit band, don’t worry. Here are some troubleshooting tips to help you out:
1. Ensure proper alignment: Make sure that the pins on the new Fitbit band line up with the holes on the device. If they are not aligned correctly, it may prevent the band from attaching securely.
2. Check for debris: Sometimes, dirt, dust, or other debris can get lodged in the holes or prongs of the Fitbit device. Use a clean, dry cloth to wipe away any obstructions before attempting to attach the new band.
3. Apply gentle pressure: When attaching the new Fitbit band, apply gentle but firm pressure to ensure a snug fit. Avoid using excessive force, as it may damage the device or the band.
4. Double-check the orientation: Ensure that the band is inserted in the correct orientation. Some Fitbit bands have a specific orientation, such as a clasp or buckle, which should be facing the correct way for proper attachment.
5. Try a different band: If you’re still having trouble, try using a different Fitbit band to see if the issue persists. It could be that the problem lies with the specific band you are trying to attach.
6. Contact Fitbit support: If none of the above troubleshooting tips resolve the issue, don’t hesitate to reach out to Fitbit customer support. They have a team of experts who can assist you further in troubleshooting and resolving any problems you may be facing.
Remember, changing the Fitbit band should be a simple and straightforward process. But if you encounter any difficulties, these troubleshooting tips should help you overcome them. Happy band swapping!
Conclusion
Changing the Fitbit band is a simple and affordable way to give your device a fresh new look and improve its functionality. Whether you want a sporty silicone band for your workouts or an elegant leather band for a formal occasion, there are countless options available to suit your style and needs.
By following the steps outlined in this article, you can easily replace the band on your Fitbit and enjoy a personalized fitness accessory. Don’t be afraid to experiment with different bands and colors to match your outfit or your mood. With a wide range of options on the market, you’re sure to find the perfect Fitbit band to enhance your overall experience.
Remember to choose a band that is compatible with your specific Fitbit model and pay attention to the instructions provided by the manufacturer. With a bit of patience and practice, you’ll become a pro at changing Fitbit bands in no time.
FAQs
1. How do I change the Fitbit band?
To change the Fitbit band, follow these steps:
- Locate the metal pin on the side of the Fitbit tracker.
- Using a small tool or your fingernail, press the pin inwards, which will release the band.
- Slide the band off the tracker.
- Select your desired new band and align the pins on the band with the holes on the tracker.
- Push the band onto the tracker until you hear a click, signaling that the band is securely in place.
2. Can I replace the Fitbit band with a third-party band?
Yes, you can replace the Fitbit band with a third-party band. Fitbit trackers are designed to be versatile, allowing you to customize the look and feel of your device. There are numerous third-party bands available in various styles, colors, and materials, giving you the freedom to choose one that best suits your preferences. Just make sure you select a band that is compatible with your specific Fitbit model.
3. Are Fitbit bands water-resistant?
Fitbit bands come in different models, and the level of water resistance may vary. It’s important to check the specifications of your particular Fitbit model to determine whether it is water-resistant or not. Some Fitbit bands, like the Fitbit Charge 4, are designed to withstand water splashes and sweat, making them suitable for everyday activities and workouts. However, it’s important to note that most Fitbit bands are not suitable for swimming and should not be submerged in water.
4. Can I adjust the size of the Fitbit band?
In most cases, Fitbit bands can be adjusted to fit different wrist sizes. Fitbit offers bands in various sizes, such as small, large, and extra-large, to cater to different users. Additionally, some Fitbit bands have adjustable clasps or buckle closures that allow you to achieve a comfortable and secure fit on your wrist. If you find that your Fitbit band is too loose or too tight, you may be able to adjust the size or consider purchasing a different size band.
5. How often should I replace my Fitbit band?
The lifespan of a Fitbit band can vary depending on factors such as usage, care, and the quality of the band. On average, Fitbit bands can last anywhere from several months to a year or longer. However, it’s important to regularly inspect your Fitbit band for signs of wear and tear, such as cracking, fraying, or discoloration. If your band is showing significant signs of deterioration, it may be time to replace it to ensure optimal functionality and comfort.