
Are you tired of wearing the same old Fitbit Charge 2 band? Do you want to give your fitness tracker a fresh and stylish look? Well, you’re in luck! In this article, we will guide you through the process of changing your Fitbit Charge 2 band. Whether you’re looking to upgrade to a more comfortable band or simply want to switch up the color to match your outfit, we’ve got you covered. Changing the band on your Fitbit Charge 2 is quick and easy, and with the wide range of bands available on the market today, you’ll never run out of options to personalize your fitness tracker. So, let’s dive in and discover how you can change your Fitbit Charge 2 band in just a few simple steps!
Inside This Article
- Step 1: Identify the Type of Fitbit Charge 2 Band
- Step 2: Remove the Old Fitbit Charge 2 Band
- Step 3: Install the New Fitbit Charge 2 Band – Step-by-step guide on how to properly install the new band onto the Fitbit device – Tips on ensuring a secure and comfortable fit
- Troubleshooting Tips – Common issues that may arise during the band replacement process – Suggestions on how to troubleshoot and resolve these issues
- Conclusion
- FAQs
Step 1: Identify the Type of Fitbit Charge 2 Band
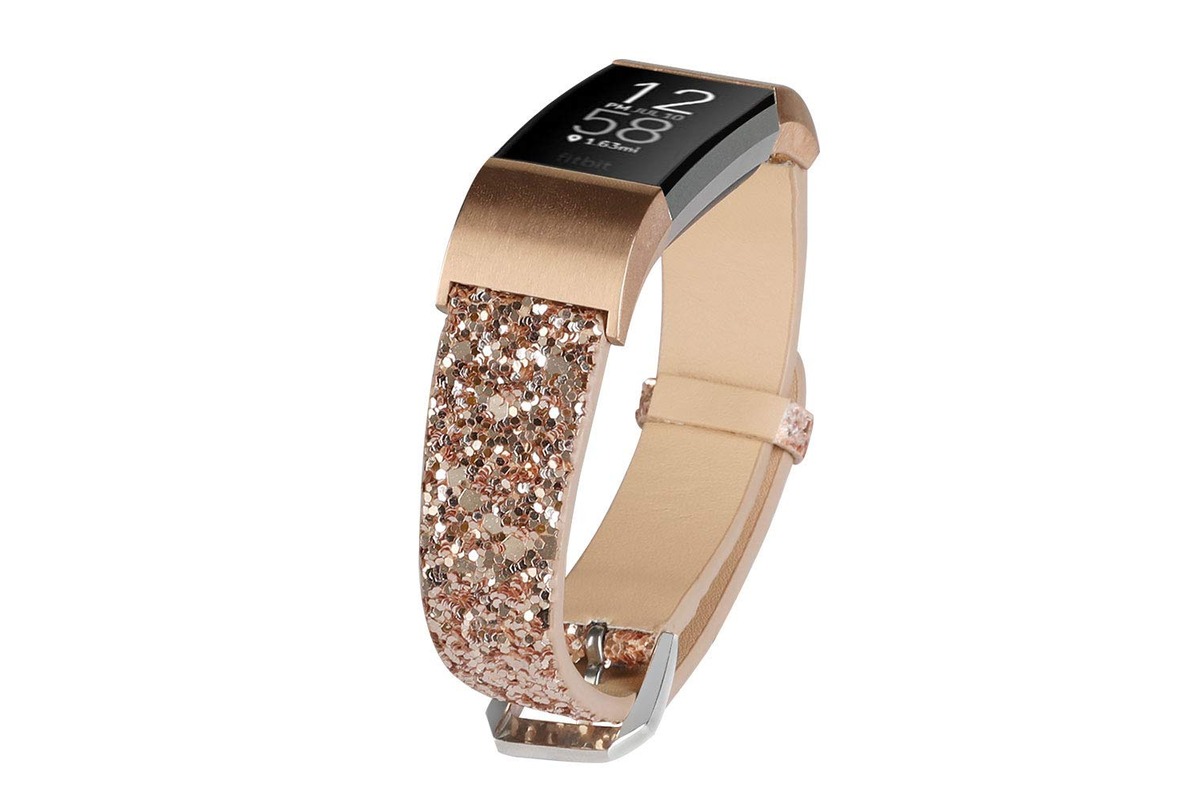
Before you can change the band on your Fitbit Charge 2, it’s important to first identify the type of band you currently have and understand the different band options available. Fitbit offers a variety of bands for the Charge 2, each with its own unique design and features.
One popular band option is the classic band, which is made of flexible elastomer material. It is comfortable to wear and ideal for everyday use. This band comes in a range of colors, allowing you to personalize your Fitbit Charge 2 to match your style.
Another band option is the leather band, which provides a more sophisticated and stylish look. Made of genuine leather, this band adds a touch of elegance to your Fitbit Charge 2. It’s a great choice for special occasions or when you want to elevate your fitness tracker’s appearance.
If you prefer a more rugged and durable band, the sport band might be the perfect fit for you. Made of a sturdy and water-resistant material, this band is ideal for active individuals who want a band that can withstand intense workouts and outdoor activities.
Now that you have an understanding of the different band options, you can proceed to identify the type of band currently on your Fitbit Charge 2. To do this, simply remove the current band and examine its features. Look for any text or markings on the band that indicate its type. Additionally, observe the color, texture, and material of the band to get a better idea of its specific characteristics.
If you’re still unsure about the type of band you have, you can refer to the Fitbit website or contact Fitbit customer support for assistance. They will be able to provide you with detailed information about your current band and help you choose the right replacement band for your Fitbit Charge 2.
Step 2: Remove the Old Fitbit Charge 2 Band
Removing the old Fitbit Charge 2 band is a crucial step to prepare for replacing it with a new one. Follow these detailed instructions to safely remove the existing band from your Fitbit device:
1. Start by locating the small metal pin on the backside of your Fitbit Charge 2. This pin holds the band in place and needs to be released to remove the band.
2. Use a small tool, such as a straightened paperclip or a push pin, to press down on the metal pin. Apply steady pressure until you feel and hear a click. This indicates that the pin has been released.
3. Once the pin is released, gently slide the band away from the device, starting from the side where the pin was located. Be cautious not to force or pull too hard, as this may damage the band or the Fitbit device.
4. Continue sliding the band until it is completely detached from the Fitbit Charge 2. Set aside the old band in a safe place, as you may need it for future use or as a backup.
5. Take a moment to inspect the connectors on the Fitbit device and ensure they are clean and free from any debris. This will help maintain a secure and reliable connection when installing the new band.
That’s it! You have successfully removed the old Fitbit Charge 2 band. Now you are ready to proceed to the next step of installing the new band and enjoying a fresh look for your Fitbit device.
Note: In some cases, the Fitbit Charge 2 bands may have a quick release feature that allows for easier removal without the need for any tools. If your band has this feature, follow the manufacturer’s instructions to take advantage of it.
Step 3: Install the New Fitbit Charge 2 Band – Step-by-step guide on how to properly install the new band onto the Fitbit device – Tips on ensuring a secure and comfortable fit
Now that you have removed the old Fitbit Charge 2 band, it’s time to install the new one. Follow these step-by-step instructions to ensure a proper and hassle-free installation:
1. Take your new Fitbit Charge 2 band and locate the metal pins on each end. These pins will be used to attach the band to the device.
2. Align the metal pins on the new band with the holes on the side of the Fitbit device. Make sure the pins are securely inserted into the holes.
3. Gently push the band into place until you hear a click. This indicates that the band is securely attached to the device.
4. Once the band is attached, give it a slight tug to ensure it is properly secured. It should feel snug and not easily come loose.
5. Adjust the band to fit your wrist comfortably. Most Fitbit Charge 2 bands come with multiple notches or sizing options to accommodate different wrist sizes. Slide the band through the notch that provides the best fit for you.
6. Once you have adjusted the band to the desired size, fasten the clasp or buckle to keep it in place. Double-check that it is secure and won’t easily slip off during regular use.
7. Take a moment to admire your new Fitbit Charge 2 band and ensure it matches your personal style and preferences. With the band properly installed, you’re ready to start tracking your fitness goals in style!
Remember, it’s important to periodically check the band’s fit and tightness to avoid any potential damage or discomfort. If the band becomes loose over time, simply repeat these installation steps to secure it properly.
Troubleshooting Tips – Common issues that may arise during the band replacement process – Suggestions on how to troubleshoot and resolve these issues
While changing the band on your Fitbit Charge 2, you may encounter a few common issues. Don’t worry, though, as these problems can be easily resolved with a little troubleshooting. Here are some tips to help you overcome any challenges you may face during the band replacement process:
1. Difficulty removing the old band: In some cases, the old band may be tightly secured and difficult to remove. To tackle this issue, try using a small flat-head screwdriver or a band removal tool to gently pry open the band from the tracker’s frame. Be careful not to apply excessive force to avoid damaging the device.
2. Incompatibility with the new band: Sometimes, the new band may not fit properly or securely on the Fitbit Charge 2. If this happens, ensure that you have purchased the correct band size and type specifically designed for the Fitbit Charge 2 model. Double-check the compatibility before making a new purchase.
3. Band alignment issues: When attaching the new band, you may face alignment problems, causing it to not sit evenly or secure on the device. To resolve this, carefully align the band with the tracker’s frame and gently push it into place. Ensure that both ends of the band are securely attached to prevent any accidental detachments.
4. Band discomfort or irritation: You may experience discomfort or skin irritation when wearing a new band, especially if it is made of a different material or has a different texture than the previous one. In this case, give your skin some time to adapt to the new band or consider purchasing a band made from a hypoallergenic material to minimize any possible sensitivity.
5. Band clasping difficulties: Some bands may have a clasp mechanism that can be a bit tricky to fasten initially. If you are having trouble securing the band, try practicing a few times to get the hang of it. You can also refer to the manufacturer’s website or user manual for specific instructions on how to properly fasten the band.
6. Band durability concerns: Over time, bands may wear out or become worn due to frequent use. If you notice signs of wear or tear on your new band, consider reaching out to the manufacturer or vendor for potential warranty coverage or replacement options.
By following these troubleshooting tips, you can overcome common issues that may arise during the Fitbit Charge 2 band replacement process. Remember to handle your device with care and consult the manufacturer’s guidelines when in doubt. Enjoy your newly replaced band and continue tracking your fitness journey with style and accuracy!
Conclusion
In conclusion, changing the band of your Charge 2 Fitbit is a simple process that can breathe new life into your wearable device. Whether you want to switch up the style or replace a worn-out band, the steps outlined in this article will guide you through the process. Remember to choose a band that suits your personal preferences and needs, whether it be a sleek and stylish metal band or a comfortable and breathable silicone one.
By following the step-by-step instructions and utilizing the tips and tricks shared here, you’ll be able to easily and efficiently change your Charge 2 Fitbit band without any hassle. Not only will this give you a fresh and updated look, but it will also ensure the longevity and functionality of your device. So why wait? Get ready to transform your Charge 2 Fitbit with a new band and take your style and fitness tracking to the next level!
FAQs
-
1. How do I change the band on my Fitbit Charge 2?
To change the band on your Fitbit Charge 2, follow these steps:
1. Locate the band attachment point on the back of the device.
2. Press the release button or slide the band attachment lever to remove the current band.
3. Align the new band with the attachment point and firmly push until it clicks into place.
4. Make sure the band is securely attached before wearing your Fitbit Charge 2 again. -
2. Can I use any band with the Fitbit Charge 2?
The Fitbit Charge 2 is designed to be compatible with standard watch bands that have a width of approximately 22mm. While many bands will fit the device, it is recommended to use bands that are specifically made for the Fitbit Charge 2 to ensure proper fit and functionality. -
3. Where can I purchase replacement bands for my Fitbit Charge 2?
Replacement bands for the Fitbit Charge 2 can be purchased from various online retailers, as well as directly from the official Fitbit website. It is important to ensure that you are purchasing a genuine Fitbit band to guarantee compatibility and quality. -
4. Are there different types of bands available for the Fitbit Charge 2?
Yes, there are various types of bands available for the Fitbit Charge 2, allowing you to personalize your device to match your style or activity. Some popular options include silicone bands, metal bands, leather bands, and woven bands. It is important to choose a band that suits your preferences and needs. -
5. How often should I change the band on my Fitbit Charge 2?
The frequency of changing the band on your Fitbit Charge 2 depends on your personal preference and the condition of the band. If the band becomes worn, damaged, or uncomfortable, it is recommended to replace it. Additionally, if you want to switch to a different style or color, you can change the band at any time.