
Are you a gamer looking to maximize your gaming experience on your PlayStation 4 (PS4)? Look no further, as we have the solution for you: the Gold Wireless Headset. Connecting a headset to your PS4 opens up a whole new world of immersive gameplay, allowing you to hear every intricate detail and communicate with your teammates effortlessly.
In this article, we will guide you through the step-by-step process of connecting your Gold Wireless Headset to your PS4. Whether you are a seasoned gamer or new to the gaming world, we’ve got you covered. So, let’s dive in and ensure that you can enjoy crystal-clear audio and seamless communication while conquering your gaming adventures.
Inside This Article
- Getting Started- Checking the Compatibility of Gold Wireless Headset and PS4
- Connecting the Gold Wireless Headset to PS4
- Adjusting Audio Settings – Step 1: Accessing the PS4 Settings Menu – Step 2: Navigating to the Devices Section – Step 3: Selecting the Audio Devices Option – Step 4: Adjusting the Headset Volume and Microphone Level
- Testing the Connection
- Conclusion
- FAQs
Getting Started- Checking the Compatibility of Gold Wireless Headset and PS4
Before you begin connecting your Gold Wireless Headset to your PS4, it’s important to ensure that they are compatible with each other. This compatibility check will help you avoid any frustration or disappointment later on.
The Gold Wireless Headset is specifically designed to work with the PlayStation 4 gaming console. It offers a seamless and immersive gaming experience, providing high-quality audio and a comfortable fit. However, it’s crucial to make sure that your PS4 model is compatible with this headset.
To determine the compatibility, you can check the packaging of your Gold Wireless Headset or visit the official PlayStation website. Look for the compatibility information mentioned on the box or the product description. It should clearly state that the headset is compatible with the PS4.
In addition to the headset compatibility, you should also ensure that your PS4 is updated with the latest firmware. Sometimes, certain features or functionalities may require a software update to work correctly. To check for updates, go to the settings menu on your PS4 and navigate to the system software update section.
By confirming the compatibility of your Gold Wireless Headset and PS4, you can proceed with confidence knowing that they are designed to work together seamlessly. Now that you have checked the compatibility, you are ready to connect your Gold Wireless Headset to your PS4 and take your gaming experience to the next level!
Connecting the Gold Wireless Headset to PS4
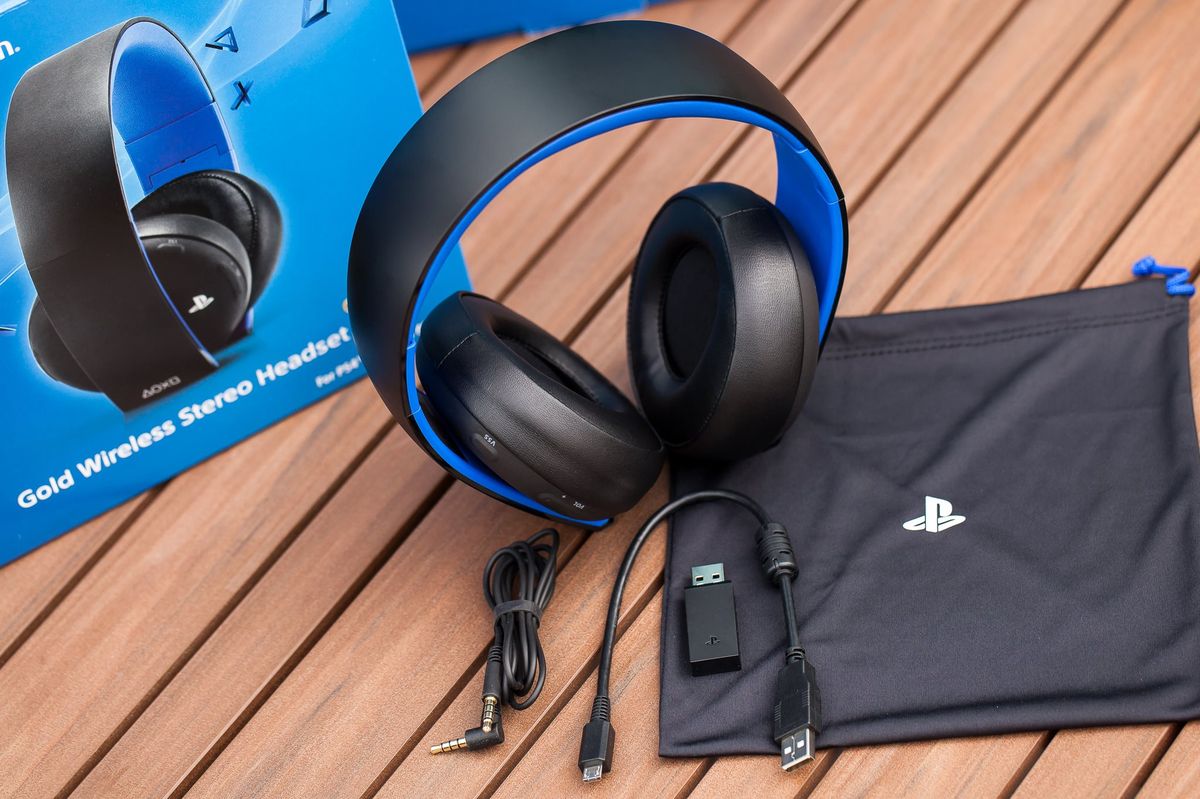
Step 1: Insert the Wireless Adapter into PS4
To begin connecting your Gold Wireless Headset to your PS4, the first thing you need to do is insert the wireless adapter into your PS4 console. Locate the USB port on the front or back of your PS4 and firmly insert the wireless adapter into the port.
Step 2: Power On the Gold Wireless Headset
Once the wireless adapter is securely connected to your PS4, it’s time to power on your Gold Wireless Headset. To do this, locate the power button on the headset and press it until the headset turns on. You may see a blinking light or hear a beep, indicating that the headset is powering up.
Step 3: Activate the Pairing Mode on the Headset
After powering on the Gold Wireless Headset, you need to activate the pairing mode on the headset. This mode allows the headset to establish a connection with your PS4. To activate the pairing mode, press and hold the power button for a few seconds until you see the LED light on the headset start to blink rapidly. Note that the process to activate pairing mode may vary slightly depending on the specific model of your Gold Wireless Headset.
Step 4: Pairing the Gold Wireless Headset with PS4
Now that the pairing mode is activated on your Gold Wireless Headset, it’s time to pair it with your PS4. On your PS4, navigate to the “Settings” menu and select the “Devices” option. Within the “Devices” menu, choose the “Bluetooth Devices” option. Your PS4 will begin searching for available Bluetooth devices.
While your PS4 is scanning for devices, make sure that the Gold Wireless Headset is within range and powered on. Once your PS4 detects the headset, it will appear on the list of available devices. Select the headset from the list and follow the on-screen prompts to complete the pairing process.
Once the pairing is successful, you will be able to use the Gold Wireless Headset with your PS4. Remember to charge the headset regularly to ensure optimal performance and enjoy an immersive audio experience while gaming.
Adjusting Audio Settings – Step 1: Accessing the PS4 Settings Menu – Step 2: Navigating to the Devices Section – Step 3: Selecting the Audio Devices Option – Step 4: Adjusting the Headset Volume and Microphone Level
Once you have successfully connected your Gold Wireless Headset to your PS4, the next step is to adjust the audio settings to ensure optimal sound quality and microphone performance. Here are the steps to follow:
Step 1: Accessing the PS4 Settings Menu
To begin adjusting the audio settings on your PS4, you need to access the settings menu. Turn on your PS4 and navigate to the main menu. From there, scroll up to the top row of icons and select the “Settings” icon, which looks like a toolbox.
Step 2: Navigating to the Devices Section
Once you are in the Settings menu, scroll down and select the “Devices” option. This will open a submenu that contains various device-related settings for your PS4, including audio settings.
Step 3: Selecting the Audio Devices Option
In the Devices submenu, scroll down until you find the “Audio Devices” option. Click on it to access the audio settings for your PS4.
Step 4: Adjusting the Headset Volume and Microphone Level
Within the Audio Devices settings, you will see options to adjust the volume of your headset and the microphone level. Use the volume slider to increase or decrease the headset volume to your liking. Additionally, you can adjust the microphone volume to ensure that your voice is captured clearly during voice chat or streaming.
It is recommended to do a sound test or ask a friend to join a voice chat to check if the volume and microphone levels are set perfectly for clear audio communication.
Keep in mind that these settings may vary slightly depending on the version of PS4 software you have installed. However, the general steps outlined here should be applicable to most PS4 systems.
Testing the Connection
Once you have successfully connected the Gold Wireless Headset to your PS4, it’s time to test the connection and ensure that everything is working properly. Here are the steps to follow:
Step 1: Launch a Game or Application on PS4
The first step is to start a game or application on your PS4. Choose a game that you would like to play or any application that requires audio output and microphone input. This will allow you to test both the audio and microphone functions of the Gold Wireless Headset.
Step 2: Checking the Audio Output and Microphone Input
Once the game or application has launched, put on the Gold Wireless Headset and adjust the volume to a comfortable level. Ensure that the headset is securely placed over your ears for optimal audio experience.
Now, pay attention to the audio output. Can you hear the game sounds clearly through the headset? If the audio is coming through the headphones, then the connection is successful.
Next, test the microphone input. Speak into the microphone and check if your voice is being transmitted clearly to other players or recorded in the game. If your voice is audible and clear, then the microphone is functioning correctly.
Step 3: Troubleshooting Common Connection Issues
If you encounter any issues during the testing phase, here are a few troubleshooting tips to help resolve common problems:
- Ensure the headset is properly connected: Check if the wireless adapter is securely inserted into the USB port of the PS4. If not, disconnect and reconnect the adapter to establish a stable connection.
- Verify the headset settings on PS4: Go to the “Settings” menu on your PS4 and select “Devices.” From there, navigate to “Audio Devices” and make sure that the Gold Wireless Headset is selected as the default input and output device.
- Update headset firmware: Periodically check for firmware updates for the Gold Wireless Headset. Sony often releases updates to improve compatibility and address any potential issues. Connect the headset to your computer using the USB cable provided and follow the instructions to update the firmware.
- Restart your PS4: Sometimes a simple restart can resolve connectivity issues. Power off your PS4 completely, wait for a few seconds, and then turn it back on. Reconnect the Gold Wireless Headset and test the connection again.
- Contact customer support: If you have tried all the troubleshooting steps and the connection issues persist, reach out to Sony’s customer support for further assistance. They will be able to guide you through advanced troubleshooting techniques or provide a replacement if necessary.
By following these steps and troubleshooting tips, you can ensure a smooth and reliable connection between your Gold Wireless Headset and PS4. Enjoy an immersive gaming experience with high-quality audio and crystal-clear communication!
Connecting your Gold Wireless Headset to your PS4 opens up a world of immersive gaming and crystal-clear communications. With just a few simple steps, you can enjoy a truly immersive gaming experience with high-quality sound and the ability to communicate with your friends and teammates. Whether you’re playing an intense action-packed game or enjoying a multiplayer adventure, the Gold Wireless Headset provides the comfort, convenience, and audio quality you need to enhance your gaming sessions.
By following the instructions provided by Sony and using the USB wireless adapter, you can easily connect your Gold Wireless Headset to your PS4. This will allow you to fully immerse yourself in the game and enjoy the rich audio experience that the headset delivers. Keep in mind that the setup process may vary slightly depending on the specific model of your headset, so it’s always a good idea to consult the user manual or online resources for detailed instructions.
FAQs
1. How do I connect my gold wireless headset to PS4?
To connect your gold wireless headset to a PS4, follow these steps:
- Plug the wireless adapter into one of the available USB ports on your PS4 console.
- Press and hold the power button on your gold wireless headset until it enters pairing mode (the power button should blink blue).
- On your PS4, go to “Settings” > “Devices” > “Audio Devices” and select “Output Device.”
- Select “Gold Wireless Headset” from the list of available devices.
- You can also adjust the volume and microphone settings in the “Audio Devices” menu to suit your preferences.
2. Can I use the gold wireless headset with other devices?
Yes, the gold wireless headset can be used with other devices that support Bluetooth connectivity, such as smartphones, tablets, and PCs. Simply put your headset in pairing mode and search for available devices on your desired device. Once paired, you can enjoy wireless audio on multiple devices.
3. Do I need to charge the gold wireless headset before using it?
Yes, it is recommended to fully charge the gold wireless headset before using it. The headset comes with a built-in rechargeable battery that provides hours of wireless audio. You can charge the headset using the included USB cable, which can be connected to a power source or your PS4 console.
4. How can I customize the audio settings on the gold wireless headset?
You can customize the audio settings on the gold wireless headset through the PS4 settings. Go to “Settings” > “Devices” > “Audio Devices” and adjust the settings according to your preferences. You can choose between different audio profiles, adjust volume levels, and enable/disable features like surround sound and microphone monitoring.
5. Can I use the gold wireless headset for online gaming and voice chat?
Yes, the gold wireless headset can be used for online gaming and voice chat on your PS4. It has a built-in microphone that allows you to communicate with other players while gaming. To ensure optimal voice chat quality, make sure the microphone is positioned correctly and adjust the microphone volume in the PS4 settings if needed.