
Are you a gaming enthusiast who wants to enhance their gaming experience on the PS4? One of the best ways to do so is by connecting a wired headset to your console. While wireless headsets are convenient, wired headsets offer a more stable and reliable audio connection, perfect for those intense gaming sessions.
In this article, we will guide you through the process of connecting a wired headset to your PS4. Whether you want to immerse yourself in the game’s audio, communicate with online teammates, or simply enjoy a more private gaming experience, we’ve got you covered. So, grab your favorite headset and let’s get started on elevating your gaming experience!
Inside This Article
- How To Connect Wired Headset To PS4
- Checking Compatibility
- Connecting the Headset
- Adjusting Audio Settings
- Troubleshooting Common Issues
- Conclusion
- FAQs
How To Connect Wired Headset To PS4
If you’re a gaming enthusiast and own a PlayStation 4, you know the importance of having a good headset. A wired headset can offer a more immersive gaming experience, allowing you to communicate with friends, hear every detail in the game, and focus on your gameplay. In this article, we will guide you through the process of connecting a wired headset to your PS4, ensuring that you can jump into your favorite games and enjoy crystal-clear audio.
Checking Compatibility
Before you connect your wired headset to your PS4, it’s essential to check for compatibility. Not all headsets are compatible with the PS4, so it’s crucial to double-check to avoid any frustration. Firstly, ensure that your headset has a 3.5mm jack. This is the standard audio jack used by most wired headsets. Additionally, check if your headset supports the CTIA standard. The CTIA standard is the most common in the gaming industry and is supported by the PS4. Once you have confirmed compatibility, you can move on to the next step.
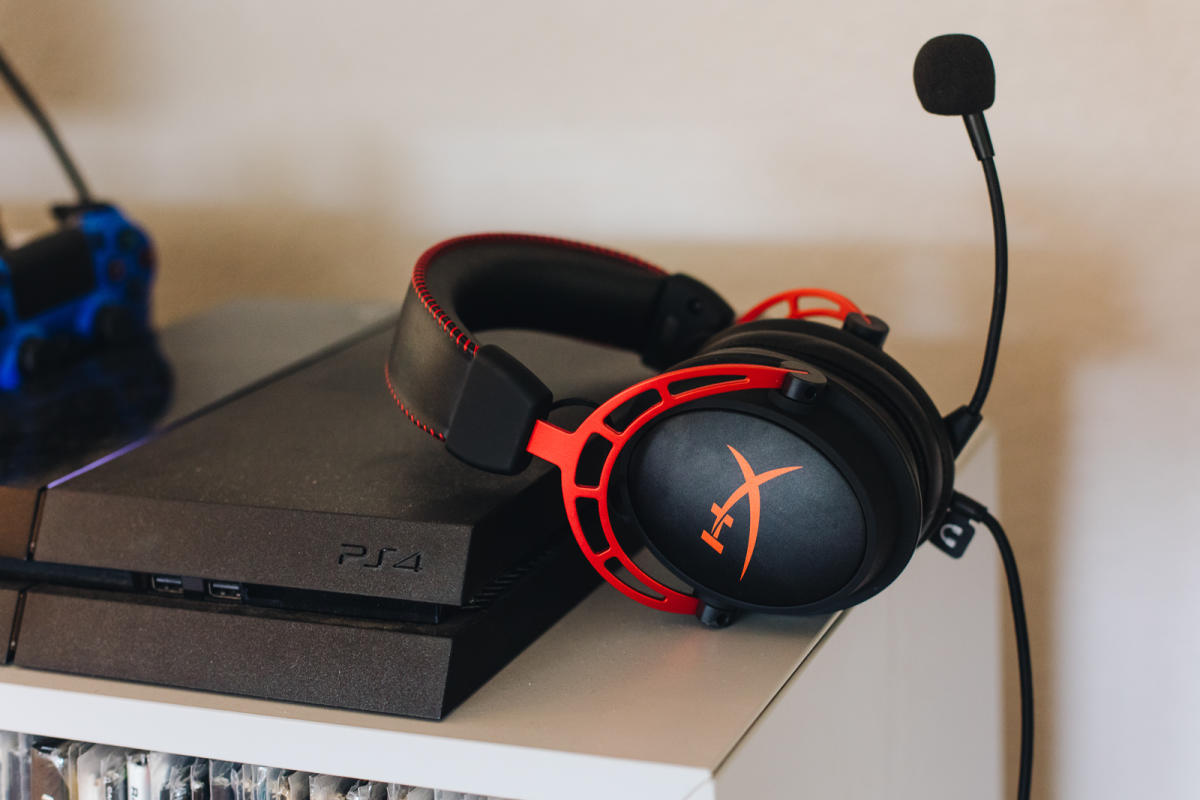
Connecting the Headset
Connecting your wired headset to your PS4 is a relatively simple process. Follow these steps to get started:
- Locate the 3.5mm audio jack on your PS4 controller. It is usually located at the bottom of the controller.
- Take the audio cable from your headset and insert it firmly into the 3.5mm audio jack on the controller.
- Ensure that the cable is securely connected, and there are no loose connections.
- Once the headset is connected, you can put on the headset and adjust it for a comfortable fit.
That’s it! Your wired headset is now connected to your PS4, and you’re ready to dive into your gaming adventures with immersive audio.
Adjusting Audio Settings
After connecting your wired headset to your PS4, you may want to adjust the audio settings to optimize your gaming experience. Here’s how you can do it:
- On the PS4 home screen, go to the “Settings” menu.
- Select “Devices” and then “Audio Devices”.
- Under the “Input Device” and “Output Device” sections, select your connected headset from the drop-down menus.
- You can also adjust the volume and microphone settings according to your preference.
By adjusting the audio settings, you can fine-tune the sound quality, volume levels, and microphone settings to suit your needs and enhance your gaming experience.
Troubleshooting Common Issues
If you encounter any difficulties or issues while connecting your wired headset to your PS4, here are a few troubleshooting steps you can try:
- Make sure your headset cable is securely connected to the PS4 controller.
- Verify that your headset is compatible with the PS4 and the CTIA standard.
- Try using a different headset or audio cable to check if the issue lies with the headset itself.
- Restart your PS4 console and try connecting the headset again.
- Check for any software updates available for your PS4 that could potentially resolve compatibility issues.
By following these troubleshooting steps, you can overcome most common issues related to connecting a wired headset to your PS4 and enjoy uninterrupted gaming sessions with clear audio.
Now that you know how to connect your wired headset to your PS4, you can enjoy an enhanced gaming experience with immersive audio and clear communication. Dive into your favorite games, communicate with friends, and enjoy every detail with the added convenience and audio quality offered by a wired headset.
Checking Compatibility
Before connecting a wired headset to your PS4, it is important to check the compatibility of the headset with the console. Not all headsets are designed to work with the PS4, so it’s crucial to ensure that the headset you have is compatible.
The first step is to look for the “Made for PS4” label on the headset packaging. This indicates that the headset is specifically designed for use with the PS4 and will offer optimal performance.
If the headset does not have the “Made for PS4” label, you can still check its compatibility by looking for the required connections. The PS4 headset jack uses a standard 3.5mm audio connection, so make sure that your headset has a matching plug. Additionally, if your headset requires a USB connection for features like surround sound or microphone functionality, ensure that the PS4 has the necessary USB ports.
It’s also a good idea to check the manufacturer’s website or product manual for compatibility information. They often provide a list of compatible consoles and devices, including the PS4. This will give you peace of mind that the headset will work seamlessly with your PS4 and provide an immersive audio experience.
If you are unsure about the compatibility of your headset, you can always reach out to the manufacturer’s customer support for clarification. They will be able to assist you in confirming whether the headset is compatible with the PS4 or suggest alternative options that work well with the console.
Connecting the Headset
Connecting a wired headset to your PS4 is a straightforward process. Here are the steps you need to follow:
1. Locate the 3.5mm audio jack on your controller. This is where you will plug in the headset.
2. Take the audio cable of your headset and plug it into the 3.5mm audio jack on the controller. Make sure it is inserted fully to ensure a secure connection.
3. Once the headset is connected, you’re ready to start enjoying your gaming experience with audio through the headphones.
4. If your headset comes with a separate microphone, locate the microphone jack on the controller. It is usually positioned near the audio jack.
5. Plug the microphone cable into the microphone jack on the controller. Just like the audio cable, make sure it is inserted completely.
6. Now, you can communicate with other players during online multiplayer sessions.
It’s worth noting that some headsets may have additional features or settings that require extra steps to connect. Always refer to the manufacturer’s instructions for precise guidance.
Adjusting Audio Settings
Once you have connected your wired headset to your PS4, you may need to adjust the audio settings to ensure optimal sound quality and a seamless gaming experience.
Here are some steps to help you adjust the audio settings on your PS4:
1. Access the settings menu: From the PS4 home screen, navigate to the settings menu. You can do this by selecting the “Settings” option from the main menu.
2. Select “Devices”: Within the settings menu, select the “Devices” option. This will allow you to configure various device settings, including audio options.
3. Choose “Audio Devices”: Under the “Devices” menu, select the “Audio Devices” option. This is where you can customize the audio settings for your wired headset.
4. Adjust the input and output settings: Within the “Audio Devices” menu, you will find options to adjust both the input and output settings. The input settings determine how your microphone is configured, while the output settings control the audio output to your headset.
5. Set the input level: To ensure that your microphone is picking up your voice clearly, you can adjust the input level. Speak into the microphone and look for the audio meters to ensure that the input level is not too low or too high.
6. Configure the output settings: You can choose the audio output to be sent to your wired headset. Select the appropriate option based on your preference, such as “Chat Audio” if you primarily want to hear chat audio, or “All Audio” if you want to hear all game audio through your headset.
7. Test the audio: After adjusting the input and output settings, it’s a good idea to test the audio to make sure everything is working correctly. Launch a game or open a voice chat application and check if you can hear the sound through your wired headset.
By following these steps and adjusting the audio settings on your PS4, you can ensure that your wired headset provides the best audio experience while gaming on your console.
Troubleshooting Common Issues
Even when connecting a wired headset to your PS4, you may encounter some common issues. However, don’t worry! Most of these issues can be easily resolved with a few troubleshooting steps. Let’s dive into some of the common problems you may face and their solutions:
No Sound: If you find that there is no sound coming through your headset, first check the volume settings on your PS4. Make sure the headset volume is turned up and not muted. You can access the volume settings by going to the “Settings” menu on the PS4 dashboard. Additionally, ensure that the audio output is set to “Headset” under the audio settings.
Intermittent Sound: If you’re experiencing sound cutting in and out or intermittent audio, check the headset connection. Ensure that the wired connection between the headset and the controller is secure. Try unplugging and plugging the headset back in to ensure a proper connection. If the issue persists, it may be worth trying a different controller or headset to rule out any hardware problems.
Mic Not Working: If your microphone doesn’t seem to be working, first check that it’s properly connected to the headset. Some headsets have detachable mics, so ensure it’s securely attached. Next, check the microphone mute switch or button on your headset. Make sure it’s not set to mute. Additionally, check the audio settings on your PS4 and ensure the microphone input is set to “Headset.”
Audio Quality Issues: If you notice poor audio quality, such as static or distortion, check the cable connections. Ensure that the audio cable is securely plugged into both the headset and the PS4 controller. Try using a different audio cable if available to see if that resolves the issue. Additionally, you can try adjusting the audio settings on your PS4 to optimize the audio output.
Echo or Feedback: Hearing an echo or feedback during gameplay can be quite annoying. This issue is often caused by audio settings conflicts. Start by verifying that you’re using the correct audio configuration for your headset, such as stereo or surround sound. You can experiment with different audio settings to find the one that works best for your setup. Additionally, try reducing the microphone sensitivity in the audio settings to minimize any potential feedback.
No Chat Audio: If you can’t hear other players in chat, check the chat settings. Ensure that the chat audio is enabled and set to output through the headset. You can access these settings by going to the “Settings” menu, then selecting “Devices” and “Audio Devices.” From there, make sure the “Output to Headphones” option is set to “All Audio” or “Chat Audio.”
Limited Control Functionality: Some headsets may have additional controls, such as volume buttons or a mute switch. If you find that these controls aren’t functioning as expected, double-check the headset compatibility with the PS4. Certain features may not be fully supported by all headsets. If you have confirmed compatibility, try disconnecting and reconnecting the headset to reset any control issues.
By following these troubleshooting steps, you should be able to resolve most common issues when connecting a wired headset to your PS4. Remember, if the problem persists, checking the compatibility of your headset with the PS4 is always a good idea. Happy gaming!
Conclusion
Connecting a wired headset to your PS4 opens up a whole new world of immersive gaming experiences. Whether you prefer intense multiplayer battles or enjoying the atmospheric sound design of your favorite single-player adventures, a high-quality headset can make all the difference.
In this article, we’ve covered the step-by-step process of connecting a wired headset to your PS4. From checking compatibility to adjusting settings and making sure the audio output is set to the headset, you now have the knowledge to seamlessly integrate your headset into your gaming setup.
Remember to choose a headset that suits your preferences and budget. Look for features like clear audio, comfortable design, and a reliable microphone for in-game communication. With the right headset, you’ll be able to hear every detail and communicate clearly with your teammates, giving you a competitive edge in the gaming world.
So, go ahead and connect your wired headset to your PS4, and elevate your gaming experience to new heights!
FAQs
1. Can I connect a wired headset to my PS4?
Yes, you can connect a wired headset to your PS4. The PS4 has a built-in 3.5mm audio jack that allows you to connect compatible headsets directly to the controller.
2. How do I connect a wired headset to my PS4?
To connect a wired headset to your PS4, simply plug the headset’s 3.5mm audio jack into the controller’s audio jack. The controller will recognize the headset, and you’ll be able to hear and communicate with other players during gameplay.
3. Do I need any additional accessories to connect a wired headset to my PS4?
No, you do not need any additional accessories to connect a wired headset to your PS4. As long as your headset has a 3.5mm audio jack and is compatible with the PS4, you can connect it directly to the controller.
4. Can I use any wired headset with my PS4?
Most wired headsets with a 3.5mm audio jack are compatible with the PS4. However, it’s always recommended to check the headset’s compatibility with the PS4 before purchasing or using it.
5. Can I adjust the audio settings for my wired headset on the PS4?
Yes, you can adjust the audio settings for your wired headset on the PS4. From the PS4’s main menu, go to “Settings,” then select “Devices,” and choose “Audio Devices.” Here, you’ll be able to adjust the volume, microphone settings, and other audio options for your headset.