
If you’re a proud owner of a Tesla electric vehicle, you already know the benefits of eco-friendly transportation and the convenience of never having to stop at a gas station. However, one essential aspect of owning an electric vehicle is having a reliable and efficient charging solution at home. That’s where the Tesla Wall Connector comes in. The Tesla Wall Connector is a powerful charging solution specifically designed for Tesla vehicles that can provide faster charging speeds compared to a standard outlet. In this article, we will guide you through the process of installing the Tesla Wall Connector, ensuring that you can enjoy the convenience of charging your Tesla at home hassle-free. So, let’s dive in and discover how easy it is to install the Tesla Wall Connector and optimize your charging experience.
Inside This Article
- Tesla Wall Connector: An Overview
- Step 1: Gather the Required Tools and Materials
- Step 2: Prepare the Electrical Wiring
- Step 3: Mount the Tesla Wall Connector
- Step 4: Connect the Electrical Wires
- Step 5: Test the Installation
- Step 6: Finalize the Installation
- Troubleshooting Common Issues
- Conclusion
- FAQs
Tesla Wall Connector: An Overview
The Tesla Wall Connector is a high-quality charging solution designed specifically for Tesla electric vehicles. It is an essential accessory for Tesla owners who want to conveniently and efficiently charge their vehicles at home or in commercial settings. The Tesla Wall Connector is designed to deliver fast and reliable charging while ensuring the safety of both the user and the vehicle.
With its sleek design and compact size, the Tesla Wall Connector can be easily installed on the wall of your home or garage. It is compatible with a wide range of electrical systems and is capable of delivering high power to charge your Tesla vehicle quickly. The Tesla Wall Connector also features smart charging capabilities, allowing you to monitor and control the charging process through the Tesla mobile app.
One of the standout features of the Tesla Wall Connector is its high charging power capability. Depending on the electrical supply available, the Wall Connector can deliver up to 48 amps of power, allowing for fast charging of your Tesla vehicle. The connector also provides flexibility with adjustable amperage settings, allowing you to choose the charging speed that fits your needs.
Another key benefit of the Tesla Wall Connector is its ease of use. Simply plug in your vehicle using the included cable, and the Wall Connector will automatically start charging. It eliminates the need for messy cables and adapters, providing a streamlined and hassle-free charging experience. The Wall Connector also offers a durable and weather-resistant construction, ensuring reliable performance in various conditions.
The Tesla Wall Connector is compatible with all Tesla electric vehicles, including the Model S, Model 3, Model X, and Model Y. It meets all relevant safety standards and is designed to provide a safe and efficient charging experience. With its advanced features and reliable performance, the Tesla Wall Connector is a must-have accessory for Tesla owners who prioritize convenience and dependability.
Step 1: Gather the Required Tools and Materials
Before you begin the installation process for your Tesla Wall Connector, it’s important to gather all the necessary tools and materials. Having everything ready before starting will make the installation smoother and more efficient. Here’s a list of the essential items you’ll need:
- Tesla Wall Connector: This is the main component of the installation and serves as the charging station for your Tesla vehicle.
- Electrical Wiring: Ensure you have the appropriate wiring based on your electrical setup and local regulations. Consult an electrician if you’re unsure of the type and specifications needed.
- Circuit Breaker: You’ll need a dedicated circuit breaker in your electrical panel to connect the Tesla Wall Connector.
- Conduit and Junction Box: Depending on your local codes, you may require conduit and a junction box to protect and route the electrical wiring.
- Wire Strippers and Cutters: These tools will be necessary to strip and cut the electrical wires during the installation process.
- Screwdriver and Drill: A screwdriver is useful for mounting the Tesla Wall Connector, while a drill may be needed to create holes for the mounting screws.
- Level: A level will ensure that the Tesla Wall Connector is mounted straight and even.
- Measuring Tape: This will help you accurately measure the distances needed during the installation.
- Wire Connectors and Electrical Tape: You’ll need wire connectors, such as wire nuts, and electrical tape to securely connect the electrical wires.
- Safety Gear: Don’t forget to wear safety glasses and gloves to protect yourself during the installation process.
By gathering all of these tools and materials beforehand, you’ll be ready to start the installation process smoothly. This preparation will help ensure that you have everything you need to complete the project and that you can work efficiently and safely.
Step 2: Prepare the Electrical Wiring
Before installing the Tesla Wall Connector, it is crucial to prepare the electrical wiring to ensure a safe and efficient installation. Here are the steps to follow:
1. Turn off the power: Start by turning off the power to the circuit where the Tesla Wall Connector will be installed. This can be done by flipping the corresponding breaker switch in your electrical panel.
2. Confirm proper voltage: Ensure that the voltage of the circuit matches the voltage requirements of the Tesla Wall Connector. Most models require a 240V outlet.
3. Gather the necessary tools: Before beginning the electrical wiring process, gather the required tools, including wire cutters, wire strippers, electrical tape, and a screwdriver. Having these tools on hand will make the installation process smoother.
4. Remove the electrical panel cover: Open the electrical panel and remove the cover. Be cautious and use proper safety measures while working with live electrical equipment.
5. Identify the circuit: Locate the circuit breaker that controls the circuit you will be connecting the Tesla Wall Connector to. Double-check that the power is still off before proceeding.
6. Run the electrical wires: Run the electrical wires from the circuit breaker to the location where the Tesla Wall Connector will be installed. Ensure that the wires are of the appropriate gauge to handle the electrical load.
7. Strip and connect the wires: Use wire cutters and strippers to carefully strip off a small portion of the insulation from the ends of the wires. Then, connect the wires to the corresponding terminals on the Tesla Wall Connector, following the manufacturer’s instructions.
8. Secure and label the wires: Once the wires are properly connected, secure them using electrical tape or wire nuts. It is also a good idea to label the wires to indicate their purpose and corresponding terminals.
9. Reattach the electrical panel cover: After completing the electrical wiring, reattach the cover of the electrical panel. Make sure it is securely fastened and provides proper protection.
10. Conduct a final inspection: Before turning the power back on, double-check all connections and ensure that there are no loose or exposed wires. Take the time to tidy up the work area and remove any debris or tools.
By following these steps and paying attention to safety protocols, you can properly prepare the electrical wiring for the installation of a Tesla Wall Connector. This will help ensure a smooth and efficient charging experience for your Tesla vehicle.
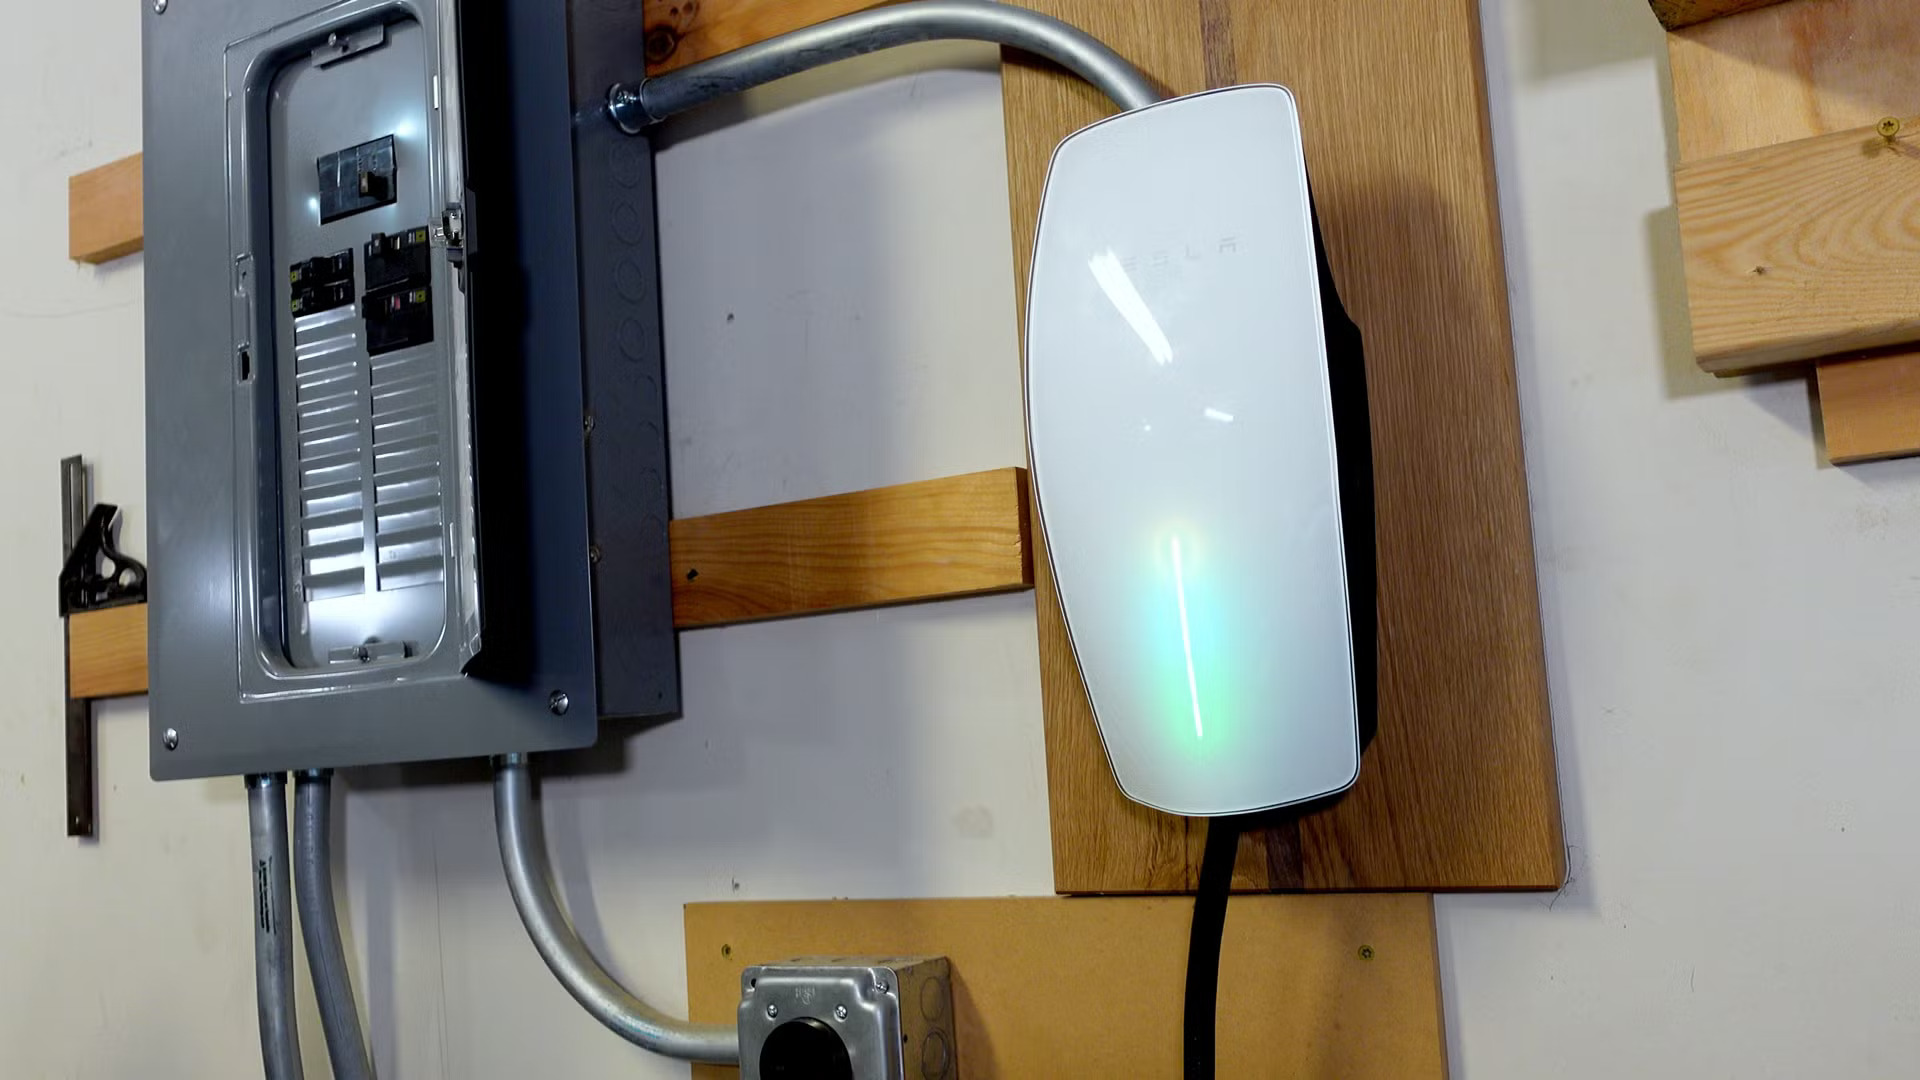
Step 3: Mount the Tesla Wall Connector
Now that you have prepared the electrical wiring, it is time to mount the Tesla Wall Connector. Follow these steps to ensure a secure and proper installation:
- Choose a suitable location: Select a location on a wall that is easily accessible and where the Tesla Wall Connector can be mounted securely. Make sure the location is within reach of your vehicle’s charging port.
- Mark the mounting holes: Using a pencil or marker, mark the mounting holes on the wall. The Tesla Wall Connector typically comes with a mounting template that you can use to ensure accurate placement.
- Drill pilot holes: With the help of a power drill and the appropriate drill bit, carefully drill pilot holes at the marked locations. Ensure that the pilot holes are drilled straight and are suitable for the type of wall material you are working with.
- Attach the mounting bracket: Align the Tesla Wall Connector’s mounting bracket with the pilot holes and screw it into place using the provided screws. Make sure the bracket is securely attached to the wall.
- Place the Tesla Wall Connector: Carefully align the Tesla Wall Connector with the mounting bracket. Slide it into place, ensuring that it fits securely.
- Secure the Tesla Wall Connector: Use the screws provided in the kit to fasten the Tesla Wall Connector to the mounting bracket. Ensure that it is tightly secured and level.
- Check for stability: Once the Tesla Wall Connector is mounted, give it a gentle shake to check for any loose connections. If it feels stable and doesn’t move, then it is securely installed.
Remember, it is crucial to follow the installation instructions provided by Tesla to ensure the safe and proper mounting of the Tesla Wall Connector. If you are unsure about any step, consult a qualified electrician to assist you with the installation process.
Step 4: Connect the Electrical Wires
Once you have mounted the Tesla Wall Connector in the desired location and prepared the electrical wiring, it is time to connect the wires. This step is crucial for ensuring a safe and efficient installation. Follow the instructions below to properly connect the electrical wires.
1. Begin by identifying the wires that you will be working with. Typically, you will have three wires: a black (hot) wire, a white (neutral) wire, and a green or bare copper (ground) wire. Make sure that the power to the circuit is turned off before proceeding.
2. Take the black wire from the Tesla Wall Connector and connect it to the black wire in the electrical junction box. Use a wire nut to securely fasten the wires together. Take care to ensure that the connection is tight and there are no exposed wires.
3. Connect the white wire from the Tesla Wall Connector to the white wire in the electrical junction box in the same manner as the black wires. Again, use a wire nut to secure the connection.
4. Finally, connect the green or bare copper wire from the Tesla Wall Connector to the green or bare copper wire in the electrical junction box. This wire is the ground wire and is essential for safety purposes.
5. Once all the wires are securely connected, you can use electrical tape to wrap around the wire nuts for added protection. This helps to prevent any accidental loosening of the connections.
6. Before proceeding to the next step, double-check all the wire connections to ensure they are properly secured. Also, make sure there are no loose or exposed wires that could pose a safety hazard.
Connecting the electrical wires correctly is crucial to ensure a safe and reliable installation. If you are unsure about any step or if you have any doubts about your electrical knowledge, it is strongly recommended to consult a certified electrician to assist you with the process.
Step 5: Test the Installation
Once you have successfully completed the previous steps of gathering the required tools and materials, preparing the electrical wiring, and mounting the Tesla Wall Connector, it is time to move on to the crucial step of testing the installation. This step ensures that everything is functioning as it should and helps to identify any potential issues or errors before finalizing the installation.
The testing process involves a series of checks and measurements to confirm that the Tesla Wall Connector is properly receiving power and is able to supply it to your electric vehicle. Here are the steps to follow:
- Check for power supply: Start by verifying that the power supply to the wall connector is active. You can do this by using a voltage tester or a multimeter to measure the voltage at the electrical panel where the circuit breaker is located. Ensure that the breaker for the charger circuit is switched on.
- Inspect the Tesla Wall Connector: Carefully examine the wall connector for any visible damage or loose connections. Look for any signs of overheating or burning, which could indicate a wiring issue. Ensure that all the electrical connections are secure and properly tightened.
- Connect the electric vehicle: Once you have confirmed that the power supply is active and the wall connector is in good condition, it is time to connect your electric vehicle. Plug in the charging cable securely into the vehicle port and make sure it is properly latched or locked.
- Check the charging status: After connecting the vehicle, check the charging status on your Tesla Wall Connector or on the vehicle’s display. It should indicate that the charging has started and display the current charging rate. If there is no indication of charging, make sure the vehicle is properly connected and that the cable is not damaged.
- Monitor the charging process: Keep an eye on the charging process to ensure it is progressing smoothly. Observe the time remaining for a full charge and the charging rate. If the charging process seems abnormally slow or the vehicle is not charging at all, there may be an issue that requires further troubleshooting.
- Perform a load test: For added assurance, you can perform a load test by charging the vehicle for a significant period of time, such as overnight. This will help verify that the Tesla Wall Connector is capable of providing a continuous and stable power supply to your electric vehicle without any interruptions or malfunctions.
By following these steps, you can ensure that the Tesla Wall Connector installation is successful and that your electric vehicle is charging effectively. However, if you encounter any issues during the testing process or if you are unsure how to proceed, it is advisable to consult a certified electrician or reach out to Tesla customer support for assistance.
Step 6: Finalize the Installation
Once you have completed the previous steps of gathering the required tools and materials, preparing the electrical wiring, mounting the Tesla Wall Connector, and connecting the electrical wires, you are now ready to finalize the installation.
Here are the remaining steps to complete the installation process:
- Secure the Wall Connector: Carefully tighten the mounting screws to ensure that the Tesla Wall Connector is securely attached to the wall. This step is crucial to prevent any movement or instability.
- Double-Check the Connections: Take a moment to inspect all the electrical connections you made in Step 4. Ensure that all wires are properly connected and tightened. Any loose connections can lead to electrical issues.
- Turn on the Power: If you had turned off the power supply in Step 2, now is the time to turn it back on. Make sure that the circuit breaker is switched on to restore power to the Tesla Wall Connector.
- Test the Charging: Plug in your electric vehicle (EV) to the Tesla Wall Connector and check if it starts charging. Monitor the charging process for a few minutes to ensure there are no issues or anomalies.
- Check for Error Codes: The Tesla Wall Connector comes with LED lights that indicate the charging status. Familiarize yourself with the different error codes in the user manual. If any error code is displayed, consult the manual for troubleshooting steps.
- Final Inspection: Look around the installation area to ensure that there are no loose wires or exposed electrical parts. Double-check that everything is in order and visually inspect for any signs of damage or physical hazards.
Remember, safety should always be a priority. If you encounter any difficulties during the installation process or notice any issues after finalizing the installation, it is best to seek professional assistance from a qualified electrician. Taking the extra step to ensure the installation is done correctly will provide peace of mind and a reliable charging solution for your electric vehicle.
Troubleshooting Common Issues
While installing a Tesla Wall Connector is a relatively straightforward process, you may encounter some common issues along the way. Here, we will discuss a few troubleshooting steps to help you address these issues and get your Tesla Wall Connector up and running smoothly.
1. No Power: If your Tesla Wall Connector does not receive any power, first check the electrical supply and make sure the breaker is not tripped. If the breaker is fine, inspect the wiring connections to ensure they are secure. Additionally, check if the electrical outlet is functioning correctly by testing it with another device.
2. Faulty Connection: In case the Tesla Wall Connector is not charging your electric vehicle, it could be due to a faulty connection. Double-check that all electrical wires are properly connected and tightened. Ensure that the wires are securely attached to their respective terminals and that there are no loose connections.
3. Slow Charging Speed: If you notice that your Tesla Wall Connector is charging your vehicle at a slower rate than expected, there are a few possible causes. First, confirm that your vehicle’s charging settings are configured correctly. You may also want to check the circuit breaker to ensure it is compatible with the power requirements of the Tesla Wall Connector. If necessary, consult an electrician to upgrade the circuit breaker.
4. Overheating: Overheating can be a serious issue that can hinder the performance and longevity of the Tesla Wall Connector. Check the ventilation around the Wall Connector to ensure it is not obstructed. Additionally, make sure that the Wall Connector is not exposed to direct sunlight or high temperatures, as this can cause overheating. If the issue persists, contact Tesla customer support for further assistance.
5. Error Codes: If your Tesla Wall Connector displays an error code, consult the user manual or Tesla support documentation to identify the specific issue. Error codes can indicate problems with the electrical supply, wiring connections, or internal components of the Wall Connector. Follow the recommended troubleshooting steps provided by Tesla to resolve the issue.
6. Firmware Updates: It is important to periodically check for firmware updates for your Tesla Wall Connector. New firmware releases may include bug fixes, performance enhancements, and compatibility improvements. Visit the Tesla website or their support portal to download and install any available updates for your Wall Connector.
7. Professional Assistance: If you have followed all the troubleshooting steps and are still experiencing issues with your Tesla Wall Connector, it may be necessary to seek professional assistance. Contact Tesla customer support or consult with a certified electrician who is experienced with electric vehicle charging installations. They will be able to diagnose the issue and provide the necessary solutions.
By following these troubleshooting steps and seeking the appropriate assistance when needed, you can overcome common issues and ensure that your Tesla Wall Connector functions reliably and efficiently.
Conclusion
Installing a Tesla Wall Connector is a great way to optimize the charging capabilities of your Tesla vehicle. With its fast charging speed and sleek design, it offers a convenient and efficient charging solution for your electric car.
By following the step-by-step installation guide provided by Tesla, you can easily set up the Wall Connector in your home or at your workplace. It is important to ensure that you have the necessary electrical capacity and a compatible circuit breaker to support the charging requirements.
Having a Tesla Wall Connector not only enhances your charging experience but also contributes towards a greener and more sustainable future. With its ability to charge your Tesla quickly and efficiently, you can enjoy the benefits of electric vehicle ownership while reducing your carbon footprint.
So, why wait? Take the first step towards seamless and efficient charging by installing a Tesla Wall Connector today!