
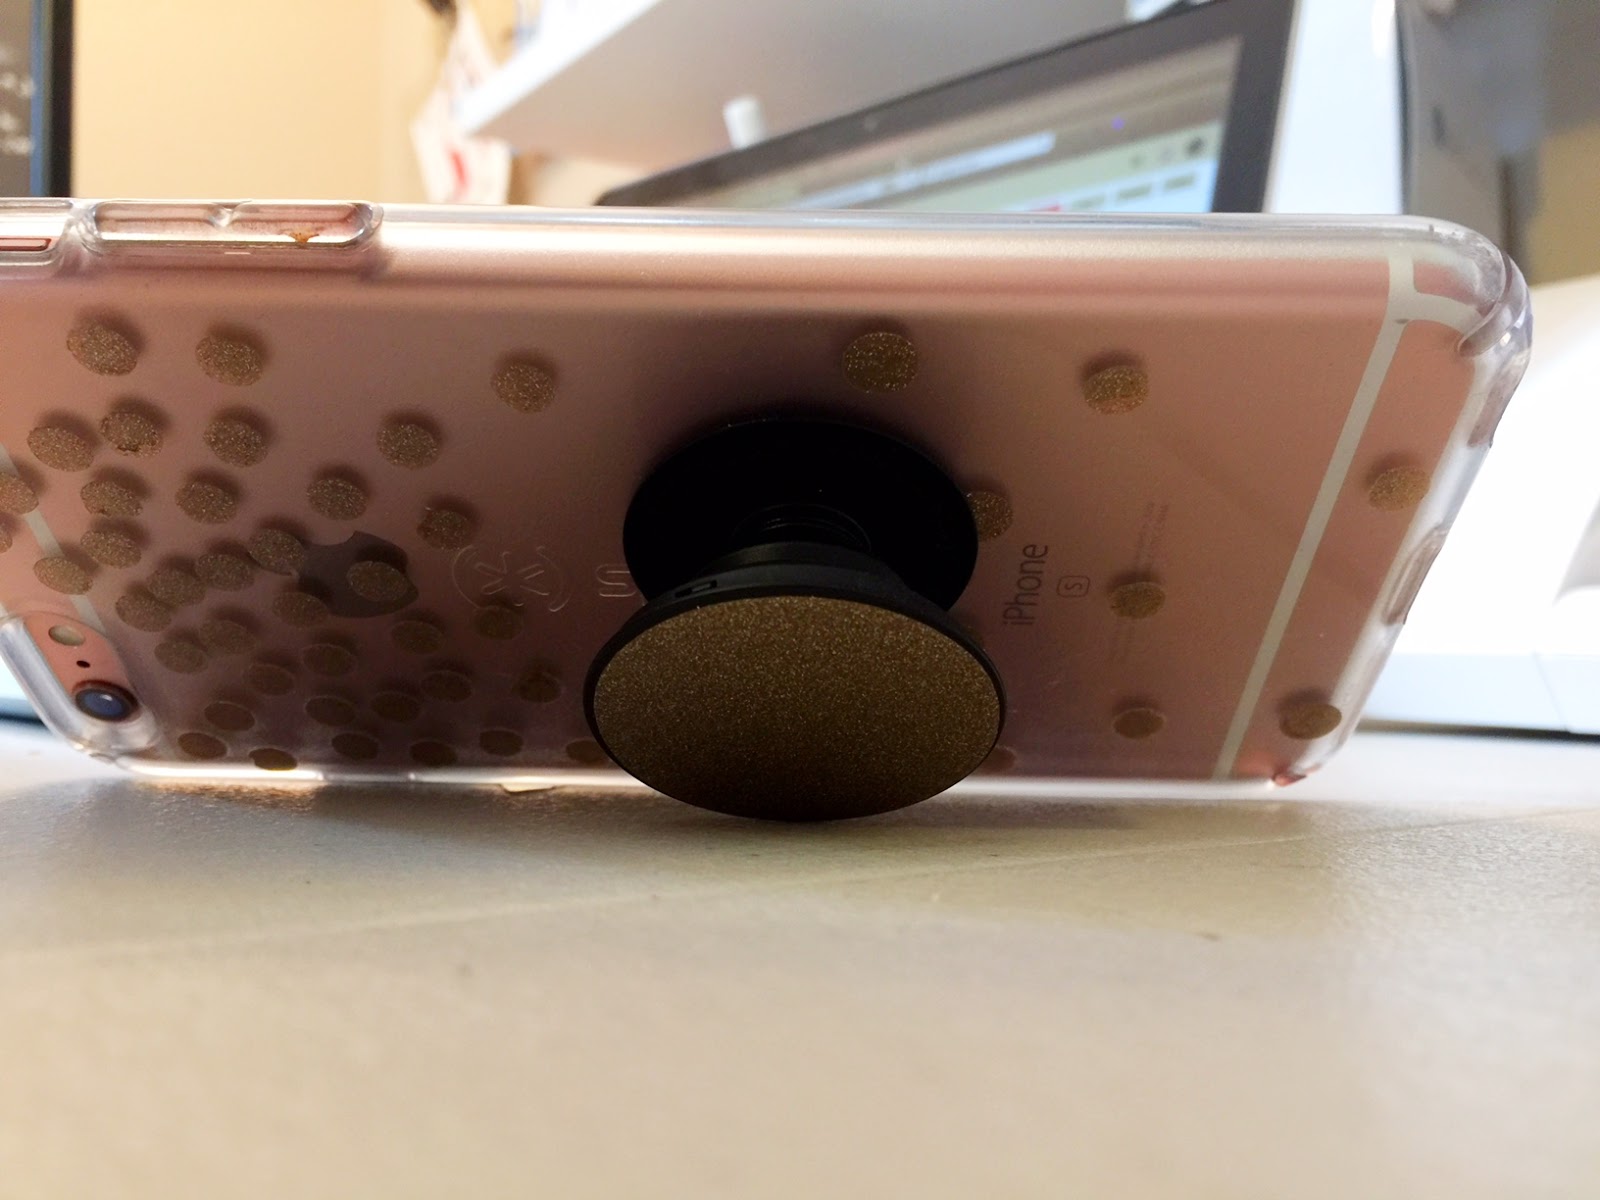
Popsockets have become quite popular in recent years, serving as a handy accessory that adds functionality and style to your mobile phone. These small but mighty gadgets allow you to hold your phone securely, prop it up for hands-free viewing, or even wrap your earphones around them for easy storage. However, what if you don’t have a hot glue gun handy? Can you still make a popsocket? The answer is yes! In this article, we will explore alternative methods to create a popsocket without the need for a hot glue gun. Whether you want to personalize your phone with a unique popsocket design or you’re simply looking for a solution in an emergency, we’ve got you covered. So let’s dive in and discover how to make your own popsocket without a hot glue gun!
Inside This Article
- Introduction
- Materials Needed
- Method 1: Using Adhesive Putty
- Method 2: Using Double-Sided Tape
- Method 3: Using Craft Glue
- Method 4: Using Fabric or Ribbon
- Tips and Considerations
- Conclusion
- Conclusion
- FAQs
Introduction
Popsockets have become a popular and trendy accessory for cell phones, providing a convenient grip and stand for your device. However, if you don’t have a hot glue gun on hand, you may be wondering how to make a popsocket without one. In this article, we will explore several alternative methods that you can use to create your own popsocket, using materials that you likely already have at home.
Whether you want to add some personality to your phone or simply find a way to securely hold it, these DIY popsocket methods are perfect for those in need of a quick and easy solution. From adhesive putty to fabric or ribbon, there are various options to choose from based on your preferences and available materials. Read on to learn more about each method and get started on creating your own custom popsocket.
Before we dive into the different methods, it’s important to note that while these alternatives may work well for temporary popsocket solutions, they may not provide the same level of durability and long-lasting hold as using a hot glue gun. It’s always a good idea to exercise caution and keep in mind that these DIY popsockets may not be as secure or reliable as commercially manufactured ones. However, they can still serve as a fun and functional accessory for your cell phone.
Materials Needed
Before we dive into the different methods of making a Popsocket without a hot glue gun, let’s gather the necessary materials. Here’s what you’ll need:
- Base material: This can be a small circular object like a bottle cap, a cardboard cutout, or a wooden disc.
- Adhesive putty or removable poster tape: These will serve as alternative adhesives to secure your Popsocket.
- Double-sided tape: Another option for creating a secure bond between the base material and your phone case.
- Craft glue: If you prefer a more permanent bonding solution, craft glue can be used instead of a hot glue gun.
- Fabric or ribbon (optional): If you want to add a decorative touch to your Popsocket, you can use fabric or ribbon to cover the base material.
- A pair of scissors: These will come in handy if you choose to use fabric or ribbon for customization.
- Decorative elements (optional): You can also gather any additional materials you’d like to use for embellishing your Popsocket, such as sequins, beads, or stickers.
With these materials in hand, you’re now ready to explore the various methods of making a Popsocket without a hot glue gun. Whether you’re looking for a temporary solution or a more personalized touch, these alternative methods will allow you to create a functional and stylish Popsocket for your phone.
Method 1: Using Adhesive Putty
Using adhesive putty is a simple and effective way to make a DIY popsocket without a hot glue gun. Here’s how you can do it:
- Start by gathering the materials you’ll need. This method requires adhesive putty, which can typically be found at stationery or craft stores. Make sure you choose a putty that is strong and durable.
- Clean the back of your phone or phone case. Wipe away any dust or debris to ensure a smooth and secure attachment.
- Take a small amount of adhesive putty and roll it into a ball. The size of the ball will depend on the desired thickness and height of your popsocket.
- Press the adhesive putty ball onto the back of your phone or phone case. Apply firm pressure to ensure it is securely attached.
- Shape the putty to create a base for your popsocket. You can make it flat or slightly rounded, depending on your preference.
- Once the base is formed, create a small indentation in the center. This is where your finger will rest when using the popsocket.
- Allow the adhesive putty to cure for a few hours or as per the instructions provided by the manufacturer. This will ensure that it is fully set and ready to use.
- Once the putty has cured, your DIY popsocket is ready to use! Simply place your finger in the indentation and securely hold your phone or use it as a stand when watching videos or taking selfies.
Using adhesive putty is a great option for those who want a non-permanent and easy-to-remove popsocket. The putty can be easily peeled off when you no longer need it or want to change the position or design.
Now that you know how to make a popsocket using adhesive putty, let’s explore another method using double-sided tape.
Method 2: Using Double-Sided Tape
If you don’t have a hot glue gun on hand, another great option for making a Popsocket is to use double-sided tape. This method is quick, easy, and doesn’t require any special tools or materials. Here’s how to make a Popsocket using double-sided tape:
- Gather your materials: You’ll need a sturdy base, such as a flat plastic disc or a small wooden circle, double-sided tape, and any decorative elements you’d like to add to your Popsocket.
- Cut the double-sided tape: Measure and cut a piece of double-sided tape that is slightly smaller than your base.
- Attach the tape to the base: Peel off the backing of the double-sided tape and carefully press it onto the base of your Popsocket.
- Add decorative elements: If desired, you can now add any decorative elements to the top of your Popsocket. This could be anything from stickers and gems to fabric or ribbons.
- Optional: Seal the edges: To ensure the longevity of your Popsocket, you can apply a layer of clear glue or sealant around the edges of the tape to secure it in place.
- Let it dry: Give your Popsocket some time to dry completely before using it.
Using double-sided tape provides a strong and durable bond, ensuring that your Popsocket stays securely attached to your phone. It’s a simple and effective alternative to using a hot glue gun.
Keep in mind that while this method works well, it may not be as long-lasting as using a hot glue gun or adhesive putty. Over time, the adhesive on the double-sided tape may wear off, so you might need to replace it or reattach the Popsocket using a fresh strip of tape.
Now that you know how to make a Popsocket using double-sided tape, you can get creative and design your own unique phone accessory. Let your imagination run wild and experiment with different materials and decorative elements to personalize your Popsocket to match your style.
Method 3: Using Craft Glue
If you don’t have a hot glue gun or adhesive putty on hand, another option for making a DIY popsocket is to use craft glue. Craft glue is a versatile adhesive that can be used for a variety of projects, including attaching decorations to surfaces.
Here are the steps to create a popsocket using craft glue:
- Step 1: Choose your base: Start by selecting a base for your popsocket. This could be a flat object with a smooth surface, such as a plastic disc or a wooden circle.
- Step 2: Position your phone: Place your phone on the base to get an idea of where you want your popsocket to be attached. This will help you determine the right size and placement for your design.
- Step 3: Prepare the adhesive: Squeeze a small amount of craft glue onto the back of the decorative element or object you want to attach to the base. Make sure to use an adhesive that is compatible with the materials you’re working with.
- Step 4: Attach the decorative element: Press the decorative element firmly onto the base, making sure it adheres well. Hold it in place for a few minutes to allow the glue to bond.
- Step 5: Let it dry: Allow the craft glue to dry completely according to the manufacturer’s instructions. This is important to ensure a strong bond between the base and the decorative element.
- Step 6: Test it out: Once the craft glue is fully dried and cured, you can test your DIY popsocket by sticking it to the back of your phone. Make sure it provides the desired stability and grip while using your device.
Using craft glue to create a popsocket gives you the freedom to use a wide variety of decorative elements, such as gems, beads, buttons, or even small figurines. Just make sure to choose lightweight objects that won’t add too much bulk to your phone.
Remember to follow the safety instructions provided by the craft glue manufacturer and allow the adhesive to dry and cure properly before using your DIY popsocket. This will ensure a durable and long-lasting attachment.
Craft glue can be a great alternative when you don’t have access to a hot glue gun or adhesive putty. It offers a strong bond and allows you to get creative with your popsocket design. Give it a try and enjoy the convenience and comfort of having a popsocket on your phone.
Method 4: Using Fabric or Ribbon
Another creative way to make a PopSocket without a hot glue gun is by using fabric or ribbon as an alternative adhesive. This method not only adds a unique and personalized touch to your PopSocket, but it also offers a secure and durable attachment.
Here is how you can make a PopSocket using fabric or ribbon:
- Start by cutting a piece of fabric or ribbon measuring approximately 6 inches in length and 1 inch in width. You can choose any fabric or ribbon that matches your style and preferences.
- Fold the fabric or ribbon in half, ensuring that the ends are aligned.
- Apply a small amount of craft glue or fabric glue to one side of the folded fabric or ribbon.
- Attach the glued side of the fabric or ribbon to the back of your phone case, making sure it is centered and aligned with the desired position for your PopSocket.
- Press down firmly to ensure a strong bond and hold it in place for a few minutes to allow the glue to dry.
- Once the glue has dried completely, you can gently pull on the fabric or ribbon to test its attachment. It should be securely attached to your phone case.
- Your fabric or ribbon PopSocket is now ready to use! Simply slide your fingers through the loop created by the fabric or ribbon to get a comfortable and secure grip on your phone.
Using fabric or ribbon allows you to customize your PopSocket and add a touch of your personal style. You can choose different patterns, colors, or textures to match your phone case and make it truly unique.
It’s important to note that the durability of the fabric or ribbon PopSocket may vary depending on the adhesive used and the strength of the bond. If you find that the fabric or ribbon starts to come loose over time, you can always reapply the craft glue or fabric glue to reinforce the attachment.
Remember to handle the fabric or ribbon PopSocket with care and avoid pulling or tugging on it too forcefully, as this may cause it to detach from your phone case.
Now that you know how to make a PopSocket without a hot glue gun using fabric or ribbon, you can enjoy the functionality and style of a PopSocket on your phone case in a creative way!
Tips and Considerations
When it comes to making a Popsocket without a hot glue gun, there are a few tips and considerations to keep in mind:
- Choose the right materials: Make sure to select materials that are durable and can withstand everyday use. Opt for strong adhesive putty, double-sided tape, or craft glue that is designed for bonding materials together.
- Test the adhesive: Before attaching your chosen material to the back of your phone or phone case, it’s important to do a small test first. Apply a small amount of adhesive to a non-visible surface and wait to see if it adheres properly. This will help ensure that the adhesive is strong enough and won’t damage your phone or case.
- Consider the weight: Depending on the material you choose, the weight of your DIY Popsocket may vary. Keep in mind that some materials, such as fabric or ribbon, may be lighter in weight compared to adhesive putty or double-sided tape. Consider the weight of the material and how it will affect the overall balance and stability of your phone when using the Popsocket.
- Position it right: Take a moment to think about the ideal position of your Popsocket on your phone or phone case. Consider the size and shape of your device, as well as your typical phone grip. By strategically placing the Popsocket, you can ensure maximum comfort and functionality.
- Keep it clean: If you’re using adhesive putty or double-sided tape, make sure to clean the surface of your phone or case before applying it. This will help ensure a strong bond and prevent any dust, dirt, or oils from affecting the adhesive quality.
- Experiment and customize: One of the fun aspects of DIY Popsockets is the ability to get creative and customize them to your liking. Try different materials, colors, patterns, or embellishments to make your Popsocket unique and reflecting your personal style.
Remember, making a Popsocket without a hot glue gun may require a bit of trial and error. It’s important to be patient and willing to adjust your method or materials until you find the perfect solution that works for you and your phone. With a bit of creativity and resourcefulness, you can enjoy the benefits of a Popsocket without the need for a hot glue gun.
Conclusion
In conclusion, making a popsocket without a hot glue gun is not only possible but also a creative way to personalize your mobile accessory. By using alternative methods like adhesive putty, double-sided tape, craft glue, or fabric/ribbon, you can easily create a popsocket that suits your style and preferences.
Whether you prefer a temporary solution or a more permanent one, these methods provide you with various options to choose from. It’s important to consider the materials you have available and the level of durability you desire when selecting the method that works best for you.
Remember, when using adhesive putty, ensure that it can hold the weight of your phone securely. Double-sided tape should be strong enough to withstand regular use, and craft glue should be applied evenly and allowed to dry completely. For a more decorative touch, using fabric or ribbon can add a unique flair to your popsocket.
As with any DIY project, it’s essential to take your time, follow instructions carefully, and be mindful of safety precautions. Always clean and dry the surface of your phone before attaching the popsocket and avoid using excessive force that could potentially damage your device.
By harnessing your creativity and exploring alternative materials, you can create a customized popsocket that reflects your personal style. Experiment with different colors, patterns, and textures to make your popsocket truly one-of-a-kind.
So go ahead, let your imagination run wild, and enjoy the process of making your own popsocket without a hot glue gun. Elevate your mobile accessory game and make a statement with a unique and stylish popsocket that perfectly complements your phone!
Conclusion
In conclusion, making a popsocket without a hot glue gun is not only possible but also a fun and creative DIY project. By following the simple steps outlined in this article, you can create a personalized popsocket using everyday materials like a phone case, adhesive tape, and a small item to serve as the grip. Whether you want to showcase your unique style, add functionality to your smartphone, or simply enjoy a fun crafting activity, this DIY approach is a great option.
Remember to experiment with different materials and designs to make your popsocket truly one-of-a-kind. You can use fabric, beads, buttons, or even draw your own patterns to customize your creation. Let your imagination run wild and have fun with the process.
So next time you find yourself without a hot glue gun but in need of a popsocket, don’t fret. Simply gather some basic supplies and get creative. With a little bit of time and effort, you’ll have a homemade popsocket that perfectly suits your style and keeps your phone secure. Happy crafting!
FAQs
Q: Can I make a popsocket without using a hot glue gun?
A: Yes, it is possible to make a popsocket without using a hot glue gun. There are alternative methods that you can try, such as using adhesive tapes or a strong adhesive.
Q: What materials do I need to make a popsocket without a hot glue gun?
A: To make a popsocket without a hot glue gun, you will need a base, such as a plastic disc or a strong adhesive pad. You will also need a decorative element, such as a button or a small accessory to personalize your popsocket.
Q: How do I attach a popsocket without using a hot glue gun?
A: If you are using adhesive tapes, you can simply cut small pieces and adhere them to both the base and the decorative element. Make sure to press firmly to ensure a strong bond. If you are using a strong adhesive, apply it to both the base and the decorative element, then press them together firmly.
Q: How long does it take for the adhesive to cure?
A: The time it takes for the adhesive to cure will depend on the specific adhesive product you are using. It is best to follow the instructions provided by the manufacturer to ensure proper curing.
Q: Is a popsocket without a hot glue gun as durable as one made with a hot glue gun?
A: While a popsocket made without a hot glue gun can still be quite durable, it may not be as strong as one made using a hot glue gun. The adhesive tapes or strong adhesives used may have limitations in terms of their strength and longevity. It is important to choose high-quality materials and ensure a secure attachment to maximize the durability of your DIY popsocket.