
Are you a fan of the popular video game series, Fallout? Have you always wanted to own your very own Pip Boy, just like the protagonist in the game? Well, we have a solution for you! In this article, we will guide you through the process of creating your own Pip Boy phone case, so you can transform your regular smartphone into a fully functional and immersive accessory.
With this Pip Boy phone case, you can protect your device while showcasing your love for the Fallout series. It’s a unique way to stand out from the crowd and display your geeky side. So, whether you’re attending a cosplay convention or simply want to add some flair to your daily life, read on to discover how you can make a Pip Boy phone case that will impress both fellow gamers and non-gamers alike.
Inside This Article
- Materials Needed
- Step 1: Choosing a Phone Case
- Step 2: Designing the Pip Boy Interface
- Step 3: Cutting and Assembling the Pip Boy Components
- Step 4: Attaching the Pip Boy Interface to the Phone Case
- Conclusion
- FAQs
Materials Needed
Before you begin creating your own Pip Boy phone case, you will need to gather a few materials. Here is a list of what you will need:
- A suitable phone case: Choose a phone case that fits your phone model and offers the right level of protection. It’s important to ensure that the case has a smooth and flat surface for easy application of the Pip Boy interface.
- Thick foam or craft foam: You will need foam sheets of various colors for creating the Pip Boy components. Make sure to choose foam that is thick enough to withstand everyday use.
- X-acto knife or scissors: These tools will be necessary for cutting the foam sheets and creating precise shapes.
- Hot glue gun and glue sticks: Hot glue will help you attach the foam pieces together and secure them onto the phone case.
- Acrylic paints and brushes: You will need these to add color and detail to the foam pieces, giving them a realistic Pip Boy look.
- Markers or pens: These will come in handy for drawing buttons, dials, and other interface details on the foam.
- Clear adhesive tape: This will be used to attach the foam pieces to the phone case without leaving any residue.
- Optional: Small LED lights: If you want to take your Pip Boy phone case to the next level, you can include small LED lights to create a glowing effect on certain parts of the interface.
Now that you have gathered all the necessary materials, you are ready to move on to the next steps and create your very own Pip Boy phone case.
Step 1: Choosing a Phone Case
When it comes to creating a unique and personalized Pip Boy phone case, the first step is choosing the right phone case as your canvas. Here are some factors to consider:
- Compatibility: Ensure that the phone case you select is compatible with your specific phone model. Different phones have different dimensions and button placements, so it’s crucial to choose a case that fits your phone perfectly.
- Material: Phone cases come in a variety of materials, such as plastic, silicone, leather, and metal. Consider the level of protection and durability you require. If you prioritize shock absorption and drop protection, a silicone or rubber case might be ideal. For a sleek and stylish look, a leather or metal case could be a great option.
- Design: Look for a phone case that allows you to easily access your phone’s buttons, ports, and camera. It’s also important to consider the overall design of the case. Some cases feature a clear back, allowing you to showcase the Pip Boy design underneath, while others may have a solid color or a textured surface.
- Customizability: If you want to take your Pip Boy phone case to the next level, look for a case that offers customization options. This could include the ability to add additional accessories, like belt clips or card holders, or even cases that have interchangeable backplates. These customization features can help make your Pip Boy phone case truly one-of-a-kind.
Step 2: Designing the Pip Boy Interface
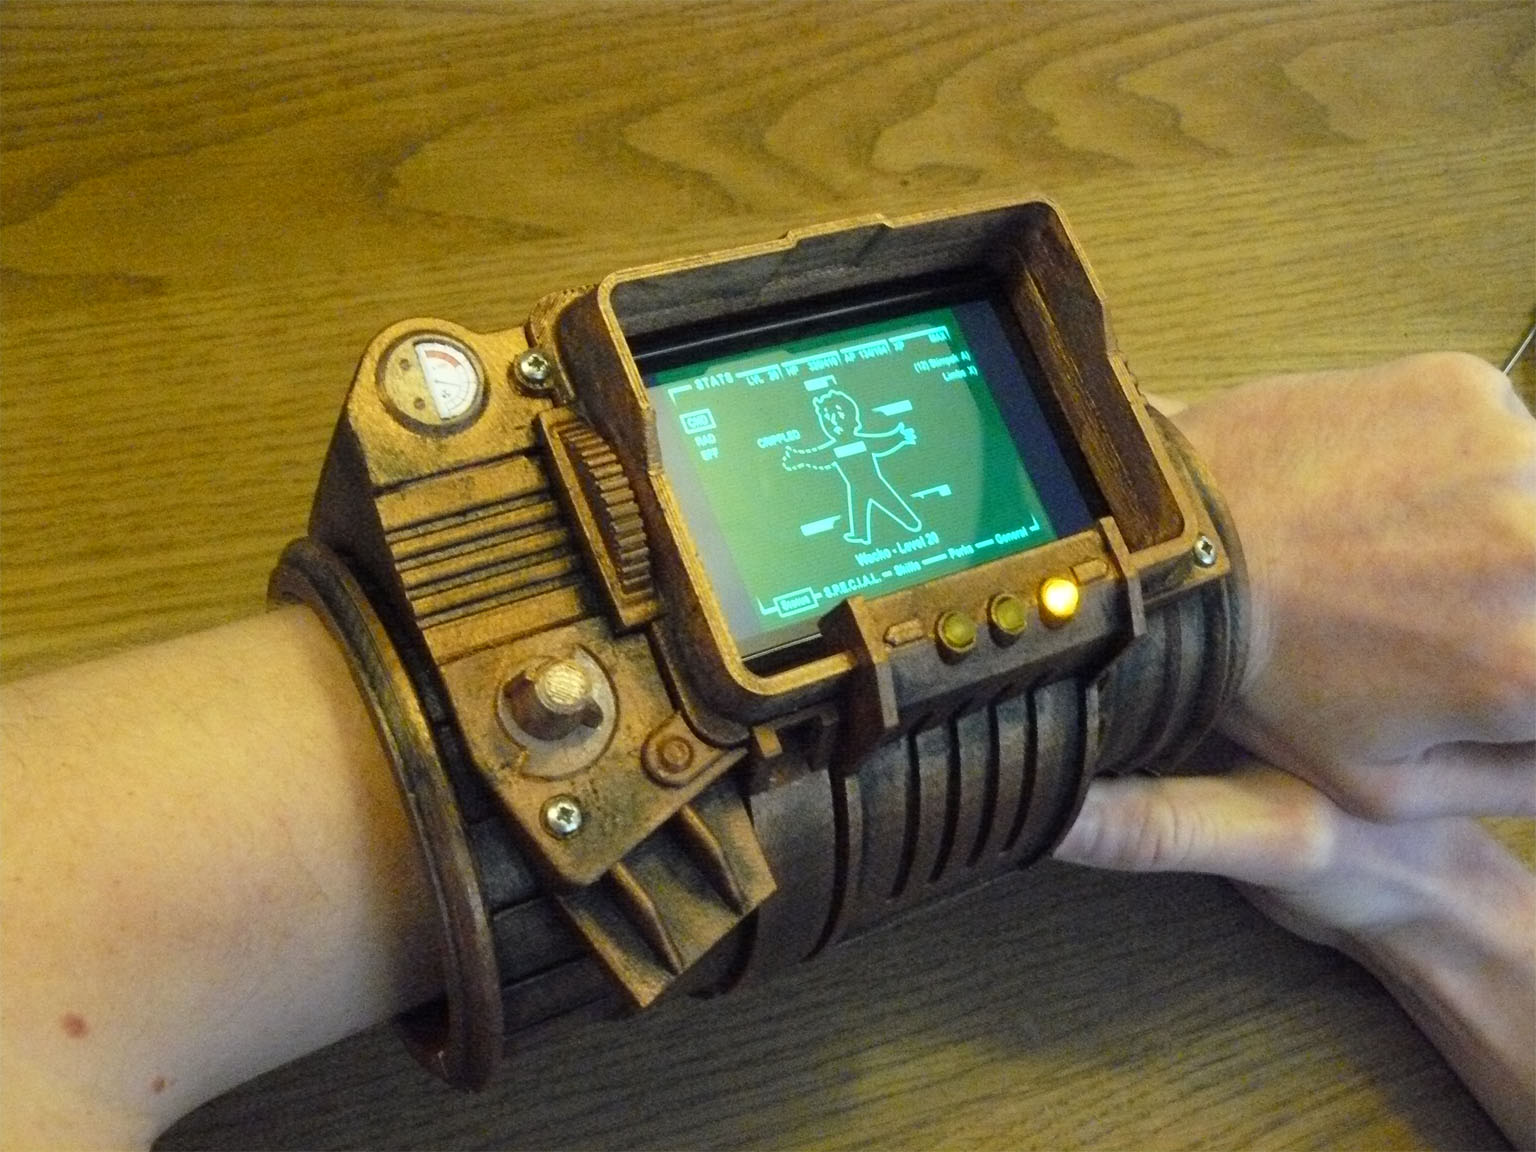
Now that you have chosen the perfect phone case, it’s time to unleash your creativity and design the Pip Boy interface. The Pip Boy is the iconic wrist-worn computer in the Fallout video game series, and recreating its unique interface will give your phone case an authentic and eye-catching look. Here’s how you can design your own Pip Boy interface:
- Gather Inspiration: Start by researching images of the Pip Boy interface from the Fallout games. Look for different color schemes, fonts, and icons that you can incorporate into your design.
- Create a Design Plan: Sketch out your design on a piece of paper or use a design software of your choice. Decide on the layout, color palette, and the elements you want to include in your Pip Boy interface.
- Choose the Right Icons and Fonts: In order to mimic the Pip Boy interface accurately, you’ll need to find matching icons and fonts. There are plenty of free resources available online that offer Fallout-inspired icons and fonts.
- Customize the Elements: Once you have gathered all the necessary assets, it’s time to bring your design to life. Use image editing software like Photoshop or Illustrator to create the different elements of the Pip Boy interface, such as the health bar, inventory tabs, and radio buttons.
- Consider User Interface Elements: While the Pip Boy interface may look visually appealing, it’s essential to keep the usability factor in mind. Ensure that the essential buttons and features on your phone are easily accessible and that the design doesn’t interfere with the functionality of your device.
- Print a Test Version: Before finalizing your design, it’s a good idea to print a test version and see how it looks on your phone case. Make adjustments if necessary and ensure that the design fits well on the case.
Remember, the key is to be creative and have fun with the design process. Don’t be afraid to add your own personal twists and elements to make your Pip Boy interface unique. Once you have completed this step, you’re ready to move on to the next phase: cutting and assembling the Pip Boy components.
Step 3: Cutting and Assembling the Pip Boy Components
Now that you have your materials and design ready, it’s time to start cutting and assembling the Pip Boy components. This step requires some precision and attention to detail, so make sure you have the necessary tools and a clean workspace.
Here’s how you can go about cutting and assembling the different parts of your Pip Boy phone case:
- Measure and mark: Use the measurements from your design to mark the dimensions onto the foam or cardboard material. Double-check your measurements to ensure accuracy.
- Cut the main body: Use a sharp craft knife or scissors to carefully cut out the main body of the Pip Boy. Take your time and make smooth, even cuts to maintain the integrity of the design.
- Assemble the different layers: If your design includes multiple layers or components, cut them out and stack them on top of each other to create the desired depth and dimension. Use adhesive or glue to secure each layer in place.
- Add details: Now it’s time to add the smaller details that will bring your Pip Boy phone case to life. Cut out buttons, dials, and screen overlays from foam or cardboard, ensuring that they align with your design. Attach these details to the main body using adhesive or glue.
- Double-check your work: Once you have assembled all the components, take a step back and inspect your work. Make any necessary adjustments or touch-ups to ensure everything is aligned and secure.
Remember, this step may require some trial and error, especially if you’re new to crafting or working with these materials. Don’t be discouraged if it takes a few attempts to get everything just right. Take your time, be patient, and enjoy the process of bringing your Pip Boy phone case to life.
Step 4: Attaching the Pip Boy Interface to the Phone Case
Finally, it’s time to bring it all together and attach the Pip Boy interface to the phone case. Here’s how you can do it:
- Place your phone case on a flat surface and make sure it is clean and free from any dust or debris.
- Apply a thin layer of adhesive to the back of the Pip Boy interface. Be careful not to apply too much, as it may cause the interface to shift or not adhere properly.
- Carefully align the edges of the Pip Boy interface with the edges of the phone case. Take your time to ensure that it is centered and straight.
- Press down firmly on the Pip Boy interface, applying even pressure to ensure that it adheres properly to the phone case.
- Let the adhesive dry according to the instructions provided by the manufacturer. It is typically recommended to let it dry for at least 24 hours to ensure a strong bond.
- Once the adhesive has fully dried, your Pip Boy phone case is ready to use!
Make sure to regularly check the adhesive bond between the Pip Boy interface and the phone case. If you notice any loosening or peeling, apply a small amount of additional adhesive to strengthen the bond.
Now, you can proudly show off your customized Pip Boy phone case and enjoy the unique design and functionality it brings.
Note: It’s important to remember that modifying your phone case may void any manufacturer warranties. Proceed with caution and at your own risk.
Conclusion
In conclusion, creating your own Pip Boy phone case is a fun and creative way to personalize your mobile device and pay homage to one of gaming’s most iconic accessories. By following the step-by-step process outlined in this article, you can bring the essence of the post-apocalyptic wasteland to your everyday life.
Not only does a Pip Boy phone case provide protection for your device, but it also adds a unique flair that will turn heads and spark conversations among fellow gaming enthusiasts. Whether you’re a fan of the Fallout series or simply appreciate the nostalgia of retro tech, this DIY project is a great way to showcase your creativity and showcase your love for gaming.
Remember, the key to a successful Pip Boy phone case is attention to detail and patience. Take your time, gather the necessary materials, and allow your creativity to soar. With a bit of effort and dedication, you can create a one-of-a-kind accessory that will make your phone stand out from the crowd.
So why settle for a boring, generic phone case when you can bring the world of Fallout to life right at your fingertips? Grab your tools, unleash your artistic side, and embark on a journey to create your very own Pip Boy phone case today!
FAQs
Q: Can I make a Pip Boy phone case on my own?
A: Yes, you can! Making a Pip Boy phone case is a fun DIY project that allows you to customize your phone and showcase your love for the iconic Pip Boy character from the Fallout games. With some basic crafting materials and a little creativity, you can create a unique Pip Boy phone case that stands out from the crowd.
Q: What materials do I need to make a Pip Boy phone case?
A: To make a Pip Boy phone case, you will need a sturdy phone case that fits your phone model, craft foam sheets in various colors, a cutting tool (such as an X-Acto knife or scissors), craft glue, markers or paint for detailing, and any additional embellishments you’d like to add, such as buttons or LED lights.
Q: Are there any templates or patterns available for making a Pip Boy phone case?
A: Yes, there are several templates and patterns available online that you can use as a starting point for your Pip Boy phone case. You can find printable templates or even digital files that you can trace onto the craft foam sheets. These templates provide the basic shape and design of the Pip Boy, making the crafting process easier.
Q: How do I attach the Pip Boy components to the phone case?
A: To attach the Pip Boy components to the phone case, you can use craft glue or adhesive tape. Make sure to secure the pieces firmly to the case to ensure they stay in place. If you’re using buttons or other small embellishments, consider using a hot glue gun for a stronger hold. Allow the glue to dry completely before handling the phone case.
Q: Can I customize my Pip Boy phone case further?
A: Absolutely! One of the great things about making your own Pip Boy phone case is the freedom to customize it to your liking. You can add extra details, paint it in your favorite colors, or even incorporate LED lights for a more immersive effect. Get creative and make your Pip Boy phone case truly unique!