
Have you ever found yourself in a situation where you need to access the internet on your devices but you don’t have a Wi-Fi connection available? Well, if you have a laptop running Windows XP, you’re in luck! With just a few simple steps, you can turn your laptop into a Wi-Fi hotspot, allowing your other devices to connect and access the internet through your laptop’s internet connection. It’s a convenient way to stay connected when you’re on the go or in an area with limited Wi-Fi access. In this article, we’ll guide you through the process of turning your laptop into a Wi-Fi hotspot on Windows XP, so you can enjoy internet connectivity wherever you are.
Inside This Article
- Setting Up Your Laptop as a Wi-Fi Hotspot in Windows XP
- Step 1: Check for Compatibility
- Step 2: Enable Internet Connection Sharing
- Step 3: Configure Network Connection Settings
- Step 4: Set Up a Wireless Network
- Step 5: Share Your Laptop’s Internet Connection
- Conclusion
- FAQs
Setting Up Your Laptop as a Wi-Fi Hotspot in Windows XP
If you have a laptop running on Windows XP and want to share your internet connection with other devices wirelessly, you can turn your laptop into a Wi-Fi hotspot. By doing so, you can easily connect your smartphones, tablets, or other devices to the internet without the need for additional routers or access points.
Here are the steps to set up your laptop as a Wi-Fi hotspot in Windows XP:
Step 1: Check for Compatibility
Before proceeding, you need to check if your laptop’s wireless network adapter supports the “Hosted Network” feature. Open the Command Prompt by pressing the “Windows + R” keys, type “cmd,” and hit enter. In the Command Prompt, type “netsh wlan show drivers” and look for the line that says “Hosted network supported: Yes.” If you see “Yes” next to it, your laptop is compatible. If not, you may need to use an external Wi-Fi adapter that supports this feature.
Step 2: Enable Internet Connection Sharing
Next, you need to enable internet connection sharing on your laptop. Go to the Network Connections window by right-clicking on the network icon in the system tray and selecting “Open Network Connections.” Right-click on your internet connection and select “Properties.” In the Properties window, go to the “Advanced” tab and check the box that says “Allow other network users to connect through this computer’s internet connection.” Click “OK” to save the changes.
Step 3: Configure Network Connection Settings
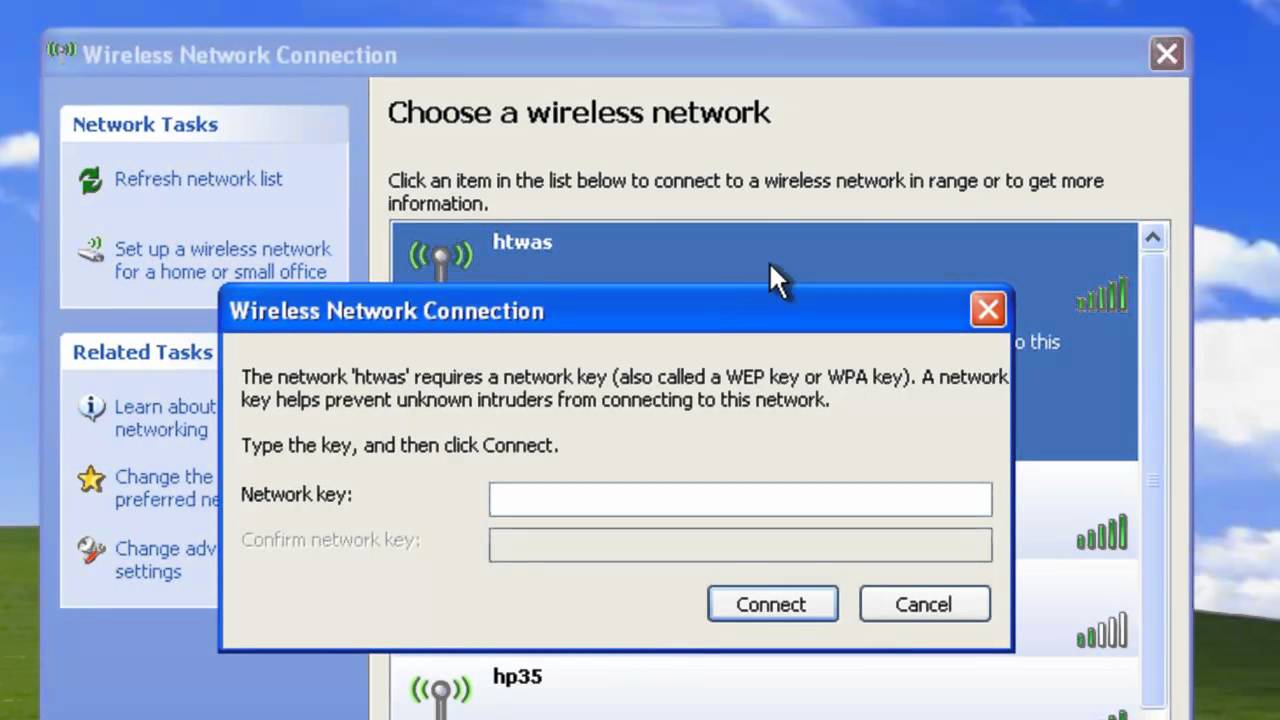
Now, you need to configure the network connection settings for the wireless hotspot. Go back to the Network Connections window and right-click on your wireless network adapter. Select “Properties” and go to the “Wireless Networks” tab. Check the box that says “Use Windows to configure my wireless network settings.” In the “Preferred networks” section, click “Add” and enter a name for your network (SSID). Choose the network authentication and encryption settings according to your preference. Click “OK” to save the changes.
Step 4: Set Up a Wireless Network
With the network connection settings configured, you can now set up a wireless network on your laptop. Open the Command Prompt and type “netsh wlan set hostednetwork mode=allow ssid=YourNetworkName key=YourNetworkPassword” (replace “YourNetworkName” and “YourNetworkPassword” with your desired network name and password). Hit enter to create the wireless network.
Step 5: Share Your Laptop’s Internet Connection
Finally, you need to share your laptop’s internet connection with the newly created wireless network. In the Command Prompt, type “netsh wlan start hostednetwork” and hit enter. Your laptop is now acting as a Wi-Fi hotspot, and other devices can connect to it using the network name and password you set earlier.
That’s it! You have successfully set up your laptop as a Wi-Fi hotspot in Windows XP. Enjoy connecting your devices to the internet wirelessly.
Step 1: Check for Compatibility
To turn your laptop into a Wi-Fi hotspot in Windows XP, the first thing you need to do is check if your computer has the necessary hardware and software compatibility.
Here are a few things you need to ensure:
- Your laptop must have a wireless network adapter. This is usually built-in on most modern laptops, but if your laptop doesn’t have one, you may need to purchase a USB wireless adapter.
- Your laptop should be running Windows XP. This method may not work on other operating systems.
- You should have administrative access to your laptop. Without administrative privileges, you won’t be able to make the necessary changes to enable internet connection sharing.
Before proceeding, make sure your laptop meets these requirements. If any of these requirements are not met, you may need to consider alternative methods or upgrade your hardware or operating system.
Step 2: Enable Internet Connection Sharing
Enabling Internet Connection Sharing (ICS) on your laptop allows it to share its internet connection with other devices. Here’s how you can do it:
1. Open the Control Panel by clicking on the “Start” button and selecting “Control Panel” from the menu.
2. In the Control Panel window, locate and open the “Network and Internet Connections” category.
3. Within the Network and Internet Connections category, click on “Network Connections” to access the list of available network connections on your laptop.
4. Right-click on the network connection that is currently providing internet access to your laptop (usually labeled as “Local Area Connection” or “Ethernet”) and select “Properties” from the context menu.
5. In the Properties window, navigate to the “Advanced” tab.
6. Look for the option that says “Allow other network users to connect through this computer’s internet connection” and check the corresponding box.
7. If prompted, select the network connection that you want to share your internet connection with from the drop-down menu. This will typically be a wireless network connection, often labeled as “Wireless Network Connection” or similar.
8. Click “OK” to save your changes and enable Internet Connection Sharing.
Once you have enabled Internet Connection Sharing, your laptop will act as a Wi-Fi hotspot, allowing other devices to connect and access the internet through your laptop’s internet connection.
Note: Make sure to keep your laptop connected to the internet throughout the process for a seamless sharing experience.
Now that you have enabled Internet Connection Sharing, you can proceed to the next step to configure network connection settings on your laptop.
Step 3: Configure Network Connection Settings
Once you have enabled Internet Connection Sharing in Windows XP, the next step is to configure the network connection settings on your laptop. This will allow you to establish a connection between your laptop and other devices that wish to connect to your Wi-Fi hotspot.
To begin, open the Control Panel on your Windows XP laptop. You can do this by clicking on the “Start” menu, selecting “Control Panel,” and then choosing “Network Connections.”
In the Network Connections window, you will see a list of available network connections on your laptop. Look for the connection that is currently providing your laptop with internet access. This could be a wired Ethernet connection or a wireless connection, depending on how your laptop is connected to the internet.
Right-click on the internet connection that you want to share as a Wi-Fi hotspot. In the context menu that appears, select “Properties.”
In the connection properties window, go to the “Advanced” tab. Here, you will find a checkbox labeled “Allow other network users to connect through this computer’s internet connection.” Enable this checkbox and click on the “OK” button to save the changes.
After configuring the network connection settings, your laptop is now ready to share its internet connection as a Wi-Fi hotspot. Other devices can connect to your laptop’s hotspot and access the internet through it.
Note that while sharing your laptop’s internet connection, the network connection that you configured in Step 3 will remain active. However, you won’t be able to use it directly for internet access as it will be serving as the hub for your Wi-Fi hotspot.
Now that you have successfully configured the network connection settings, you can proceed to the next step and set up a wireless network on your laptop.
Step 4: Set Up a Wireless Network
Once you have enabled Internet Connection Sharing in Windows XP, the next step is to set up a wireless network on your laptop. By doing so, you can connect other devices, such as smartphones, tablets, or other laptops, to your laptop’s newly created Wi-Fi hotspot.
To set up a wireless network, you will need to access the Network Connections settings in your Control Panel. Here’s how:
- Click on the “Start” menu and select “Control Panel.”
- In the Control Panel window, find and click on the “Network Connections” icon.
- In the Network Connections window, right-click on the connection that has Internet access (usually the one that is connected to your modem or Ethernet connection).
- From the drop-down menu, select “Properties.”
- In the Properties window, click on the “Wireless Networks” tab.
Now that you are in the Wireless Networks tab, you can start configuring your wireless network settings:
- Check the box that says “Use Windows to configure my wireless network settings.” This will allow Windows XP to manage your wireless network connections.
- Click on the “Add” button to create a new wireless network.
- In the “Network name (SSID)” field, enter a name for your wireless network. This is the name that will be displayed when other devices search for available Wi-Fi networks.
- In the “Network Authentication” section, choose the type of security you want for your wireless network. It is highly recommended to select WPA2-PSK, as it offers the highest level of security.
- Enter a password in the “Network key” field. This password is required for devices to connect to your wireless network.
Once you have entered all the necessary information, click on the “OK” button to save your wireless network settings.
Your laptop is now set up as a wireless network, and other devices can connect to it using the network name (SSID) and password you specified. Remember to keep your wireless network secure by regularly changing the password and avoiding public Wi-Fi networks.
Now that you have successfully set up a wireless network on your laptop, you can move on to the final step – sharing your laptop’s internet connection with connected devices.
Step 5: Share Your Laptop’s Internet Connection
Now that you have successfully configured your laptop’s network settings and set up a wireless network, it’s time to share your laptop’s internet connection. By doing so, other devices can connect to your laptop and access the internet using the Wi-Fi hotspot you’ve created. Here’s how to share your laptop’s internet connection:
- Open the Control Panel on your Windows XP laptop.
- Click on the “Network and Internet Connections” category.
- Select “Network Connections.”
- Right-click on the network connection that represents your laptop’s internet connection (usually a Local Area Connection).
- From the context menu, select “Properties.”
- In the Properties window, click on the “Advanced” tab.
- Check the box next to “Allow other network users to connect through this computer’s Internet connection.”
- If you have multiple connections, select the one that corresponds to the wireless network you created in Step 4.
- Click “OK” to save the changes.
Once you’ve completed these steps, your laptop will start sharing its internet connection with other devices. You can now connect your phone, tablet, or any other Wi-Fi-enabled device to your laptop’s wireless network and enjoy internet access.
Remember to consult the full article for detailed instructions and explanations of each step. Sharing your laptop’s internet connection can be quite useful, especially when you’re on the go and don’t have access to a traditional Wi-Fi network. By turning your laptop into a Wi-Fi hotspot, you can stay connected wherever you are.
Conclusion
Creating a Wi-Fi hotspot on your Windows XP laptop can be a game-changer when you need to connect multiple devices to the internet on the go. By following the step-by-step guide outlined in this article, you can easily transform your laptop into a wireless access point, eliminating the need for additional routers or adapters.
With just a few clicks, you can share your internet connection with friends, family, or colleagues, enabling them to stay connected wherever they are. Whether you’re in a coffee shop, hotel room, or a location without Wi-Fi, having the ability to turn your Windows XP laptop into a Wi-Fi hotspot provides convenience and flexibility.
Remember to prioritize security by setting a strong password and regularly updating your laptop’s software and drivers. By taking these precautions, you can ensure a safe and reliable internet connection for yourself and those you share it with.
So, the next time you find yourself needing to connect multiple devices to the internet, don’t fret. With the help of these instructions and your trusty Windows XP laptop, you can become the go-to person for Wi-Fi sharing wherever you go.
FAQs
1. Can I use my laptop as a Wi-Fi hotspot if I have Windows XP?
Yes, you can. Windows XP has built-in functionality that allows you to turn your laptop into a Wi-Fi hotspot.
2. How do I enable the Wi-Fi hotspot feature in Windows XP?
To enable the Wi-Fi hotspot feature in Windows XP, you will need to access the Network Connections settings. From there, you can set up an ad hoc network connection and enable connection sharing to allow other devices to connect to your laptop and use its internet connection.
3. Are there any limitations when using a laptop as a Wi-Fi hotspot with Windows XP?
Yes, there are some limitations. One limitation is that Windows XP can only support a maximum of 10 simultaneous connections. Additionally, older laptops may have slower Wi-Fi connectivity, which can affect the overall speed and performance of the hotspot.
4. Can I secure my Wi-Fi hotspot on Windows XP?
Yes, you can secure your Wi-Fi hotspot on Windows XP by setting up a password. This will prevent unauthorized users from connecting to your hotspot and access your internet connection.
5. Can I share my laptop’s internet connection with devices other than Wi-Fi?
Yes, you can share your laptop’s internet connection with devices other than Wi-Fi. Windows XP allows you to set up an ad hoc network connection and share your laptop’s internet connection either through Wi-Fi or Ethernet.