
Are you a new Android phone owner who is wondering how to put a SIM card in your device? Well, you’ve come to the right place! A SIM card is an essential component that allows your phone to connect to a cellular network and make calls, send messages, and access mobile data. While the process may seem daunting at first, inserting a SIM card in your Android phone is actually quite simple. In this article, we will guide you through the step-by-step process of how to properly insert a SIM card in your Android phone. Whether you have a brand new phone or need to replace your existing SIM card, we’ve got you covered with all the information you need to get connected.
Inside This Article
- Overview
- Step 1: Locate the SIM card slot
- Step 2: Power off the device
- Step 3: Insert the SIM card
- Step 4: Power on the device
- Troubleshooting Tips
- Conclusion
- FAQs
Overview
Putting a SIM card in your Android phone is an essential step to get your device up and running. Whether you’ve just purchased a new phone or need to switch to a different SIM card, the process is relatively simple. In this article, we’ll walk you through the steps you need to take to successfully insert a SIM card into your Android device.
By following these instructions, you’ll be able to ensure that your phone is connected to a mobile network, allowing you to make calls, send text messages, and access the internet on your device.
Before we dive into the step-by-step process, let’s take a moment to understand what a SIM card is and the role it plays in your Android phone.
A SIM card, or Subscriber Identity Module card, is a small chip that stores your subscriber information, including your phone number, contacts, and network settings. It is a crucial component that allows your phone to connect to a cellular network and authenticate your identity to access the network’s services.
Now that we have a basic understanding of what a SIM card is, let’s get started with the step-by-step instructions to insert a SIM card into your Android phone.
Step 1: Locate the SIM card slot
Before you can insert a SIM card into your Android phone, you need to locate the SIM card slot. The location of the SIM card slot can vary depending on the make and model of your device, but it is typically found on the side or the back of the phone.
To find the SIM card slot, look for a small tray or a small hole with a cover. Some phones may have a push-button mechanism to release the SIM card tray, while others may require you to use a SIM card ejection tool or a paperclip to open the slot.
If you are unsure about the location of the SIM card slot on your specific Android phone, you can refer to the user manual or do a quick online search for your device model.
Once you have located the SIM card slot, you are ready to move on to the next step: powering off the device.
Step 2: Power off the device
Before inserting or removing the SIM card from your Android phone, it is essential to power off the device. This ensures that you don’t accidentally damage the SIM card or the internal components of your phone. Powering off your Android phone is a simple process that can be done in just a few steps.
To power off your Android phone, locate the power button, typically located on the side or top of the device. Press and hold the power button until the power options menu appears on the screen. This menu allows you to choose whether to power off, restart, or put the device into sleep mode.
Once the power options menu appears, select the “Power off” option. This will initiate the shutdown process, and within a few moments, your Android phone will power down completely. It is important to wait for the phone to fully power off before proceeding to the next step.
If you are experiencing difficulty powering off your Android phone using the power button, you can also try removing the battery, if it is removable. In this case, simply remove the back cover of your phone, locate the battery, and gently lift it out using your fingers or a small tool. Wait for a few seconds, then reinsert the battery and power on the device again to ensure a proper shutdown.
Remember to handle your Android phone with care when powering it off. Avoid pressing too hard on the power button or applying excessive force when removing the battery to prevent any accidental damage. By following these steps, you can safely power off your Android phone and proceed to the next step of inserting or removing the SIM card.
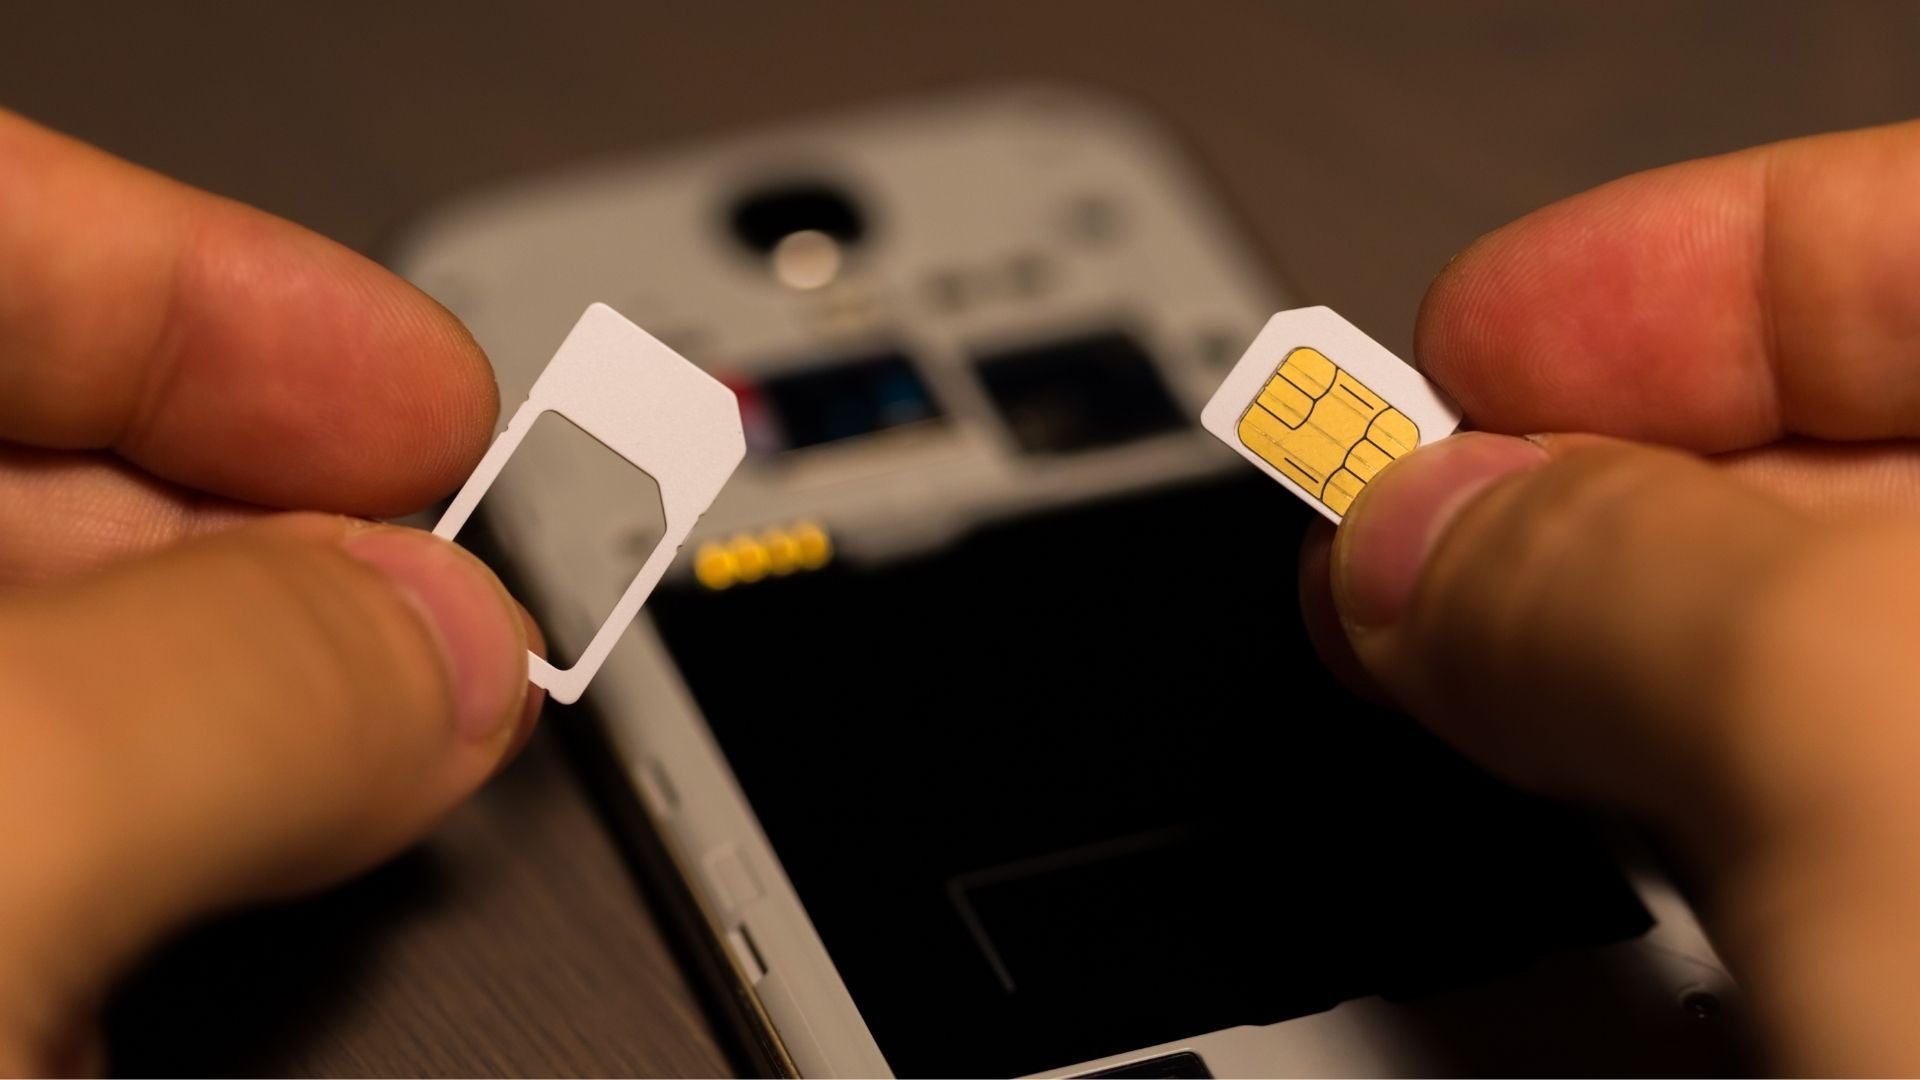
Step 3: Insert the SIM card
After locating the SIM card slot and powering off your Android phone, it’s time to insert the SIM card. Follow these steps:
1. Take your SIM card out of its packaging and ensure it’s the correct size for your device. Most Android phones use either a standard SIM card, a micro SIM card, or a nano SIM card.
2. Carefully align the metal contacts on the SIM card with the corresponding contacts in the SIM card slot.
3. Gently insert the SIM card into the slot. Be sure not to force it in; it should slide in smoothly. Ensure that the gold contacts are facing downward and the notched corner is aligned with the designated spot.
4. Once the SIM card is fully inserted into the slot, use your fingertip or a SIM eject tool (if provided) to push it in until it clicks into place. This ensures that the card is secured and won’t accidentally pop out.
5. Take a moment to check that the SIM card is flush with the surface of the phone. If it’s sticking out or doesn’t seem to be inserted correctly, carefully remove it and repeat the process to ensure a proper fit.
6. Now that the SIM card is securely in place, you can proceed to power on your Android phone and complete the setup process.
Step 4: Power on the device
After successfully inserting the SIM card into your Android phone, the next step is to power on the device. This will activate the SIM card and make your phone ready for use.
To power on your Android phone, press and hold the power button located on the device. The position of the power button may vary depending on the brand and model of your phone, but it is usually situated either on the side or the top of the device.
Once you locate the power button, press and hold it for a few seconds until you see the phone’s logo or the screen lights up. This indicates that the device is powering on.
When the device powers on, you will be presented with the lock screen or the home screen, depending on your phone’s settings. If prompted, enter your PIN or unlock pattern to gain access to your phone’s features and functionalities.
It is worth noting that the initial power on process may take a few moments as the phone performs system checks and configurations. Be patient and allow the device to complete the startup process.
Once the Android phone is fully powered on, you will be able to make calls, send text messages, and connect to the internet using your activated SIM card. Enjoy the full functionality of your phone and make the most out of its features.
If you encounter any issues during the power on process, such as the phone not turning on or freezing on the startup screen, try performing a soft reset by holding down the power button and volume down button simultaneously for about 10 seconds. This will force the device to restart and may resolve the problem.
If the issue persists, you may need to seek assistance from the manufacturer’s support or bring your phone to a certified service center for further diagnosis and repair.
Troubleshooting Tips
Even with the easiest tasks, like inserting a SIM card into an Android phone, problems can sometimes arise. If you encounter any difficulties during the process, consider the following troubleshooting tips:
1. Ensure compatibility: Make sure that the SIM card you are attempting to insert is compatible with your Android phone model. Some phones may only support specific types of SIM cards, so double-check this before proceeding.
2. Check the SIM card: Inspect the SIM card for any visible damage, such as scratches or bent connectors. If the card appears to be damaged in any way, it may need to be replaced.
3. Clean the SIM card and slot: Dust and debris can accumulate over time, causing connectivity issues. Use a clean, soft cloth to gently wipe the SIM card and the SIM card slot in your phone before attempting to insert the card again.
4. Confirm correct insertion: Ensure that the SIM card is properly inserted into the designated slot. It should fit securely without any gaps. If you are unsure, consult your device’s user manual for specific instructions.
5. Restart the device: Sometimes, a simple restart can resolve the issue. Power off your Android phone, remove the SIM card, wait for a few seconds, reinsert the card, and then power it back on.
6. Try a different SIM card: If you have access to another SIM card, try inserting it into your Android phone to determine if the issue lies with the SIM card itself. If the phone recognizes the new card, the original SIM card may need to be replaced.
7. Contact your service provider: If none of the above steps resolve the problem, contact your mobile service provider for further assistance. They may be able to guide you through additional troubleshooting steps or provide a replacement SIM card if necessary.
Remember, if you encounter any difficulties or are unsure about any steps, it’s always best to consult your device’s user manual or reach out to the manufacturer or service provider for guidance. They will be able to provide you with the most accurate and relevant troubleshooting advice for your specific device.
In conclusion, learning how to insert a SIM card into an Android phone is a fundamental skill for anyone who wants to fully utilize their device’s capabilities. By following the step-by-step instructions mentioned earlier, you can easily unlock the potential of your Android phone and stay connected to your network. Whether you’re switching carriers, replacing a damaged SIM card, or simply setting up a new phone, knowing how to properly insert a SIM card is essential.
Remember to handle your SIM card with care, ensuring that it is properly aligned and inserted into the designated slot. Take note of any specific instructions provided by your phone’s manufacturer or your carrier to avoid any potential issues. Once the SIM card is inserted, double-check that your phone recognizes it and that you have access to network services.
With this newfound knowledge, you can confidently navigate the world of Android phones and enjoy seamless connectivity on your device. So go ahead, grab your SIM card, and start unlocking the full potential of your Android phone today!
FAQs
1. How do I know which type of SIM card I need for my Android phone?
2. Can I use a micro SIM card in a phone that requires a nano SIM card?
3. Do I need to power off my phone before inserting or removing the SIM card?
4. What should I do if my SIM card gets stuck in my Android phone?
5. Can I use a SIM card from a different carrier in my Android phone?