
Are you ready to unleash the full potential of your Android phone? One of the crucial steps to getting started is inserting a SIM card. This tiny piece of technology is responsible for connecting your phone to a cellular network, enabling you to make calls, send messages, and access the internet.
In this article, we will guide you on how to put a SIM card in an Android phone. Whether you’re setting up your new device or replacing an existing SIM card, we’ve got you covered with step-by-step instructions, helpful tips, and common troubleshooting solutions.
By the time you finish reading this article, you’ll be equipped with the knowledge and confidence to successfully install a SIM card and begin using your Android phone to its fullest potential.
Inside This Article
- Steps to Put a Sim Card in an Android Phone
- Power off your Android phone
- Locate the Sim card slot
- Insert the Sim card
- Power on your Android phone
- Conclusion
- FAQs
Steps to Put a Sim Card in an Android Phone
Putting a SIM card in your Android phone is a straightforward process that allows you to connect to a mobile network and make calls, send messages, and access data. Follow these simple steps to insert a SIM card into your Android device:
- Power off your Android phone: Before you begin, make sure to power off your Android phone. This will prevent any accidental damage to the device or the SIM card.
- Find the SIM card slot: The location of the SIM card slot may vary depending on the model of your Android phone. In most cases, it can be found either on the side of the phone or beneath the back cover. Look for a small tray or slot labeled “SIM”.
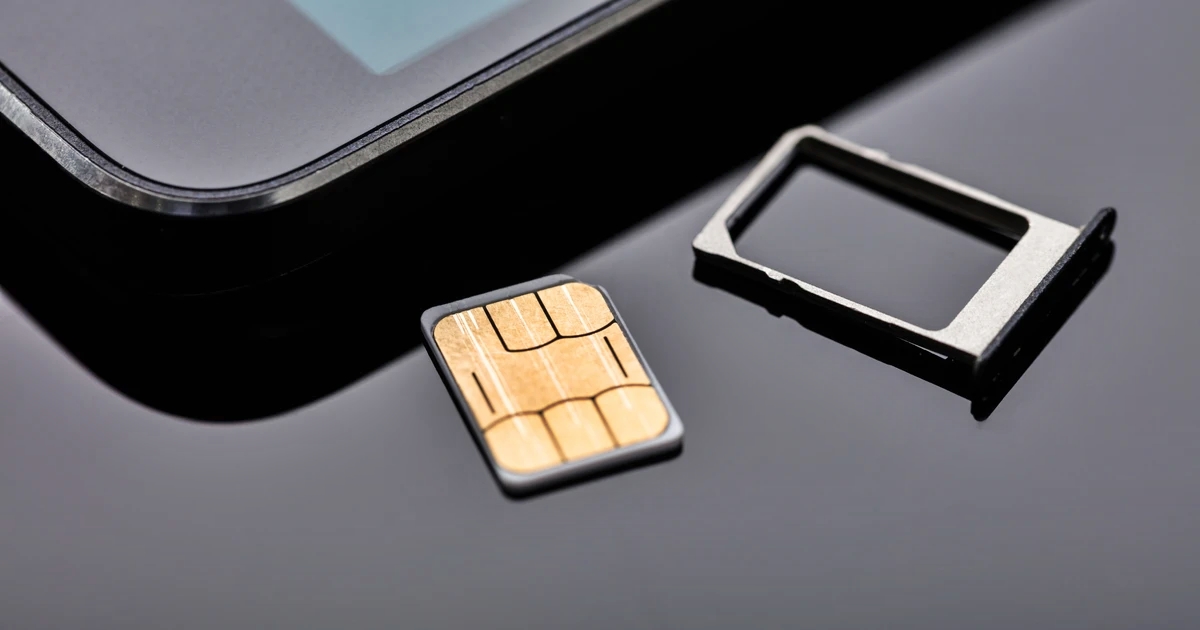
- Insert the SIM card: Once you have located the SIM card slot, gently insert the SIM card into the tray or slot. Make sure that the gold contacts on the SIM card are facing downwards and align with the contacts in the slot. If your SIM card has a micro or nano size, you may need to use an adapter to fit it into the slot.
- Power on your Android phone: After inserting the SIM card, carefully close the tray or replace the back cover of your phone. Power on your Android device and wait for it to recognize the SIM card. Once the phone has booted up, you should see the network signal bars indicating that your phone is connected to a mobile network.
Now you’re all set! Your Android phone is ready to make calls, send messages, and access the internet using the SIM card you have inserted. Remember to keep your SIM card safe and secure, as it contains your personal information and is essential for network connectivity.
Power off your Android phone
Before you begin the process of inserting a Sim card into your Android phone, it’s important to ensure that your device is powered off. This is a simple step but it’s crucial to avoid any potential damage to the phone or the Sim card.
To power off your Android phone, press and hold the power button located on the side or the top of your device. A menu will appear on the screen, prompting you to power off the phone. Tap on the “Power off” option, and wait for your phone to completely shut down.
It’s important to note that the location of the power button may vary depending on the make and model of your Android phone. Refer to the user manual or the manufacturer’s website for specific instructions on how to power off your device.
Once your Android phone is powered off, you’re ready to proceed to the next step of inserting the Sim card.
Locate the Sim card slot
Before inserting a Sim card into your Android phone, you need to locate the Sim card slot. The location of the Sim card slot can vary depending on the make and model of your Android phone. However, most Android phones have the Sim card slot either on the sides or on the back of the device.
If your Android phone has a removable back cover, the Sim card slot is usually located underneath it. To access the Sim card slot, you will need to remove the back cover by gently prying it off. Once the back cover is removed, you should see the Sim card slot, which is a small rectangular opening.
On the other hand, if your Android phone has a non-removable back cover, the Sim card slot is typically located on the sides of the device. Look for a small tray that can be ejected using a Sim card removal tool or a small pin. This tray will house the Sim card slot.
It’s important to note that not all Android phones have a removable back cover or a dedicated Sim card slot. Some newer models may have a Sim card tray that is accessed by a slot on the side of the phone. In this case, you will need to use the Sim card removal tool or a small pin to eject the tray and insert the Sim card. Consult the user manual or the manufacturer’s website for specific instructions on locating the Sim card slot for your particular Android phone model.
Insert the Sim card
Now that you have located the Sim card slot in your Android phone, it’s time to insert the Sim card. Follow these simple steps:
1. Take your Sim card out of its packaging. Look for a small, rectangular card with a metal chip on one side.
2. Hold the Sim card carefully, ensuring that you do not touch the metal chip with your fingers. Fingerprints or dirt can interfere with the Sim card’s functionality.
3. Align the Sim card with the Sim card slot in your Android phone. The Sim card slot is usually located on the side or the back of the phone. Some phones may have a removable back cover that needs to be taken off to access the Sim card slot.
4. Gently and carefully insert the Sim card into the Sim card slot. Make sure it is properly aligned and inserted into the slot. You may hear a click sound when the Sim card is securely in place.
5. Once the Sim card is inserted, close the Sim card slot cover or reattach the back cover of your Android phone, if applicable.
6. Turn on your Android phone by pressing and holding the power button until you see the device’s logo on the screen.
7. Wait for your Android phone to initialize and recognize the Sim card. This may take a few moments.
8. Once your phone is powered on and has detected the Sim card, you will see signals bars or an indicator showing that your device is connected to a cellular network.
And there you have it! Your Sim card is now properly inserted into your Android phone, and you are ready to use it for calls, texts, and mobile data.
Power on your Android phone
Once you have successfully inserted the SIM card into your Android phone, it’s time to power it on and get ready to use your device. To power on your Android phone, follow these simple steps.
1. Press and hold the power button located on the side or top of your device. The exact location of the power button may vary depending on the model of your Android phone.
2. After holding the power button for a few seconds, you will see the device logo or the manufacturer’s name appear on the screen. This indicates that the phone is turning on.
3. Release the power button once you see the logo or manufacturer’s name. Your Android phone will continue to boot up and load the operating system.
4. You may be prompted to set up or activate your device if it’s your first time using it. Follow the on-screen instructions to complete the setup process.
5. Once the setup is complete, your Android phone is now powered on and ready to use. You can unlock the device and explore its features, apps, and settings.
It’s important to note that the exact power-on process may vary slightly depending on the Android phone model and the version of the operating system. However, the basic steps mentioned above should be applicable to most Android devices.
Conclusion
The process of putting a SIM card in an Android phone is a simple and straightforward task. By following the steps outlined in this article, you can easily access the full functionality of your device and stay connected to your network provider. Remember to power off the phone before inserting or removing the SIM card to avoid any potential damage. Additionally, ensure that the SIM card is compatible with your Android phone model and that it is properly activated and configured with your network provider. With a properly installed SIM card, you can make calls, send messages, and use mobile data on your Android phone hassle-free, allowing you to stay connected wherever you go.
FAQs
Q: How do I insert a SIM card in an Android phone?
A: Inserting a SIM card in an Android phone is a straightforward process. Most Android phones have a SIM card slot located either on the side of the device or behind the back cover. First, power off your phone. Then, using a SIM card ejector tool or a small paperclip, gently insert it into the small hole next to the SIM card slot to release the tray. Carefully remove the tray and place the SIM card into the designated slot, ensuring it is inserted correctly. Finally, reinsert the tray back into the phone and power it on.
Q: Can I use any SIM card with an Android phone?
A: Generally, Android phones are typically “unlocked,” meaning they can work with SIM cards from various carriers. However, it is important to check if your phone is compatible with the specific network or carrier you wish to use. Some phones may be locked to a particular carrier, in which case you will need to contact the carrier or unlock the phone before using a different SIM card.
Q: How do I remove a SIM card from an Android phone?
A: To remove a SIM card from an Android phone, power off the device. Locate the SIM card slot, which is usually on the side or behind the back cover. Use a SIM card ejector tool or a small paperclip to gently push into the small hole next to the SIM card slot. This will release the tray. Carefully pull out the tray and remove the SIM card.
Q: Can I transfer my contacts from one SIM card to another on an Android phone?
A: Yes, you can transfer your contacts from one SIM card to another on an Android phone. Open the “Contacts” app on your Android device and go to the settings menu. Select the option to import/export contacts and choose the “Export to SIM card” option. This will save your contacts to the SIM card. To transfer the contacts to a new SIM card, insert the new SIM card into the phone and repeat the process, selecting the “Import from SIM card” option instead.
Q: What should I do if my Android phone does not recognize the SIM card?
A: If your Android phone does not recognize the SIM card, there are a few troubleshooting steps you can try. First, ensure that the SIM card is inserted properly into the SIM card slot. Remove it and reinsert it carefully to ensure a secure connection. If the issue persists, try cleaning the SIM card and the SIM card slot with a soft cloth or compressed air. Restart your phone and check if the SIM card is detected. If the problem continues, contact your network provider for further assistance.