
In this guide, we will discuss the step-by-step process of replacing a toilet connector. The toilet connector is an essential component that connects the water supply line to your toilet tank, ensuring a steady flow of water for flushing.
Over time, these connectors can become worn, corroded, or start leaking, which can lead to water damage and other issues. Replacing a faulty toilet connector is a relatively simple task that can be done with a few basic tools and some know-how.
In this article, we will walk you through the necessary steps to successfully replace a toilet connector, providing you with valuable tips and guidance along the way. Whether you are a seasoned DIY enthusiast or a beginner looking to tackle your first plumbing project, this guide will help you get the job done right.
Inside This Article
- How To Replace Toilet Connector
- Assessing the Situation: Inspecting the Existing Toilet Connector
- Gathering Necessary Tools for Replacement
- Shutting Off Water Supply- Locating the shut-off valve- Turning off the water supply to the toilet- Flushing the toilet to drain remaining water
- Removing the Old Toilet Connector
- Installing the New Toilet Connector
- Testing for Leaks- Turning on the water supply valve- Checking for any water leaks near the connector- Making necessary adjustments to ensure a tight and leak-free connection
- Conclusion
- FAQs
How To Replace Toilet Connector
Replacing a toilet connector may seem like a daunting task, but with the right tools and a step-by-step approach, it can be a straightforward process. In this guide, we will walk you through the steps to replace a toilet connector with ease. By following these instructions, you can ensure a leak-free and properly functioning toilet.
Step 1: Gather the necessary tools
Before you start replacing the toilet connector, make sure you have all the required tools handy. These may include an adjustable wrench, a bucket or towel to catch any water spillage, and a new toilet connector. Ensure that the new connector is of the correct size and type for your toilet.
Step 2: Shut off the water supply
The first thing you need to do is turn off the water supply to the toilet. Locate the shut-off valve, usually situated near the base of the toilet, and turn it clockwise until it is fully closed. This step is crucial to prevent any water leakage during the replacement process.
Step 3: Empty the tank and disconnect the old connector
Once the water supply is turned off, flush the toilet to empty the tank. Next, use an adjustable wrench to loosen the nuts connecting the old toilet connector to the tank and the water supply valve. Carefully remove the old connector from both ends, ensuring no water spills onto the floor.
Step 4: Measure and cut the new connector
Take the new toilet connector and measure the required length between the tank outlet and the water supply valve. It’s essential to get an accurate measurement to avoid any kinks or excessive tension. Use a pipe cutter or a hacksaw to cut the new connector to the appropriate length.
Step 5: Attach the new connector to the toilet tank
With the new connector cut to size, use the adjustable wrench to tighten the nut onto the tank outlet. Ensure a secure connection but avoid over-tightening, as it may damage the fittings or cause leaks. A gentle hand-tightening is usually sufficient to create a proper seal.
Step 6: Connect the other end of the connector to the water supply valve
Position the other end of the new toilet connector onto the water supply valve. Again, use the adjustable wrench to tighten the nut securely, ensuring a watertight connection. Take care not to overtighten, as it can strip the threads or cause leaks.
Step 7: Turn on the water supply and check for leaks
Once the new connector is securely in place, turn on the water supply valve by turning it counterclockwise. Allow the tank to fill up, and carefully inspect for any leaks around the connections. If you notice any leaks, tighten the nuts slightly until the leaks stop.
And there you have it! By following these simple steps, you can easily replace a toilet connector and ensure a leak-free toilet. Remember, if you encounter any difficulties or are unsure about any step, it’s always best to consult a professional plumber for assistance. Happy plumbing!
Assessing the Situation: Inspecting the Existing Toilet Connector
Before replacing a toilet connector, it is important to assess the situation and inspect the existing connector. This will help determine if a replacement is necessary and identify any signs of damage or wear.
Start by turning off the water supply to the toilet. This can usually be done by shutting off the valve located on the wall behind the toilet. Once the water supply has been turned off, flush the toilet to empty the tank and remove any remaining water.
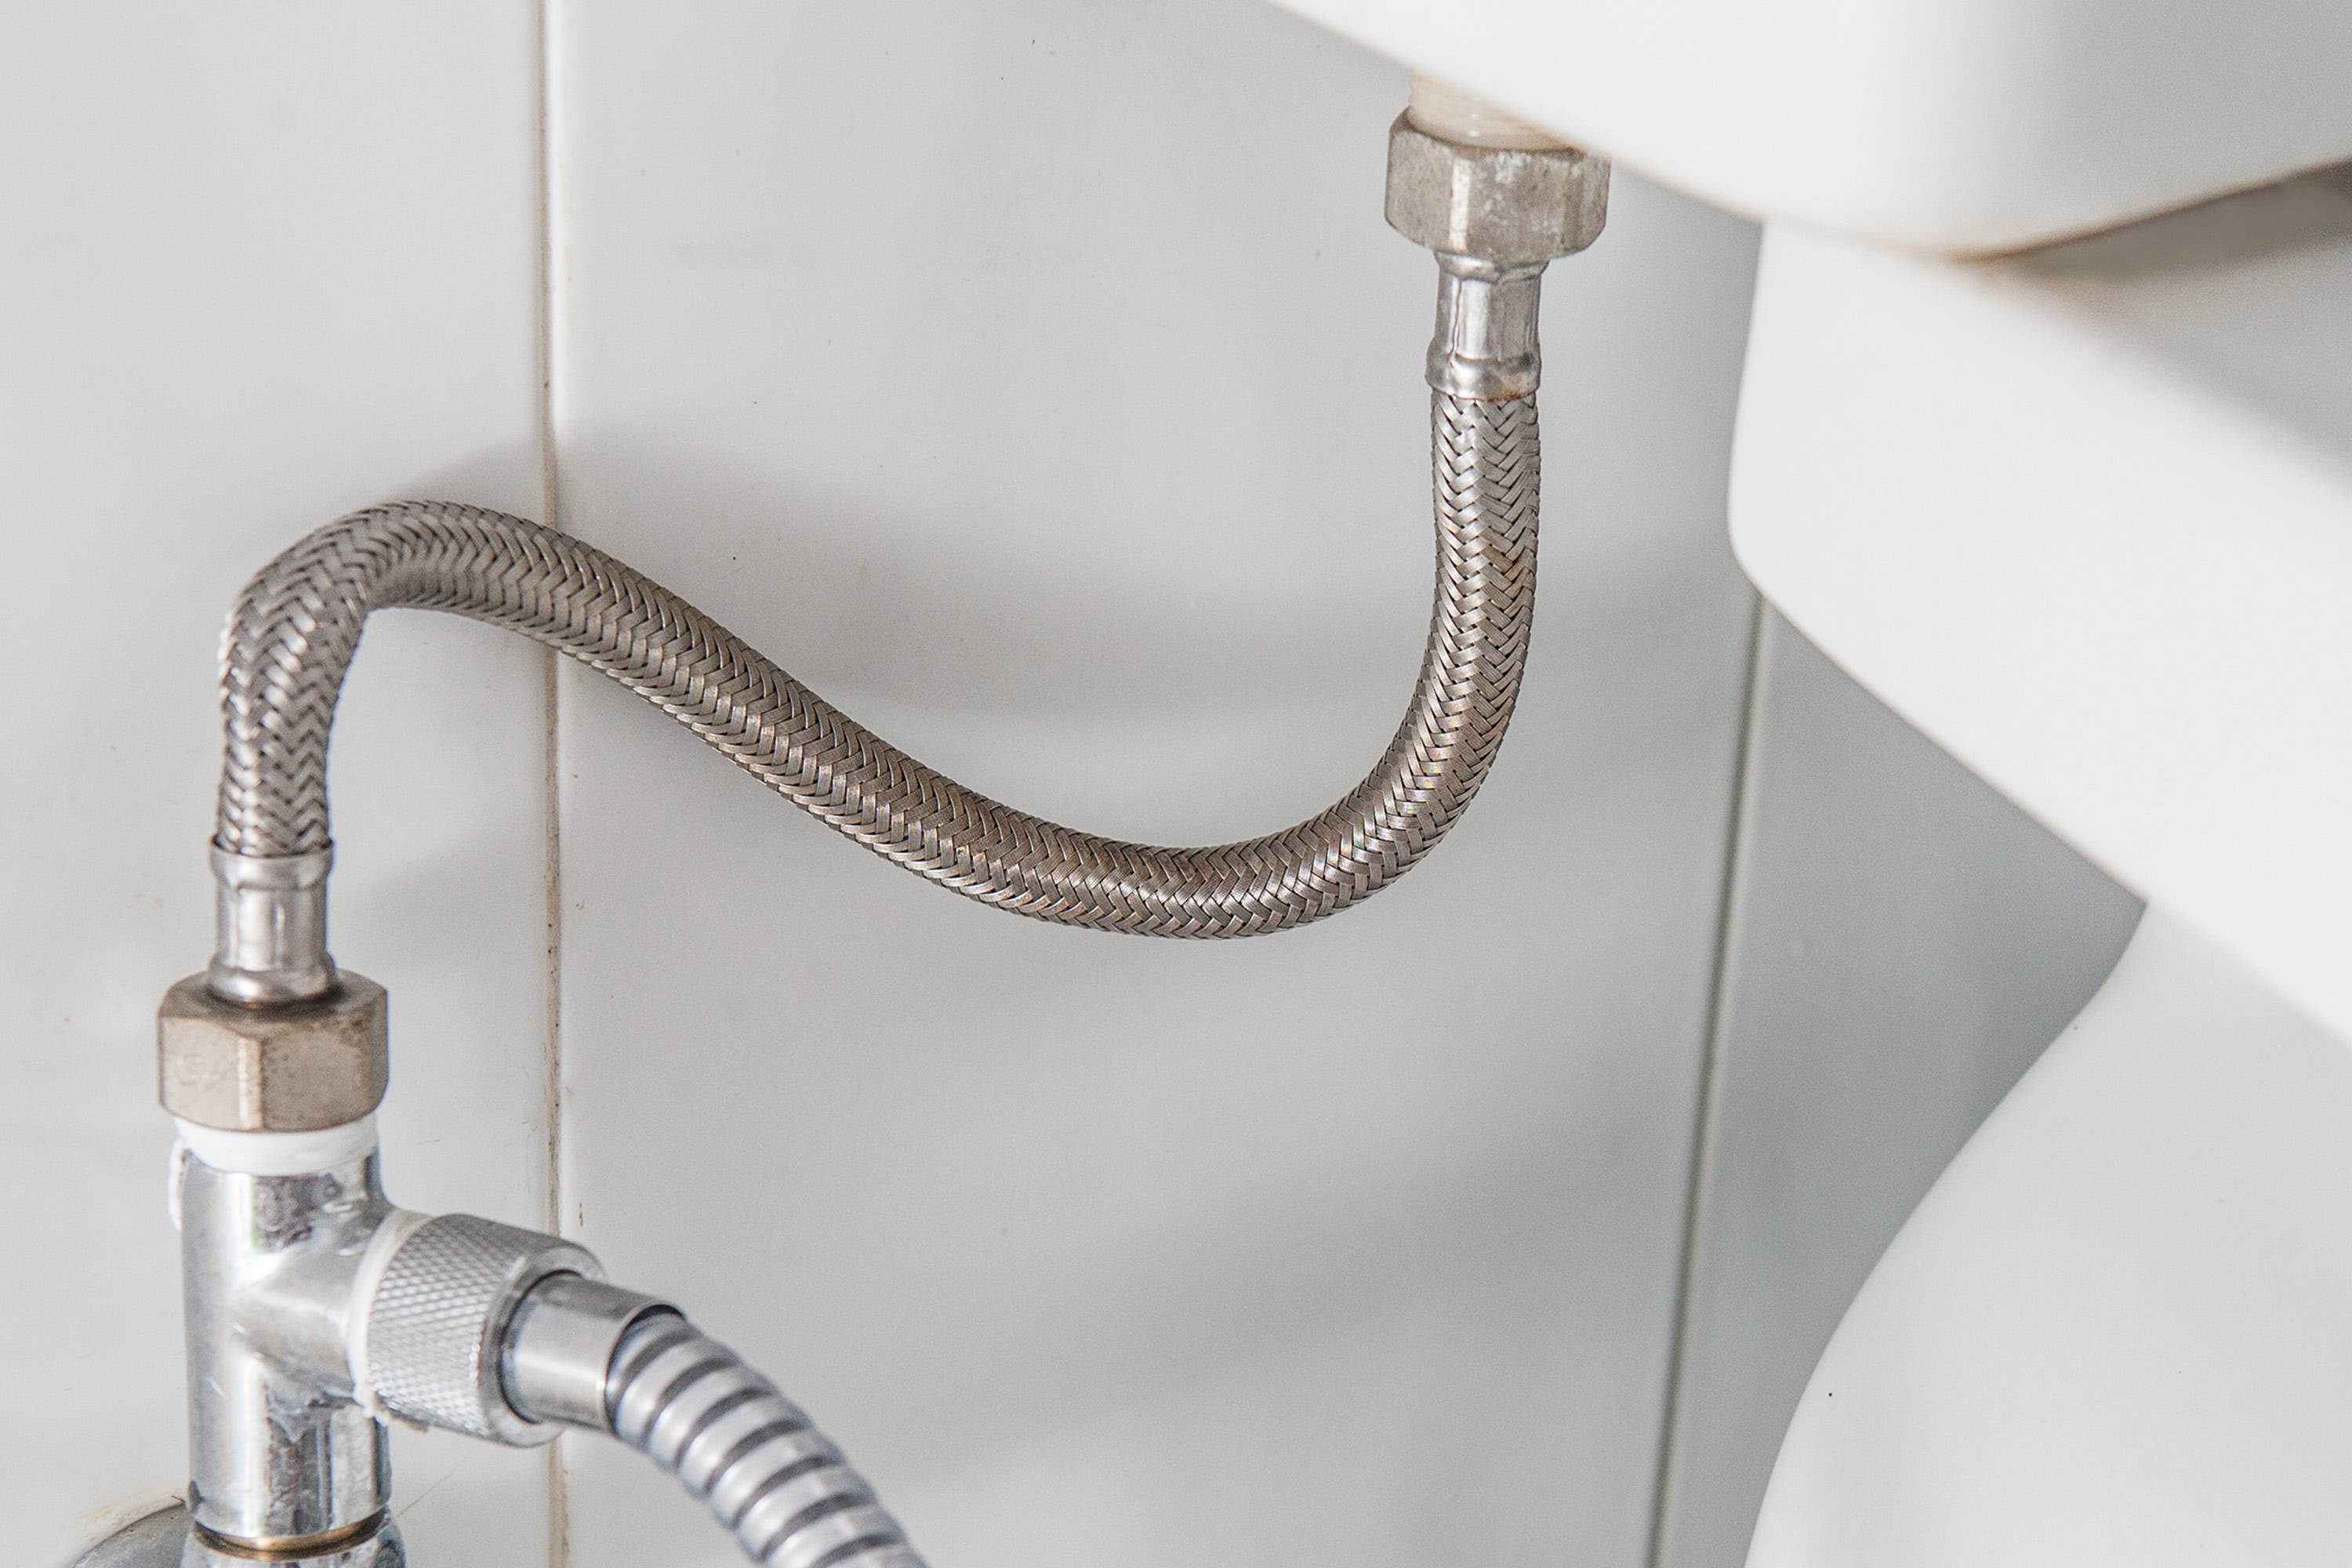
Next, take a close look at the existing connector. Check for any signs of cracks, leaks, or rust. Inspect the flexible hose for any wear and tear, such as bulging or fraying. Additionally, examine the fittings at both ends of the connector to ensure they are secure and in good condition.
If you notice any of these signs of damage or wear, it is recommended to replace the toilet connector to prevent leaks and potential water damage. Even if there are no visible issues, it is still a good idea to replace the connector every few years as a preventative measure.
Gathering Necessary Tools for Replacement
Once you have assessed the situation and determined that a replacement is needed, it’s time to gather the necessary tools for the job. Here are the essential tools you will need:
- Adjustable wrench or pliers
- Bucket or towels to catch any water
- Teflon tape for sealing the fittings
- New toilet connector
The adjustable wrench or pliers will be used to loosen and tighten the fittings on the old and new connectors. The bucket or towels will come in handy to catch any water that may spill during the process. Teflon tape is used to provide a tight seal between the fittings, preventing leaks. And, of course, you’ll need a new toilet connector to replace the old one.
Having these tools ready before you begin the replacement process will help ensure a smooth and efficient installation.
Shutting Off Water Supply- Locating the shut-off valve- Turning off the water supply to the toilet- Flushing the toilet to drain remaining water
Shutting off the water supply is an important step when replacing a toilet connector. This ensures that water doesn’t flow into the toilet tank and cause any leakage during the replacement process. Here’s how you can easily shut off the water supply:
1. Locate the shut-off valve: The shut-off valve is typically located near the base of the toilet or on the wall behind the toilet. It is usually a small chrome or plastic valve with a lever or wheel handle.
2. Turning off the water supply to the toilet: Once you’ve located the shut-off valve, turn it clockwise (to the right) to shut off the water supply. This will prevent any water from flowing into the toilet tank while you work on replacing the connector.
3. Flushing the toilet to drain remaining water: After shutting off the water supply to the toilet, flush the toilet to drain the remaining water from the tank. This will help prevent any spills or leaks when disconnecting the old connector.
By following these steps, you can safely shut off the water supply to your toilet and proceed with replacing the connector without any water-related issues. Remember to always turn off the water supply before performing any plumbing repairs or replacements to avoid any unnecessary complications.
Removing the Old Toilet Connector
When it comes time to replace your toilet connector, the first step is to remove the old one. This process involves detaching the water supply line from the toilet tank, loosening and removing the connector compression nut, and finally, removing the old connector from both the toilet tank and the water supply valve.
Here is a step-by-step guide on how to remove the old toilet connector:
- Detaching the water supply line from the toilet tank: Begin by locating the water supply valve, typically located behind or beside the toilet. Turn the valve clockwise to shut off the water supply. Once the water supply is turned off, use an adjustable wrench or pliers to loosen the nut connecting the water supply line to the bottom of the toilet tank. Gently twist the nut counterclockwise until it is loose enough to remove by hand, then carefully disconnect the water supply line from the toilet tank.
- Loosening and removing the connector compression nut: With the water supply line detached, locate the connector compression nut on the underside of the toilet tank. This nut secures the connector in place. Use an adjustable wrench or pliers to loosen the compression nut by turning it counterclockwise. Once the nut is loose, you should be able to remove it by hand.
- Removing the old connector from the toilet tank and the water supply valve: Now that the compression nut is removed, gently pull the old connector out from the bottom of the toilet tank. Next, locate the other end of the connector, which is connected to the water supply valve. Use caution as you detach the connector from the valve, ensuring not to damage any surrounding plumbing components.
By following these steps, you successfully remove the old toilet connector. Keep in mind that it’s important to handle plumbing components with care to avoid any damage or leaks. With the old connector removed, you are now ready to install a new one and restore your toilet’s water supply.
Installing the New Toilet Connector
Once you have measured and cut the new connector according to the previous steps, it’s time to install it. Follow these steps to place the new connector on both the toilet tank and the water supply valve.
1. Placing the new connector on the toilet tank: Begin by positioning the threaded end of the connector into the hole on the bottom of the toilet tank where the old connector was previously attached. Insert the connector fully and ensure it is secure.
2. Placing the new connector on the water supply valve: Locate the water supply valve where the other end of the connector will be attached. Insert the threaded end of the connector into the valve opening, making sure it is aligned correctly.
3. Tightening the connector compression nut securely: Once the new connector is in place on both the toilet tank and the water supply valve, use an adjustable wrench to tighten the compression nut. Turn it clockwise until the nut is snug and secure. Be careful not to overtighten, as this could damage the connector or the fittings.
4. Reconnecting the water supply line to the toilet tank: With the new connector securely attached at both ends, it’s time to reconnect the water supply line to the toilet tank. Slide the compression nut of the supply line over the threaded end of the connector on the toilet tank and tighten it with the adjustable wrench, just enough to create a watertight seal.
Remember, it’s essential to ensure that all connections are tight and secure to prevent any leaks. Check for any signs of water leakage around the connections, and if necessary, use the adjustable wrench to make any additional adjustments.
Your new toilet connector is now successfully installed and ready for use. Turn on the water supply valve, and allow the tank to fill up. Test the toilet by flushing it and check for any leaks. If everything is functioning properly and there are no signs of leakage, congratulations! You’ve successfully replaced the toilet connector and can enjoy a properly functioning toilet.
Testing for Leaks- Turning on the water supply valve- Checking for any water leaks near the connector- Making necessary adjustments to ensure a tight and leak-free connection
Once you have successfully replaced the toilet connector, it is essential to test for leaks to ensure a proper installation. Follow these steps to test for leaks:
1. Turning on the water supply valve: Locate the water supply valve and gently turn it on. This will allow water to flow through the newly installed connector and into the toilet tank.
2. Checking for any water leaks near the connector: Once the water supply is turned on, carefully inspect the area around the connector for any signs of water leaks. Look for drips, pooling water, or wet spots.
3. Making necessary adjustments to ensure a tight and leak-free connection: If you notice any water leaks, it may indicate that the connector is not properly sealed. In such cases, you may need to make some adjustments to achieve a tight and leak-free connection.
To make necessary adjustments:
- Tighten the connector: Use a wrench or adjustable pliers to tighten the nuts on both ends of the connector. Be careful not to overtighten, as this may lead to damaged threads or cracks.
- Inspect the rubber washers: Check the rubber washers at both ends of the connector. If they are worn out or damaged, replace them with new ones. Make sure they are positioned correctly to create a watertight seal.
- Reposition the connector: If the connector seems misaligned, gently reposition it to ensure a proper fit. Make sure it is securely attached to both the toilet tank and the water supply valve.
- Apply plumber’s tape: If necessary, apply plumber’s tape around the threaded connections to provide an additional layer of sealing. Wrap the tape clockwise around the threads, making sure to cover them completely.
After making these adjustments, turn on the water supply valve again and check for any leaks. Repeat the process until you achieve a tight and leak-free connection.
Remember, a properly installed and sealed toilet connector is crucial for the efficient and reliable functioning of your toilet. Testing for leaks and making necessary adjustments will help ensure that you have a trouble-free plumbing system.
Conclusion
Replacing a toilet connector can seem daunting, but with the right tools and guidance, it can be a simple and straightforward process. By following the steps outlined in this article, you can ensure that your toilet remains leak-free and functions efficiently for years to come.
Remember to always turn off the water supply before starting the replacement process and use caution when working with plumbing components. If you’re unsure or uncomfortable with tackling this DIY project, it’s always best to consult a professional plumber.
By taking the time to properly replace your toilet connector, you can save yourself from potential headaches and costly repairs down the line. So don’t hesitate – get started on replacing your toilet connector today!
FAQs
1. How often should I replace my toilet connector?
It is recommended to replace your toilet connector every 5-7 years or if you notice any signs of wear and tear, such as cracks, leaks, or corrosion.
2. Can I replace the toilet connector myself?
Yes, replacing a toilet connector is a relatively simple task that can be done by most homeowners. However, if you are unsure or uncomfortable with DIY projects, it is always best to consult a professional plumber.
3. What tools do I need to replace a toilet connector?
To replace a toilet connector, you will need a few basic tools, including an adjustable wrench, a bucket or towels to catch any water spills, and possibly a screwdriver depending on the type of connector you have.
4. How do I choose the right toilet connector?
When selecting a toilet connector, pay attention to the length and type of connector you need. Measure the distance between the toilet tank and the water supply valve to ensure you choose a connector of the appropriate length. Additionally, determine whether you need a flexible or rigid connector based on the plumbing setup.
5. How do I replace a toilet connector?
Here is a step-by-step guide to replacing a toilet connector:
1. Turn off the water supply by closing the shut-off valve.
2. Flush the toilet to drain the water from the tank.
3. Disconnect the existing toilet connector by loosening the nuts at both ends.
4. Remove the old connector and clean the threads on the toilet tank and water supply valve.
5. Install the new connector by attaching one end to the toilet tank and the other end to the water supply valve.
6. Tighten the nuts securely using an adjustable wrench.
7. Turn on the water supply and check for any leaks.
8. Flush the toilet to ensure proper water flow.
Congratulations, you have successfully replaced your toilet connector!