
In today’s digital age, our smartphones have become extensions of ourselves. We rely on them for communication, entertainment, and staying connected to the world. But amidst the constant notifications and incoming calls, it can sometimes be overwhelming to have our phones ringing for every contact. What if you could set your phone to only ring for specific contacts?
Whether you’re in a meeting, enjoying some much-needed downtime, or simply want to prioritize your important contacts, being able to customize your phone’s ringtone is a valuable feature. In this article, we will explore how you can set your phone to ring only for specific contacts. Whether you’re an Android user or an iPhone enthusiast, we’ve got you covered with step-by-step instructions to help you personalize your phone’s ringtone experience.
Inside This Article
- Allow Only Select Contacts to Ring on Your Phone
- Steps to Set Your Phone to Ring Only for Specific Contacts
- Customize Ringtone Settings for Individual Contacts
- Utilize Do Not Disturb Mode for All Calls Except Certain Contacts
- Conclusion
- FAQs
Allow Only Select Contacts to Ring on Your Phone
Do you ever find yourself constantly being interrupted by phone calls from unwanted numbers? It can be incredibly frustrating, especially when you’re in an important meeting or trying to enjoy some peace and quiet. Luckily, there is a solution to this problem – you can set your phone to ring only for specific contacts. This feature allows you to prioritize calls from important people while ignoring calls from unknown or unwanted numbers.
Whether you have an iPhone or an Android device, the process of enabling this feature is relatively simple and can be done in just a few steps. By customizing your ringtone settings and utilizing the Do Not Disturb mode, you can ensure that your phone only rings for the contacts that matter most to you.
Ready to regain control over your phone’s ringing? Let’s dive into the steps you need to follow to allow only select contacts to ring on your phone.
Steps to Set Your Phone to Ring Only for Specific Contacts
There may be times when you want to prioritize certain contacts and have your phone ring only when they call. This can be useful for important calls that you don’t want to miss, while enabling you to silence other incoming calls. Fortunately, setting your phone to ring only for specific contacts is a straightforward process. Follow these simple steps to customize your phone’s ring settings and enjoy a more personalized calling experience.
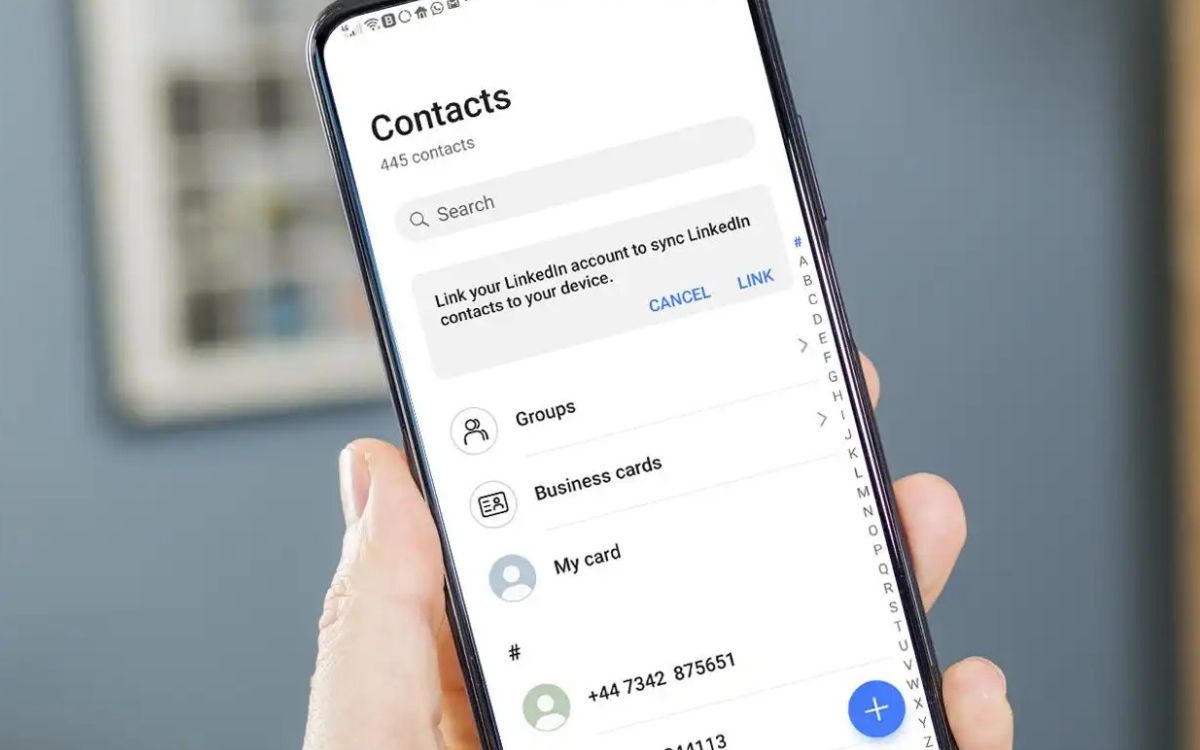
1. Open your phone’s Contacts app. This app is usually pre-installed on your phone and can be easily accessed from the home screen or the app drawer. Once you open the app, you will see a list of all your contacts.
2. Select the contact you want to set as a priority. Scroll through your contacts list or use the search bar at the top to find the specific contact you want to customize. Tap on the contact’s name to open their details.
3. Tap on the “Edit” or “More” option. This will vary depending on your phone model and the version of the Contacts app you are using. Look for an option that allows you to edit and customize the contact’s settings.
4. Scroll down to the “Ringtone” or “Phone ringtone” section. This is where you can change the ringtone specifically for this contact. Tap on the current ringtone to open the list of available options.
5. Select the ringtone you want to assign to this contact. You can choose from the default ringtones provided by your phone or select a custom ringtone if you have one saved on your device. Preview the ringtone by tapping on it, and if it suits your preference, tap “OK” or “Save” to apply it to the contact.
6. Repeat these steps for other contacts you want to set as priority. If you want to set multiple contacts to ring only when they call, simply repeat the process for each individual contact, customizing their ringtone accordingly.
7. Test the setting by having the contact call you. Once you have finished customizing the ringtone settings for your selected contacts, ask one of them to call you to see if your phone only rings for their calls. If the customized ringtone plays, congratulations! You have successfully set your phone to ring only for specific contacts.
By following these steps, you can easily set your phone to prioritize important contacts and ensure that you don’t miss their calls. This feature is especially useful for professionals who want to filter their incoming calls and keep disruptions to a minimum. Take advantage of this customization option to tailor your phone’s ring settings to suit your specific needs and preferences.
Customize Ringtone Settings for Individual Contacts
One of the great features of modern smartphones is the ability to customize different aspects of your device to suit your preferences. When it comes to incoming calls, you can easily customize the ringtone settings for individual contacts, allowing you to identify the caller without even looking at your phone.
To customize the ringtone settings for an individual contact, follow these steps:
- Open your phone’s Contacts or People app.
- Select the contact that you want to customize the ringtone for.
- Tap on the “Edit” or “More” option, usually represented by three dots or a pencil icon.
- Scroll down to the “Ringtone” or “Default Ringtone” section.
- Tap on the current ringtone to open the list of available options.
- Select the desired ringtone from the list.
- Tap “Save” or “Done” to apply the changes.
By following these steps, you can easily assign a unique ringtone to a specific contact. This can be particularly useful if you receive a lot of calls throughout the day and want to recognize important contacts immediately without checking your phone.
It’s worth mentioning that not all smartphones have the same interface or settings, so the exact steps to customize ringtone settings for individual contacts may vary. However, the general process remains similar across most devices.
Customizing ringtone settings for specific contacts can also be a fun way to personalize your phone and give each contact their own unique sound. You can assign different songs, melodies, or even sound effects to different contacts, making it even easier to know who is calling without having to look at your screen.
So, take advantage of this feature and customize the ringtone settings for your important contacts. It’s a simple and effective way to make sure you never miss an important call from someone you value.
Utilize Do Not Disturb Mode for All Calls Except Certain Contacts
If you want to allow only certain contacts to ring through on your phone, you can take advantage of the Do Not Disturb mode. This feature allows you to silence all incoming calls, messages, and notifications, but still receive calls from specific contacts that you choose to whitelist.
To set up this feature on your phone, follow these simple steps:
- Open the Settings app on your phone.
- Scroll down and find the “Do Not Disturb” option.
- Tap on “Do Not Disturb” to access the settings.
- Toggle the switch to enable the Do Not Disturb mode.
- Once enabled, tap on “Allow Calls From”.
- Select the option “Favorites” or “Custom” depending on your preference.
- If you choose “Favorites”, only the contacts marked as favorites in your phonebook will be able to reach you.
- If you choose “Custom”, you can manually select specific contacts to allow calls from.
- After selecting the desired option, you can customize the settings further by enabling “Repeated Calls” and allowing calls from recent contacts.
By utilizing the Do Not Disturb mode and selectively allowing calls from certain contacts, you can filter out unwanted distractions while still being accessible to important calls. This feature is especially useful during meetings, work hours, or when you simply need some uninterrupted time.
Keep in mind that other notifications and alerts will still be silenced while in Do Not Disturb mode. If you want to receive notifications from certain apps or contacts as well, you can adjust the settings accordingly in the “Allow Notifications” section.
Take control of your phone’s interruptions and ensure that you only receive important calls even when you have the Do Not Disturb mode enabled. This feature can provide you with a much-needed sense of peace and privacy, while still staying in touch with the people who matter most.
In conclusion, setting your phone to ring only for specific contacts is a valuable feature that can help you prioritize important calls and avoid unnecessary interruptions. By customizing your ringtone settings, you can ensure that you never miss an important call from specific contacts while minimizing distractions from unwanted calls. Whether you want to set a special ringtone for family members, close friends, or work-related contacts, this functionality gives you greater control over your phone’s notifications.
FAQs
1. How can I set my phone to ring only for specific contacts?
To set your phone to ring only for specific contacts, you can follow these steps:
- Open the Contacts app on your phone.
- Select the contact you want to set a custom ringtone for.
- Tap on the Edit option.
- Scroll down and find the Ringtone option.
- Select a custom ringtone or create a new one.
- Save your changes and exit the Edit mode.
2. Can I assign different ringtones for different contacts on my iPhone?
Yes, you can assign different ringtones for different contacts on your iPhone. Here’s how:
- Open the Phone app and go to the Contacts tab.
- Select the contact you want to set a custom ringtone for.
- Tap on Edit in the top-right corner.
- Scroll down and tap on Ringtone.
- Select a ringtone from the provided options or tap on “Add Ringtone” to use a custom one.
- Tap on Done to save the changes.
3. On Android, how do I set a specific ringtone for a contact?
To set a specific ringtone for a contact on Android, follow these steps:
- Open the Contacts app on your Android device.
- Select the contact you want to set a custom ringtone for.
- Tap on the Edit icon (pencil or three dots) to edit the contact.
- Scroll down and look for the Ringtone option.
- Tap on the Ringtone option and select the desired ringtone.
- Save your changes by tapping on the Save or Done button.
4. Is it possible to set a different ringtone for calls and notifications on my Android phone?
Yes, it is possible to set a different ringtone for calls and notifications on an Android phone. Here’s how:
- Go to the Settings app on your Android device.
- Scroll down and tap on Sound or Sound & Vibration.
- Look for the Phone ringtone option and tap on it.
- Select a ringtone from the list or tap on “Add” to use a custom one.
- Go back to the previous screen and look for the Notification sound option.
- Select a different ringtone for notifications.
- Save your changes, and the different ringtones will be applied.
5. Can I set my phone to vibrate only for specific contacts?
Yes, you can set your phone to vibrate only for specific contacts. Here’s how:
- Open your Contacts app.
- Select the contact you want to set a custom vibration pattern for.
- Tap on the Edit option.
- Scroll down and find the Vibration option.
- Select the desired vibration pattern or create a custom one.
- Save your changes and exit the Edit mode.