
As technology continues to advance, automation has become an integral part of our lives. From smart homes to self-driving cars, automation has revolutionized the way we interact with the world around us. Android, with its vast array of features and functionalities, offers a myriad of possibilities for automation. Whether you want to streamline daily tasks, enhance productivity, or improve efficiency, automating Android can be a game-changer. This article will guide you through the process of automating your Android device, providing you with valuable insights and practical tips. So, if you’re ready to unlock the full potential of your Android phone and elevate your digital experience, let’s dive into the world of Android automation!
Inside This Article
- Overview
- Prerequisites
- Method 1: Using Tasker
- Method 2: Using Automate
- Method 3: Using AutomateIt
- Conclusion
- FAQs
Overview
Automating tasks on your Android device can greatly enhance your productivity and convenience. Whether it’s scheduling the opening and closing of apps, toggling settings, or sending automated messages, there are several methods available to automate your Android device.
In this article, we will explore three popular methods to automate Android: Tasker, Automate, and AutomateIt. These powerful automation tools allow you to create customized automated actions based on triggers and conditions. By setting up rules, you can automate repetitive tasks and save valuable time.
By automating your Android device, you can streamline your daily routine, reduce manual interactions, and make your smartphone work smarter for you. Whether you’re a business professional, a busy parent, or someone who loves exploring new technologies, automating Android can be a game-changer.
Now, let’s dive into the step-by-step instructions for each method, and start automating your Android device to unlock its full potential.
Prerequisites
In order to successfully automate your Android device, there are a few prerequisites that you need to fulfill:
1. Android Device: Make sure you have a functioning Android device running on an updated version of the Android operating system. This will ensure compatibility with the automation apps mentioned in this guide.
2. Tasker/Automate/AutomateIt App: Depending on the method you choose, you will need to download and install either Tasker, Automate, or AutomateIt from the Google Play Store. These apps will be the foundation for automating tasks on your Android device.
3. Basic Knowledge of Automation Concepts: While not mandatory, having a basic understanding of automation concepts will greatly assist you in effectively automating tasks on your Android device. Familiarize yourself with terms like triggers, actions, and conditions.
4. Internet Connectivity: In order to download and install automation apps, as well as access any online resources related to automation, ensure that your Android device is connected to the internet via WiFi or mobile data.
5. Permissions: Automation apps often require various permissions in order to access certain features and perform tasks on your Android device. Make sure to grant the necessary permissions to the automation app you choose to use.
With these prerequisites fulfilled, you are now ready to dive into the world of automating your Android device. Let’s explore the various methods you can use to achieve this!
Method 1: Using Tasker
If you’re looking for a powerful and versatile automation app for your Android device, Tasker is the go-to choice. With Tasker, you can automate a wide range of tasks and actions on your phone, from launching apps to adjusting settings based on specific triggers.
To get started with Tasker, you’ll need to install the app from the Google Play Store. Once installed, follow these steps to automate your Android device:
- Create a new task: Open Tasker and tap on the “+” button to create a new task. Give your task a name and tap on the checkmark icon to save it.
- Add actions: Tap on your newly created task, then tap on the “+” button to add actions to your task. Tasker offers a wide range of action categories, such as App, Display, Keyboard, and more. Select the action you want to automate and configure its settings.
- Add triggers: To trigger your task, you’ll need to add a context or event. Tap on the “Profiles” tab in Tasker and tap on the “+” button to create a new profile. Select the trigger type you want, such as Time, Location, or Event, and configure its settings.
- Link your profile to the task: Once you’ve configured the trigger, tap on the checkmark icon to save it. Tap on the task field, select your task from the list, and tap on the checkmark icon again to save the profile.
With Tasker, the possibilities are virtually endless. You can automate tasks like sending text messages, changing your phone’s display brightness based on the time of day, automatically launching your favorite music app when you connect headphones, and much more. Tasker also supports plugins, allowing you to extend its functionality even further.
While Tasker offers a lot of advanced features and customization options, it may require some time and effort to fully understand and utilize its capabilities. However, once you get the hang of it, Tasker can significantly streamline your Android experience and save you time by automating repetitive tasks.
So, if you’re ready to take control of your Android device and automate a variety of tasks, give Tasker a try. Download it from the Google Play Store and start exploring the possibilities today.
Method 2: Using Automate
If you’re looking for a user-friendly and intuitive way to automate your Android device, look no further than Automate. Whether you want to schedule tasks, create custom actions, or streamline your daily activities, Automate offers a range of features and functionalities to make your life easier.
Automate uses a visual flowchart-like interface, allowing you to easily create automation routines by connecting blocks together. Each block represents a specific action or condition, and by arranging them in a logical sequence, you can create complex automations with just a few taps.
To get started with Automate, follow these steps:
- Install the Automate app from the Google Play Store.
- Launch the app and tap on the “+” icon to create a new flowchart.
- Choose a trigger block, which will initiate the automation process. For example, you can select the “Time” block to trigger an action at a specific time.
- Connect the trigger block to one or more action blocks to define the desired actions. These action blocks can include sending a message, launching an app, toggling settings, and much more.
- Arrange the blocks in a logical sequence to ensure the automation flows smoothly.
- Once you’re satisfied with the flowchart, give it a name and save it.
- Enable the automation by toggling the switch next to its name.
With Automate, the possibilities are endless. You can create automations to turn off Wi-Fi when you leave home, silence your phone during meetings, automatically respond to specific messages, and so much more. The app offers a wide range of blocks, making it easy to customize and tailor your automations to suit your specific needs.
In addition to its user-friendly interface and powerful capabilities, Automate also provides a community forum where users can share and discover pre-existing automation flows. This allows you to leverage the creativity and expertise of other users, saving you time and effort in creating your own automations.
So, if you’re ready to take control of your Android device and automate your daily tasks, give Automate a try. With its intuitive interface, vast array of blocks, and the ability to share automation flows, you’ll be able to streamline your device and optimize your productivity like never before.
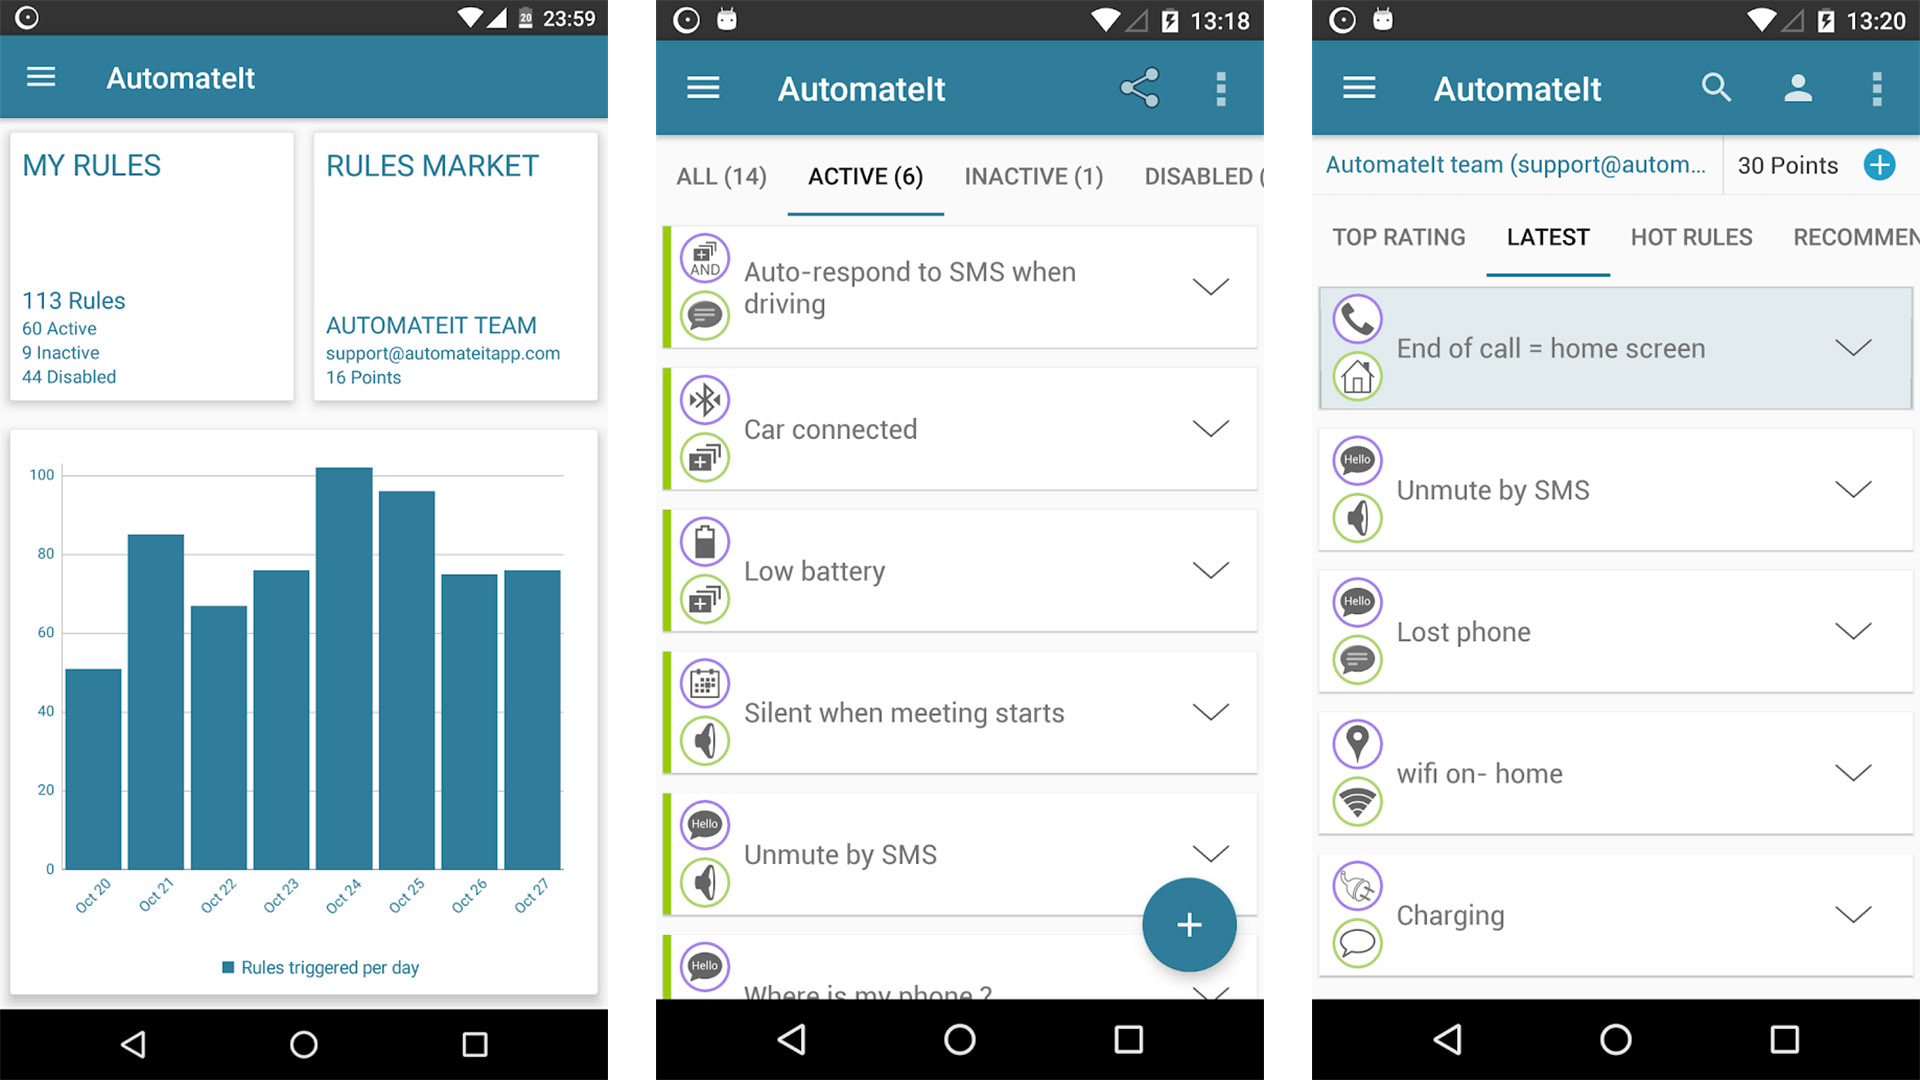
Method 3: Using AutomateIt
AutomateIt is another powerful automation tool for Android that allows you to create custom rules and automate various tasks on your device. With its intuitive interface and wide range of pre-built triggers and actions, AutomateIt enables you to fully automate your Android experience.
Here is a step-by-step guide on how to use AutomateIt to automate tasks on your Android device:
- Install and launch AutomateIt: Start by downloading and installing the AutomateIt app from the Google Play Store. Once installed, open the app to begin setting up your automations.
- Create a new rule: Tap on the “Add Rule” button to create a new automation rule. You will be prompted to choose a trigger, which is the event that will initiate the automation. AutomateIt offers a wide array of triggers, such as time-based events, device events, location-based events, and more. Select the trigger that best suits your automation needs.
- Add actions to the rule: After selecting the trigger, you can add one or more actions that will be performed when the trigger is activated. AutomateIt provides a vast library of actions to choose from, including launching apps, sending messages, adjusting settings, and much more. Select the desired actions and set their parameters accordingly.
- Configure rule settings: Once you have added the necessary triggers and actions, you can configure additional settings for your automation rule. This includes specifying the execution priority, enabling or disabling the rule, setting conditions for the rule to be active, and more. Customize these settings according to your preferences.
- Save and activate the rule: Finally, save the automation rule and activate it. Once activated, the rule will run in the background, monitoring the specified triggers and executing the associated actions automatically.
AutomateIt provides endless possibilities for automation on your Android device. Whether you want to automatically silence your phone during meetings, toggle Wi-Fi based on your location, or send a notification when your battery is low, AutomateIt can handle it all.
Remember to regularly review and update your automation rules in AutomateIt to ensure they continue to meet your needs. Experiment with different triggers and actions to unlock the full potential of this powerful automation tool.
Now that you know how to use AutomateIt for automation on your Android device, it’s time to take control of your smartphone and make your life easier. Start automating your tasks today!
In conclusion, automating Android devices can greatly enhance productivity and efficiency, making day-to-day tasks easier to manage. By leveraging the power of automation, users can streamline their workflows, save time, and focus on more important tasks. Whether it’s scheduling reminders, setting up custom routines, or automating repetitive actions, Android provides a wide range of options through built-in features and third-party apps.
By harnessing the power of automation, users can take full advantage of their Android devices to simplify their lives. From setting up automatic backups to automating smart home devices, the possibilities are endless. By utilizing the right tools and techniques, users can customize their Android experience to fit their unique needs and preferences.
So why wait? Start automating your Android device today and unlock the full potential of what your device can do for you. Whether you’re a business professional, a busy parent, or a tech enthusiast, automation can revolutionize the way you use your Android device and make your life easier and more efficient.
FAQs
1. Can I automate tasks on my Android phone?
Yes, you can automate tasks on your Android phone through the use of various automation apps and features. Android offers built-in tools like Tasker, which allows you to create custom automated tasks based on triggers and actions. Additionally, there are numerous third-party apps available on the Google Play Store that provide even more advanced automation capabilities.
2. What are some examples of tasks that can be automated on Android?
There are countless tasks that can be automated on Android to make your life easier. Some common examples include:
- Automatically silencing your phone during specific hours of the day or at certain locations.
- Scheduling regular backups of your data to a cloud storage service.
- Automatically enabling or disabling Wi-Fi based on your location.
- Setting up personalized text message responses for specific contacts or during specific events.
- Automatically toggling between different sound profiles based on the time of day.
These are just a few examples, but the possibilities for automation are virtually endless.
3. How do I set up automation on my Android phone?
To set up automation on your Android phone, you can follow these steps:
- Install an automation app from the Google Play Store, such as Tasker or Automate.
- Launch the app and familiarize yourself with its interface.
- Create a new automation task by specifying a trigger event, such as a certain time, location, or action.
- Choose the desired action that you want your phone to perform when the trigger event occurs.
- Configure any additional settings or conditions for the automation task, if necessary.
- Save and activate the automation task.
By following these steps, you’ll be able to set up customized automation on your Android phone.
4. Can automation apps drain my phone’s battery?
Automation apps have the potential to impact your phone’s battery life, as they may run in the background and perform various actions. However, most automation apps are designed to be efficient and minimize resource usage. Furthermore, you can optimize your automation tasks to ensure they do not unnecessarily drain your phone’s battery. This can be done by keeping the number of active automation tasks to a minimum, using triggers and conditions that have a lower impact on battery usage, and considering the overall impact of each action performed by the automation app.
5. Are there any risks associated with automating tasks on my Android phone?
While automating tasks on your Android phone can greatly enhance your productivity and convenience, it is important to be cautious and consider any potential risks involved. Some potential risks include:
- Accidental triggering of automation tasks, which could lead to unintended consequences.
- Privacy concerns if the automation app has access to sensitive data or features on your phone.
- Reliance on automation, which could make it difficult to manually perform certain tasks if the automation fails.
- Possible conflicts between multiple automation apps running simultaneously on your phone.
By carefully selecting reputable automation apps, being mindful of the tasks being automated, and regularly reviewing and adjusting automation settings, you can mitigate these risks and enjoy the benefits of automation on your Android phone.