
Dark mode has become increasingly popular among users as it offers a sleek and stylish interface while reducing eye strain. If you are an iPhone user, you may already be familiar with the dark mode feature on iOS. But did you know that you can also enjoy the benefits of dark mode on your Mac?
Switching to dark mode on your Mac can not only transform the look of your computer but also provide a more comfortable viewing experience, especially in low-light environments.
In this article, we will guide you through the process of enabling dark mode on your Mac, step by step. Whether you’re a longtime Mac user or new to the platform, you’ll find it surprisingly quick and easy to switch to dark mode and enjoy a whole new visual experience on your Mac.
Inside This Article
- Enabling Dark Mode on macOS
- System Preferences Method
- Keyboard Shortcut Method
- Menu Bar Method
- Conclusion
- FAQs
Enabling Dark Mode on macOS
Dark Mode is a popular feature of macOS that allows users to switch their display to a darker color scheme, reducing eye strain and improving readability, especially in low-light conditions. Here are three easy methods to enable Dark Mode on your Mac:
System Preferences Method
The first method is to enable Dark Mode through the System Preferences. Simply follow these steps:
- Click on the Apple menu located in the top left corner of your screen.
- Select “System Preferences” from the dropdown menu.
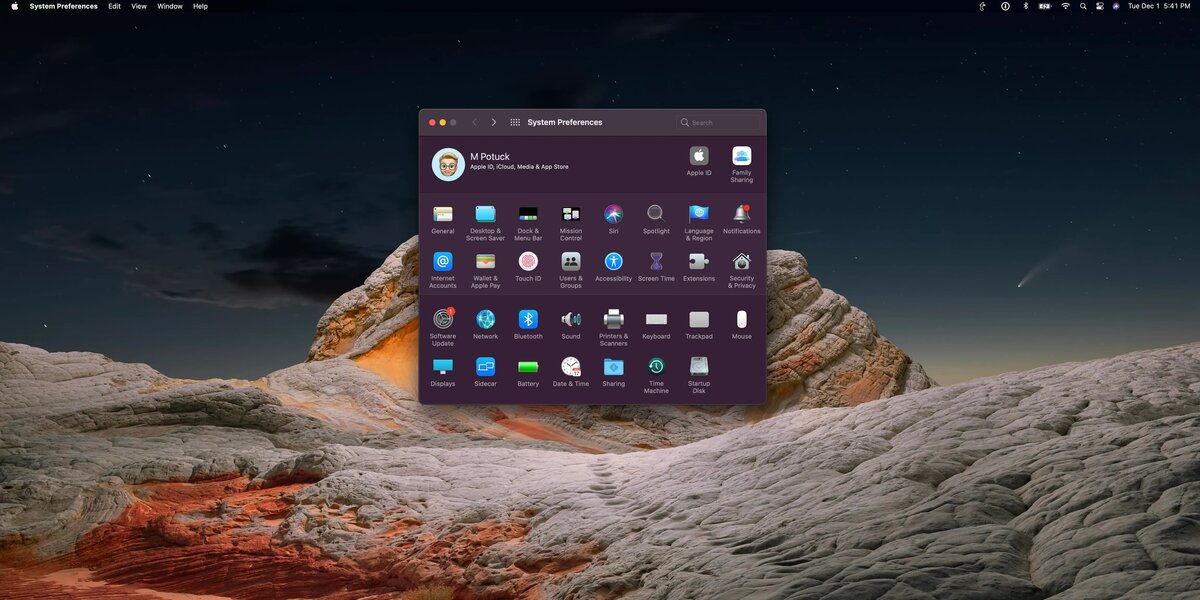
- In the System Preferences window, click on “General.”
- Under the “Appearance” section, click on the “Dark” option.
Once you have selected the “Dark” option, your Mac’s interface will instantly switch to Dark Mode, giving your device a sleek and stylish appearance.
Keyboard Shortcut Method
If you prefer using keyboard shortcuts, this method is perfect for you. Follow these steps to switch to Dark Mode:
- Press and hold the “Option” key on your keyboard.
- While holding the “Option” key, click on the “Apple” menu in the top left corner of your screen.
- In the dropdown menu, select “System Preferences.”
- In the System Preferences window, click on “General.”
- Under the “Appearance” section, click on the “Dark” option.
By holding down the “Option” key, the “Light” option will change to “Dark,” allowing you to quickly enable Dark Mode without navigating through multiple menus.
Menu Bar Method
Lastly, you can enable Dark Mode through the menu bar on your Mac. Here’s how:
- Click on the Apple menu in the top left corner of your screen.
- In the dropdown menu, select “System Preferences.”
- In the System Preferences window, click on “General.”
- At the top of the window, you will find the appearance options. Click on the “Light” or “Dark” icons to switch between modes.
The menu bar method provides a convenient way to toggle between Light Mode and Dark Mode directly from the menu bar.
With these three methods, you can easily switch to Dark Mode on your Mac, allowing for a more comfortable and visually appealing experience. Give it a try and enjoy your Mac in a stylish new look!
System Preferences Method
If you prefer a more straightforward approach to enabling dark mode on your Mac, the System Preferences method is the way to go. This method allows you to easily switch between light and dark modes through the system settings.
To activate dark mode using the System Preferences method, follow these simple steps:
- Click on the Apple menu icon in the top left corner of your screen.
- Select “System Preferences” from the drop-down menu.
- In the System Preferences window, locate and click on “General.”
- In the Appearance section, you will see the option to choose between Light and Dark mode. Click on the “Dark” option to activate dark mode.
Once you have selected dark mode, your Mac’s interface will instantly change to a sleek and stylish dark aesthetic. The menu bar, dock, and built-in apps will all adopt a dark color scheme, providing a visually pleasing and comfortable environment for extended periods of use.
If you wish to switch back to light mode, simply follow the same steps and choose the “Light” option under the Appearance section in System Preferences.
This method is ideal for those who prefer a more hands-on approach to customizing their Mac’s settings. It allows for easy toggling between light and dark modes, ensuring that your Mac’s display suits your personal preferences and enhances your user experience.
Keyboard Shortcut Method
If you prefer a quicker way to switch to Dark Mode on your Mac, you can utilize the keyboard shortcut method. With just a few keystrokes, you can instantly transform the appearance of your Mac’s interface.
To activate Dark Mode using a keyboard shortcut, follow these simple steps:
- Press and hold the Command key.
- While holding down the Command key, press the Option key.
- Finally, press the T key.
By pressing these three keys simultaneously, you will toggle between Light Mode and Dark Mode effortlessly.
This keyboard shortcut makes it convenient to switch to Dark Mode on the fly, allowing you to adapt the appearance of your Mac to your preferences and the environment you’re in. Whether you want a sleek and modern interface or a more subdued and eye-friendly display, Dark Mode can be activated with just a simple keystroke.
Keep in mind that the specific keys mentioned above (Command, Option, and T) may vary depending on the keyboard layout you’re using or any modifications you’ve made to the default keyboard shortcuts. However, most Mac users should find that this keyboard shortcut method works seamlessly on their devices.
Now that you know how to activate Dark Mode using the keyboard shortcut method, you can quickly switch between different visual modes on your Mac without navigating through menus or system preferences. This functionality is especially handy when switching from a brightly lit environment to a low-light setting or when you just want to give your eyes a break from the constant glare of a bright screen.
So, next time you want to switch to Dark Mode on your Mac, remember this easy keyboard shortcut. It’s a time-saving and efficient way to customize your Mac’s appearance and create a more comfortable user experience.
Menu Bar Method
If you’re looking for a quick and hassle-free way to switch to Dark Mode on your Mac, the Menu Bar Method is just for you. This method allows you to toggle between Light Mode and Dark Mode with just a couple of clicks from the menu bar.
To get started, look for the small Apple logo at the top left corner of your Mac’s screen. Click on it to open the Apple menu. From there, select “System Preferences” to open the preferences window.
In the System Preferences window, you’ll find various icons representing different settings. Look for the one labeled “General” and click on it. This will open the General settings panel where you can customize your Mac’s appearance and behavior.
Within the General settings panel, you’ll see a “Appearance” section. Here, you can choose between Light Mode and Dark Mode. To switch to Dark Mode, simply click on the option that says “Dark”.
Once you’ve selected Dark Mode, you’ll notice an instant change in the appearance of your Mac’s interface. The menu bar, dock, and other system elements will now be displayed in a sleek darkened color scheme.
If you ever want to switch back to Light Mode, simply follow the same steps and select the “Light” option within the “Appearance” section of the General settings panel.
The Menu Bar Method is a straightforward and user-friendly way to switch to Dark Mode on your Mac. It offers convenience and quick access, allowing you to seamlessly switch between light and dark interfaces depending on your preference or the lighting conditions around you.
Now that you know how to switch to Dark Mode using the Menu Bar Method, go ahead and give it a try. Explore the enhanced visual experience and reduced eye strain that Dark Mode brings to your Mac usage.
Dark Mode on Mac is a fantastic feature that not only enhances the visual appeal of your device but also offers several benefits. It reduces eye strain, conserves battery life, and creates a more immersive and focused user experience. Whether you prefer a dark interface for aesthetic reasons or want to take advantage of the practical benefits, switching to Dark Mode on your Mac is a simple and worthwhile process.
By following the steps mentioned in this article, you can easily enable Dark Mode and personalize your Mac to match your style and environment. So go ahead, give your Mac a sleek and stylish makeover by embracing the Dark Mode. Enjoy the ease on your eyes and the overall enhanced user experience that comes with it.
FAQs
Q: How do I switch to dark mode on Mac?
To switch to dark mode on Mac, follow these steps:
- Click on the Apple menu in the top left corner of the screen.
- Select “System Preferences” from the drop-down menu.
- In System Preferences, click on “General”.
- Under the “Appearance” section, click on the “Dark” option to enable dark mode.
Q: Can I schedule dark mode on my Mac?
Yes, you can schedule dark mode on your Mac. Here’s how:
- Go to System Preferences by clicking on the Apple menu.
- Select “General”.
- Under the “Appearance” section, you will find the “Auto” option. Click on it to open the schedule settings.
- Choose whether you want dark mode to be enabled “Sunset to Sunrise” or set a custom schedule by selecting “Custom” and specifying the start and end time.
Q: Can I enable dark mode for specific apps on Mac?
Yes, you have the option to enable dark mode for specific apps on your Mac. Here’s how:
- Click on the Apple menu, go to System Preferences, and select “General”.
- Under the “Appearance” section, you will see the “Auto” and “Light” options.
- To enable dark mode for specific apps, select the “Auto” option.
- Then, go to the “App Store” and update the apps you want to use in dark mode.
Q: Does dark mode on Mac improve battery life?
Using dark mode on Mac may help improve battery life, especially on devices with OLED displays as they can turn off individual pixels to display blacks. However, the impact on battery life may vary depending on the specific device and usage patterns.
Q: How can I customize dark mode on Mac?
You can customize dark mode on your Mac by adjusting the accent color and highlight color. Here’s how:
- Go to System Preferences and select “General”.
- Under the “Appearance” section, click on the “Accent color” dropdown menu to choose a color.
- You can also click on the “Highlight color” dropdown menu to select a different color.