
The microphone is a vital part of your phone. You need it when you’re on a call with someone, when you’re recording a video or a voice memo, or when you have to use Siri. That’s why it can be quite frustrating to discover that your iPhone microphone is not working anymore. Luckily, there are easy fixes for this issue and we discuss them all in detail in this guide.
Also read: Apple Music Not Working: 10 Best Fixes That Will Work
Inside This Article
- Possible Reasons Why Your iPhone Microphone Is Not Working
- How to Test If Your iPhone Microphone Is Working
- 13 Ways to Fix an iPhone Microphone That’s Not Working
- Clean the Microphone
- Make Sure Microphone Access Is Enabled
- Remove the Phone Case
- Disconnect Bluetooth Devices
- Turn Off Noise Cancellation
- Close Apps That Can Access Microphone
- Restart Your iPhone
- Switch to the Latest iOS Version for iPhones
- Use a Pair of Headphones That Has a Microphone
- Make iPhone Settings Revert to Default
- Hard Reset Your iPhone
- Put Your iPhone in DFU Mode
- Reach Out to Apple Support
Possible Reasons Why Your iPhone Microphone Is Not Working
Your iPhone microphone not working can be caused by a number of reasons. It could be that there’s something blocking the mic, or there’s an existing Bluetooth-related problem. Other possible reasons are an outdated iOS version, issues within the app you’re using, or hardware problems. The only way to really pinpoint what’s causing your iPhone microphone to not work is by trying a fix.
How to Test If Your iPhone Microphone Is Not Working
Before you try any of the fixes we’ve listed in this guide, it’s best to be absolutely sure first that your iPhone microphone really isn’t working. That’s because a few of the solutions to this problem include resetting your iPhone’s settings and hard resetting your phone.
There are two ways to test if your iPhone microphone is not working: one is by using the Voice Memos app, and the other is by using the Camera app. We discuss both methods in detail below.
Using the Voice Memos App
If you can’t be heard when you’re on phone calls or FaceTime calls, test if your iPhone microphone is working using the Voice Memos app.
- Use the Voice Memos app on your iPhone.
- Hit the Record button (the round, red button at the bottom of your screen).
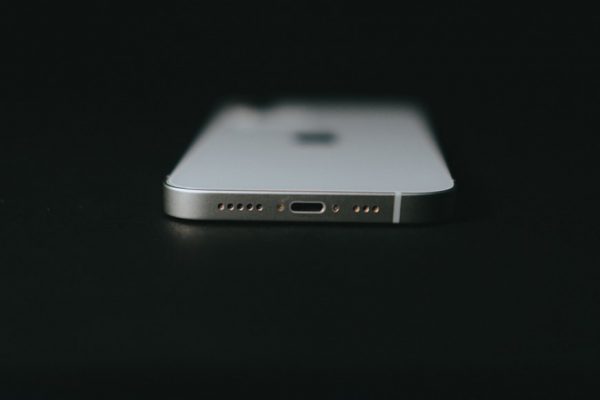
- Speak into the microphone that’s located at the bottom of your phone.
- Tap the square, red button at the bottom to stop recording.
- Play the recording back by clicking on the voice memo you just recorded and tapping on the play button. If there’s no sound at all or your recorded voice doesn’t sound right, then the microphone isn’t working.
Using the Camera App
The other method of testing if your iPhone microphone is not working is by recording a video using the Camera app. Use this method if you can’t be heard when you’re on speakerphone.
- Use the Camera app on your gadget.
- Record a video by selecting the Video option at the bottom of your screen and then tapping on the round, red button. Make sure to speak into the microphone located at the top of your phone.
- Play back the video by selecting the thumbnail in the lower-left corner of your screen and then tap on the play button. If you don’t hear anything, or if your voice isn’t clear in the recording, then your iPhone microphone is faulty.
Easy Ways to Fix an iPhone Microphone That Is Not Working
Once you have verified that your iPhone microphone is really not working, you can diagnose and troubleshoot the issue with these solutions:
1. Clean the Microphone

The first thing you should do if your iPhone microphone is not working is to check for remnants of dust or dirt blocking the bottom, top, and rear microphones. If you find that they’re dusty or dirty, this can be the reason that you sound muffled during calls or recordings. One of the ways you can clean your iPhone microphone is with a dry, soft, and clean toothbrush. Gently brush over the microphone holes to remove any dirt, dust, and pocket lint that may be stuck in there. Be careful not to accidentally push the debris inward.
Another way you can clean your iPhone’s microphone is by using compressed air. However, be careful if you’re going to use this method as this can potentially damage the inner workings of your device. When using compressed air to clean your iPhone’s microphone, remember to spray gently and not directly into the mic. If it’s your first time using compressed air on your phone, spray from a good distance first to test the pressure. Then, move closer if you have to.
It’s also important to note that you shouldn’t use anything sharp to try and dislodge debris from your iPhone microphone.
After you have cleaned the microphones on your device, test to see if they’re now working using the methods we showed you above. If they’re still not working, proceed to the next method.
2. Make Sure Microphone Access Is Switched On
If your iPhone microphone is not working only for certain apps, then it might be because you haven’t allowed microphone access for these apps. Luckily, this is easy to rectify. To enable microphone access for a third-party app, follow these steps:
- From your iPhone’s app dashboard, select Settings.
- Swipe the display up and tap Privacy once it’s onscreen.
- Choose Microphone from the menu.
- Tap the toggle next to an app to enable microphone access.
3. Remove the Phone Case and/or Screen Protector
Screen protectors and phone cases are a must-have if you want your iPhone to last as long as it can. However, if you’re using a cheap screen protector or phone case from a third-party manufacturer, it’s possible that it might be the reason your iPhone microphone is not working properly. The holes of those phone cases and screen protectors can sometimes be not precisely placed; therefore, the said accessories cover the ports and microphones of your device. Also, they cause your voice to be muffled when you speak into one of your iPhone’s mics.
If you think any of your accessories is the culprit making your iPhone microphone not function properly, the best thing to do is to remove your phone case or screen protector. Confirm if this solved the problem by recording a voice memo or a video. If you can now hear yourself clearly in both recordings, then your phone case or screen protector is the culprit. The next thing you should do is to get a new one from a legitimate manufacturer. You can check out our guide to choosing the best mobile accessories to help you find a reliable phone case or screen protector.
4. Disconnect Bluetooth Devices from Your Phone
Bluetooth connections could also be the reason behind your iPhone microphone not working. Even if your Bluetooth earbuds are already in their charging case, they can still sometimes switch on on their own and connect to your iPhone. The same can happen if your iPhone is paired to the infotainment system in your car or a Bluetooth speaker. In such cases, your iPhone’s native microphone won’t be able to pick up any audio when you receive a call or record a video. Thus, it’s important to unlink Bluetooth accessories or gadgets from your iPhone when you’re no longer using them. Here’s how:
- Access your iPhone’s Settings via the app dashboard.
- Pick Bluetooth from the Settings menu.
- From the list of linked Bluetooth devices onscreen, pick the accessory to unpair by clicking the ‘i’ icon beside it.
- Select Disconnect to disconnect from that device.
5. Turn Off Noise Cancellation
Noise cancellation has long been a staple feature of the iPhone, and this is switched on by default. This is to reduce the ambient noise during an ongoing call. However, turning on noise cancellation can sometimes muffle your voice, especially when you’re talking to someone on speakerphone.
If you have an iPhone that’s running on at least iOS 13, follow these steps to switch off noise cancellation:
- On your iPhone, look for and click the Settings app.
- Scroll until you see Accessibility, then tap on the said option.
- Select Audio/Visual from the menu.
- If the toggle next to Phone Noise Cancellation is green, tap on it to switch off this feature.
Here’s how to disable noise cancellation on an iPhone that’s running on iOS 12 or earlier:
- Head over to your iPhone’s Settings app.
- Scroll down to General and tap it.
- Pick Accessibility from the menu options.
- Under Hearing, check if the toggle next to Phone Noise Cancellation is green. If it is, tap it to turn it off.
6. Close Apps That Can Access Your iPhone’s Microphone
An app that has microphone access can sometimes be the reason why your iPhone microphone is not working. It can be that the app is currently using your device’s mic or that the app might have crashed. Either way, you can diagnose and resolve the problem by following these steps:
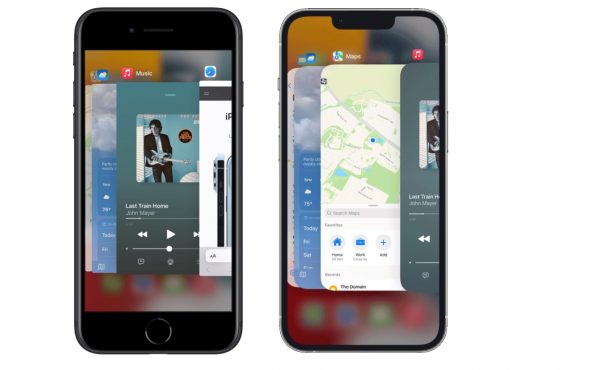
- Access your iPhone’s App Switcher. How you do so differs depending on your phone’s model.
- If you have an iPhone X, 11, 12, or 13, drag upwards from the bottom to the middle of your device’s screen. Stop doing so once the App Switcher is already onscreen.
- If you own an iPhone SE or older versions up to the iPhone 8, double-press the Home button.
- Scan through your recently used apps.
- Swipe up on the app that’s using your microphone to close it.
Once you have closed the app that you think is causing the problem, check to see if your microphone is now working by recording a voice memo or a video.
7. Restart Your iPhone
Your iPhone microphone not working can also be a sign that your device needs a bit of rest. Remember, your gadget might not operate smoothly if it’s constantly turned on. That’s why tech experts recommend that you restart your phone at least once every week.
We discuss how to restart each iPhone model in the next sections.
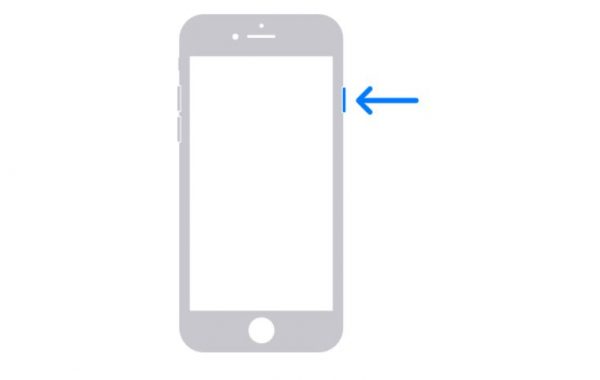
Restarting an iPhone X, 11, 12, or 13
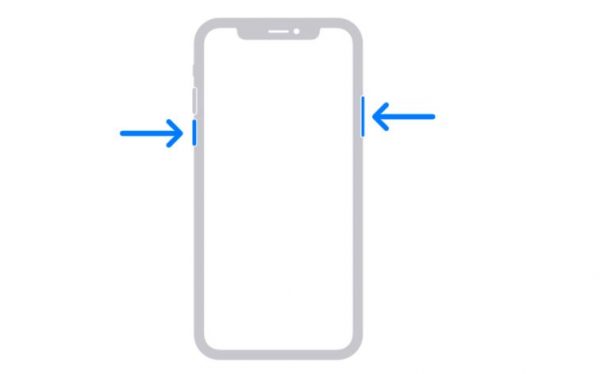
- Press for a few seconds the Power button and any of the volume buttons of your gadget as shown in the sample image above.
- Toggle the Power Off slider to switch off your iPhone. Your device will switch off after about 30 seconds; you’ll know it’s off when the screen has turned completely black.
- Give the device 30 seconds to rest in that state.
- Switch your iPhone on again by long-pressing the Power button on the right side. Stop doing so when the Apple logo in on display.
Rebooting an iPhone 6, 7, 8, or SE (2nd Generation)
- Press for a few seconds the Power button on the upper-right side of your gadget. Stop doing so once the Power Off slider pops up on your phone’s screen.
- Toggle the Power Off slider to shut down your iPhone.
- Wait for about 30 seconds for the gadget to finish shutting down, and another 30 seconds to let it rest in power-off state.
- Switch your iPhone back on by long-pressing the Power button. Stop doing so once the Apple logo is on display.
Restarting an iPhone SE (1st Generation), 5, or earlier
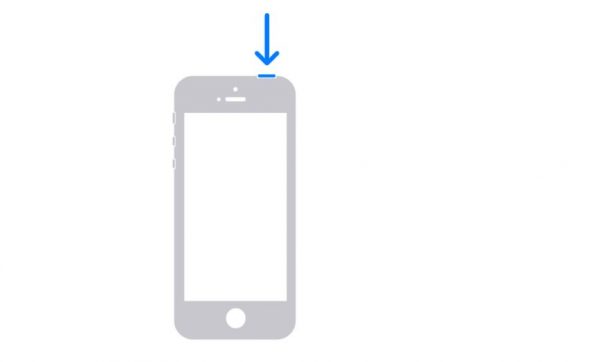
- Long press the top-right Power button and stop doing so when the Power Off slider shows up.
- Toggle the Power Off slider so that your iPhone will shut down.
- Wait for about 30 seconds for the gadget to rest.
- To switch your iPhone back on, simply long-press the Power button and discontinue pressing when the Apple logo is shown.
8. Switch to the Latest iOS Version for iPhones
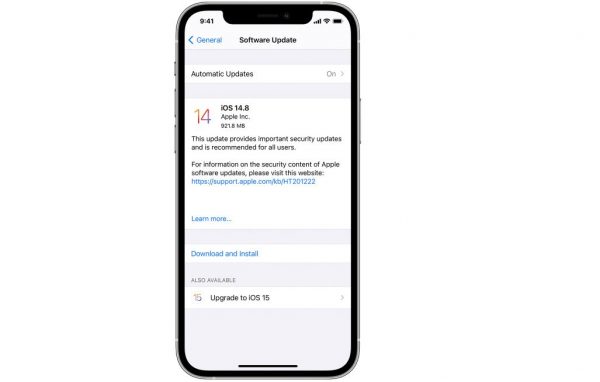
An iOS that isn’t updated for too long already can also be the reason why your iPhone microphone is not working normally. If an update is already available for your device, you should download and install it and see if this solves the issue. However, make sure to first back up your data through iCloud or a PC so that you don’t lose your files. Here’s how to upgrade your iOS:
- Plug your iPhone into a stable power source and ensure it is on a strong WiFi connection.
- From its home interface, navigate to the Settings app.
- Find and press General.
- Pick Software Update from the menu.
- Find and tap Download and Install Now to download the iOS update.
- Type in your passcode if your device asks you to.
- Go for the Install Now option to install the update.
The process can take anywhere from a couple of minutes to around an hour, depending on how major the update is. Once your phone is done updating, it will restart automatically.
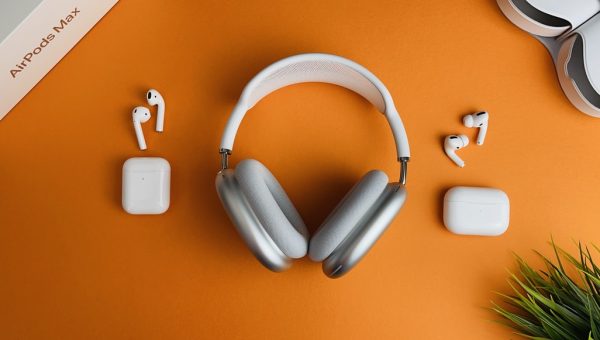
9. Use a Pair of Headphones That Has a Microphone
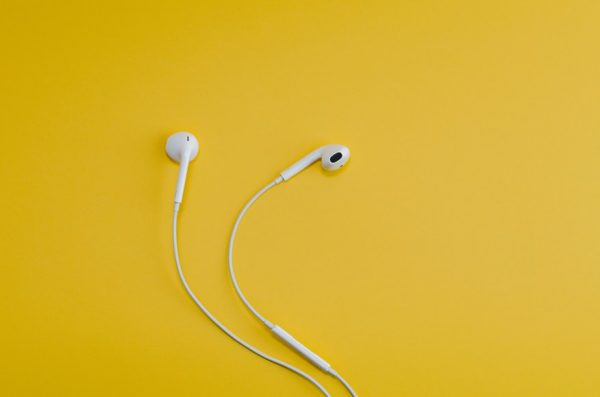
This method won’t really get your iPhone’s built-in microphone to start working again. That said, it is a good quick fix if you need to make or receive a phone call or record a video right away. Simply grab a good pair of headphones that has a microphone and plug it in using a 3.5 mm headphone jack adapter, which you can get from Amazon for a low price. Then, you can speak into the headphones’ mic and see if you’re now heard during calls and recordings.
10. Make iPhone Settings Revert to Default
You can also try to revert your device’s settings back to the default configurations if your iPhone microphone is still not working or doesn’t capture sound properly. This removes bugs that might be causing your phone’s mics to not be responsive. However, worry not as this won’t delete any files, photos, or videos. Take note, though, that it does disconnect you from the networks you were previously connected to and erase all WiFi passwords. You can also back up your iPhone if you want to save your settings. That way, you can easily restore them if resetting your settings doesn’t solve the issue with your mic.
To reset your iPhone settings, proceed with these steps:
- From your gadget’s home dashboard, access the Settings app.
- Next, search for and press General.
- Swipe up on the display until you see Reset, then tap it.
- Go for the Reset All Settings option.
- Type in your passcode.
- Press Reset All Settings to finalize the action.
11. Hard Reset Your iPhone
If resetting your device’s settings doesn’t work to get your iPhone microphone to work again, try hard resetting your phone. The difference between these two methods is that a hard reset wipes all of your phone’s data. So, if you don’t want to lose any of your files or photos, you should back them all up before you hard reset your phone.
Just like restarting your iPhone, how you hard reset your smartphone depends on its model.
Hard Resetting an iPhone 8, SE (2nd Generation), X, Xs, XR, 11, 12, or 13

- Quickly press the Volume Up rocker once.
- Quickly press the Volume Down rocker this time.
- Press for a few seconds your gadget’s Power button.
- Discontinue pressing the Power button once the Apple logo is onscreen.
- Wait shortly for your device to boot up. After that, you’ll see your phone’s Lock screen.
Hard Resetting an iPhone 7 or 7 Plus

- Press for a few seconds the Power button and Volume Down rocker of your gadget like in the sample image above.
- Stop pressing both when you already see the Apple logo.
- Wait a few seconds for your phone to boot up. You’ll know your device is done hard resetting when your Lock screen appears.
Hard Resetting an iPhone 6s, SE (1st Generation), or earlier

- Long press both the Home button and the Power button at once.
- Stop pressing them both only when the screen turns completely black and then the Apple logo pops up on the display.
- Your phone will take a few seconds to boot up. Afterward, your Lock Screen will appear.
12. Put Your iPhone in DFU Mode
If, after hard resetting, your iPhone microphone is still not working, you might need to restore your device on a much deeper level; switching on DFU mode on your iPhone does just the trick.
DFU (or Device Firmware Update) mode is a more comprehensive version of Recovery mode. It changes your iPhone’s firmware, removes bugs, and rewrites every bit of code on your smartphone. Needless to say, you’ll need to back up your iPhone’s data before switching on DFU mode on your iPhone.
For a step-by-step guide on how to perform the procedure, check out our tutorial on how to enter DFU mode on your iPhone.
13. Reach Out to Apple Support
If your iPhone microphone is still not working no matter what workaround or solution you do, the culprit is most likely a firmware issue. In that case, the problem is already beyond your control, and you’ll need to contact Apple Support to get your iPhone microphone to work again. Be sure to describe the issue thoroughly and to mention which fixes you’ve tried.
Final Thoughts
You need your iPhone microphone for a lot of things, like making and receiving phone calls, recording videos, and using Siri for assistance. So, when this vital part of your smartphone suddenly stops working, it can be extremely upsetting. We hope this guide has helped you find a way to get your iPhone microphone to work again. Don’t forget to share this guide with your friends who might be encountering the same problem.