
Welcome to our comprehensive guide on how to approve apps on iPhone. As an iPhone user, you know how important it is to have access to the latest and greatest apps available on the App Store. However, sometimes the process of approving apps can be a bit confusing or overwhelming. That’s where this guide comes in handy! Whether you’re a new iPhone user or someone who just wants to understand the app approval process better, we’ve got you covered. In this article, we’ll walk you through the steps to approve apps on your iPhone, including tips and tricks to streamline the process. So, let’s jump right in and discover how to effortlessly approve apps on your iPhone!
Inside This Article
- Overview of App Approval Process
- Preparing Your App for Approval
- Submitting Your App for Review
- Review Guidelines and App Review Process
- Troubleshooting Common Approval Issues
- Conclusion
- FAQs
Overview of App Approval Process
When it comes to getting your app approved for the iPhone, there is a defined process that you need to follow. This process is put in place to ensure the quality and security of apps available on the App Store. Understanding this approval process can help you navigate the steps required to get your app live and available to iPhone users.
The first step in the app approval process is preparing your app for submission. This involves making sure your app meets Apple’s guidelines and requirements. You need to ensure that your app is free from any bugs, crashes, or issues that could negatively impact the user experience. It is also important to follow Apple’s design and content guidelines to ensure your app complies with their standards.
Once you have prepared your app, you can submit it for review. This is done through the Apple Developer Portal, where you will provide all the necessary information about your app, such as its name, description, category, and screenshots. It is crucial to accurately describe your app’s features and functionality to give the reviewers a clear understanding of what your app offers.
After submitting your app, it enters the app review process. This is where Apple’s team of reviewers thoroughly evaluate your app for compliance with their guidelines. They check for any potential violations, such as inappropriate content, privacy issues, or functionality that could mislead or harm users. The review process may take some time, as the reviewers carefully inspect each aspect of your app to ensure it meets their criteria.
If your app meets all the guidelines and requirements, it will be approved and made available on the App Store. However, if there are any issues or violations found during the review process, your app may be rejected. In such cases, Apple will provide you with specific feedback on what needs to be fixed or improved before resubmitting your app for another review.
It is worth noting that the app approval process can sometimes be challenging and time-consuming. However, it is essential for maintaining the integrity of the App Store and providing users with reliable and secure apps. By following Apple’s guidelines and ensuring the quality of your app, you increase your chances of a successful approval and reaching millions of iPhone users around the world.
Preparing Your App for Approval
When it comes to getting your app approved on the iPhone, there are a few important steps you need to follow to ensure a smooth and successful process. By taking the time to properly prepare your app for approval, you can increase your chances of getting it accepted and ready for download by millions of iPhone users.
1. Focus on Functionality: The first thing you need to do is make sure your app functions properly. Test it thoroughly on different devices and iOS versions to ensure it works seamlessly. Check for any bugs, crashes, or performance issues and fix them before submission.
2. Design a User-Friendly Interface: Apple wants to ensure that apps provide a great user experience. Pay attention to the design and layout of your app interface. Make it intuitive, easy to navigate, and visually appealing to users.
3. Adhere to Apple’s App Store Guidelines: Familiarize yourself with Apple’s App Store Review Guidelines. Make sure your app complies with the rules and regulations set by Apple. This includes avoiding offensive or inappropriate content, ensuring the app is bug-free, and respecting user privacy.
4. Optimize App Performance: Performance is key when it comes to app approval. Optimize your app to ensure it runs smoothly and doesn’t consume excessive battery or memory. Minimize loading times and ensure all features work as expected.
5. Test In-App Purchases: If your app includes in-app purchases, thoroughly test them to ensure they work correctly. Apple will review these features during the approval process, so make sure they are implemented properly and adhere to Apple’s guidelines.
6. Prepare App Metadata: Before submitting your app, gather all the necessary metadata, such as app title, description, keywords, and screenshots. Craft a compelling description that accurately conveys your app’s features and benefits to potential users.
7. Consider Localization: To expand your app’s reach, consider localizing it for different languages and regions. This can increase the appeal to a wider audience and improve your chances of approval.
8. Review and Test App Store Guidelines: Review Apple’s App Store Guidelines again before submitting your app. Check for any recent updates or changes that may affect your app’s approval process.
By following these steps and thoroughly preparing your app for approval, you can increase the likelihood of getting it approved by Apple. Remember to test rigorously, comply with the guidelines, and provide a top-notch user experience. Good luck with your app submission!
Submitting Your App for Review
Once you have prepared your app for submission and ensured that it meets all the necessary guidelines, it’s time to submit it for review. This is the final step before your app can be made available to users on the App Store.
To submit your app for review, follow these simple steps:
- Log in to your Apple Developer Account: Access the Apple Developer website and sign in to your developer account with your credentials.
- Select App Store Connect: After logging in, navigate to the “App Store Connect” section.
- Choose “My Apps”: From the App Store Connect dashboard, select the “My Apps” option, where you will find a list of your existing apps.
- Select the App to be Submitted: Locate and choose the app you want to submit for review from the list.
- Fill in the App Details: Provide all the necessary information about your app, including its name, description, screenshots, and promotional materials. Ensure that you fill in every field accurately and thoroughly.
- Upload App Binary: Upload the compiled binary of your app using Xcode or Application Loader. Make sure the binary is signed with the proper provisioning profiles and certificates.
- Set App Pricing and Availability: Choose the pricing model for your app and specify the territories in which you want it to be available. You can also set the release date and decide whether to offer your app as a pre-order.
- Submit App for Review: Once you have completed all the necessary steps, click on the “Submit for Review” button to initiate the review process.
After submitting your app, it will enter the review queue, where Apple’s App Review team will assess its compliance with the guidelines and standards set by the company. The review process typically takes a few days, although it may vary depending on the volume of submissions at the time.
During the review process, it’s essential to remain patient and monitor your email for any communication from Apple regarding your app. They may request additional information or clarifications if required.
Upon successful review and approval, you will receive notification that your app has been accepted and is ready for release. It will then be listed on the App Store, allowing users to download and enjoy your creation.
Review Guidelines and App Review Process
Once you have submitted your app for review, it will go through a thorough evaluation process conducted by Apple’s app review team. This process ensures that all apps available on the App Store meet the high standards set by Apple and provide a safe and enjoyable user experience.
During the review process, Apple will consider various factors such as the functionality of your app, its user interface, and its compliance with their App Store Review Guidelines. These guidelines cover a wide range of topics, including but not limited to, design, performance, content, and privacy.
It’s essential to familiarize yourself with these guidelines before submitting your app to ensure it meets all the requirements. Apple provides detailed documentation that outlines their expectations and what they consider acceptable behavior for apps on the App Store.
One important aspect of the review process is to ensure that your app does not contain any prohibited content. This includes explicit or offensive material, misleading information, or any functionality that violates the privacy or security of users. Apple takes these guidelines seriously and will reject apps that fail to comply.
Furthermore, Apple also looks for apps that provide a high-quality user experience. This includes intuitive navigation, responsive design, and optimized performance. If your app crashes frequently or has usability issues, it may not pass the review process.
It’s important to note that the review process typically takes a few days, but it can sometimes take longer, depending on the volume of submissions. Apple strives to maintain a fair and efficient process, ensuring every app receives a thorough evaluation.
If your app passes the review process, it will be approved and made available on the App Store for users to download and enjoy. However, if there are issues or concerns, Apple’s review team will provide you with feedback explaining the reasons for rejection or requesting necessary changes.
Upon receiving feedback, you will have the opportunity to make the required adjustments and resubmit your app for another review. Apple’s goal is to work with developers to ensure that their apps meet the desired standards and deliver the best possible experience to users.
Once your app is approved and live on the App Store, you will have the opportunity to update it regularly with new features, bug fixes, and enhancements. However, it’s important to note that any updates you make will also go through the same app review process to ensure continued compliance with the guidelines.
Troubleshooting Common Approval Issues
So, you have developed an amazing app and eagerly submitted it for review on the App Store. However, you received an email stating that your app has been rejected. Don’t panic! App rejections are common and often due to easily fixable issues. In this section, we will discuss some of the most common approval issues and provide troubleshooting tips to help you get your app approved.
1. UI/UX Design: One of the main reasons for app rejections is an inadequate user interface or user experience design. Apple emphasizes the importance of intuitive and user-friendly interfaces. Ensure that your app has a clean and visually appealing design that adheres to Apple’s design guidelines. Double-check for any broken links, unresponsive buttons, or confusing navigation that may hinder user experience.
2. App Crashes: Another common issue is app instability or frequent crashes. Apple wants to ensure a smooth and error-free user experience. Test your app thoroughly on different devices and iOS versions before submission to identify and fix any bugs or performance issues. Use crash reporting tools to track and address crash reports efficiently.
3. Functionality: Apple expects apps to have clear and well-defined functionalities. Check that all the features and functionalities you mentioned in your app description are working as intended. Avoid any hidden or broken features that may lead to rejection. Provide clear instructions or onboarding screens to guide users through the app’s functionality.
4. Inadequate Content: Your app’s content, including text, images, and multimedia, must comply with Apple’s guidelines. Avoid any offensive or inappropriate content. Ensure that you have all the necessary rights and permissions for the content used in your app. Also, provide accurate and up-to-date information to avoid rejection on the grounds of misleading or false content.
5. Privacy and Data Security: Apple values user privacy and data security. Make sure your app collects and uses personal data only when necessary and with user consent. Clearly explain your data handling practices in the app’s privacy policy. Implement appropriate security measures to protect user data from unauthorized access or breaches.
6. App Name and Description: Your app’s name and description should be clear, concise, and accurately represent what your app does. Avoid using misleading or generic keywords in your app’s metadata. Apple may reject apps with names or descriptions that infringe on trademarks or violate App Store guidelines.
7. In-App Purchases: If your app offers in-app purchases, ensure that they are functioning correctly. Apple requires that developers clearly state any subscription or purchase terms, including pricing, duration, and any applicable restrictions. Test your in-app purchase flow thoroughly before submission to avoid rejection.
8. Use of Third-Party Libraries: If your app uses third-party libraries or frameworks, ensure that they are properly integrated and adhere to Apple’s guidelines. Check for any compatibility issues or conflicts with Apple’s APIs. Provide proper attribution and licensing information for any third-party libraries used in your app.
9. Device Compatibility: Apple requires developers to ensure that their apps are compatible with multiple devices and iOS versions. Test your app on different screen sizes and resolutions to ensure a seamless experience across devices. Address any layout or functionality issues specific to certain devices or iOS versions.
10. App Store Review Guidelines: Lastly, familiarize yourself with Apple’s App Store Review Guidelines and ensure your app complies with them. These guidelines cover various aspects such as content, functionality, design, and more. Regularly check for any updates to the guidelines to avoid potential rejection issues.
By addressing these common approval issues and making the necessary corrections, you can increase the chances of getting your app approved successfully. Remember, app rejections are an opportunity for improvement and ensuring a better user experience. Pay attention to detail, follow the guidelines, and persevere in your app development journey.
Conclusion
Approving apps on your iPhone is a simple and necessary process to ensure a safe and enjoyable mobile experience. Whether you’re browsing the App Store or installing apps from external sources, taking a few minutes to review and evaluate the app can save you from potential security risks and disappointments.
By following the steps outlined in this article, you can confidently navigate the app approval process. Remember to always read user reviews, verify the app developer’s reputation, and pay attention to app permissions before granting access to your device’s features and data.
With a little bit of caution and due diligence, you can fill your iPhone with apps that enhance your productivity, entertainment, and overall mobile experience. Stay informed, stay safe, and enjoy exploring the vast world of apps that are available for your iPhone.
FAQs
1. How do I approve apps on my iPhone?
To approve apps on your iPhone, follow these steps:
- Open the App Store on your iPhone.
- Tap on your profile picture or the silhouette icon in the upper-right corner of the screen.
- Scroll down and tap on “Purchased.”
- You will see a list of all the apps you have downloaded or purchased. Find the app that you want to approve and tap on it.
- On the app page, locate the “Not on this iPhone” tab and tap on it.
- This will show all the apps that you have purchased but are not currently installed on your iPhone.
- Find the app you want to approve and tap on the cloud-shaped download icon next to it.
- The app will begin downloading and installing on your iPhone.
- Once the app is installed, it will be available on your home screen, and you can now use it.
2. Why do I need to approve apps on my iPhone?
By approving apps on your iPhone, you ensure that only authorized and trusted applications are installed on your device. This helps protect your privacy, security, and overall user experience on your iPhone. It prevents malicious or unverified apps from being installed, reducing the risk of malware or unauthorized access to your personal information.
3. Can I approve apps remotely on my iPhone?
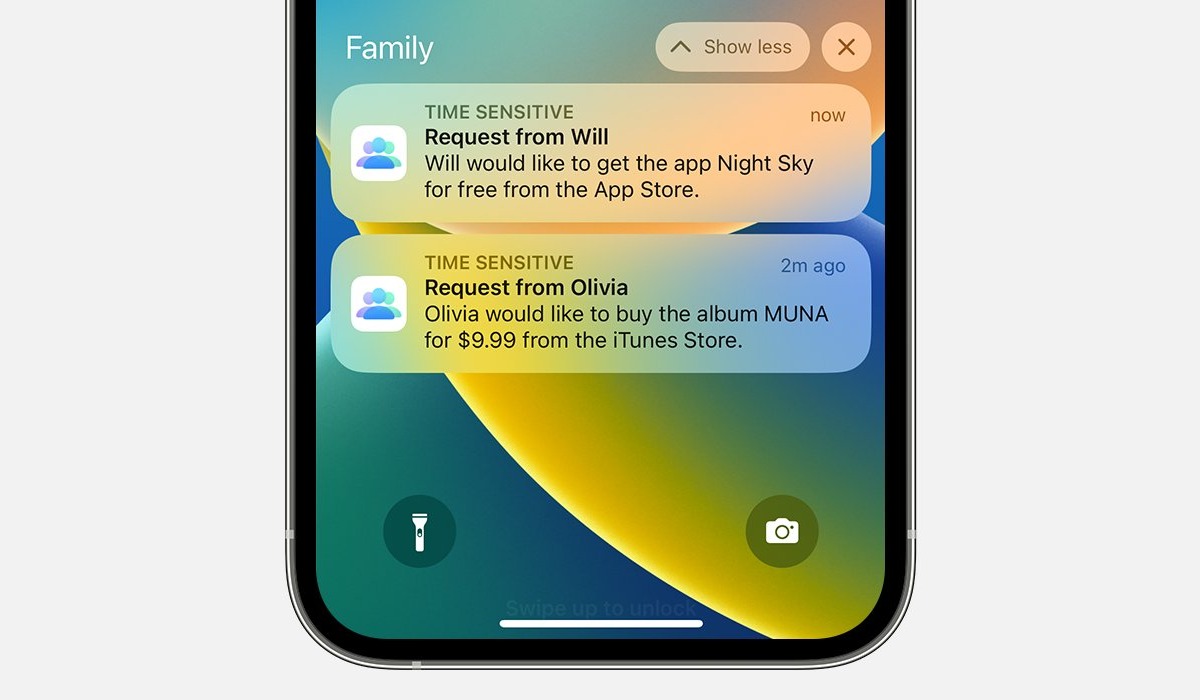
Yes, you can approve apps remotely on your iPhone by enabling the “Ask to Buy” feature in Family Sharing. This feature allows parents or guardians to approve app purchases or downloads made by family members, especially children, from their own devices. To enable this feature, go to Settings > [Your Name] > Family Sharing > Ask to Buy, and toggle the switch to enable it.
4. What if I accidentally decline an app approval on my iPhone?
If you accidentally decline an app approval on your iPhone, don’t worry. Simply open the App Store and follow these steps:
- Tap on your profile picture or the silhouette icon in the upper-right corner of the screen.
- Scroll down and tap on “Purchased.”
- Look for the app you accidentally declined and tap on it.
- On the app page, tap on the cloud-shaped download icon to reinstall the app.
- The app will start downloading and installing on your iPhone, and you can now use it.
5. Can I disable app approvals on my iPhone?
Yes, you can disable app approvals on your iPhone by turning off the “Ask to Buy” feature in Family Sharing. Keep in mind that disabling this feature may allow family members, especially children, to install apps without requiring your approval. To disable “Ask to Buy,” go to Settings > [Your Name] > Family Sharing > Ask to Buy, and toggle the switch to disable it.