
Apple Pay, the revolutionary mobile payment system developed by Apple, has made it incredibly easy to make payments with just a simple tap of your iPhone or Apple Watch. But did you know that you can also use Apple Pay to send and receive cash from your friends and family? With the new Apple Pay Cash feature, transferring money has never been more convenient.
In this comprehensive guide, we will walk you through the steps of requesting and receiving cash in Apple Pay. Whether you need to split a bill with your friends, pay back a borrowed amount, or simply send money to a loved one, Apple Pay Cash provides a seamless and secure way to do so.
Keep reading to learn how to make the most out of Apple Pay’s money transfer feature and enjoy the convenience of sending and receiving cash with ease.
Inside This Article
- Setting up Apple Pay Cash
- Requesting cash from contacts
- Receiving cash in Apple Pay
- Managing Apple Pay Cash balance
- Using Apple Pay Cash for purchases
- Conclusion
- FAQs
Setting up Apple Pay Cash
Apple Pay Cash is a convenient and secure way to send and receive money directly through your iPhone or other Apple devices. Before you can start using this feature, you’ll need to set it up on your device. Follow these simple steps to get started:
- Make sure you have the latest iOS version: To use Apple Pay Cash, ensure that your device is running on iOS 11.2 or later. You can check your iOS version by going to Settings > General > About and looking for the “Software Version” information.
- Link a debit card or credit card to Apple Wallet: Apple Pay Cash requires you to have a valid payment method linked to your Apple Wallet. Open the Wallet app on your device and follow the instructions to add your debit or credit card. If you already have a card linked, you can skip this step.
- Verify your identity: Apple Pay Cash adheres to financial regulations and requires users to verify their identity. In the Wallet app, navigate to Apple Pay Cash, tap on “Set Up Apple Pay Cash,” and follow the prompts to verify your identity. You may be asked to provide your name, address, and the last four digits of your Social Security number.
- Agree to terms and conditions: Review and accept the terms and conditions for Apple Pay Cash. These terms outline the rights and responsibilities of users when using this feature.
- Set up a security code: To protect your Apple Pay Cash transactions, set up a unique security code or enable Touch ID or Face ID. This will ensure that only you can authorize payments and access your funds.
Once you complete these steps, you’ll be ready to use Apple Pay Cash to send and receive money with ease. Remember to keep your device secure and never share your security code or Apple ID password with anyone.
Requesting cash from contacts
One of the convenient features of Apple Pay is the ability to request cash from your contacts. Whether you need to split a bill, borrow some money, or simply collect funds owed to you, requesting cash through Apple Pay is a quick and hassle-free process.
To request money from your contacts, follow these simple steps:
- Open the Apple Pay app on your iPhone or iPad.
- Tap on the “Contacts” tab at the bottom of the screen to access your list of contacts.
- Select the contact from whom you want to request money.
- Tap on the “Request” button, which is denoted by a dollar sign ($).
- Enter the amount you are requesting and add a note if necessary.
- Tap “Send” to complete the request.
Your contact will receive a notification that you have requested cash from them. They can then choose to approve or decline the request. If your contact approves the request, the requested amount will be deducted from their Apple Pay balance or linked bank account and transferred to your Apple Pay balance.
It’s worth noting that requesting cash from contacts can only be done with individuals who are using Apple Pay and have the necessary funds available. If your contact does not have Apple Pay or sufficient funds, they will not be able to fulfill your request.
Additionally, if you have multiple requests pending with the same contact, Apple Pay will consolidate them into a single notification for easy management and processing.
By requesting cash from your contacts through Apple Pay, you can streamline the process of money transfer and avoid the inconvenience of handling physical cash or using other payment apps.
Remember to exercise discretion and etiquette when requesting money from your contacts, and make sure to settle any outstanding debts promptly to maintain a healthy financial relationship.
Receiving cash in Apple Pay
Apple Pay has made it incredibly convenient to send and receive money with just a few taps on your iPhone or iPad. Whether you’re splitting a bill or reimbursing a friend, the process of receiving cash in Apple Pay is seamless and efficient. Let’s explore how you can easily receive cash through Apple Pay.
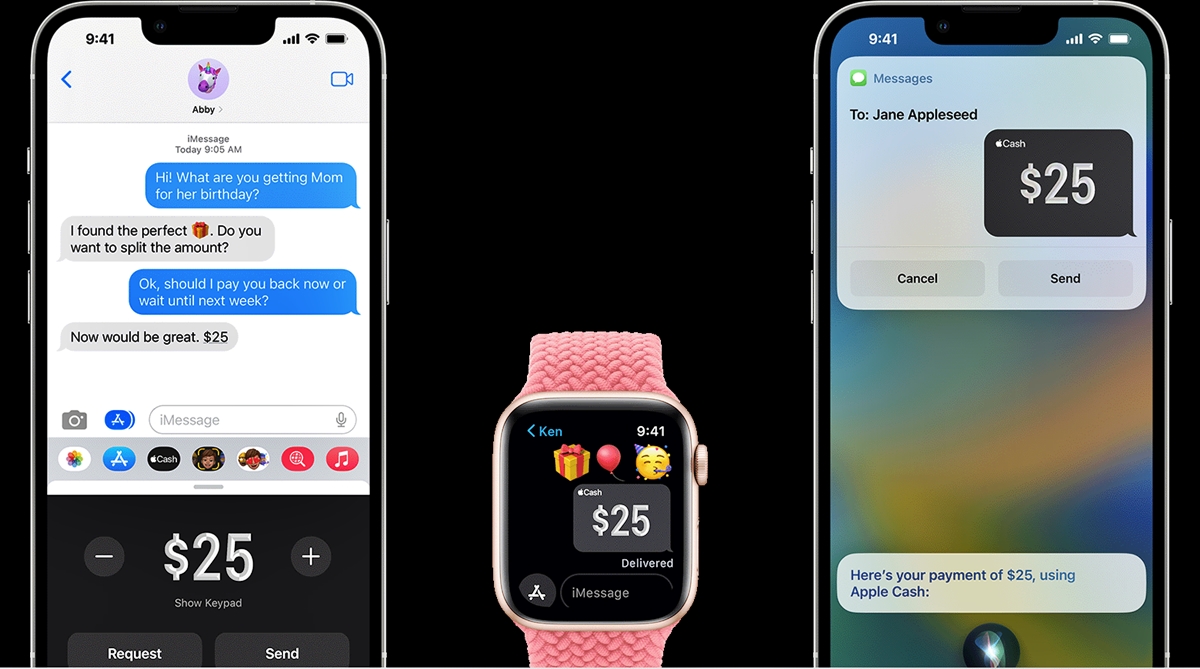
To receive cash in Apple Pay, start by opening the Messages app on your device. Tap on the conversation with the person who wants to send you money. Once you’re in the conversation, you’ll see the Apple Pay icon, which resembles a dollar sign, just above the keyboard.
Tap on the Apple Pay icon to bring up the payment interface. Enter the amount you’re expecting to receive, and you can even add a note to specify the purpose of the payment. Once you’ve filled in the details, tap on the “Request” button to send the payment request to your contact.
When you send a payment request through Apple Pay, your contact will receive a notification with the request amount and details. They will have the option to approve or decline the request. If they approve your request, the requested amount will be automatically deducted from their Apple Pay balance or linked debit/credit card.
If you have sent a payment request to someone and they haven’t responded, you can send them a gentle reminder. Open the conversation in Messages, tap on the payment request at the top, and then tap on “Remind.” This will send a reminder to your contact, prompting them to take action on the payment request.
Once your contact approves the payment request, the cash will be credited to your Apple Pay balance. You can access your balance by opening the Wallet app. From there, you can either keep the balance for future purchases or transfer it to your bank account.
It’s important to note that while Apple Pay provides a secure and convenient way to receive cash, it’s essential to verify and confirm payments once they are received. Make sure to check your Apple Pay transactions regularly to ensure that all payments are accurately credited to your account, and report any discrepancies to Apple or your bank if necessary.
With Apple Pay, managing and withdrawing your cash is also straightforward. Open the Wallet app, tap on your Apple Pay Cash card, and you’ll find options to manage your balance, add funds, or transfer money to your bank account. Apple Pay even allows you to use your cash balance for online purchases through Apple Pay-supported merchants.
Managing Apple Pay Cash balance
Once you have received cash in Apple Pay, you might be wondering how to manage and utilize the balance. Here are some simple steps to help you effectively manage your Apple Pay Cash balance.
1. Checking your balance: To view your Apple Pay Cash balance, open the Wallet app on your iPhone and tap on your Apple Pay Cash card. The available balance will be displayed on the screen.
2. Adding funds: If your balance is running low, you can easily add funds to your Apple Pay Cash balance. Go to the Wallet app, tap on your Apple Pay Cash card, and then tap on “Add Money.” Enter the amount you wish to add and confirm the transaction. The funds will be immediately available in your balance for future use.
3. Sending money: With Apple Pay Cash, you can easily send money to other people. Open the Messages app, start a conversation with the person you want to send money to, and then tap on the Apple Pay button. Enter the amount and confirm the payment. The funds will be deducted from your Apple Pay Cash balance.
4. Paying with Apple Pay: Your Apple Pay Cash balance can be used to make purchases at participating retailers that accept Apple Pay. Simply hold your iPhone or Apple Watch near the contactless payment terminal and authenticate the transaction using Face ID, Touch ID, or your passcode. The purchase amount will be deducted from your balance.
5. Transferring money to your bank account: If you want to access the funds in your Apple Pay Cash balance as actual cash, you can transfer it to your linked bank account. Open the Wallet app, tap on your Apple Pay Cash card, and then tap on “Transfer to Bank.” Enter the desired transfer amount and follow the prompts to initiate the transfer. It may take a few business days for the transfer to be completed.
6. Managing your transactions: You can easily keep track of your Apple Pay Cash transactions to monitor your spending. Open the Wallet app, tap on your Apple Pay Cash card, and then scroll down to view the transaction history. This will show you a detailed list of all incoming and outgoing payments.
7. Setting transaction limits: To ensure security and control over your Apple Pay Cash balance, you can set transaction limits. Open the Settings app on your iPhone, navigate to Wallet & Apple Pay, and then select “Apple Pay Cash.” From there, you can set a limit for the maximum amount that can be spent per transaction.
With these simple steps, you can effectively manage your Apple Pay Cash balance and make the most out of your funds. Whether you are sending money to friends, making purchases, or transferring funds to your bank account, Apple Pay Cash provides a convenient and secure way to handle your finances.
Using Apple Pay Cash for purchases
Apple Pay Cash is a convenient and secure way to make purchases using your iPhone or Apple Watch. With Apple Pay Cash, you can link your debit or credit card to your Apple Pay account and use the funds to buy goods and services at participating stores and online platforms. Here’s how you can use Apple Pay Cash for your purchases:
1. Set up Apple Pay Cash: First, make sure you have set up Apple Pay on your iPhone or Apple Watch. You can do this by going to the Settings app, tapping on “Wallet & Apple Pay,” and following the prompts to add your card details.
2. Link your debit or credit card: Once Apple Pay is set up, you’ll need to link your debit or credit card to your Apple Pay Cash account. Open the Wallet app on your iPhone, tap on the “+” sign, and follow the instructions to add your card. Make sure the card you add is eligible for Apple Pay Cash transactions.
3. Make a purchase: To use Apple Pay Cash for your purchases, look for the contactless payment symbol at the checkout counter or on the website you’re shopping from. When you’re ready to pay, simply hold your iPhone or Apple Watch near the payment terminal or select Apple Pay as the payment method online. Your Apple Pay Cash balance will be used to complete the transaction.
4. Confirm the payment: After making a purchase with Apple Pay Cash, you may need to confirm the payment using Face ID, Touch ID, or your passcode. This adds an extra layer of security to ensure that only you can authorize transactions.
5. Track your transactions: Apple Pay Cash keeps a record of all your transactions, making it easy to track your spending. You can view your transaction history in the Wallet app, allowing you to keep tabs on your expenses and manage your budget more effectively.
6. Manage your Apple Pay Cash balance: To replenish your Apple Pay Cash balance, you can transfer money from your linked bank account or receive money from other Apple Pay Cash users. This gives you the flexibility to add funds as needed and ensures you always have enough to make purchases.
Using Apple Pay Cash for purchases is a hassle-free and secure way to shop. It eliminates the need to carry physical cash or credit cards and simplifies the checkout process. With its seamless integration with iPhone and Apple Watch, Apple Pay Cash gives you a convenient way to pay for goods and services with just a tap.
Conclusion
In conclusion, Apple Pay offers a convenient and secure way to request and receive cash from friends and family. With just a few simple steps, you can easily send a personalized payment request and receive funds directly in your Apple Pay account. The integration with iMessage makes it even more seamless, allowing you to send and receive money without even leaving your conversation.
Not only does Apple Pay make it easy to split bills and repay debts, but it also keeps your financial information private and secure. The use of biometric authentication, such as Touch ID or Face ID, adds an extra layer of protection to ensure that only you can authorize transactions. Plus, Apple Pay transactions are encrypted, making it virtually impossible for your payment data to be intercepted.
Whether you need to request money for a shared meal or to pay back a friend, Apple Pay is a fast, reliable, and user-friendly solution. Say goodbye to the hassle of handling cash or struggling with bank transfers. Embrace the simplicity and convenience of Apple Pay and experience a new way of managing your finances.
FAQs
FAQ 1: Can I request cash from someone using Apple Pay?
Yes, you can request cash from someone using Apple Pay. Apple Pay allows users to send and receive money through its platform, making it easy and convenient to split bills or pay back a friend.
FAQ 2: How do I request money using Apple Pay?
To request money using Apple Pay, follow these steps:
- Open the Messages app on your iPhone or iPad.
- Start a new conversation or select an existing conversation with the person you want to request money from.
- Tap on the Apple Pay icon in the app drawer.
- Enter the amount you want to request and add a note if needed.
- Tap on the “Request” button.
Your friend will receive a notification with the amount you requested, and they can easily send you the money through Apple Pay.
FAQ 3: Can I request cash from someone who doesn’t have Apple Pay?
No, you cannot request cash from someone who doesn’t have Apple Pay. Both the sender and the recipient need to have Apple Pay set up on their devices to be able to send and receive money.
FAQ 4: How long does it take to receive cash through Apple Pay?
The time it takes to receive cash through Apple Pay can vary. In most cases, the money will be available in your Apple Pay Cash balance immediately after the sender completes the transaction. However, there may be some instances where it can take up to two business days for the funds to be transferred to your bank account.
FAQ 5: Are there any fees for requesting and receiving cash in Apple Pay?
There are no fees for requesting and receiving cash in Apple Pay if it is sent using a debit card. However, if a credit card is used, there may be a standard 3% credit card fee applied to the transaction amount. It’s always a good idea to check with your bank or card issuer for any potential fees or charges associated with using Apple Pay.