
Are you tired of the generic name of your iPhone? Do you want to personalize it by giving it a unique and meaningful name? You’re in luck! In this article, we will guide you through the process of changing the name of your beloved iPhone. Whether you have just purchased a new iPhone or simply want to refresh the identity of your device, we’ve got you covered.
Changing the name of your iPhone not only adds a personal touch, but it also helps you easily identify and connect with your device in a crowded network. With just a few simple steps, you can give your iPhone a catchy name that truly reflects your individuality or make it easier to distinguish among other devices. So, let’s dive in and explore the different methods to change the name of your iPhone. Whether you’re tech-savvy or a newcomer to the world of smartphones, you’ll find our guide easy to follow and implement.
Inside This Article
- Introduction
- Step 1: Accessing Settings – Opening the Settings app – Navigating to General
- Step 2: Locating the Device Name – Finding the ‘About’ section – Identifying the current device name
- Step 3: Editing the Device Name – Tapping on the device name – Entering the desired name
- Step 4: Saving Changes- Confirming the new name- Verifying the updated device name in different settings and apps
- Conclusion
- FAQs
Introduction
Changing the name of your iPhone can be a fun and personal way to customize your device. Whether you want to give it a unique name that reflects your personality or simply differentiate it from other iPhones when connecting Bluetooth devices, changing the name is a simple and straightforward process. In this article, we will guide you through the steps to change the name of your iPhone and provide some important considerations before doing so.
Before we dive into the process, let’s explore the reasons why changing the name of your iPhone can be beneficial. Firstly, it allows you to add a personal touch to your device. In a sea of identical iPhones, having a unique name not only sets yours apart but also makes it feel more personal and special. Additionally, changing the name can help you easily identify your iPhone when connecting to other devices, such as Bluetooth speakers or your car’s audio system.
Now that you understand the benefits, let’s proceed with the step-by-step process of changing the name of your iPhone:
Step 1: Accessing Settings – Opening the Settings app – Navigating to General
If you’re looking to change the name of your iPhone, you’ll need to access the device’s settings. The Settings app on your iPhone is where you can customize various aspects of your device, including its name. Here’s a step-by-step guide on how to access the Settings app and navigate to the General section:
- Unlock your iPhone: Start by unlocking your iPhone using either your passcode, Touch ID, or Face ID.
- Locate the Settings app: The Settings app is represented by a gear icon and is usually located on your iPhone’s home screen. You can quickly find it by swiping down on your home screen and utilizing the search bar at the top of the screen. Simply type “Settings” and tap on the app icon that appears.
- Open the Settings app: Tap on the Settings app icon to open it. Once opened, you’ll be presented with the main settings menu.
- Navigate to the General section: Scroll down the settings menu until you find the option labeled “General.” It should be towards the top of the list.
- Tap on General: Once you’ve located the General option, tap on it to access the general settings of your iPhone.
You have now successfully accessed the Settings app and navigated to the General section of your iPhone. The General section is where you’ll find a variety of options to customize your device, including the ability to change its name.
Step 2: Locating the Device Name – Finding the ‘About’ section – Identifying the current device name
Once you have accessed the Settings app and navigated to the General section, it’s time to locate the device name. Here’s how you can find it:
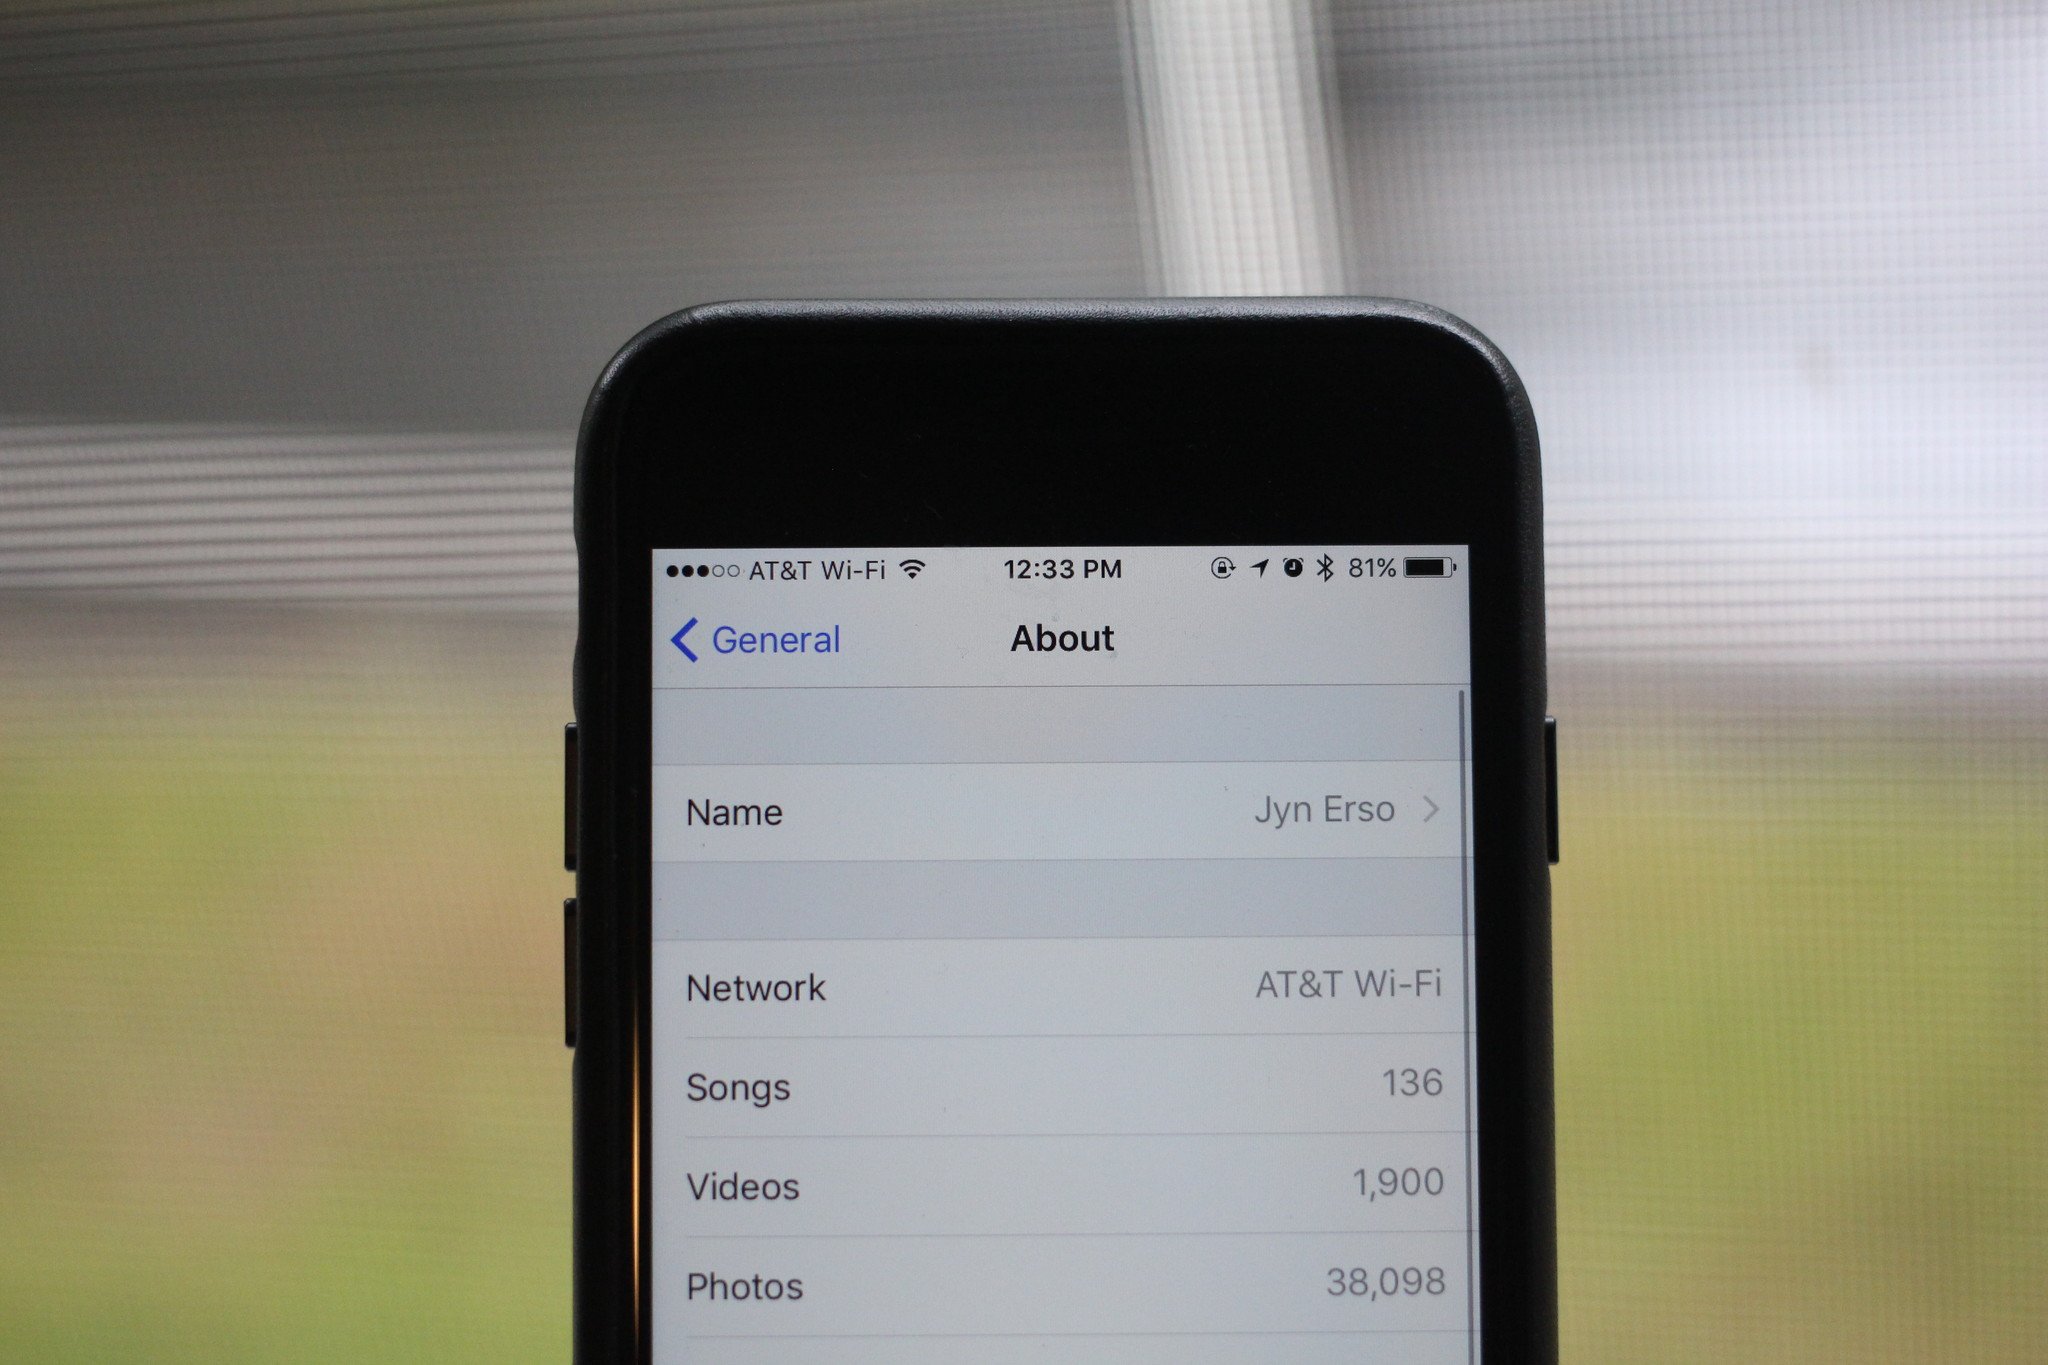
- Finding the ‘About’ section: Scroll down the General settings page until you see the ‘About’ option. Tap on it to access detailed information about your iPhone.
- Identifying the current device name: Within the ‘About’ section, look for the field labeled ‘Name.’ This is where your iPhone’s current name is displayed. The name you see here is what other devices will see when they are in close proximity.
It’s important to note that the default device name is typically the model of your iPhone (e.g., iPhone 12, iPhone SE), followed by your name (e.g., John’s iPhone). However, you have the freedom to change it to something more personalized or unique to reflect your style or preferences.
Before moving on to the next step, take a moment to familiarize yourself with the current device name displayed in the ‘About’ section. This will help ensure that you correctly identify it when you proceed to change it in the upcoming steps.
Step 3: Editing the Device Name – Tapping on the device name – Entering the desired name
Once you have located the ‘About’ section in the General settings, you are ready to edit the device name. Follow the steps below to change the name of your iPhone:
- Tap on the device name: Within the About section, you will see the current name of your iPhone. It is usually listed at the top. Tap on it to proceed with the editing process.
- Enter the desired name: A text box will appear, allowing you to modify the current device name. Simply delete the existing name and enter the new name of your choice. Be creative! You can use your name, a unique nickname, or a fun label that reflects your personality.
Keep in mind that there are a few things to consider when choosing a new name for your iPhone. Make sure it’s easily recognizable to you, especially if you have multiple Apple devices. You may also want to avoid using any personal or sensitive information in the device name, as it could potentially be visible to others when connecting to Wi-Fi networks or using certain apps.
Once you have entered the desired name, double-check for any spelling errors or typos. It’s always a good idea to ensure the name is accurate before finalizing the change. Once you’re satisfied with the new name, tap on ‘Done’ or ‘Save’ (depending on your iOS version) to apply the changes.
It’s important to note that changing the device name does not affect the functionality of your iPhone. It is merely a cosmetic change that allows you to personalize your device and make it more identifiable to you. The new name will appear when you connect your iPhone to other devices (such as a computer or Bluetooth accessories) or when sharing your Wi-Fi network.
Now that you have successfully edited the device name, your iPhone will be identified by the new name you have chosen. Enjoy your personalized iPhone experience!
Step 4: Saving Changes- Confirming the new name- Verifying the updated device name in different settings and apps
After entering the desired name for your iPhone, it’s time to save the changes and make sure that the new name has been successfully applied. Here’s how you can do it:
- Confirming the new name:
- Verifying the updated device name in different settings and apps:
- Settings:
- Bluetooth:
- iCloud:
- iMessage:
- iTunes:
Once you have entered the desired name for your device, simply tap on “Done” or “Save” depending on your device’s interface. This will confirm and save the changes you made to the device name.
Now, it’s time to check if the updated device name reflects across various settings and apps on your iPhone. Here’s where you can verify the changes:
Go back to the main Settings menu and navigate to the “General” section. Tap on “About” and you should see the updated device name listed under the “Name” field.
If you have any Bluetooth devices connected to your iPhone, the updated device name should be visible when you check the connected devices list in the Bluetooth settings.
If you use iCloud services, the updated device name should also be reflected when you access your iCloud settings.
If you use iMessage, the updated device name should be visible to your contacts when they receive messages from you. However, keep in mind that this might take some time to propagate and update across all devices.
If you connect your iPhone to a computer and open iTunes, the updated device name should be displayed when you select your device in iTunes.
By verifying the updated device name in these different settings and apps, you can ensure that the changes you made have been applied correctly. If you notice any inconsistencies or the new name doesn’t appear as expected, you can go back and repeat the steps mentioned earlier to modify the device name again.
Changing the name of your iPhone can be a simple yet effective way to personalize your device and make it more distinct. Whether you want to add your name or a creative nickname, following these steps will allow you to easily customize the device name to your preference. So go ahead, give your iPhone a new identity that truly reflects your style and personality!
Conclusion
In conclusion, changing the name of your iPhone is a simple process that can personalize your device and make it feel more like your own. Whether you want to use your own name, a catchy phrase, or something unique, the steps outlined in this article should help you achieve that goal. By following these instructions, you can easily change the name of your iPhone through the Settings app. Remember, the new name will be visible to other devices when you connect to Bluetooth or Wi-Fi networks, so choose a name that reflects your personality or makes a statement. Don’t be afraid to get creative and have fun with it!
So, what are you waiting for? Take a few moments to customize your iPhone and give it a name that truly represents you. Show off your individuality and make a statement with a unique iPhone name. Personalize your device and make it stand out from the crowd. Happy renaming!
FAQs
1. Can I change the name of my iPhone?
Yes, you can easily change the name of your iPhone. By following a few simple steps, you can give your device a personalized name that reflects your style and personality.
2. Why would I want to change the name of my iPhone?
There could be various reasons why you would want to change the name of your iPhone. Perhaps you purchased a pre-owned device and want to make it truly yours. Or maybe you just want to have a unique and distinct name for your phone that stands out from the rest.
3. How do I change the name of my iPhone?
To change the name of your iPhone, go to the “Settings” app on your device. From there, tap on “General” and then select “About”. On the next screen, you should see the option to edit the name of your iPhone. Simply tap on it, enter the new name, and then tap “Done” to save the changes.
4. Will changing the name of my iPhone affect its functionality?
No, changing the name of your iPhone will not affect its functionality in any way. The name is purely cosmetic and doesn’t have any impact on the performance or features of the device. It is simply a way for you to customize and personalize your phone.
5. Can I change the name of my iPhone back to its original name?
Yes, you can change the name of your iPhone back to its original name at any time. Just follow the same steps mentioned earlier to access the name editing option in the “Settings” app. Simply delete the current name and enter the original name, then tap “Done” to save the changes.