
Are you looking for a comprehensive guide on how to program a Polycom phone? You’ve come to the right place! Whether you’re a business owner setting up your office or an IT professional tasked with configuring the phones, this article will walk you through the steps to program your Polycom phone with ease. Polycom phones are known for their advanced features and robust functionality, making them a popular choice in the business world. From setting up the phone lines to customizing the settings, we’ll cover everything you need to know to maximize the potential of your Polycom phone. So grab your phone and let’s dive into the world of programming Polycom phones!
Inside This Article
- Overview
- Preparing Your Polycom Phone
- Programming Buttons on Your Polycom Phone
- Configuring Call Features on Your Polycom Phone
- Conclusion
- FAQs
Overview
If you are a proud owner of a Polycom phone and want to make the most of its features, programming the phone to suit your needs is essential. By customizing the buttons and configuring call features, you can streamline your communication process and maximize your productivity. In this article, I will guide you through the process of programming a Polycom phone, step by step.
Whether you are a business professional, a remote worker, or a home user, programming your Polycom phone allows you to personalize your device to your specific requirements. From speed dials and intercom buttons to call forwarding and voicemail settings, you can tailor your phone’s functionality to improve efficiency and convenience.
Before diving into the programming process, it’s important to ensure that you have the necessary information and tools. Make sure you have access to the phone’s administrative interface and a PC or laptop with a web browser. Additionally, familiarize yourself with the phone’s user manual, as it will provide detailed instructions and specifications.
Once you have gathered all the necessary resources, you can proceed to the next sections, where I will explain the steps for preparing your Polycom phone, programming buttons, and configuring call features. Follow along with the instructions, and soon you’ll have a fully customized Polycom phone that caters to your unique communication needs.
So, let’s get started and unlock the full potential of your Polycom phone by diving into the exciting world of programming!
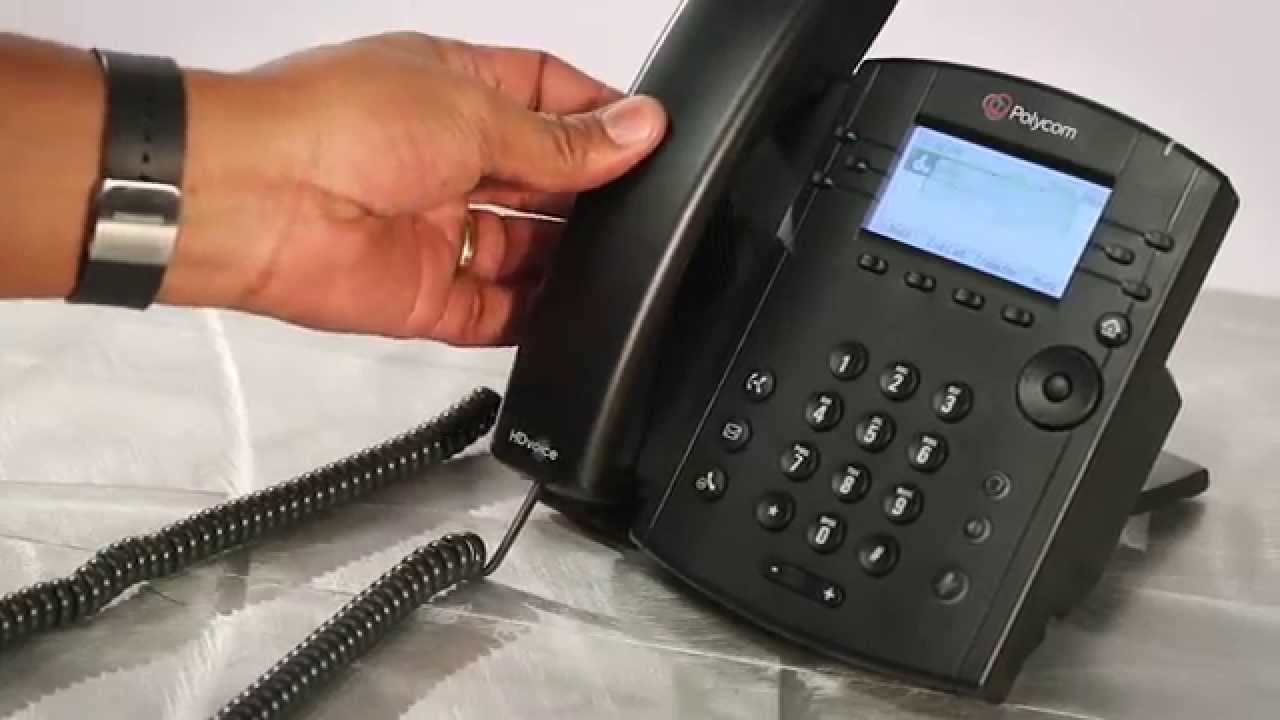
Preparing Your Polycom Phone
Before you can start using your Polycom phone, there are a few steps you need to take to ensure it is properly prepared. These steps will help you set up your phone and customize it to meet your specific needs. Here’s a guide on how to prepare your Polycom phone:
- Unpack and Connect: Start by unpacking your Polycom phone and its accessories. Connect one end of the Ethernet cable to the network port on the phone and the other end to the network jack on your wall. Connect the handset and power adapter to their corresponding ports.
- Power On: Once everything is connected, power on the Polycom phone by plugging in the power adapter. The phone will go through a boot-up process, so give it a few moments to start up.
- Set Network Configuration: Once the phone powers on, you will need to configure the network settings. Navigate to the phone’s settings menu and select the network configuration option. Here, you can input the necessary information such as IP address, subnet mask, gateway, and DNS settings. Make sure to save the changes after you’ve entered the required information.
- Sign In to Your Account: After setting up the network configuration, you will need to sign in to your account. This will require your username and password. Enter the credentials provided to you by your service provider or system administrator.
- Customize Display and Audio Settings: Once signed in, you can proceed to customize the display and audio settings on your Polycom phone. Adjust the brightness, contrast, and backlight settings to make the display comfortable for your eyes. You can also adjust the volume and ringtone settings to your preferred levels.
- Configure Call Forwarding and Voicemail: Depending on your preferences, you may need to set up call forwarding and voicemail on your Polycom phone. Navigate to the call settings menu and select the appropriate options to configure call forwarding rules and set up your voicemail.
By following these steps, you will have successfully prepared your Polycom phone for use. It’s important to ensure that each step is completed correctly to ensure the optimal functionality of your phone.
Programming Buttons on Your Polycom Phone
One of the great features of Polycom phones is the ability to program the buttons according to your needs. This allows you to have quick access to frequently used functions and features. Whether it’s speed dialing, call transfer, or accessing specific applications, programming buttons can greatly enhance your productivity and efficiency. In this section, we will guide you through the process of programming buttons on your Polycom phone.
The first step in programming the buttons is to identify the available programmable buttons on your Polycom phone. These buttons are typically located on the sides or below the screen of the phone. They are labeled with numbers or icons, indicating their functionality. You can refer to the user manual of your specific Polycom model to find the exact layout of the programmable buttons on your phone.
Once you have identified the programmable buttons, the next step is to access the phone’s programming menu. To do this, press the “Menu” button on your Polycom phone. This will bring up a list of options on the phone’s display. Navigate through the menu using the arrow keys and locate the “Settings” option. Press the “Select” button to access the settings menu.
In the settings menu, look for the “Preferences” or “Button Configuration” option. This option may vary slightly depending on the model of your Polycom phone. Once you find the button configuration option, select it and you will be presented with a list of available buttons on your phone’s screen.
Choose the button that you want to program and select it. This will open up a list of functions and features that can be assigned to the selected button. Depending on your phone model, you may have different options to choose from, such as speed dial, call transfer, call park, and more.
Select the desired function or feature from the list. You may be prompted to enter additional information, such as the phone number for speed dial or the extension for call transfer. Follow the on-screen instructions to complete the programming process for the selected button.
Repeat the above steps for each button that you want to program on your Polycom phone. You can assign different functions and features to each button, based on your personal preferences and usage.
Once you have finished programming the buttons, save your changes and exit the programming menu. Your Polycom phone is now ready to use with the newly programmed buttons. You can now enjoy the convenience and efficiency of having quick access to your desired functions and features at the touch of a button.
Remember, if you ever need to change or reprogram the buttons on your Polycom phone, simply follow the same process outlined above. With the ability to customize the buttons, you have the flexibility to adapt your phone to your specific needs and workflows.
Configuring Call Features on Your Polycom Phone
Your Polycom phone comes with a range of call features that can enhance your communication experience. Whether you need to forward calls, set up call waiting, or enable call transfer, configuring these call features is essential for efficient and effective phone usage. In this section, we will guide you through the process of setting up and customizing call features on your Polycom phone.
1. Call Forwarding: Call forwarding allows you to redirect incoming calls to another number. To configure call forwarding on your Polycom phone, follow these steps:
- Press the “Menu” button on your phone’s keypad.
- Navigate to the “Settings” option and press “Select”.
- Select “Call Features” and then “Forwarding”.
- Choose the type of call forwarding you want to set up (e.g., unconditional, busy, or no answer).
- Enter the phone number to which you want to forward calls.
- Save your settings and exit the menu.
2. Call Waiting: Call waiting ensures that you never miss an important call while on another call. To activate call waiting on your Polycom phone, follow these steps:
- Press the “Menu” button on your phone’s keypad.
- Select “Settings” and then “Call Features”.
- Choose “Call Waiting” and turn it on.
- Save your settings.
3. Call Transfer: Call transfer allows you to transfer an ongoing call to another internal or external number. To configure call transfer on your Polycom phone, use the following steps:
- During an active call, press the “Transfer” button on your phone’s keypad.
- Enter the number to which you want to transfer the call.
- Press “Transfer” again to complete the transfer.
4. Do Not Disturb (DND): The Do Not Disturb feature enables you to temporarily stop all incoming calls and notifications. To enable Do Not Disturb on your Polycom phone, follow these steps:
- Press the “Menu” button on your phone’s keypad.
- Select “Settings” and then “Call Features”.
- Choose “Do Not Disturb” and turn it on.
- Save your settings.
5. Speed Dial: Speed dial allows you to quickly call frequently dialed numbers. To set up speed dial on your Polycom phone, follow these steps:
- Press the “Menu” button on your phone’s keypad.
- Select “Settings” and then “Call Features”.
- Choose “Speed Dial” and enter the phone number you want to assign to a speed dial key.
- Save your settings.
Remember, these are just a few examples of the call features you can configure on your Polycom phone. Explore your phone’s settings menu to discover additional features and customization options that can enhance your calling experience.
Conclusion
Programming a Polycom phone is a straightforward process that allows you to customize your device to meet your specific needs. Whether you need to set up call forwarding, configure speed dial options, or adjust audio settings, the programming options available on Polycom phones enable you to optimize your communication experience.
By following the guidelines and steps provided in this article, you can confidently navigate the menu system of your Polycom phone and make the necessary programming adjustments. Whether you are a business professional, a telecommuter, or a home user, taking the time to program your Polycom phone will help you make the most out of its features and improve your overall communication efficiency.
Remember to consult the user manual specific to your Polycom phone model for more detailed instructions or reach out to the Polycom support team if you encounter any issues during the programming process.
Now, armed with the knowledge of how to program your Polycom phone, go ahead and unlock its full potential to enhance your communication capabilities.
FAQs
Q: Can I program my Polycom phone to customize its settings?
A: Yes, you can program your Polycom phone to customize a variety of settings such as ringtone preferences, call forwarding, speed dial numbers, and more. The programming options may vary depending on the specific model of your Polycom phone, but most models offer a straightforward menu-based interface for easy customization.
Q: How do I program speed dial numbers on my Polycom phone?
A: To program speed dial numbers on your Polycom phone, follow these steps:
- Press the “Menu” button on your phone.
- Navigate to the “Settings” or “Features” option using the arrow keys.
- Select “Speed Dial” from the menu.
- Choose an available speed dial slot and enter the desired phone number.
- Save the speed dial entry and assign a name or label if prompted.
Q: Can I program multiple lines on my Polycom phone?
A: Yes, most Polycom phones support multiple lines, allowing you to handle multiple incoming and outgoing calls simultaneously. The exact method for programming multiple lines may vary depending on the model of your Polycom phone, but it generally involves accessing the phone’s settings menu and configuring the line settings accordingly. Refer to the user manual or online resources specific to your phone model for detailed instructions.
Q: How can I program call forwarding on my Polycom phone?
A: To program call forwarding on your Polycom phone, you need to access the call settings or features menu. Follow these general steps:
- Press the “Menu” button on your phone.
- Navigate to the “Settings” or “Features” option using the arrow keys.
- Select “Call Forwarding” from the menu.
- Choose the type of call forwarding you want to set up (e.g., all calls, busy calls, no answer calls).
- Enter the destination number where the calls should be forwarded.
- Save the call forwarding settings.
Q: Is it possible to program a headset or a Bluetooth device with my Polycom phone?
A: Depending on the model of your Polycom phone, you may be able to program and use a headset or a Bluetooth device for hands-free communication. Most Polycom phones have a dedicated headset port or support Bluetooth connectivity. To program and use a headset or Bluetooth device, refer to the user manual provided by the manufacturer or consult online resources specific to your phone model for detailed instructions.