
Welcome to our comprehensive guide on how to set up Apple TV! Apple TV is a powerful streaming device that allows you to enjoy a wide range of entertainment options on your television screen. Whether you’re eager to stream your favorite movies, TV shows, or even play games, Apple TV provides a seamless and user-friendly experience.
In this article, we will walk you through the step-by-step process of setting up your Apple TV. From connecting it to your TV and home network, to signing in with your Apple ID and configuring the settings, we’ve got you covered. Whether you’re a tech-savvy individual or a first-time Apple TV user, our guide will help you get your device up and running in no time.
So, let’s dive in and discover how to unleash the full potential of your Apple TV!
Inside This Article
- Initial Setup
- Connecting Apple TV to your TV
- Connecting to Wi-Fi
- Apple ID and iCloud Setup
- Conclusion
- FAQs
Initial Setup
Setting up your Apple TV is a straightforward process that allows you to enjoy all the amazing features it has to offer. Whether you’re a tech-savvy individual or new to the world of streaming devices, this guide will help you get started. Here are the essential steps to follow for the initial setup:
1. Unbox and connect: Begin by unboxing your Apple TV and locating all the necessary cables. Connect one end of the HDMI cable to your Apple TV and the other end to an available HDMI port on your TV.
2. Power it up: Connect the power cable to your Apple TV and plug it into a power outlet. Ensure that your TV is turned on and set to the correct HDMI input to receive the signal from your Apple TV.
3. Pair the remote: Your Apple TV comes with a remote that needs to be paired with the device. To do this, simply hold the remote close to your Apple TV and press and hold the “Menu” and “Volume Up” buttons together for a few seconds. Once the remote is paired, you’ll be able to navigate and control your Apple TV.
4. Select language and region: Follow the on-screen instructions to select your preferred language and region. This will ensure that your Apple TV displays the appropriate content and settings for your location.
5. Connect to Wi-Fi: Next, you’ll need to connect your Apple TV to your Wi-Fi network. Navigate to the “Settings” menu and select “Network.” Choose your Wi-Fi network from the available options, enter the password if prompted, and wait for the connection to be established.
6. Sign in with Apple ID: Your Apple ID is crucial for accessing various features, apps, and services on your Apple TV. If you have an existing Apple ID, sign in by entering your username and password. If you don’t have an Apple ID, you can create one directly on your Apple TV.
7. iCloud Setup: iCloud allows you to sync your content, such as photos, videos, and music, across multiple Apple devices. Choose whether you want to enable iCloud on your Apple TV and follow the prompts to complete the setup process.
Once you’ve completed these initial setup steps, you’ll be ready to explore the wide range of apps, games, and entertainment options available on your Apple TV. Enjoy streaming your favorite movies, TV shows, and more on the big screen!
Connecting Apple TV to your TV
Setting up your Apple TV and connecting it to your TV is the first step to unlocking a world of entertainment. Whether you’re a movie aficionado or a casual viewer, this process is straightforward and can be done in just a few simple steps.
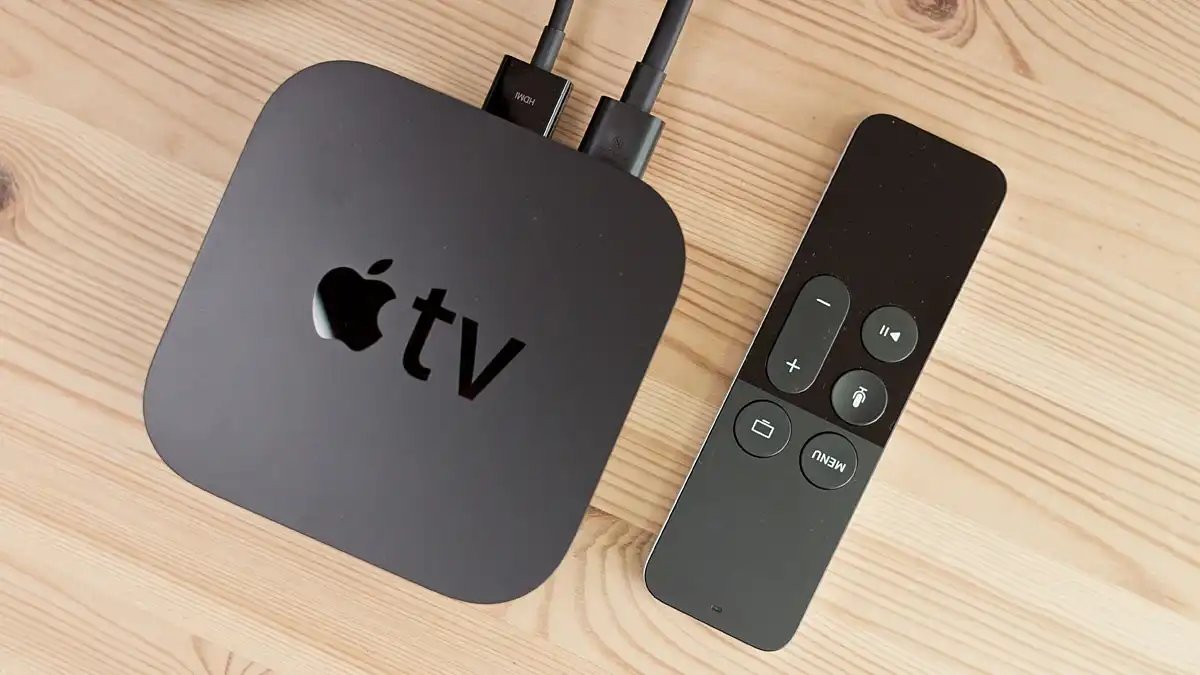
To begin, you’ll need an HDMI cable (not included with Apple TV). This single cable will transmit both high-quality video and audio signals from your Apple TV to your TV. Start by locating the HDMI port on the back of your TV and plug one end of the HDMI cable into it.
Next, connect the other end of the HDMI cable to the HDMI port on your Apple TV. It’s usually located on the back of the device, labeled as “HDMI.” Make sure it’s securely connected to ensure a stable signal transmission.
Now that the cable is connected, you’ll want to power on your TV and Apple TV. Use your TV’s remote control to turn it on and select the HDMI input where your Apple TV is connected. This input might be labeled as “HDMI 1” or “HDMI 2,” depending on your TV model.
Once you’ve selected the correct HDMI input, you should see the Apple TV setup screen displayed on your TV. If not, try cycling through the HDMI inputs until you find the one that corresponds to your Apple TV connection.
That’s it! Your Apple TV is now successfully connected to your TV. You can take it a step further by adjusting the display settings to optimize the picture quality or fine-tune the audio settings for an immersive experience. But in most cases, the default settings will work just fine.
Now you’re ready to explore the vast variety of apps, streaming services, and content available on your Apple TV. From streaming movies and TV shows to playing games and accessing personalized recommendations, the possibilities are endless.
So grab the popcorn, sit back, and enjoy the incredible entertainment experience that Apple TV brings directly to your living room.
Connecting to Wi-Fi
One of the essential steps in setting up your Apple TV is connecting it to a Wi-Fi network. Without a proper internet connection, you won’t be able to access the vast range of content and features that Apple TV has to offer. Here’s a simple guide to help you connect your Apple TV to Wi-Fi:
1. Start by navigating to the “Settings” option on your Apple TV’s home screen. You can do this by using the Apple TV remote and selecting the gear icon.
2. In the “Settings” menu, select “Network” or “General > Network”, depending on your Apple TV model. This will take you to the network settings screen.
3. On the network settings screen, you will see a list of available Wi-Fi networks. Locate and select your desired Wi-Fi network from the list.
4. If your Wi-Fi network is password-protected, you will be prompted to enter the password. Use the on-screen keyboard to enter the correct password, taking care to capitalize letters and input any special characters accurately.
5. Once you have entered the password, select “Connect” or “Join” to connect your Apple TV to the Wi-Fi network.
6. After a few moments, your Apple TV will establish a connection to the Wi-Fi network. You may see a loading or connecting message on the screen during this process.
7. Once the connection is successful, you will see a confirmation message on the screen, indicating that your Apple TV is connected to the Wi-Fi network.
8. You can now proceed to use your Apple TV to stream content, access apps, and enjoy various other features that require an internet connection.
Remember, it’s important to choose a Wi-Fi network with a strong, stable connection to ensure smooth performance and a seamless user experience on your Apple TV.
If you encounter any issues while connecting your Apple TV to Wi-Fi, make sure that your router is properly set up and functioning correctly. You may also want to try restarting your Apple TV and router to resolve any temporary connectivity issues.
So, go ahead and connect your Apple TV to Wi-Fi to unlock a world of entertainment possibilities right from your living room!
Apple ID and iCloud Setup
Setting up your Apple ID and iCloud is a crucial step in getting the most out of your Apple TV. Your Apple ID is the key to accessing a wide range of features and services, including iCloud storage, Apple Music, the App Store, and personalized recommendations. Here’s how to set up your Apple ID and iCloud on Apple TV:
1. Start by navigating to the Settings app on your Apple TV’s home screen. Scroll down and select “Users and Accounts.”
2. Next, choose “Add New Apple ID” to create a new Apple ID or “Sign in to your Apple ID” if you already have one.
3. If you’re creating a new Apple ID, you’ll be prompted to enter your email address and create a password. Make sure to choose a secure password that you can remember easily.
4. After entering your email and password, you’ll be asked to add a rescue email. This is an optional step that helps you recover your Apple ID if you forget your password. It’s recommended to add a rescue email for added security.
5. Once you’ve completed the necessary steps, you’ll be asked to agree to the terms and conditions. Read through them, and if you agree, select “Agree.”
6. At this point, you may be prompted to set up two-factor authentication. This is an additional layer of security that verifies your identity with a trusted device. It’s highly recommended to enable this feature to protect your Apple ID.
7. Now, you’ll be asked to sign in to iCloud. If you’re using an existing Apple ID, your iCloud settings will already be configured. Otherwise, enter your Apple ID and password to sign in.
8. Finally, you can choose to enable or disable iCloud features, such as iCloud Drive, Photos, and iCloud Keychain. These features offer seamless integration with other Apple devices, allowing you to access your files, photos, and passwords across multiple devices.
Once you’ve completed these steps, your Apple ID and iCloud should be fully set up on your Apple TV. You’ll now have access to a range of features that enhance your Apple TV experience, including personalized recommendations, synced content, and secure storage of your data. Enjoy exploring all that Apple TV has to offer!
Conclusion
Setting up Apple TV is a straightforward and intuitive process that allows users to unlock a myriad of entertainment possibilities. With its sleek design, powerful features, and seamless integration with other Apple devices, Apple TV offers a truly immersive home entertainment experience.
By following the step-by-step instructions provided in this guide, you can easily configure your Apple TV and start enjoying your favorite content on the big screen. Whether you’re streaming movies and shows, playing games, or listening to music, Apple TV provides endless options for entertainment and convenience.
So, if you haven’t set up your Apple TV yet, what are you waiting for? Take advantage of the incredible features and benefits it offers and turn your living room into a captivating multimedia hub. Get ready to indulge in a world of entertainment with Apple TV!
FAQs
1. How do I set up Apple TV?
Setting up Apple TV is a straightforward process. First, connect the Apple TV to your TV using an HDMI cable. Then, plug in the power cable and turn on your TV. Select the appropriate input source on your television to display the Apple TV interface. Follow the on-screen instructions to connect to your Wi-Fi network, sign in with your Apple ID, and configure additional settings such as language preferences and screen resolution.
2. Can I use Apple TV without an Apple device?
Yes, you can use Apple TV without an Apple device. Apple TV functions as a stand-alone media streaming device and can be controlled using its included remote or the Apple TV Remote app available for iOS devices. However, to access certain features like AirPlay or stream content from your iTunes library, you will need an Apple device such as an iPhone, iPad, or Mac.
3. How do I connect Apple TV to my home theater system?
To connect Apple TV to your home theater system, you have a couple of options depending on the available inputs on your system. The most common method is to connect the Apple TV directly to your TV using an HDMI cable and then use an optical or HDMI cable to pass the audio from your TV to the home theater system. Alternatively, if your home theater system has an HDMI input, you can connect the Apple TV directly to the system using an HDMI cable.
4. Can I use Apple TV with a non-smart TV?
Yes, you can use Apple TV with a non-smart TV. The Apple TV device essentially turns your TV into a smart TV by enabling access to streaming services, apps, and other features. Simply connect the Apple TV to your TV using an HDMI cable, and you’ll be able to enjoy all the functionalities offered by Apple TV, such as streaming content, accessing apps, and even playing games.
5. Can I watch Netflix on Apple TV?
Yes, you can watch Netflix on Apple TV. Netflix is available as a pre-installed app on Apple TV. All you need to do is open the app, sign in with your Netflix account, and start streaming your favorite movies and TV shows from the Netflix library. Additionally, you can also use the Siri Remote’s voice control feature to search for specific shows or browse through Netflix’s extensive catalog.