
Are you running out of storage space on your Android phone due to an extensive collection of photos? Don’t worry, we’ve got you covered! Transferring photos from your Android phone to an external hard drive is an excellent solution to free up space and ensure that your precious memories are safely backed up. In this article, we will guide you through the step-by-step process of transferring photos from your Android phone to an external hard drive. Whether you want to organize your photo albums, create a backup, or simply make room for more memories, we’ll provide you with all the necessary information and tips to make the process seamless. Let’s get started and discover how you can easily transfer your photos and protect them for years to come!
Inside This Article
- Overview
- Option 1: Using a USB OTG Cable
- Option 2: Transferring via a Computer
- Option 3: Using Cloud Storage Services
- Option 4: Using a File Manager App
- Conclusion
- FAQs
Overview
Transferring photos from your Android phone to an external hard drive can be a great way to free up storage space on your device and keep your precious memories safe. Whether you have a large collection of photos or want to back up your images for extra security, there are several options available to help you conveniently move your photos to an external hard drive. In this article, we will explore four different methods that you can use to transfer photos from your Android phone to an external hard drive.
From using a USB OTG cable to transferring via a computer, utilizing cloud storage services, or using a file manager app, we will guide you through each method step by step. Whether you’re a tech-savvy individual or a beginner, these methods are simple and can be accomplished with ease.
So, if you’re ready to take control of your photo storage and enjoy the peace of mind that comes with having a backup of your precious memories, let’s dive into the different options you have for transferring photos from your Android phone to an external hard drive.
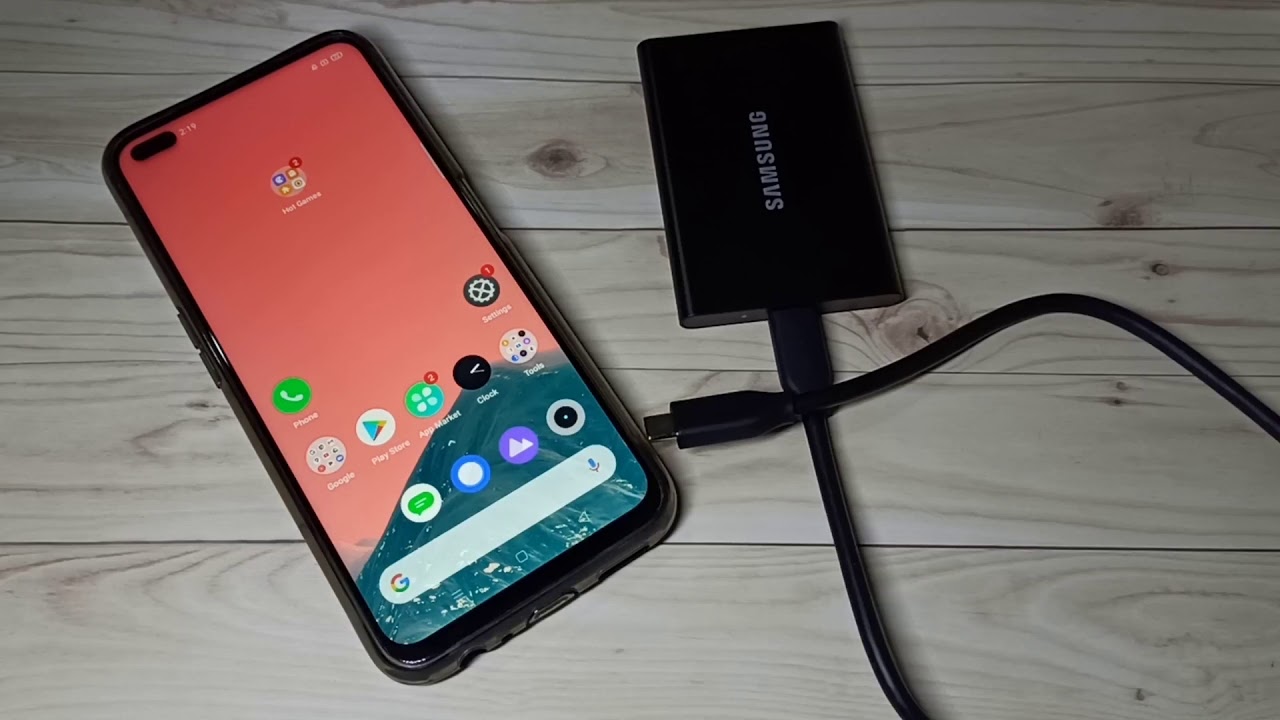
Option 1: Using a USB OTG Cable
If you want to transfer photos from your Android phone to an external hard drive, one convenient option is using a USB OTG (On-The-Go) cable. This cable allows you to connect your Android device directly to the external hard drive, enabling you to transfer files quickly and easily.
To get started, you’ll need a USB OTG cable that is compatible with your Android phone. These cables typically have a micro USB or USB-C connector on one end and a standard USB-A connector on the other end. Once you have the cable, follow these steps:
- Connect the USB OTG cable to your Android phone.
- Connect the external hard drive to the USB-A end of the OTG cable.
- Your Android phone should recognize the external hard drive as an external storage device.
- Open the File Manager app or the Gallery app on your Android phone.
- Navigate to the folder or album containing the photos you want to transfer.
- Select the photos you want to transfer by tapping on them.
- Tap on the options menu (usually represented by three dots or a gear icon).
- Select the “Copy” or “Move” option.
- Navigate to the external hard drive folder where you want to transfer the photos.
- Tap on the options menu again and select the “Paste” option.
- The photos will now be transferred from your Android phone to the external hard drive.
Using a USB OTG cable is a straightforward and efficient way to transfer photos from your Android phone to an external hard drive. It eliminates the need for a computer as an intermediary, allowing you to directly access and transfer files between your phone and the external storage device.
Option 2: Transferring via a Computer
If you prefer to transfer photos from your Android phone to an external hard drive using a computer, you have several options available to you. This method provides a seamless and efficient way to transfer large amounts of data.
Here are the steps to transfer your photos via a computer:
- Connect your Android phone to your computer using a USB cable.
- On your Android phone, swipe down from the top of the screen to access the notification panel, then tap on the USB option.
- Select “File Transfer” or “Media Transfer” mode.
- On your computer, open the file explorer or use the built-in file manager.
- Locate your Android phone in the list of connected devices.
- Open the folder that contains the photos you want to transfer.
- Connect your external hard drive to your computer via USB.
- Open a new window to view the contents of your external hard drive.
- Drag and drop the photos from your Android phone folder to the external hard drive window.
- Wait for the transfer to complete. The speed of the transfer will depend on the size of the files and the speed of your USB connection.
- Once the transfer is complete, safely disconnect your Android phone and the external hard drive from your computer.
Transferring photos via a computer provides a reliable and straightforward method to store your precious memories on an external hard drive.
Remember to organize your transferred photos on your external hard drive for easy access and to free up storage space on your Android phone. You can create folders by date or event to keep your photos organized and easily locate them when needed.
Now that you know how to transfer photos from your Android phone to an external hard drive using a computer, you can enjoy the convenience of having your photos stored in a secure and easily accessible location.
Option 3: Using Cloud Storage Services
Another convenient way to transfer photos from your Android phone to an external hard drive is by utilizing cloud storage services. These services allow you to upload and store your photos securely in the cloud, making them easily accessible from any device with an internet connection. Here are a few popular cloud storage services that you can use:
1. Google Photos: Google Photos is a widely used cloud storage service that offers free storage for high-quality photos. Simply install the Google Photos app on your Android phone, sign in with your Google account, and enable the “Backup & Sync” feature. This will automatically upload your photos to your Google Photos account. You can then access your photos on any device by logging in to your Google account.
2. Dropbox: Dropbox is another popular cloud storage service that allows you to store and sync files across multiple devices. Install the Dropbox app on your Android phone and create an account. You can then upload your photos to your Dropbox account and access them from any device with the Dropbox app installed or through the Dropbox website.
3. Microsoft OneDrive: If you prefer using Microsoft services, OneDrive is an excellent option. Install the OneDrive app on your Android phone and sign in with your Microsoft account. You can then upload your photos to your OneDrive storage and access them on other devices using the OneDrive app or website.
To transfer your photos from your Android phone to an external hard drive using cloud storage services, follow these steps:
- Open the cloud storage app on your Android phone.
- Select the photos you want to transfer to the external hard drive.
- Tap on the “Upload” or “Backup” option to start the upload process.
- Once the upload is complete, open the cloud storage app on your computer.
- Sign in to your account and locate the uploaded photos.
- Download the photos to your computer.
- Connect your external hard drive to your computer.
- Copy and paste or drag and drop the downloaded photos from your computer to the external hard drive.
By using cloud storage services, you can easily transfer your photos from your Android phone to an external hard drive without the need for any physical connections. It provides a convenient and secure way to back up your photos and access them from multiple devices.
Option 4: Using a File Manager App
If you prefer a more organized and intuitive way to transfer photos from your Android phone to an external hard drive, using a file manager app is a great option. These apps provide a user-friendly interface that allows you to easily locate and manage your files.
Here are the steps to transfer photos using a file manager app:
- Download and install a file manager app from the Google Play Store. Some popular options include ES File Explorer, Solid Explorer, and Astro File Manager.
- Launch the file manager app on your Android phone.
- Navigate to the folder where your photos are stored. This is often the DCIM folder, where the camera photos are stored by default.
- Select the photos you want to transfer by long-pressing on them.
- Tap on the menu or options button (usually represented by three dots or lines) and choose the “Move” or “Copy” option.
- Navigate to the external hard drive folder where you want to transfer the photos. This can be a folder you create specifically for storing photos.
- Select the destination folder and tap on the “Move” or “Paste” button to transfer the photos.
- Wait for the transfer process to complete. The time it takes will depend on the size of the photos and the speed of your Android phone and external hard drive.
- Once the transfer is finished, you can safely disconnect your external hard drive from your Android phone.
Using a file manager app provides a convenient way to transfer photos from your Android phone to an external hard drive. It gives you more control over the selection of photos and allows you to easily organize them into specific folders on the external hard drive.
In conclusion, transferring photos from your Android phone to an external hard drive is a simple and effective way to free up space on your device and ensure that your precious memories are safely backed up. With the help of the right tools and step-by-step instructions, you can easily transfer your photos and organize them in a way that suits your needs.
Whether you want to create more storage space on your phone or you just want the peace of mind that comes with having a backup of your photos, the process is straightforward and accessible for users of all levels of tech-savviness.
By following the methods outlined in this guide, you can safely transfer your photos to an external hard drive and keep your Android phone running smoothly. Say goodbye to storage limitations and preserve your memories with ease.
FAQs
1. Can I transfer photos from my Android phone to an external hard drive?
Absolutely! Transferring photos from your Android phone to an external hard drive is a convenient way to free up space on your device and keep your precious memories safe. With the right steps, you can easily transfer your photos to an external hard drive.
2. What do I need to transfer photos from my Android phone to an external hard drive?
To transfer photos from your Android phone to an external hard drive, you’ll need the following:
– An Android phone
– An OTG (On-The-Go) cable or adapter
– An external hard drive with sufficient storage space
– A file manager app on your Android phone (like the ES File Explorer app)
– A USB cable to connect the external hard drive to your Android phone via the OTG cable or adapter.
3. How do I connect my Android phone to an external hard drive?
To connect your Android phone to an external hard drive, follow these steps:
1. Plug the OTG cable or adapter into your Android phone’s charging port.
2. Connect the USB cable from the external hard drive to the OTG cable or adapter.
3. Your Android phone should detect the external hard drive and display its content in the file manager app.
Note: Some Android devices may require enabling the “USB OTG” feature in the settings menu before connecting the external hard drive.
4. How do I transfer photos from my Android phone to an external hard drive?
To transfer photos from your Android phone to an external hard drive, follow these steps:
1. Connect your Android phone to the external hard drive using an OTG cable or adapter.
2. Open the file manager app on your Android phone and navigate to the folder containing the photos you want to transfer.
3. Select the photos you want to transfer by long-pressing on them or using the file manager’s selection feature.
4. Tap on the “Copy” or “Move” option in the file manager app.
5. Navigate to the external hard drive’s folder where you want to transfer the photos.
6. Tap on the “Paste” option to transfer the selected photos to the external hard drive.
7. Wait for the transfer process to complete, and ensure that all the photos have been successfully transferred before disconnecting the external hard drive.
5. Are there any precautions I should take while transferring photos from my Android phone to an external hard drive?
Yes, there are a few precautions you should consider:
– Ensure that both your Android phone and the external hard drive have sufficient battery power to complete the transfer process.
– Make sure the external hard drive is compatible with your Android device and supports the file system used by your phone (usually FAT32 or exFAT).
– Create a backup of your photos before transferring them to the external hard drive, just in case anything goes wrong.
– Avoid disconnecting the external hard drive or interrupting the transfer process while it’s in progress to prevent data loss or corruption.
– Keep your external hard drive in a safe place to protect your photos from physical damage or loss.