
Autocorrect is a convenient feature on Samsung S20 smartphones that helps to prevent typos and incorrect spellings when typing on the device’s keyboard. Whether you’re composing a text message, writing an email, or updating your social media status, autocorrect can save you time and effort by automatically suggesting and correcting words as you type. However, if you’re new to the Samsung S20 or have accidentally disabled autocorrect, you may be wondering how to turn it back on. In this article, we will guide you through the steps to enable autocorrect on your Samsung S20, ensuring that you can type with confidence and accuracy. So, let’s dive in and discover how to make the most of this helpful feature on your Samsung S20.
Inside This Article
- Enabling Autocorrect on Samsung S20-
- Accessing Keyboard Settings-
- Enabling Autocorrect Feature-
- Customizing Autocorrect Options-
- Troubleshooting Autocorrect Issues
- Conclusion
- FAQs
Enabling Autocorrect on Samsung S20-
Autocorrect is a useful feature on smartphones that can save you from embarrassing typing mistakes. If you’re using a Samsung S20, you’ll be pleased to know that enabling autocorrect is a straightforward process. In this article, we’ll guide you through the steps to turn on autocorrect on your Samsung S20.
To start, you need to access the keyboard settings on your Samsung S20. This is where you can find the option to enable or disable autocorrect. To access the keyboard settings, follow these steps:
- Open any app that requires text input, such as Messages or Notes.
- Tap on the text input field to open the keyboard.
- Long press on the comma (,) key until a pop-up menu appears.
- From the pop-up menu, select the gear icon to open the keyboard settings.
Now that you’re in the keyboard settings, you can begin enabling autocorrect. Follow these steps:
- In the keyboard settings, find the “Smart typing” option and tap on it.
- Look for the “Auto replace” or “Autocorrect” option and toggle it on. The label may vary slightly depending on your device’s software version.
Congratulations! You have successfully enabled autocorrect on your Samsung S20. From now on, the autocorrect feature will automatically correct common spelling errors and typos as you type.
If you’re not satisfied with the default autocorrect settings, you can customize them to better suit your preferences. Here’s how you can do it:
- Go back to the keyboard settings by following the steps mentioned earlier.
- In the keyboard settings, locate and tap on the “Auto replace” or “Autocorrect” option.
- You will see a list of suggested corrections and their corresponding replacements. You can edit or add new entries to personalize the autocorrect dictionary.
- Once you’re done customizing the autocorrect options, save your changes and exit the settings menu.
That’s it! You have now learned how to enable and customize autocorrect on your Samsung S20. Enjoy typing with confidence, knowing that autocorrect is there to help you avoid those pesky typos.
In case you encounter any issues with the autocorrect feature, here are a few troubleshooting tips:
- Make sure you have the latest software update installed on your Samsung S20. Updates often include bug fixes and improvements that can resolve autocorrect issues.
- Try clearing the cache of the keyboard app you’re using. To do this, go to Settings > Apps > select your keyboard app > Storage > Clear Cache.
- If the issue persists, consider using a different keyboard app from the Google Play Store. There are plenty of third-party options available that offer enhanced autocorrect features.
- If all else fails, you can reach out to Samsung customer support for further assistance.
We hope this guide has helped you enable and make the most of the autocorrect feature on your Samsung S20. Happy typing!
Accessing Keyboard Settings-
Enabling autocorrect on your Samsung S20 can greatly improve your typing experience and help you avoid common typos. To access the keyboard settings and enable autocorrect, follow the steps below:
1. Launch the Settings app on your Samsung S20. You can find the app in your app drawer or by swiping down from the top of your screen and searching for “Settings.
2. In the Settings menu, scroll down and tap on “General Management”. This option is usually located towards the top of the menu, but the exact placement may vary based on your device’s software version.
3. Within the General Management settings, tap on “Language and Input”. This will open a new menu where you can customize various language and input settings.
4. In the Language and Input menu, tap on “On-screen Keyboard”. This option may also be labeled as “Virtual Keyboard” or “Keyboard.
5. The next step is to find the keyboard app you are currently using. If you are using the default Samsung keyboard, tap on “Samsung Keyboard”. If you have installed a custom keyboard, such as Gboard or Swiftkey, select the respective keyboard app.
6. Once you have selected the keyboard app, you will see a list of options specific to that keyboard. Look for the “Text Correction” or “Autocorrect” option and tap on it.
7. In the Text Correction or Autocorrect menu, you should find a toggle switch to enable autocorrect. Simply slide the switch to the “On” position.
8. Once you have enabled autocorrect, you can customize additional settings, such as the autocorrect sensitivity and word suggestions, to suit your preferences. These settings may vary depending on the keyboard app you are using.
That’s it! You have successfully accessed the keyboard settings on your Samsung S20 and enabled autocorrect. Now you can enjoy accurate typing and the convenience of autocorrection.
Enabling Autocorrect Feature-
One of the most convenient features on modern smartphones is autocorrect. This function automatically corrects your spelling mistakes as you type, ensuring that your messages and texts are accurate and professional. On the Samsung S20, you can easily enable the autocorrect feature in just a few simple steps.
To begin, unlock your Samsung S20 and access the Settings menu. You can do this by swiping down from the top of the screen and tapping on the gear-shaped icon in the top right corner. Alternatively, you can find the Settings app in your app drawer and open it.
Once you are in the Settings menu, scroll down and tap on “General Management.” In the General Management menu, look for the “Language and Input” option and tap on it.
Within the Language and Input menu, you will see a list of available keyboards. Tap on the keyboard that you are currently using, which is usually “Samsung Keyboard.”
Now, you will be presented with a variety of keyboard settings. Look for the “Smart typing” section and tap on it. In the Smart typing menu, you will find the option for “Auto-replace.” Toggle the switch next to Auto-replace to enable the autocorrect feature.
With autocorrect enabled, your Samsung S20 will now automatically correct any spelling mistakes as you type. This can save you time and ensure that your messages are free from embarrassing typos.
It is worth noting that autocorrect may not always be perfect. It’s possible that it may incorrectly change words or struggle with certain slang or unique language. However, Samsung S20 provides an option to customize autocorrect settings for a more personalized experience, which we will delve into in the next section.
Customizing Autocorrect Options-
Autocorrect is a handy feature on the Samsung S20 that helps correct your typing errors as you type. However, you may find that the default settings don’t always suit your preferences or typing style. Luckily, you can customize the autocorrect options on your Samsung S20 to ensure a more personalized and accurate typing experience. Here’s how you can do it:
1. Open the Settings menu on your Samsung S20. You can do this by swiping down from the top of the screen and tapping on the gear icon in the top-right corner, or by accessing the Settings app from your app drawer.
2. Scroll down and tap on “General Management.”
3. Within General Management, locate and tap on “Language and Input.”
4. Tap on “Virtual Keyboard.”
5. Select the keyboard you are using on your device. It’s usually “Samsung Keyboard.”
6. Tap on “Smart Typing.”
7. Here, you will find various autocorrect options that you can customize according to your preferences.
8. To enable or disable autocorrect, toggle the “Auto replace” option. When enabled, it will automatically replace mistyped words with the correct ones.
9. You can also enable or disable “Auto capitalization,” which automatically capitalizes the first letter of a sentence. This can be helpful if you tend to forget to capitalize letters.
10. Additionally, you can customize the level of autocorrect aggressiveness. You can choose between “Moderate” and “Aggressive” autocorrect, depending on how actively you want the feature to correct your typing.
11. If you find that autocorrect often interferes with certain words or slang terms that you frequently use, you can add them to the “Personal dictionary” to ensure they are not corrected. Just tap on “Personal dictionary” and then tap on the “+” icon to add words manually.
12. Another helpful option is the “Block offensive words” feature. When enabled, the keyboard will block offensive or inappropriate words from being typed.
13. Once you have customized the autocorrect options according to your preferences, you can exit the settings, and the changes will be applied immediately.
By customizing the autocorrect options on your Samsung S20, you can ensure a more accurate and tailored typing experience. Whether you want to fine-tune the autocorrect aggressiveness or prevent certain words from being corrected, these customizable options will help you make the most out of the autocorrect feature on your device.
Troubleshooting Autocorrect Issues
Autocorrect is a helpful feature that can save you from embarrassing typos and spelling errors. However, like any technology, it can sometimes encounter issues. If you’re experiencing problems with autocorrect on your Samsung S20, here are some troubleshooting steps to try:
1. Check your language settings: Make sure that the language you are typing in is set as the default language on your device. To do this, go to Settings > General Management > Language and Input > On-screen keyboard, and select the appropriate language.
2. Restart your device: Sometimes, a simple restart can resolve minor software issues. Press and hold the power button until the power menu appears, then select “Restart” to reboot your Samsung S20.
3. Clear the keyboard cache: Clearing the cache of your keyboard app can help refresh its settings and resolve any glitches. Go to Settings > Apps > Keyboard app (e.g., Samsung Keyboard) > Storage > Clear Cache.
4. Update your keyboard app: Ensure that you have the latest version of your keyboard app installed. Updates often include bug fixes and performance improvements. Go to the Google Play Store, search for your keyboard app, and tap on “Update” if available.
5. Reset keyboard settings: If the issue persists, you can try resetting the keyboard settings to their default values. Go to Settings > General Management > Language and Input > On-screen keyboard, select your keyboard app, and then tap on “Reset settings.”
6. Disable and re-enable autocorrect: Turn off autocorrect for a few seconds and then turn it back on. This can sometimes help refresh the feature. Go to Settings > General Management > Language and Input > On-screen keyboard, select your keyboard app, and toggle the autocorrect option.
7. Use a third-party keyboard: If all else fails, you can try using a different keyboard app from the Google Play Store. There are several third-party options available that may offer better autocorrect functionality.
If you have followed these troubleshooting steps and autocorrect is still not working properly on your Samsung S20, it may be helpful to contact Samsung Support or visit a service center to get further assistance.
Remember that while autocorrect is a useful tool, it’s not perfect. Always proofread your messages and documents before sending or publishing to ensure accuracy.
Conclusion
In conclusion, knowing how to turn on autocorrect on your Samsung S20 can greatly enhance your typing experience and help you avoid embarrassing mistakes. Autocorrect is a handy feature that can save you time by automatically correcting misspelled words and offering suggestions for better accuracy. By following the simple steps outlined in this article, you can easily enable autocorrect on your device and start benefiting from its functionality.
Remember, autocorrect is not infallible, so it’s always important to proofread your messages before sending them. Additionally, customizing autocorrect settings to suit your individual preferences can further improve its performance. Don’t hesitate to explore the various options available to personalize your autocorrect experience.
With autocorrect enabled, you can confidently type away on your Samsung S20, knowing that the system will help you produce error-free text. So why wait? Utilize autocorrect and streamline your typing process today!
FAQs
1. How do I turn on autocorrect on my Samsung S20?
– To turn on autocorrect on your Samsung S20, follow these steps:
– Go to the Settings menu on your Samsung S20.
– Select “General Management” or “System” depending on your device.
– Tap on “Language and Input.”
– Select “On-screen Keyboard.”
– Choose the keyboard you are using, such as Samsung Keyboard or Google Keyboard.
– Tap on “Smart typing” or “Text correction” depending on your device.
– Toggle the switch for “Autocorrect” to enable it. You may also have additional options to customize the autocorrect settings.
2. Can I customize the autocorrect settings on my Samsung S20?
– Yes, you can customize the autocorrect settings on your Samsung S20. After enabling autocorrect through the steps mentioned in the previous question, you can further customize it by following these steps:
– Tap on “Autocorrect” or “Text correction” in the keyboard settings.
– You may see options like “Auto-replace” or “Auto-correct while typing.” Toggle the switch to enable or disable these features as per your preference.
– Some devices also allow you to add words to the dictionary or customize specific autocorrect suggestions. Explore the autocorrect settings menu to see if such options are available on your Samsung S20.
3. How does autocorrect work on the Samsung S20?
– Autocorrect on the Samsung S20 uses predictive text technology to automatically correct misspelled words while you type. It analyzes the words you are typing and suggests corrections based on a built-in dictionary and language patterns. When enabled, autocorrect works in real-time, providing suggestions and automatically replacing words it identifies as potentially misspelled. This feature helps improve typing speed and accuracy, preventing common spelling mistakes.
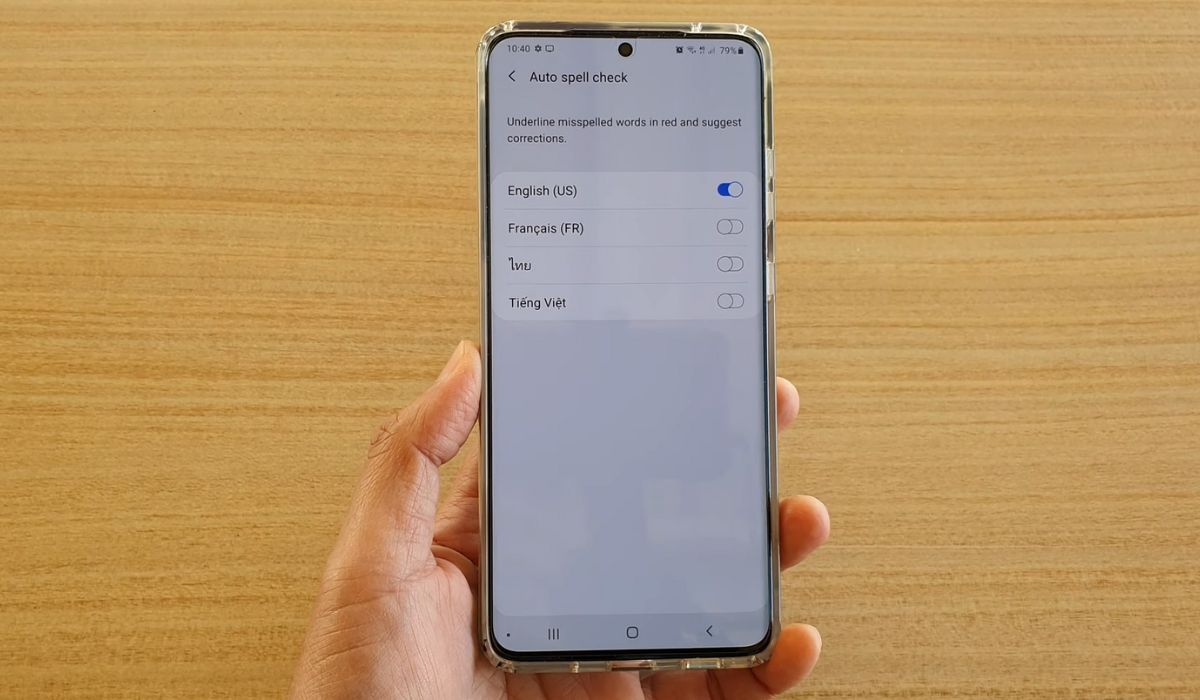
4. Is autocorrect available in multiple languages on the Samsung S20?
– Yes, autocorrect on the Samsung S20 supports multiple languages. You can add and switch between different languages in the keyboard settings. To do this, follow these steps:
– Go to the keyboard settings through the Settings menu as mentioned in the first question.
– Tap on “Languages and Types” or “Input Languages.”
– Select the desired language from the list provided.
– Once added, you can switch between languages by tapping the globe or language icon on the keyboard.
5. Can I turn off autocorrect on my Samsung S20?
– Yes, if you prefer not to use autocorrect on your Samsung S20, you can easily turn it off. Simply follow these steps:
– Go to the keyboard settings through the Settings menu mentioned in the first question.
– Tap on “Autocorrect” or “Text correction.”
– Toggle off the switch for “Autocorrect” to disable it.
– Please note that by turning off autocorrect, you will no longer receive suggestions or automated corrections for misspelled words.