
Are you tired of struggling to be heard during phone calls or voice recordings? Look no further! In this article, we will guide you on how to use a mini microphone on your phone to enhance the sound quality and ensure crystal-clear communication. Whether you’re conducting important business calls or recording podcasts on the go, a mini microphone can serve as a game-changer, providing professional-level audio with minimal effort. Join us as we explore the benefits of using a mini microphone, the different types available, and step-by-step instructions on how to connect and utilize this handy device with your mobile phone. Say goodbye to muffled conversations and low-quality recordings – let’s unlock the full potential of your phone’s audio capabilities!
Inside This Article
- Getting Started – Connecting the Mini Microphone to Your Phone – Adjusting the Microphone Settings
- Recording with the Mini Microphone – Selecting the Appropriate Recording App – Positioning the Microphone for Optimal Sound Quality
- Troubleshooting – Dealing with Connection Issues – Fixing Audio Distortion Problems
- Tips and Tricks – Enhancing Sound Quality with Accessories – Using the Mini Microphone for Video Recordings
- Conclusion
- FAQs
Getting Started – Connecting the Mini Microphone to Your Phone – Adjusting the Microphone Settings
Using a mini microphone with your phone can significantly enhance the audio quality of your recordings and voice calls. Whether you are a content creator, a journalist, or simply want to improve the clarity of your phone conversations, connecting a mini microphone to your phone is a great option. In this section, we will guide you through the process of connecting the mini microphone to your phone and adjusting the microphone settings for optimal performance.
Connecting the Mini Microphone to Your Phone:
To start, ensure that your mini microphone is compatible with your phone. Most mini microphones connect using the standard 3.5mm audio jack, which is commonly found on most smartphones. If your phone doesn’t have a 3.5mm audio jack, you may need to purchase an adapter to connect the mini microphone to your phone’s USB-C or Lightning port.
Once you have confirmed the compatibility, follow these steps to connect the mini microphone to your phone:
- Locate the 3.5mm audio jack on your phone.
- Insert the mini microphone’s 3.5mm audio plug into the audio jack firmly.
- Make sure the connection is secure and tight.
After connecting the mini microphone to your phone, it’s time to adjust the microphone settings to ensure optimal performance.
Adjusting the Microphone Settings:
Open the settings app on your phone and navigate to the sound or audio settings. Look for the microphone or audio input options. Here you can adjust various settings to optimize the performance of the mini microphone.
Some common microphone settings you may find include:
- Microphone Gain: This controls the sensitivity of the microphone. Adjust it to the appropriate level depending on the surrounding noise and the desired audio volume.
- Microphone Directionality: If your mini microphone supports different directionality patterns (such as cardioid or omnidirectional), you can select the suitable option depending on your recording or calling scenario.
- Microphone Equalizer: Some phones offer built-in equalizer settings to adjust the frequency response of the microphone. Experiment with these settings to find the best audio quality for your needs.
Remember to test the microphone after adjusting the settings. Record a short sample or make a call to ensure the audio quality meets your expectations. If necessary, you can fine-tune the settings further until you achieve the desired results.
Now that you have connected the mini microphone to your phone and adjusted the necessary settings, you are ready to start enjoying higher quality audio recordings and clearer voice calls. In the next sections, we will delve into recording with the mini microphone and troubleshooting common issues that may arise.
Recording with the Mini Microphone – Selecting the Appropriate Recording App – Positioning the Microphone for Optimal Sound Quality
Once you have successfully connected your mini microphone to your phone, you can start recording audio using the appropriate recording app. Selecting the right app is crucial to ensure that you capture high-quality sound with your mini microphone.
There are numerous recording apps available for different mobile devices, each with its own set of features and capabilities. When choosing an app, consider the following factors:
1. Compatibility: Ensure that the recording app you choose is compatible with your mobile phone’s operating system. Check if it supports the necessary audio inputs and outputs for external microphones.
2. Audio Quality Settings: Look for an app that allows you to adjust the audio quality settings. This will enable you to optimize the sound output based on your specific recording needs.
3. File Formats: Consider the file formats supported by the app. Ensure that it offers widely-used formats such as WAV or MP3, which provide good audio quality and are compatible with most devices.
4. Editing Capabilities: If you require basic editing features, such as trimming or merging recordings, choose an app that offers these functionalities. It will allow you to make necessary adjustments to your recordings without additional software.
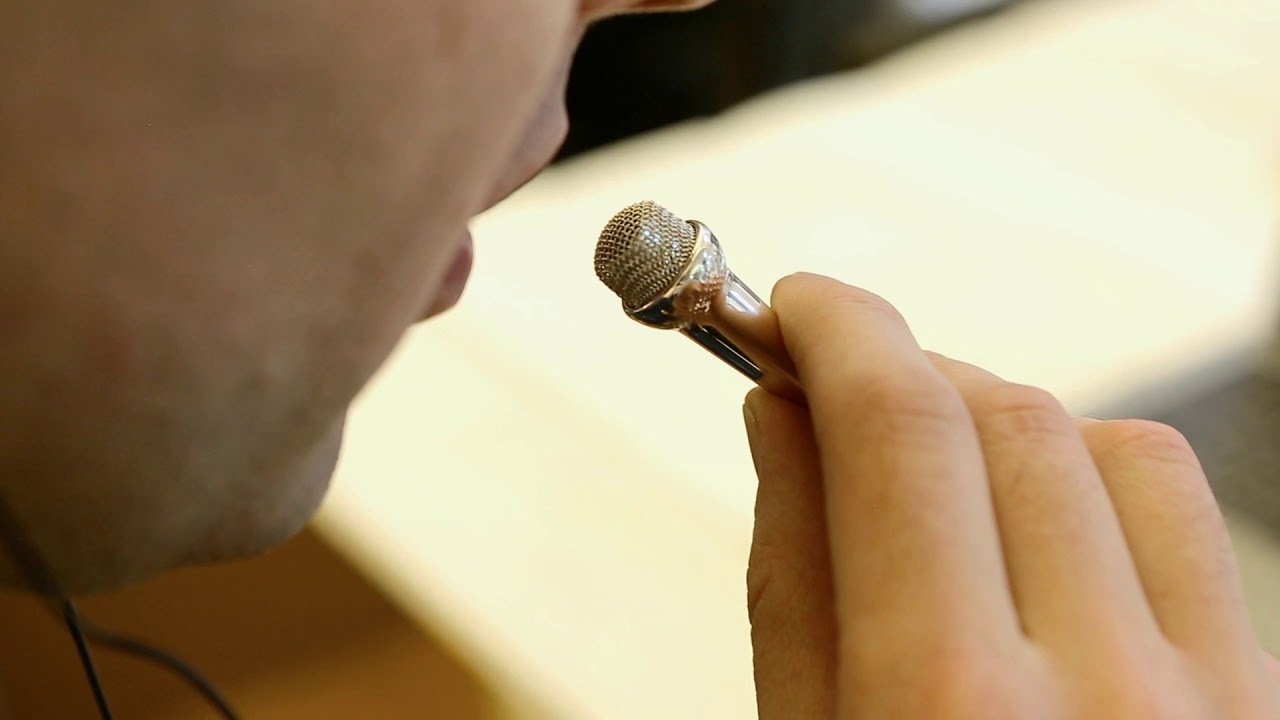
Once you have selected the recording app, it’s time to focus on positioning the mini microphone for optimal sound quality. Proper microphone placement plays a significant role in capturing clear and pristine audio:
1. Distance from the Sound Source: Position the mini microphone at an appropriate distance from the sound source. For example, if you’re recording someone speaking, position the microphone a few inches away from their mouth to avoid distortion or excessive background noise.
2. Angle and Direction: Angle the mini microphone towards the sound source to capture the desired audio. If you’re recording a musical instrument, experiment with different angles to find the sweet spot where the instrument’s sound is projected most effectively.
3. Acoustic Environment: Consider the acoustic environment where you’ll be recording. Avoid noisy areas and try to find a quiet space to minimize unwanted background sound interference.
4. Use of Windscreen or Pop Filter: If you’re recording outdoors or in a location with airflow, consider using a windscreen or pop filter to reduce wind noise and plosive sounds caused by fast-moving air or exaggerated consonant sounds.
By selecting the appropriate recording app and positioning the mini microphone correctly, you’ll be able to capture professional-quality audio recordings with ease. Experiment with different setups and settings to find the perfect configuration for your recording needs.
Troubleshooting – Dealing with Connection Issues – Fixing Audio Distortion Problems
When using a mini microphone on your phone, connection issues and audio distortion problems can sometimes occur. However, fret not! In this section, we will discuss some common troubleshooting techniques to help you overcome these challenges.
Dealing with Connection Issues:
If you’re experiencing connection issues with your mini microphone, here are a few steps you can take to resolve them:
- Check the connection: Ensure that the mini microphone is securely connected to your phone’s audio jack or lightning port, depending on the type of device you have. Sometimes, a loose connection can cause audio problems.
- Clean the connection: Over time, dirt, dust, or debris can accumulate in the audio jack or lightning port, leading to poor connection quality. Use a cotton swab or compressed air to gently clean the ports and remove any obstructions.
- Try a different microphone: If the connection issue persists, try using a different mini microphone to determine if the problem lies with the microphone itself. This will help you identify whether it’s a compatibility issue or a faulty microphone.
Fixing Audio Distortion Problems:
If you’re encountering audio distortion problems while using the mini microphone, here are a few troubleshooting tips to help you resolve them:
- Adjust the microphone distance: Sometimes, positioning the mini microphone too close to the sound source can result in audio distortion. Try increasing the distance between the microphone and the source to prevent distortion and achieve clearer sound quality.
- Check the microphone sensitivity: Some mini microphones have adjustable sensitivity settings. If you find that the audio is distorted, try adjusting the sensitivity to a lower level. This can help eliminate distortion caused by input overload.
- Reduce background noise: Excessive background noise can contribute to audio distortion. Minimize background noise by recording in a quiet environment or use a noise-cancelling app or software to filter out unwanted sounds.
- Use a windscreen: If you’re recording outdoors or in a windy environment, a windscreen can help prevent wind noise and distortion. Attach a foam or furry windscreen to the mini microphone to reduce unwanted noise caused by wind gusts.
By following these troubleshooting techniques, you should be able to effectively deal with connection issues and fix audio distortion problems when using a mini microphone on your phone. Remember to experiment with different settings and environments to optimize your recording experience and ensure crystal-clear sound quality.
Tips and Tricks – Enhancing Sound Quality with Accessories – Using the Mini Microphone for Video Recordings
When it comes to recording audio on your phone using a mini microphone, there are a few tips and tricks you can employ to enhance the sound quality and get the best possible results. In this section, we will explore two important aspects: enhancing sound quality with accessories and using the mini microphone for video recordings.
Enhancing Sound Quality with Accessories
While mini microphones are designed to improve the audio recording quality on your phone, incorporating certain accessories can further enhance the sound and bring it to a professional level. Here are a few accessories you can consider:
- Windscreen: A windscreen is a small foam cover that fits over the microphone. It helps reduce wind noise and unwanted plosive sounds (such as “p” and “b” sounds) for cleaner audio recordings.
- Pop Filter: Similar to a windscreen, a pop filter is a screen that is placed in front of the microphone to reduce plosive sounds. It can make a significant difference in the overall sound quality, especially when recording vocals or interviews.
- Extension Cable: Depending on your recording setup, you might need an extension cable to provide more flexibility in microphone placement. This is particularly useful for capturing audio from a distance or in a controlled environment.
- Shock Mount: A shock mount is a device that suspends the microphone, reducing vibrations and handling noise. It ensures clean and undisturbed recordings, especially when the microphone is mounted on a tripod or boom arm.
- Headphones: Connecting a pair of headphones to your phone can help you monitor the audio in real-time and identify any potential issues while recording. This allows you to make necessary adjustments on the go and ensure high-quality sound.
By using these accessories, you can take your mini microphone recordings to the next level, ensuring professional-grade sound quality in your recordings.
Using the Mini Microphone for Video Recordings
Aside from audio recordings, mini microphones can also significantly improve the audio quality in video recordings. Whether you’re capturing vlogs, interviews, or any other video content, using a mini microphone can vastly enhance the overall audio experience. Here are a few tips to get the best results when using a mini microphone for video recordings:
- Position the microphone close to the subject: To capture clear audio, position the mini microphone as close to the sound source as possible. This will help eliminate background noise and ensure the main audio is crisp and distinct.
- Use a tripod or stabilizer: To avoid any shake or movement that can affect the audio quality, use a tripod or stabilizer to keep your phone steady during video recordings. This will ensure clean and stable audio throughout the video.
- Monitor the audio while recording: As mentioned earlier, connecting headphones to your phone allows you to monitor the audio in real-time. This is especially crucial when recording videos, as you can catch any audio issues and make necessary adjustments immediately.
- Consider ambient noise: When recording videos outdoors or in a noisy environment, take into account the ambient noise and adjust the microphone sensitivity accordingly. This will help capture the desired audio while minimizing unwanted background sounds.
With these tips, you can ensure that your video recordings have excellent audio quality, making them more engaging and professional.
By following the tips for enhancing sound quality with accessories and using the mini microphone for video recordings, you can take full advantage of your mini microphone and elevate the audio quality of your mobile recordings to the next level.
Using a mini microphone on your phone can greatly enhance your audio experience and expand the capabilities of your device. Whether you’re recording podcasts, making videos, conducting interviews, or simply wanting to improve the clarity of your phone calls, a mini microphone can make a significant difference.
By connecting a mini microphone to your phone, you’ll have the ability to capture high-quality audio with greater precision. This can greatly enhance the overall content quality and professionalism of your recordings. Additionally, many mini microphones offer advanced features such as noise cancellation and adjustable sensitivity, further enhancing the audio capturing capabilities.
With the convenience of lightweight and portable mini microphones, you can easily carry them with you wherever you go, making them a versatile tool for content creators, journalists, musicians, and anyone looking to improve their audio recording quality.
So, whether you’re a professional or an amateur, adding a mini microphone to your phone can take your audio recording capabilities to the next level, and open up a whole new world of creative possibilities.
FAQs
1. What is a mini microphone for a phone?
A mini microphone for a phone is a small external microphone that can be connected to a mobile device to enhance the audio recording quality. It is designed to capture clear and professional-quality sound for various purposes such as vlogging, podcasting, interviews, and video recordings.
2. How do I connect a mini microphone to my phone?
To connect a mini microphone to your phone, you will need a compatible adapter or a microphone that supports your phone’s connection port. For newer smartphones without a dedicated audio jack, you may need to use a USB or Lightning adapter. Once you have the necessary equipment, simply plug the mini microphone into the appropriate port or adapter, and it should be ready to use.
3. Are mini microphones compatible with all phones?
Mini microphones can be compatible with most smartphones and mobile devices that have a standard audio jack or support USB/Lightning connections. However, it is always advisable to check the specifications and compatibility of the microphone with your specific phone model before making a purchase.
4. Do I need any additional apps to use a mini microphone on my phone?
In most cases, you do not need any additional apps to use a mini microphone on your phone. The microphone should work with your device’s default audio recording app or any other compatible recording apps available on your phone’s app store. However, some microphones may come with their dedicated companion apps that offer additional features and customization options.
5. Can I use a mini microphone for phone calls?
No, a mini microphone is not meant for phone calls. It is primarily designed for improving the audio quality of recordings and capturing external sound sources. When it comes to phone calls, the built-in microphone of your phone should be sufficient for regular voice calls.